If you run an online store with WooCommerce, you already know that product layout matters a lot. The default shop page shows products in a grid view. This works fine for many stores. But sometimes, your customers need a faster and clearer way to see many products at once.
This is where a custom WooCommerce product table becomes very useful. Instead of clicking each product one by one, customers can view all important details in one place. It includes Product Thumbnail, Product Name, SKU, Star Rating, Price, and an Add to Cart Button.
With these elements, buyers can quickly compare products and make a decision without wasting time. In this guide, you will learn how to create a custom WooCommerce product table step by step. Let’s get started!
Step 01: Install and Activate WP Table Builder
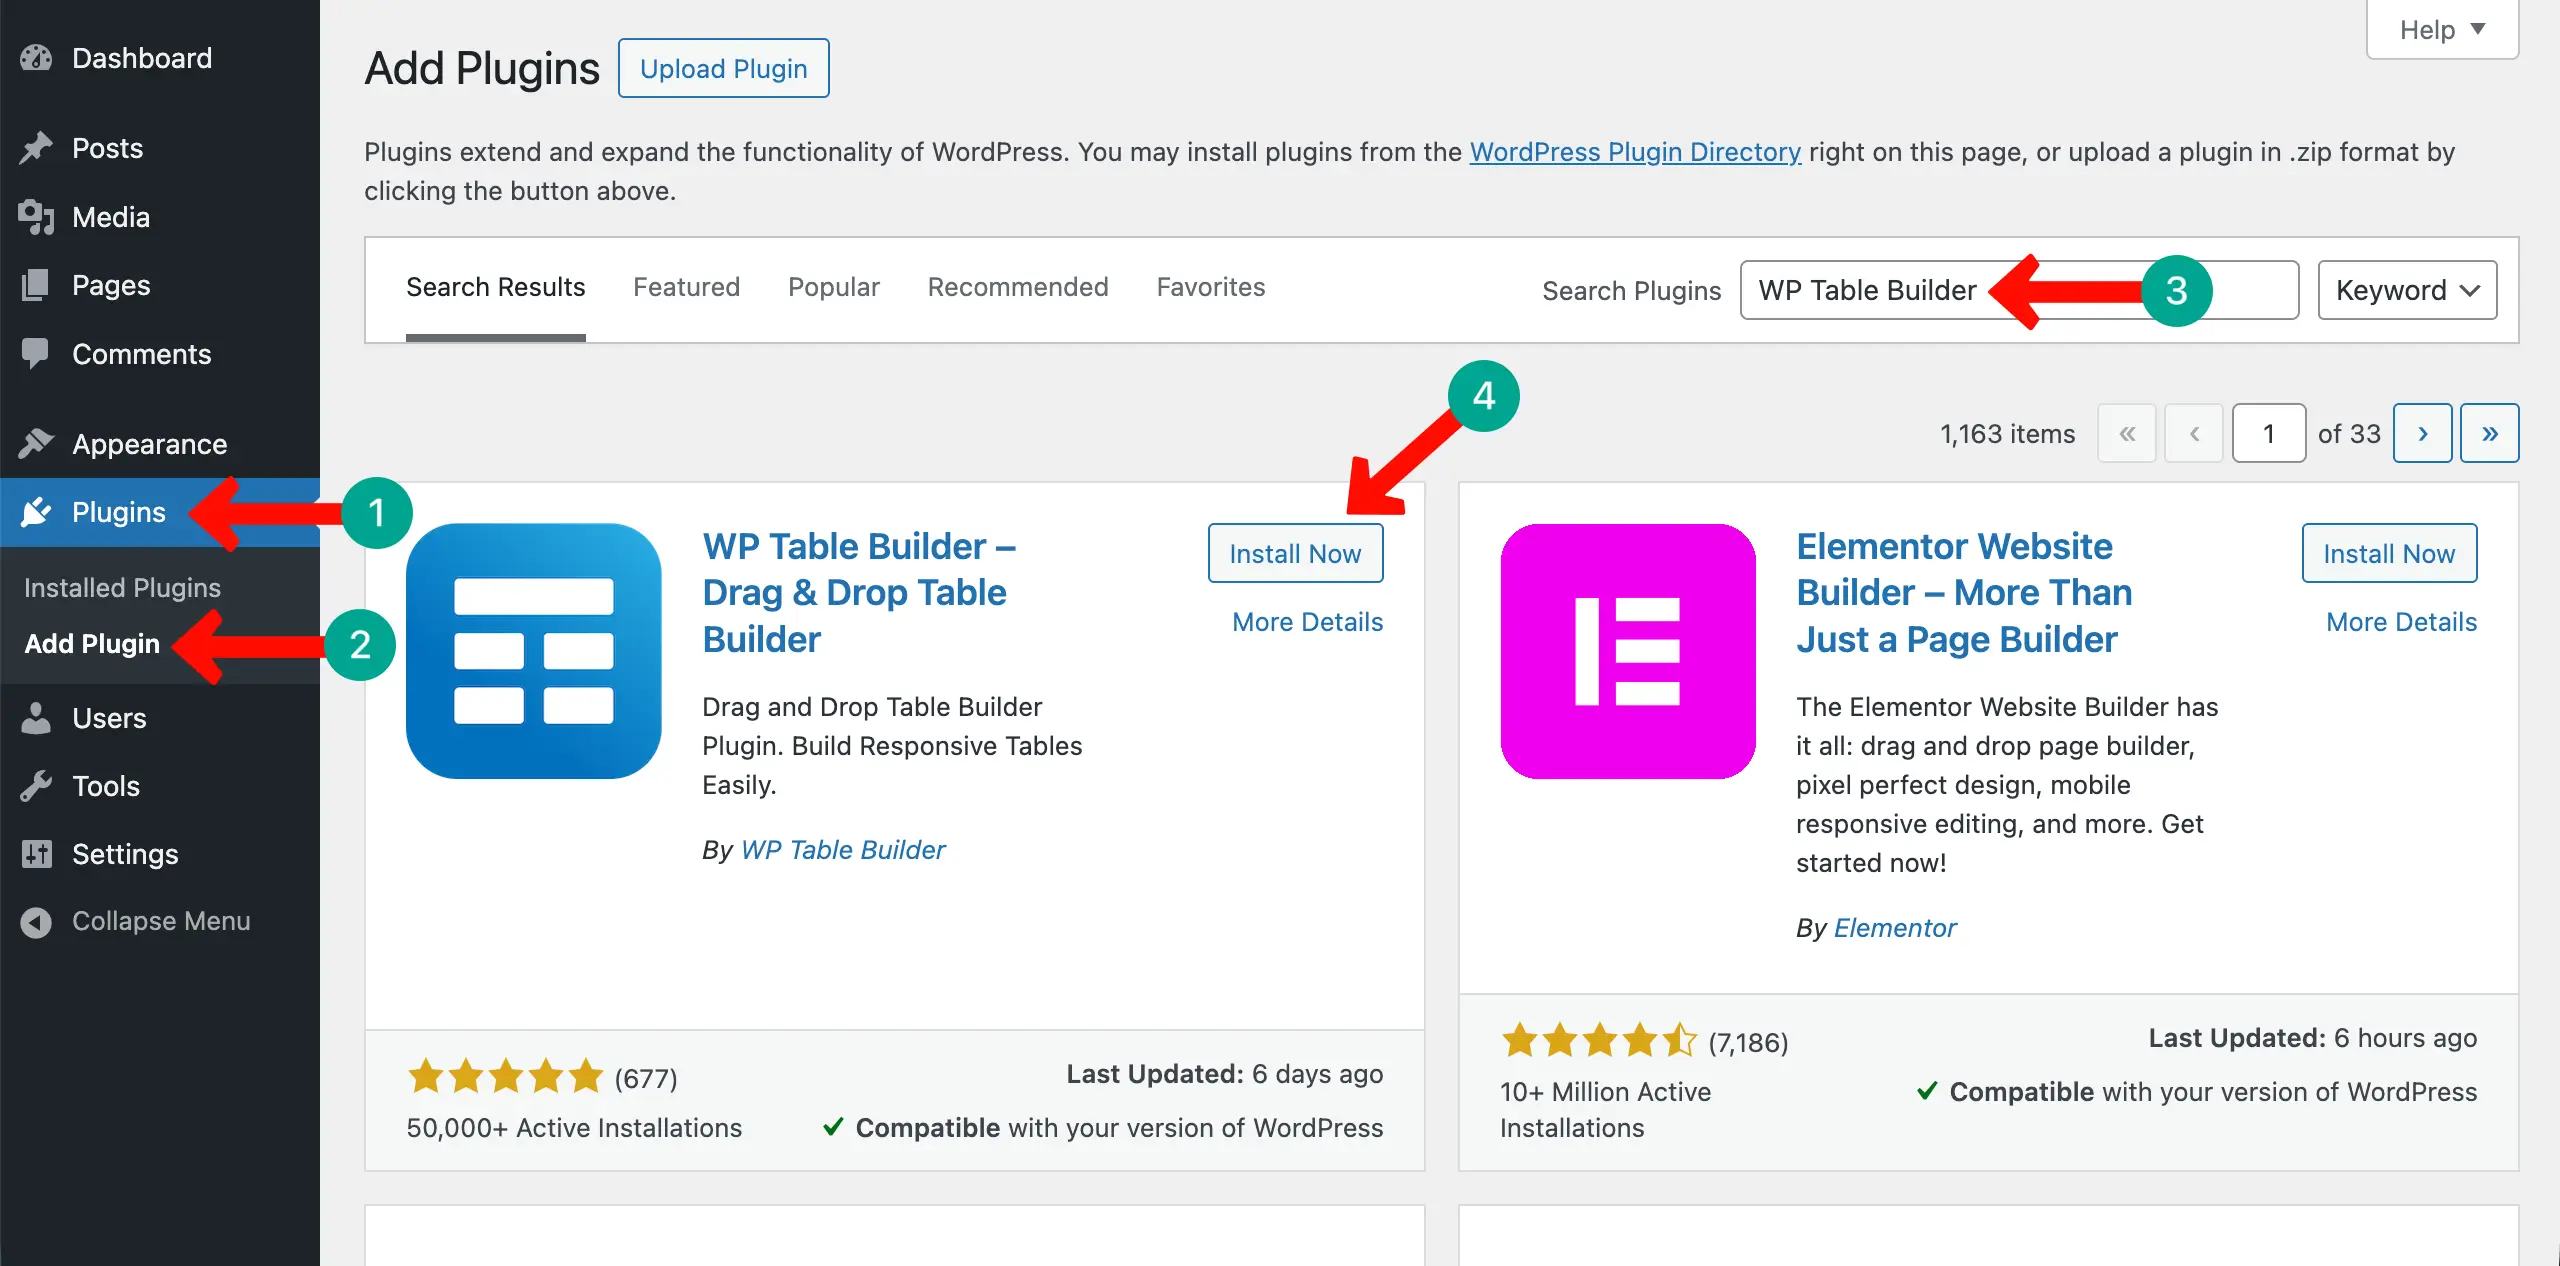
The default table block lacks numerous advanced features, which makes it impossible to create a WooCommerce product table with it. This is why you need a feature-rich additional plugin. WP Table Builder is a great one. It’s a drag-and-drop table builder plugin.
Navigate to Plugins > Add Plugin. Find WP Table Builder by typing its name in the search box. Install and activate it.
Step 02: Create the Table Structure
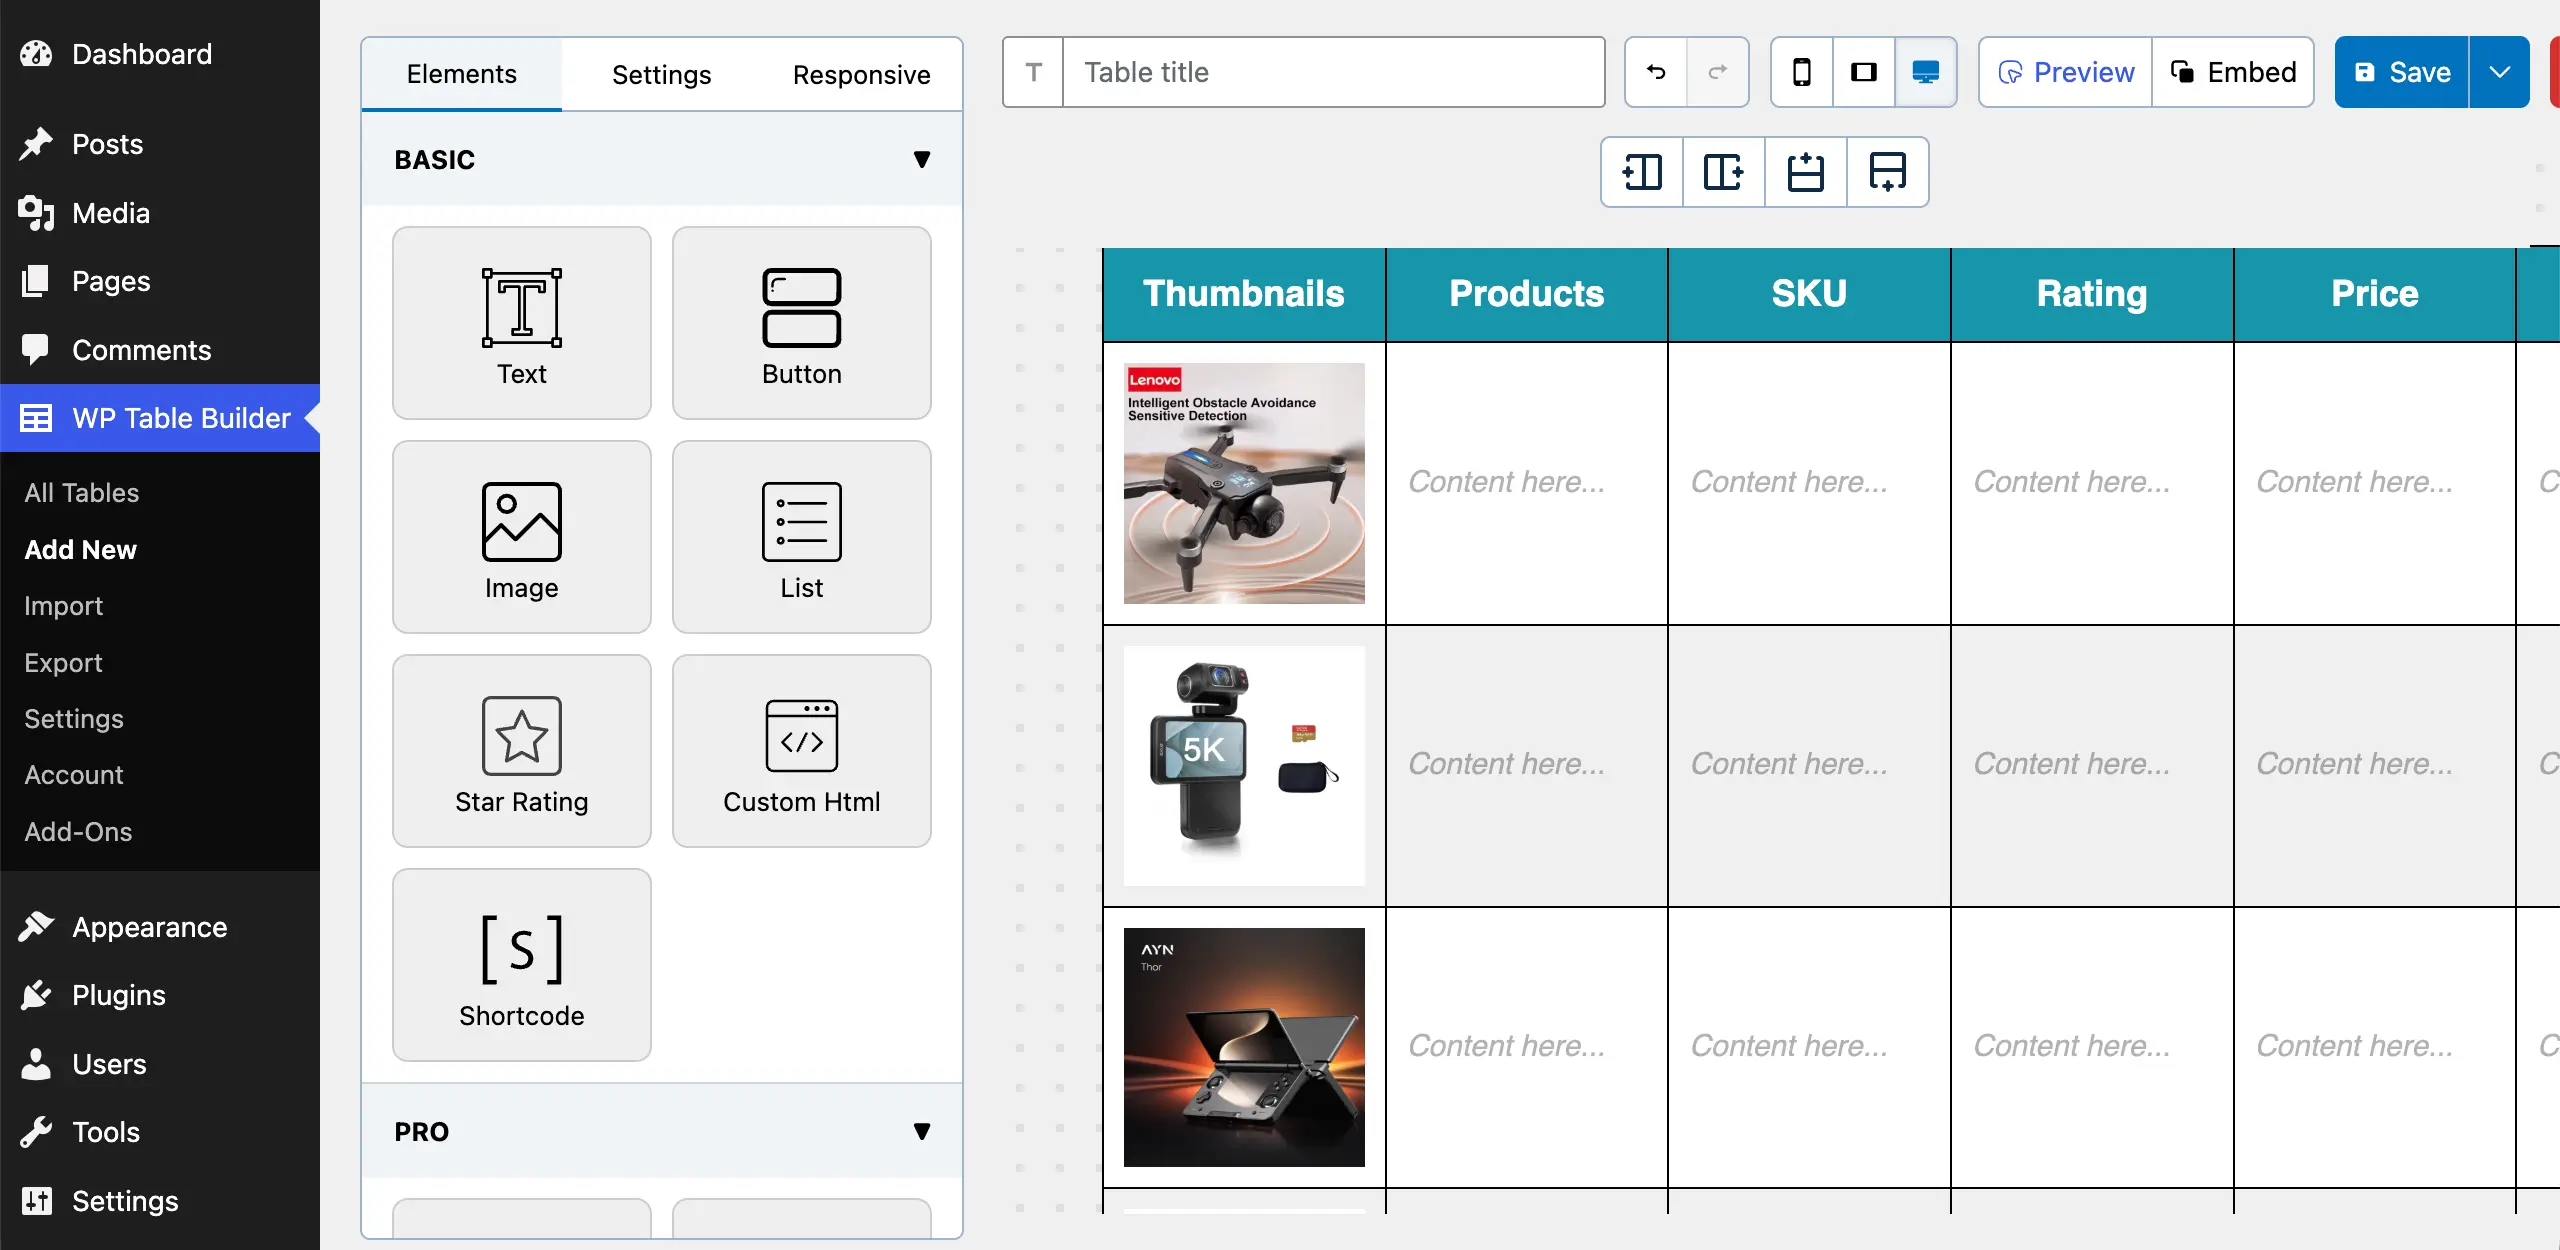
Navigate to WP Table Builder > Add New. Set the number of rows and columns you want for the table. By default, it’s always 4*4. Change it to what you want. Finally, click the Create New button.
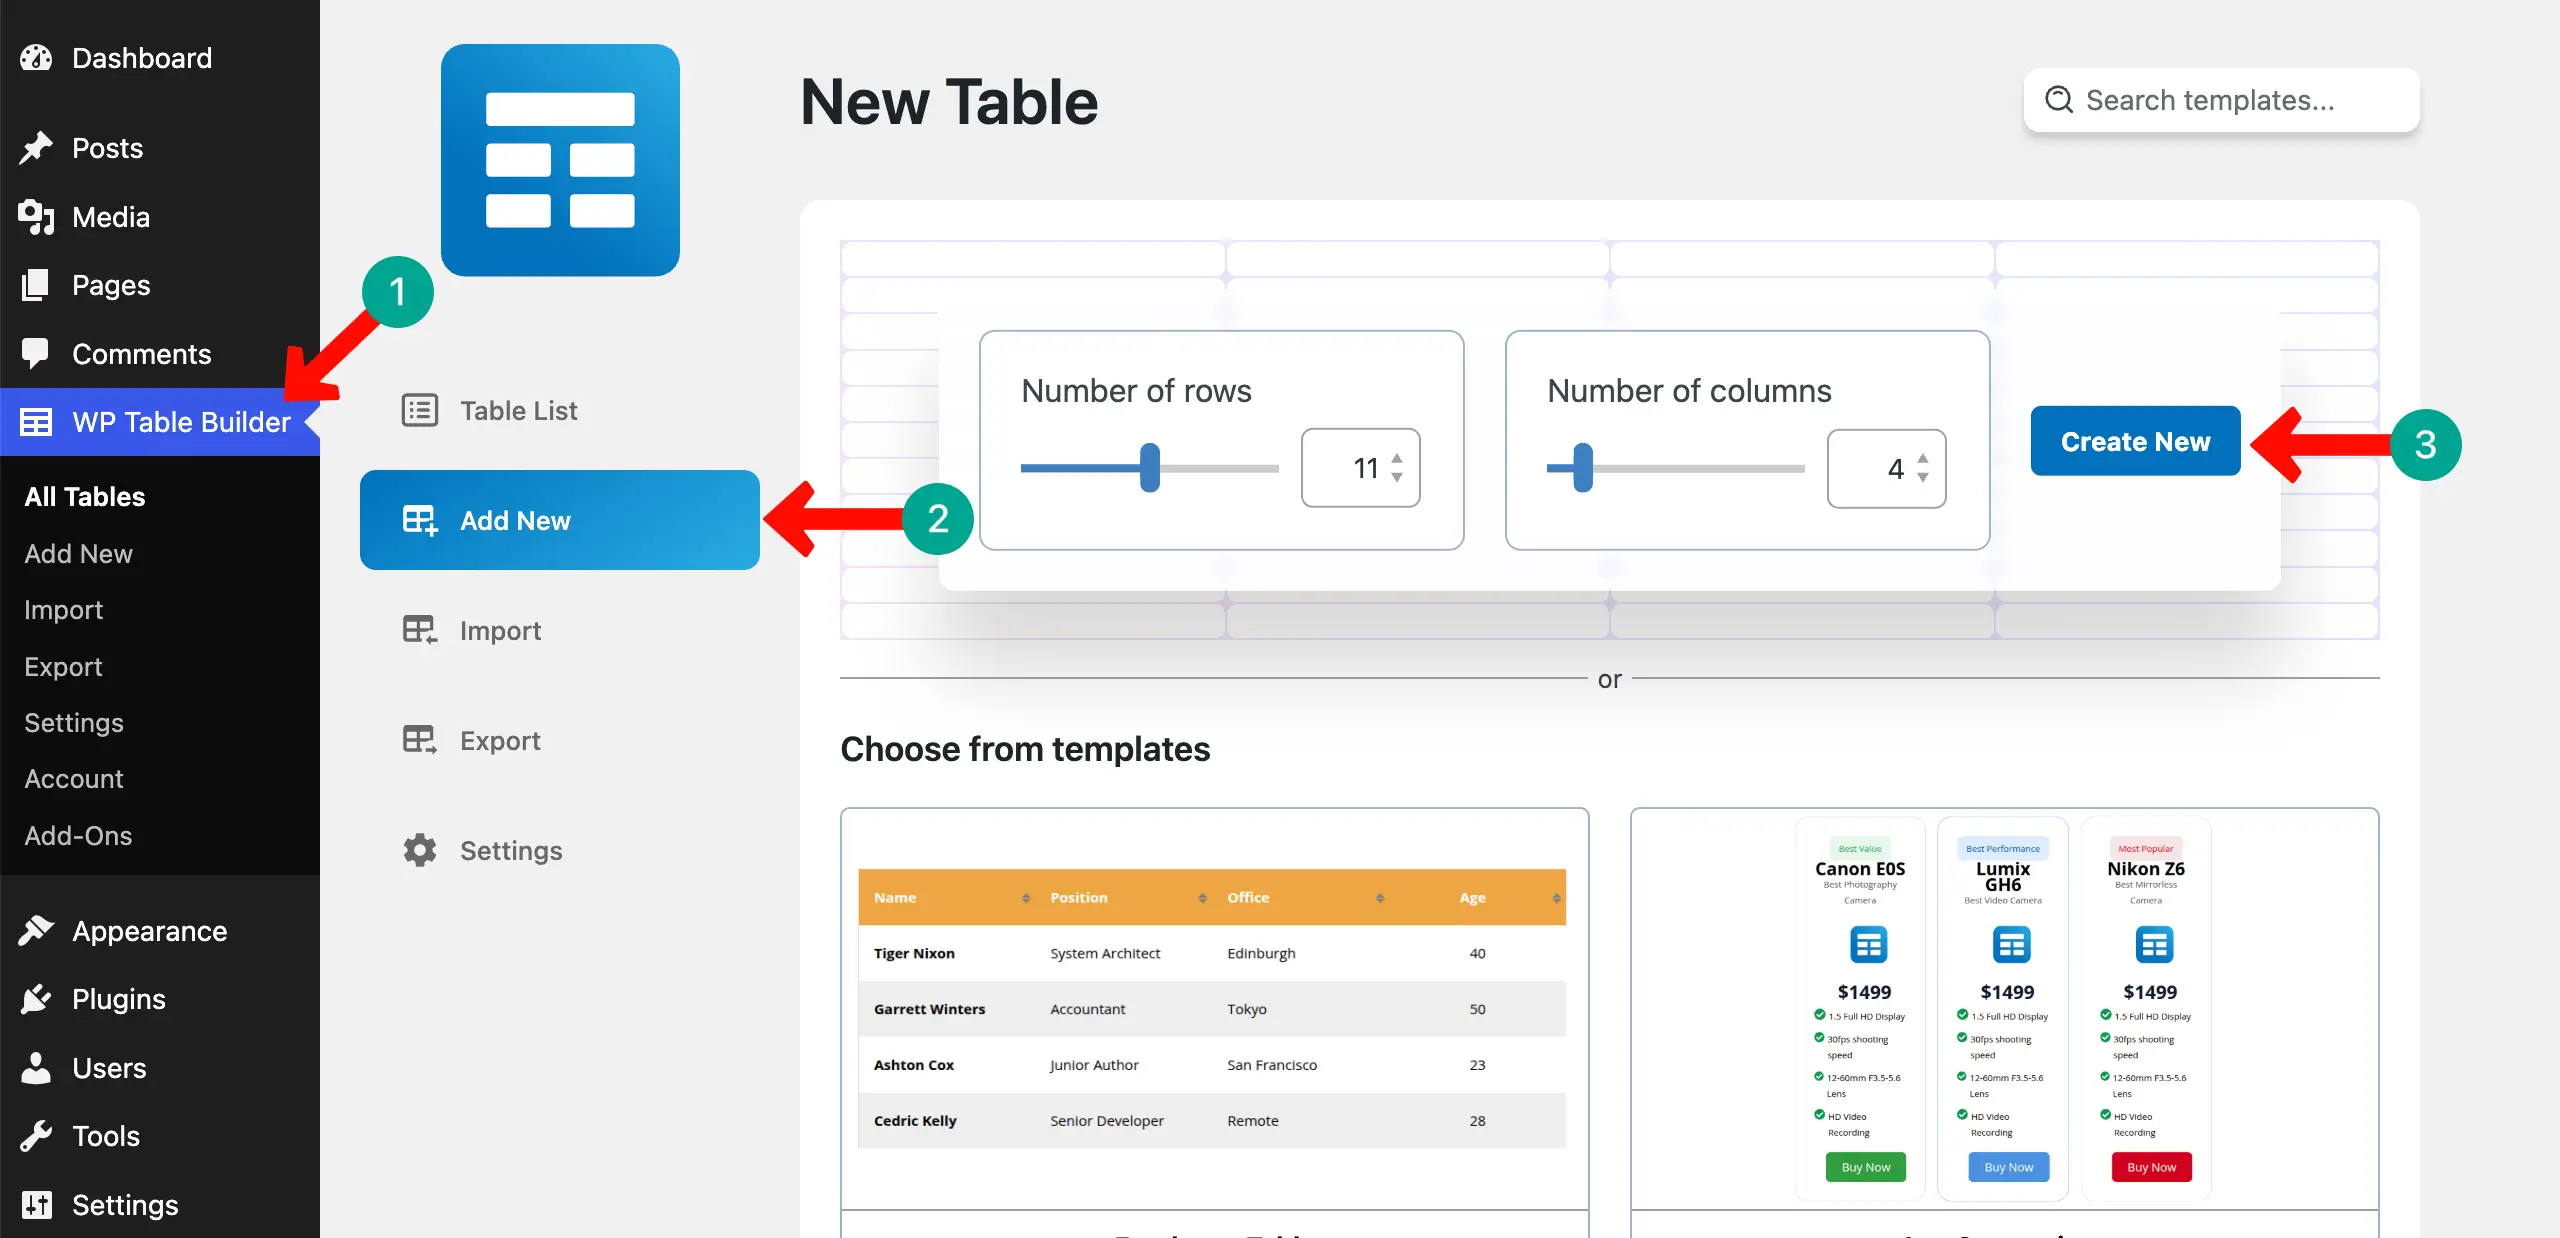
A layout for the WooCommerce product table will instantly be created.
Check how to create a highly converting pricing table in WordPress.
Step 03: Label the Table Columns
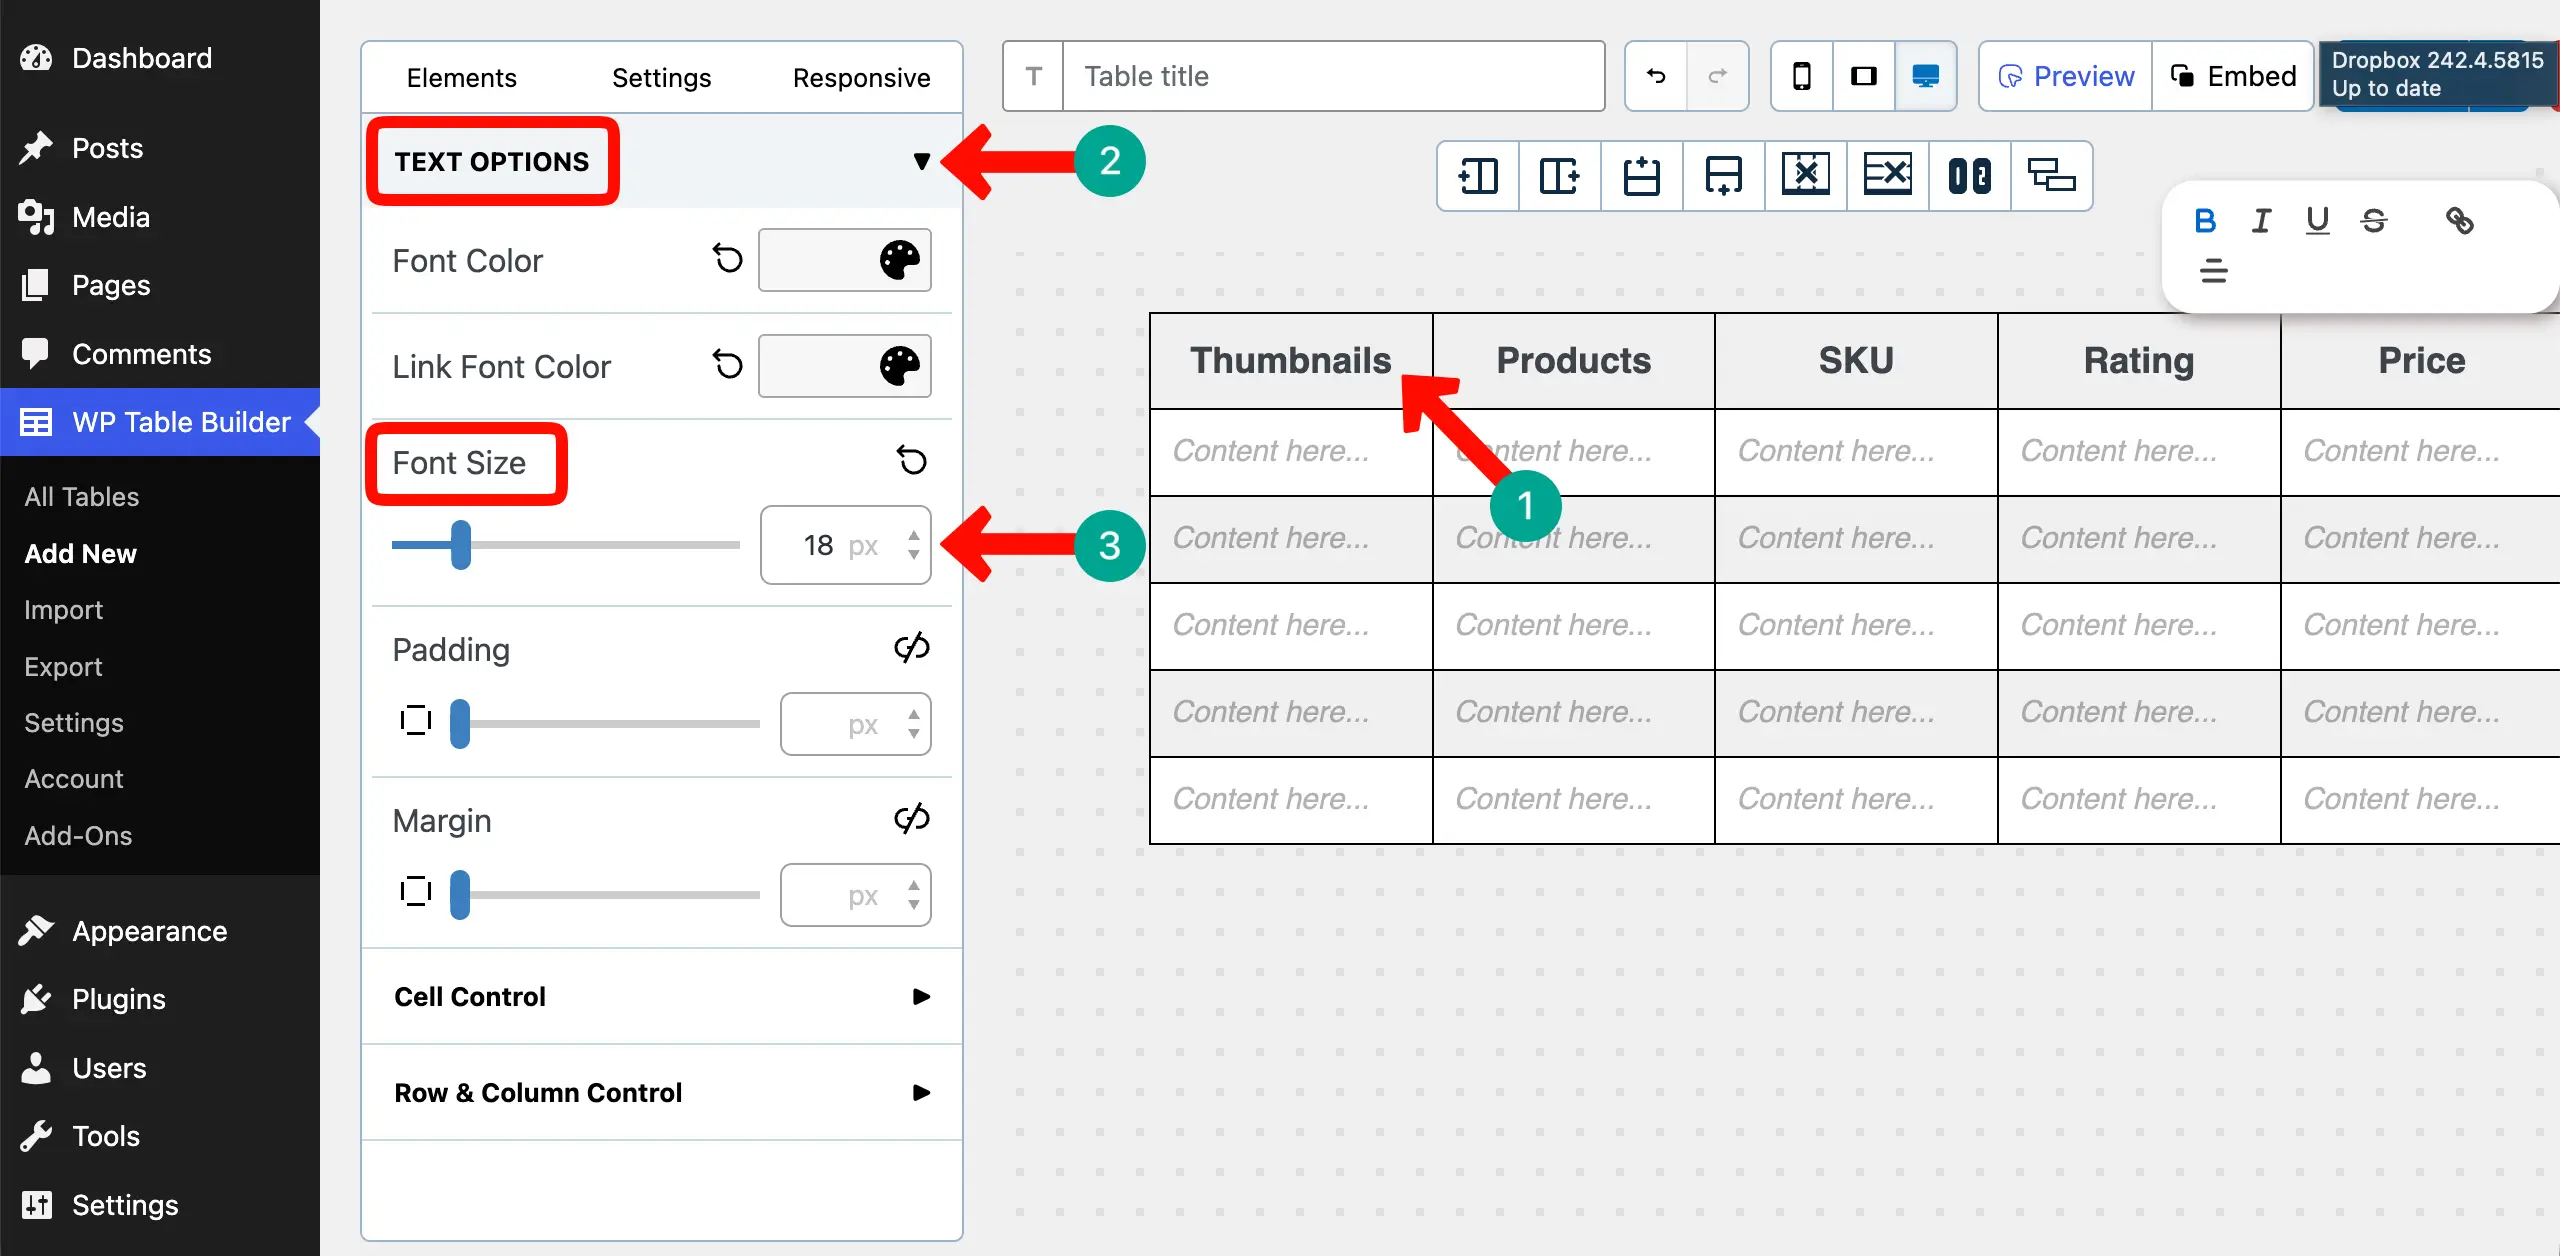
Now, label the table columns with easy-to-understand names. Just place your cursor on the top cells and write the names as you want to define them.
After that, expand the Text Options section and set a font size you want for the column names.
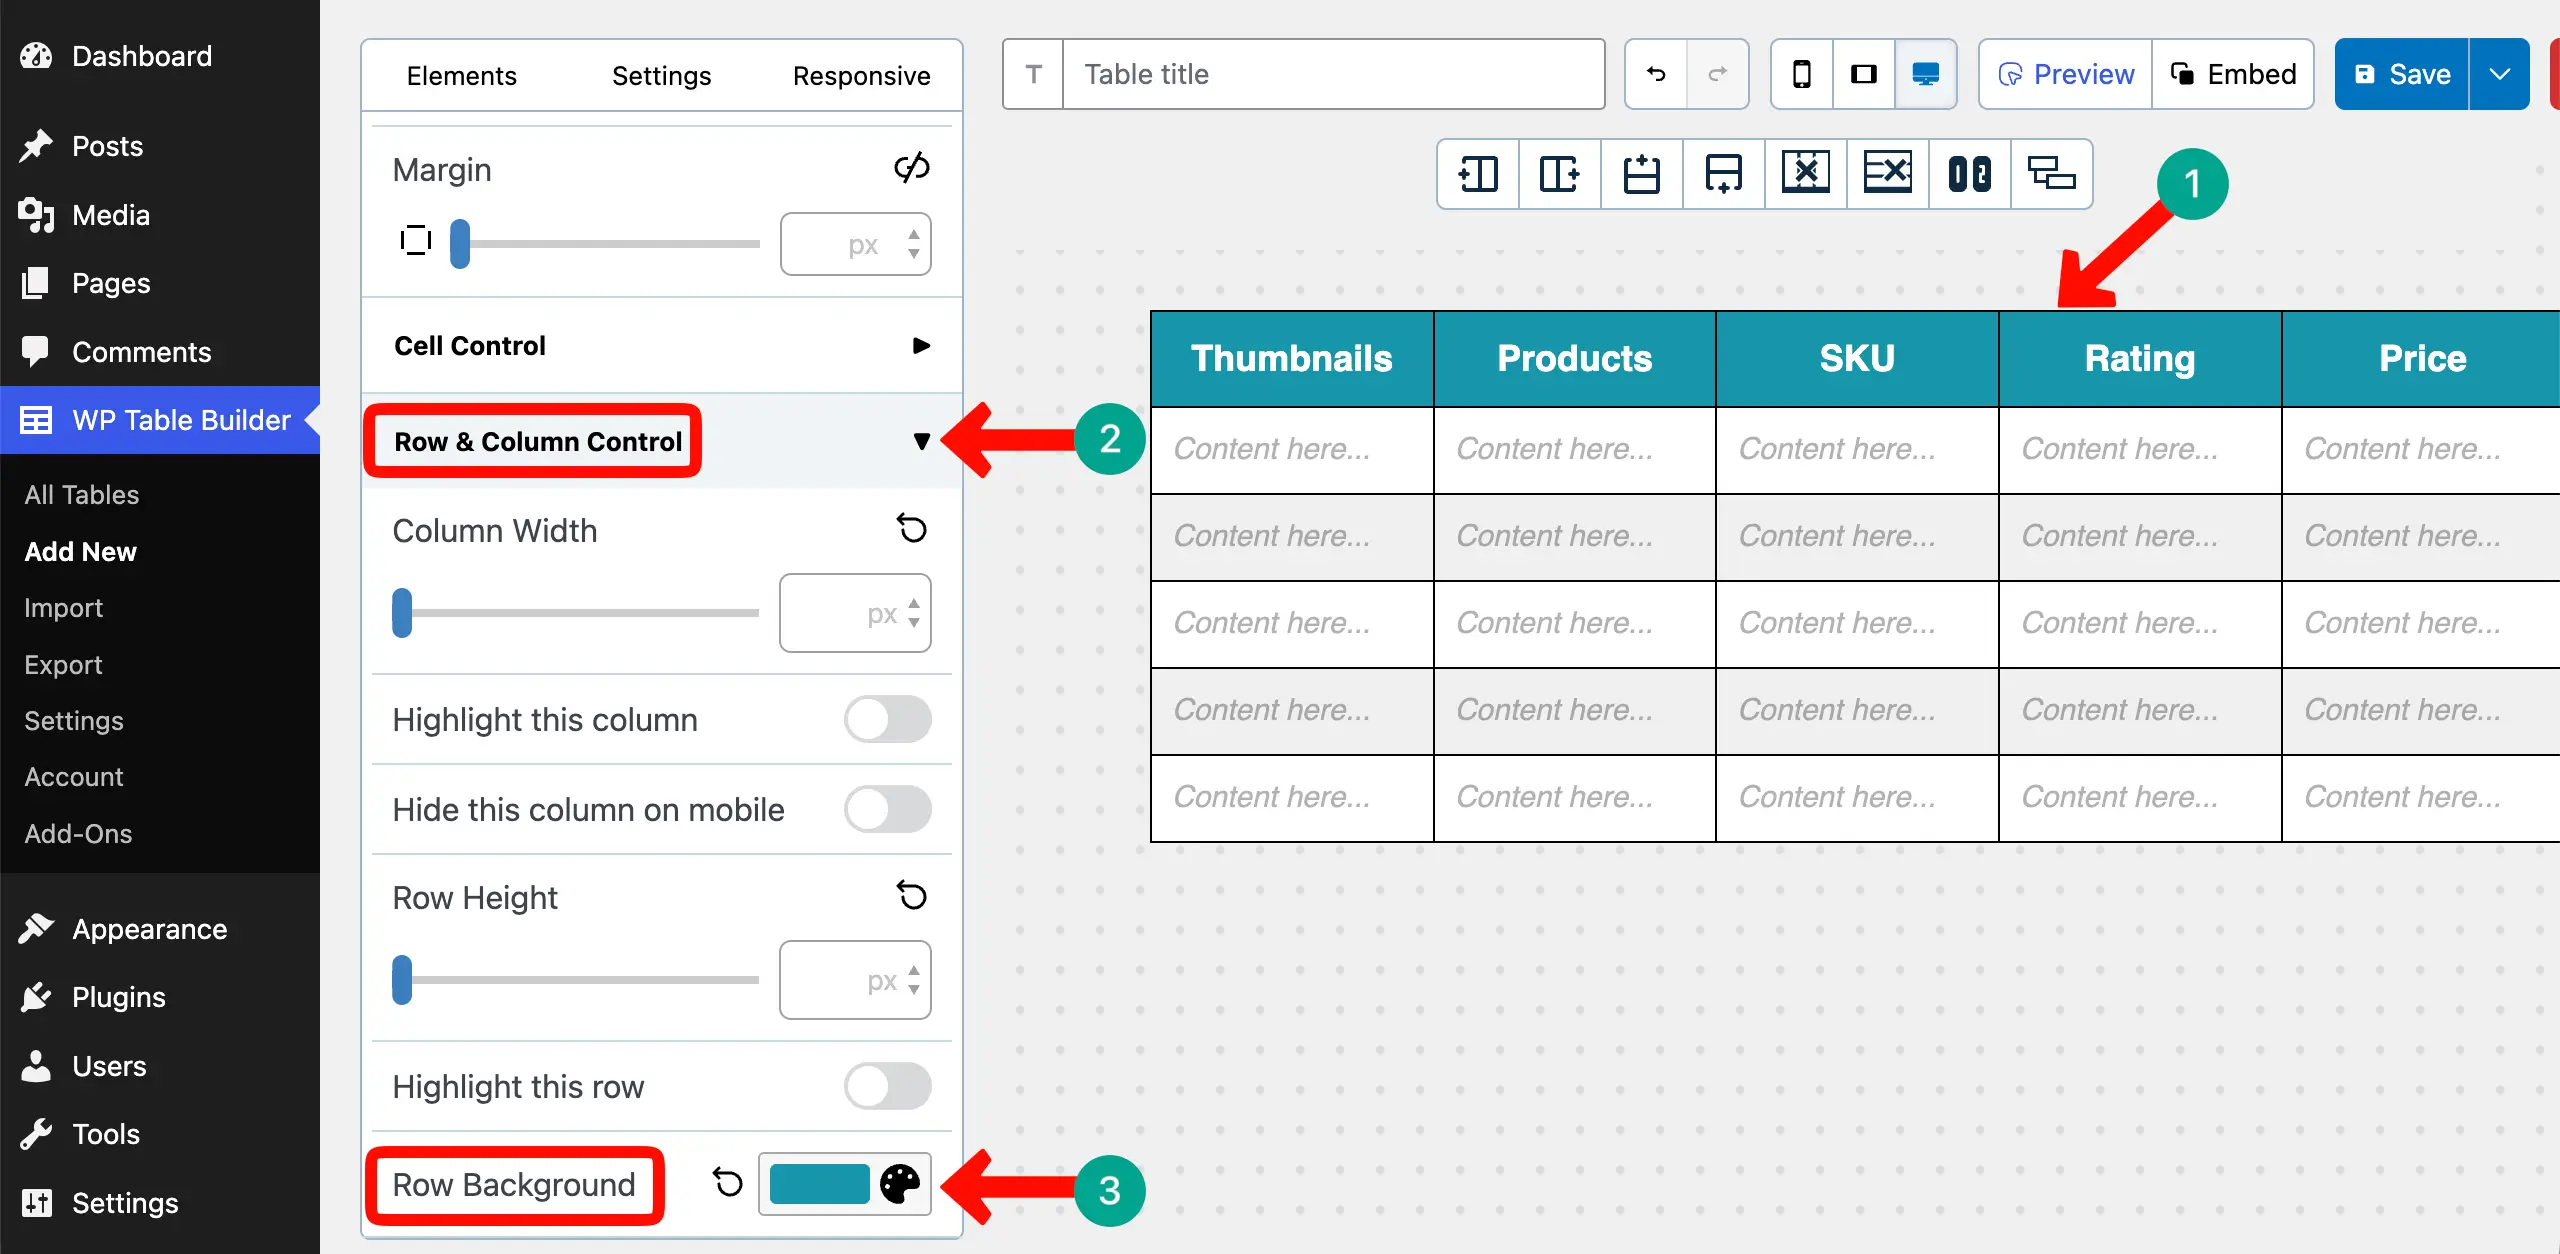
For stylization, it’s better to set a background color to the header row so it stands out. Just select the row, expand the Row & Column Control, and choose a background color from the Row Background option.
Learn how to add a size guide in WordPress using a table.
Step 04: Add Product Thumbnails
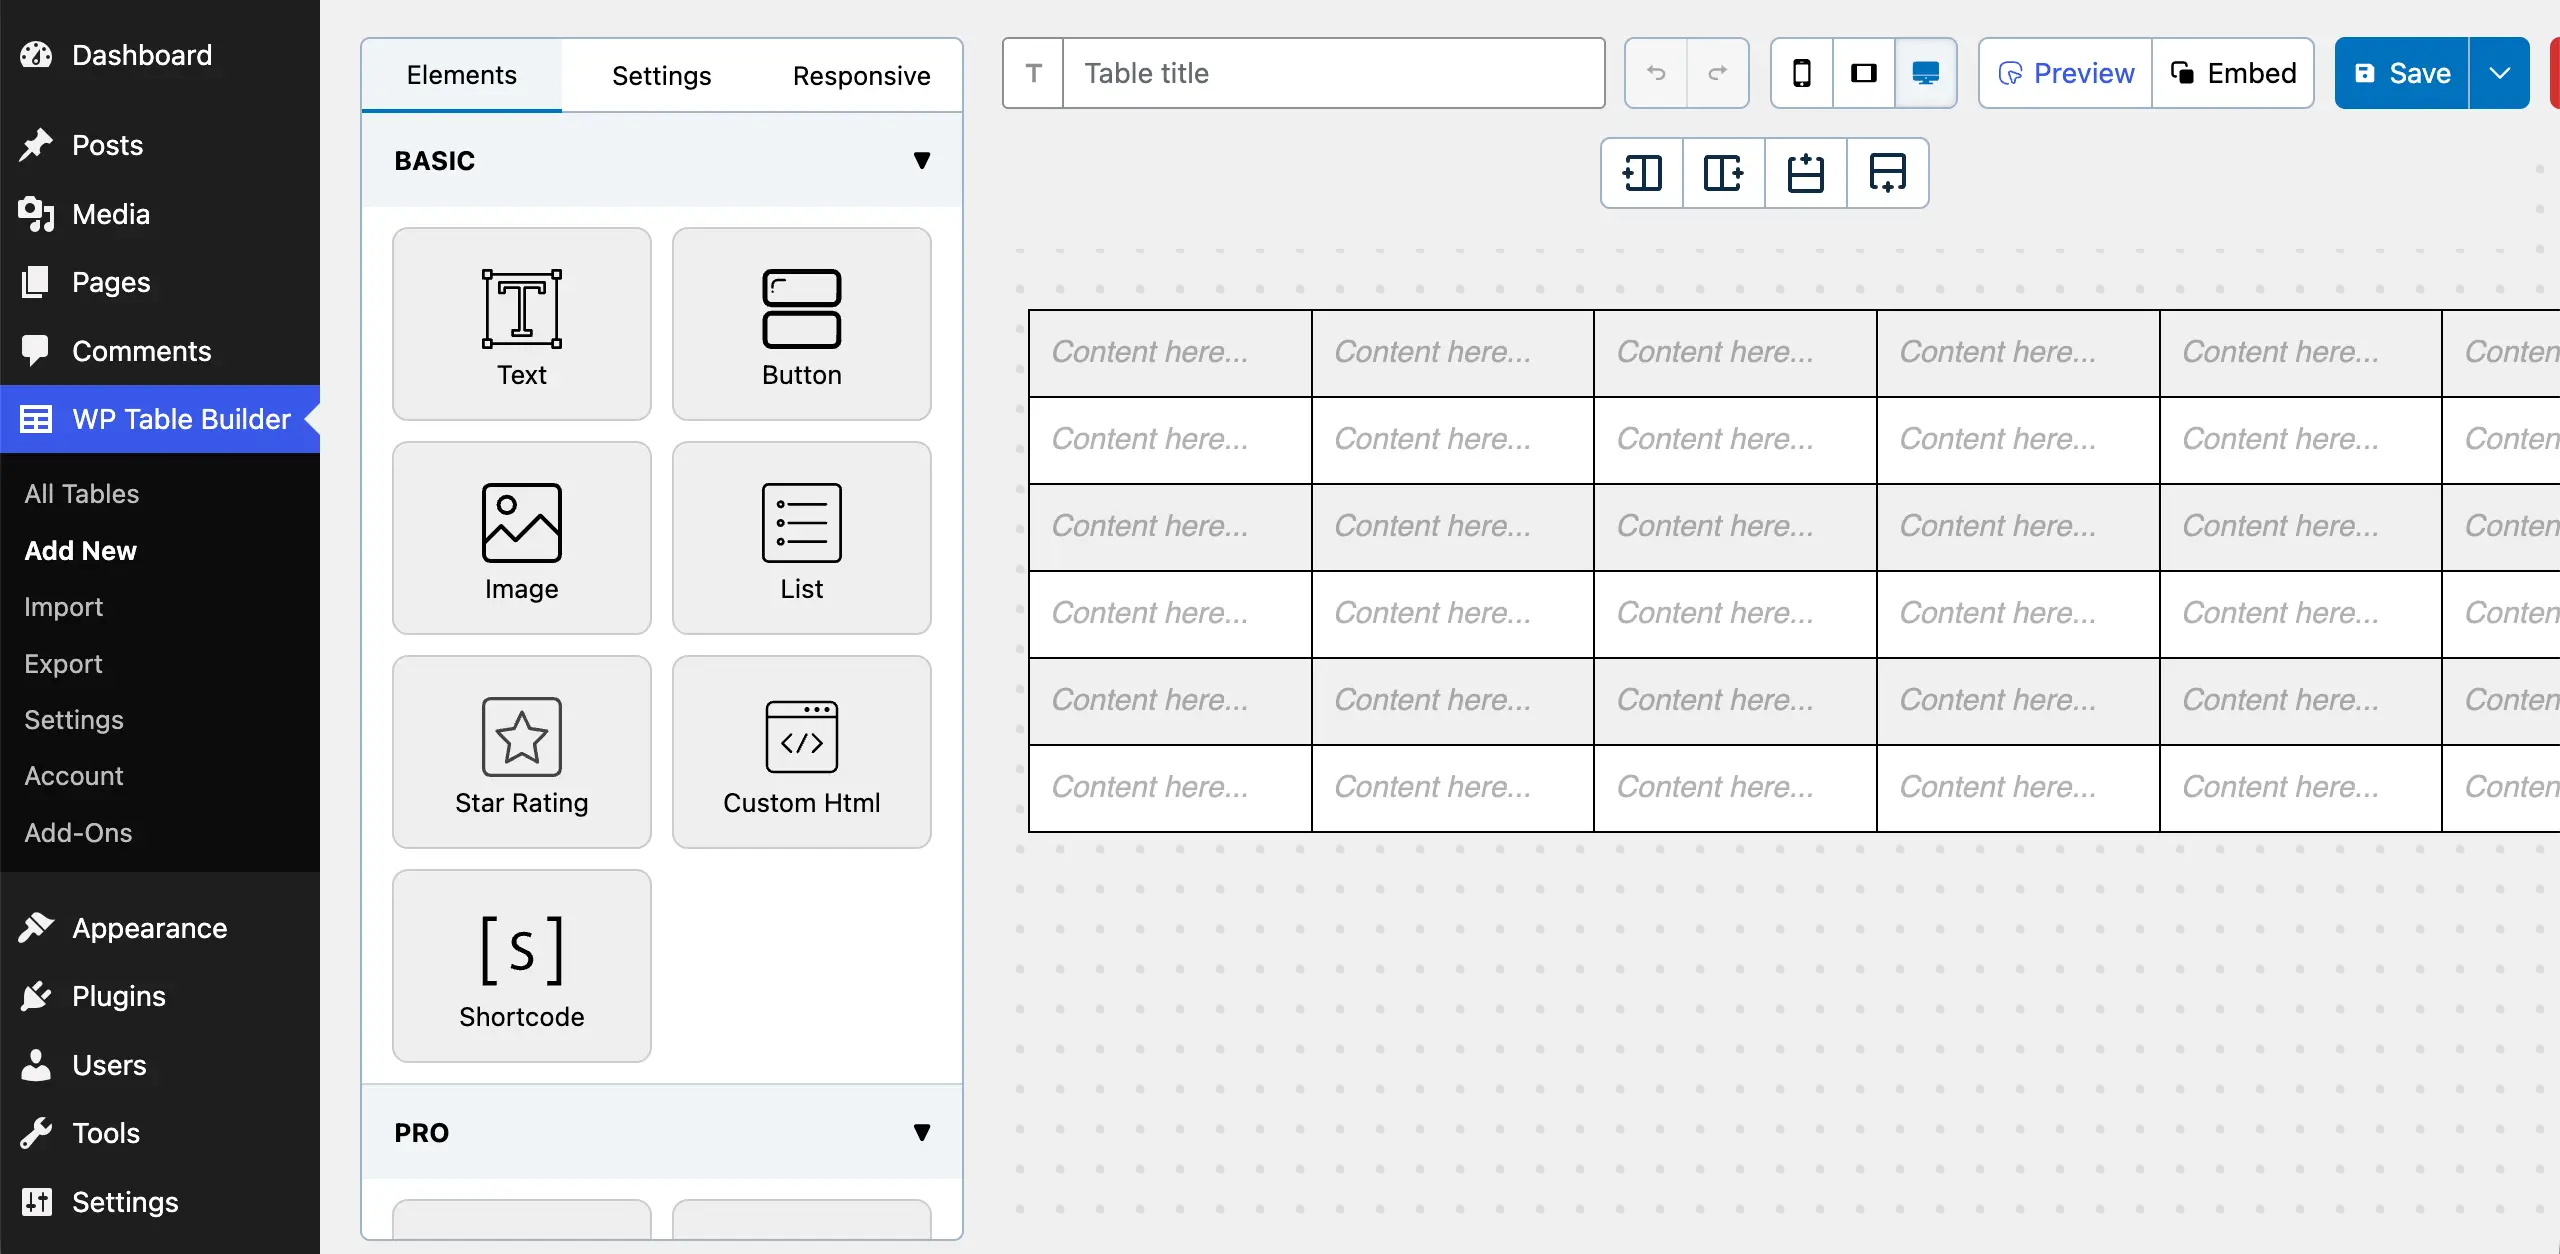
A thumbnail is a small preview image that shows a reduced version of a larger picture or product image. To display this, add the Image element to the table cell by dragging and dropping.
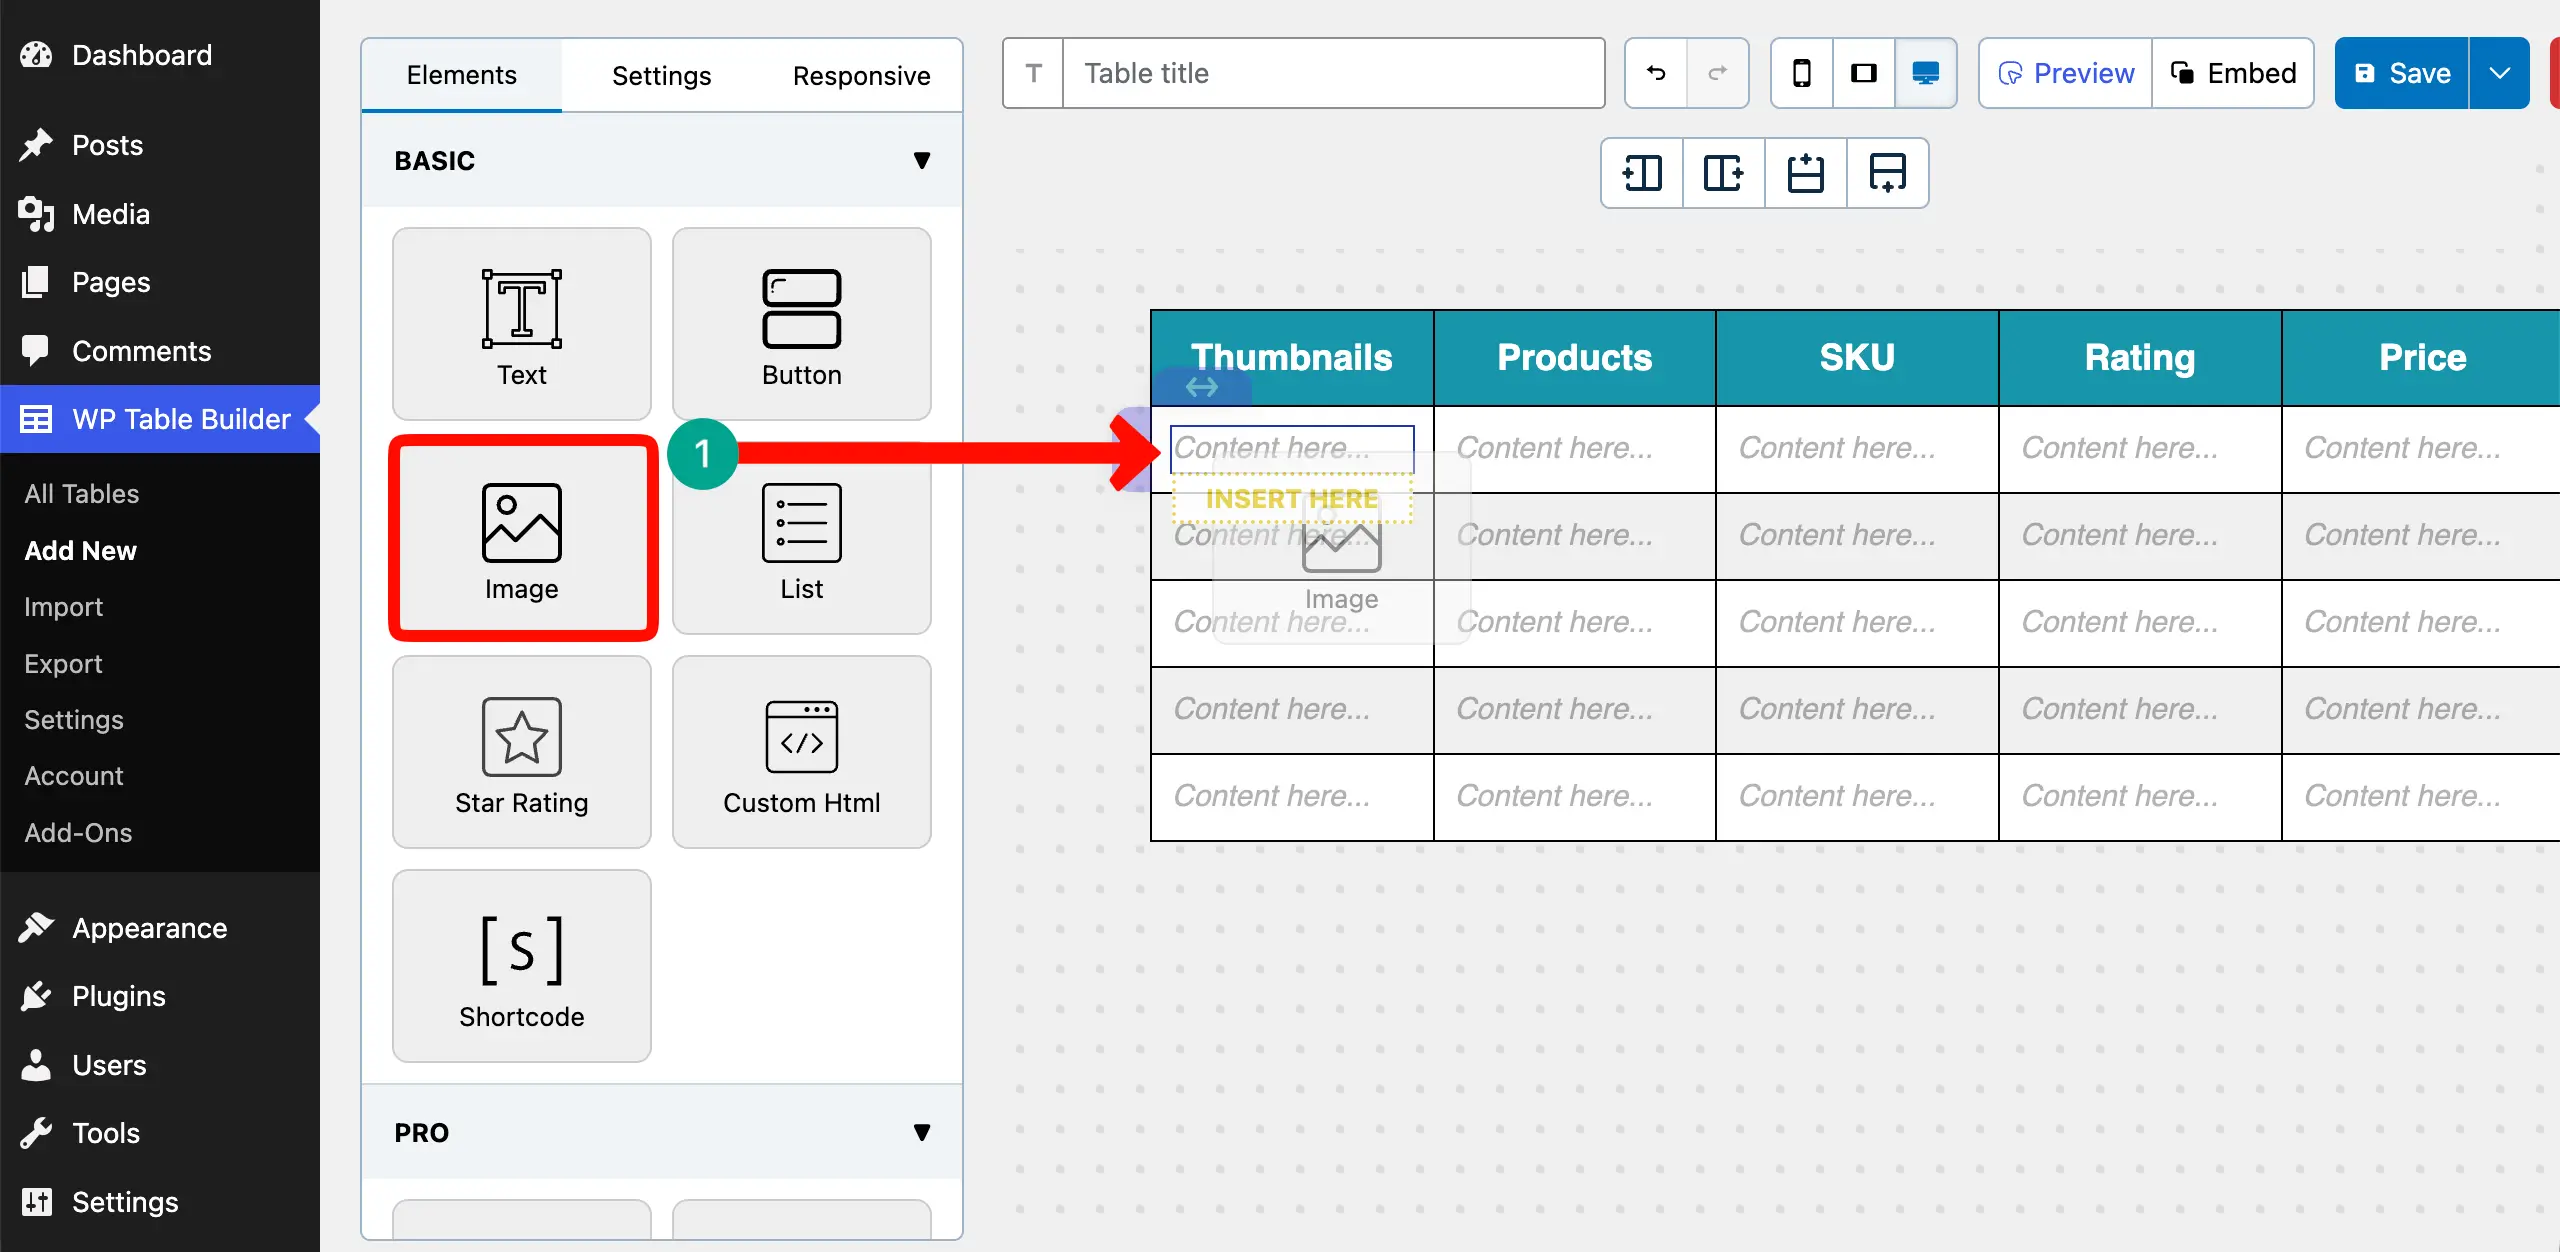
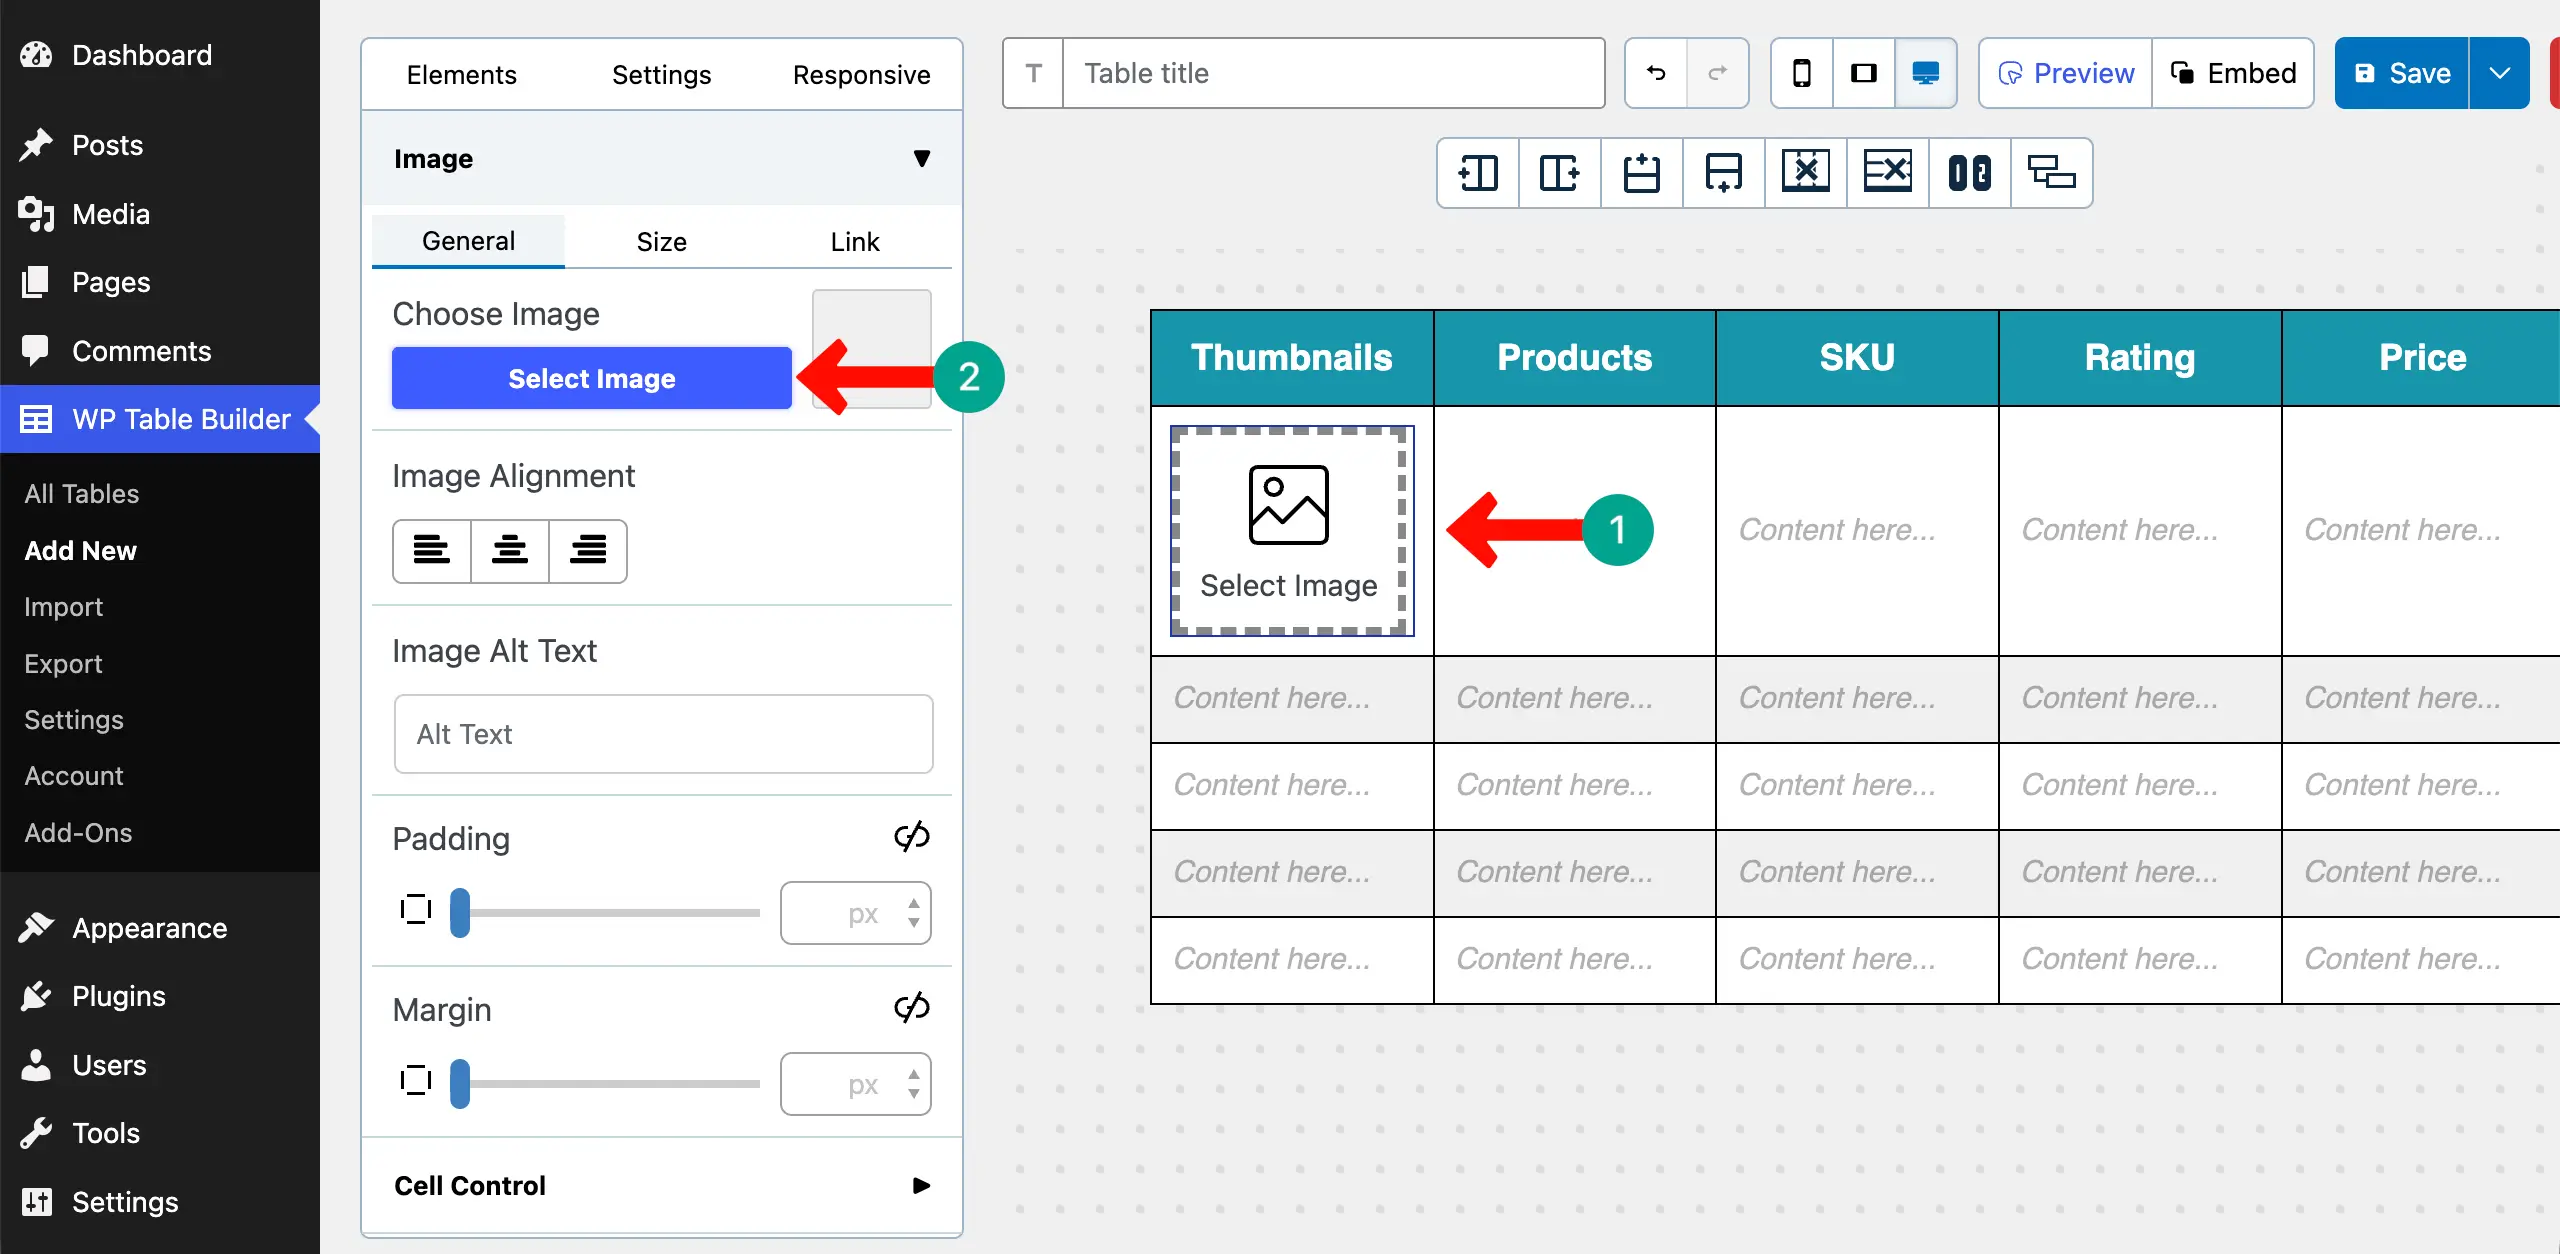
Once the element is added, click on the Image icon. You’ll see the Select Image option on the left sidebar. By clicking this option, you can add your desired image for the thumbnail.
You can see below that we have added a thumbnail of the product to the table.
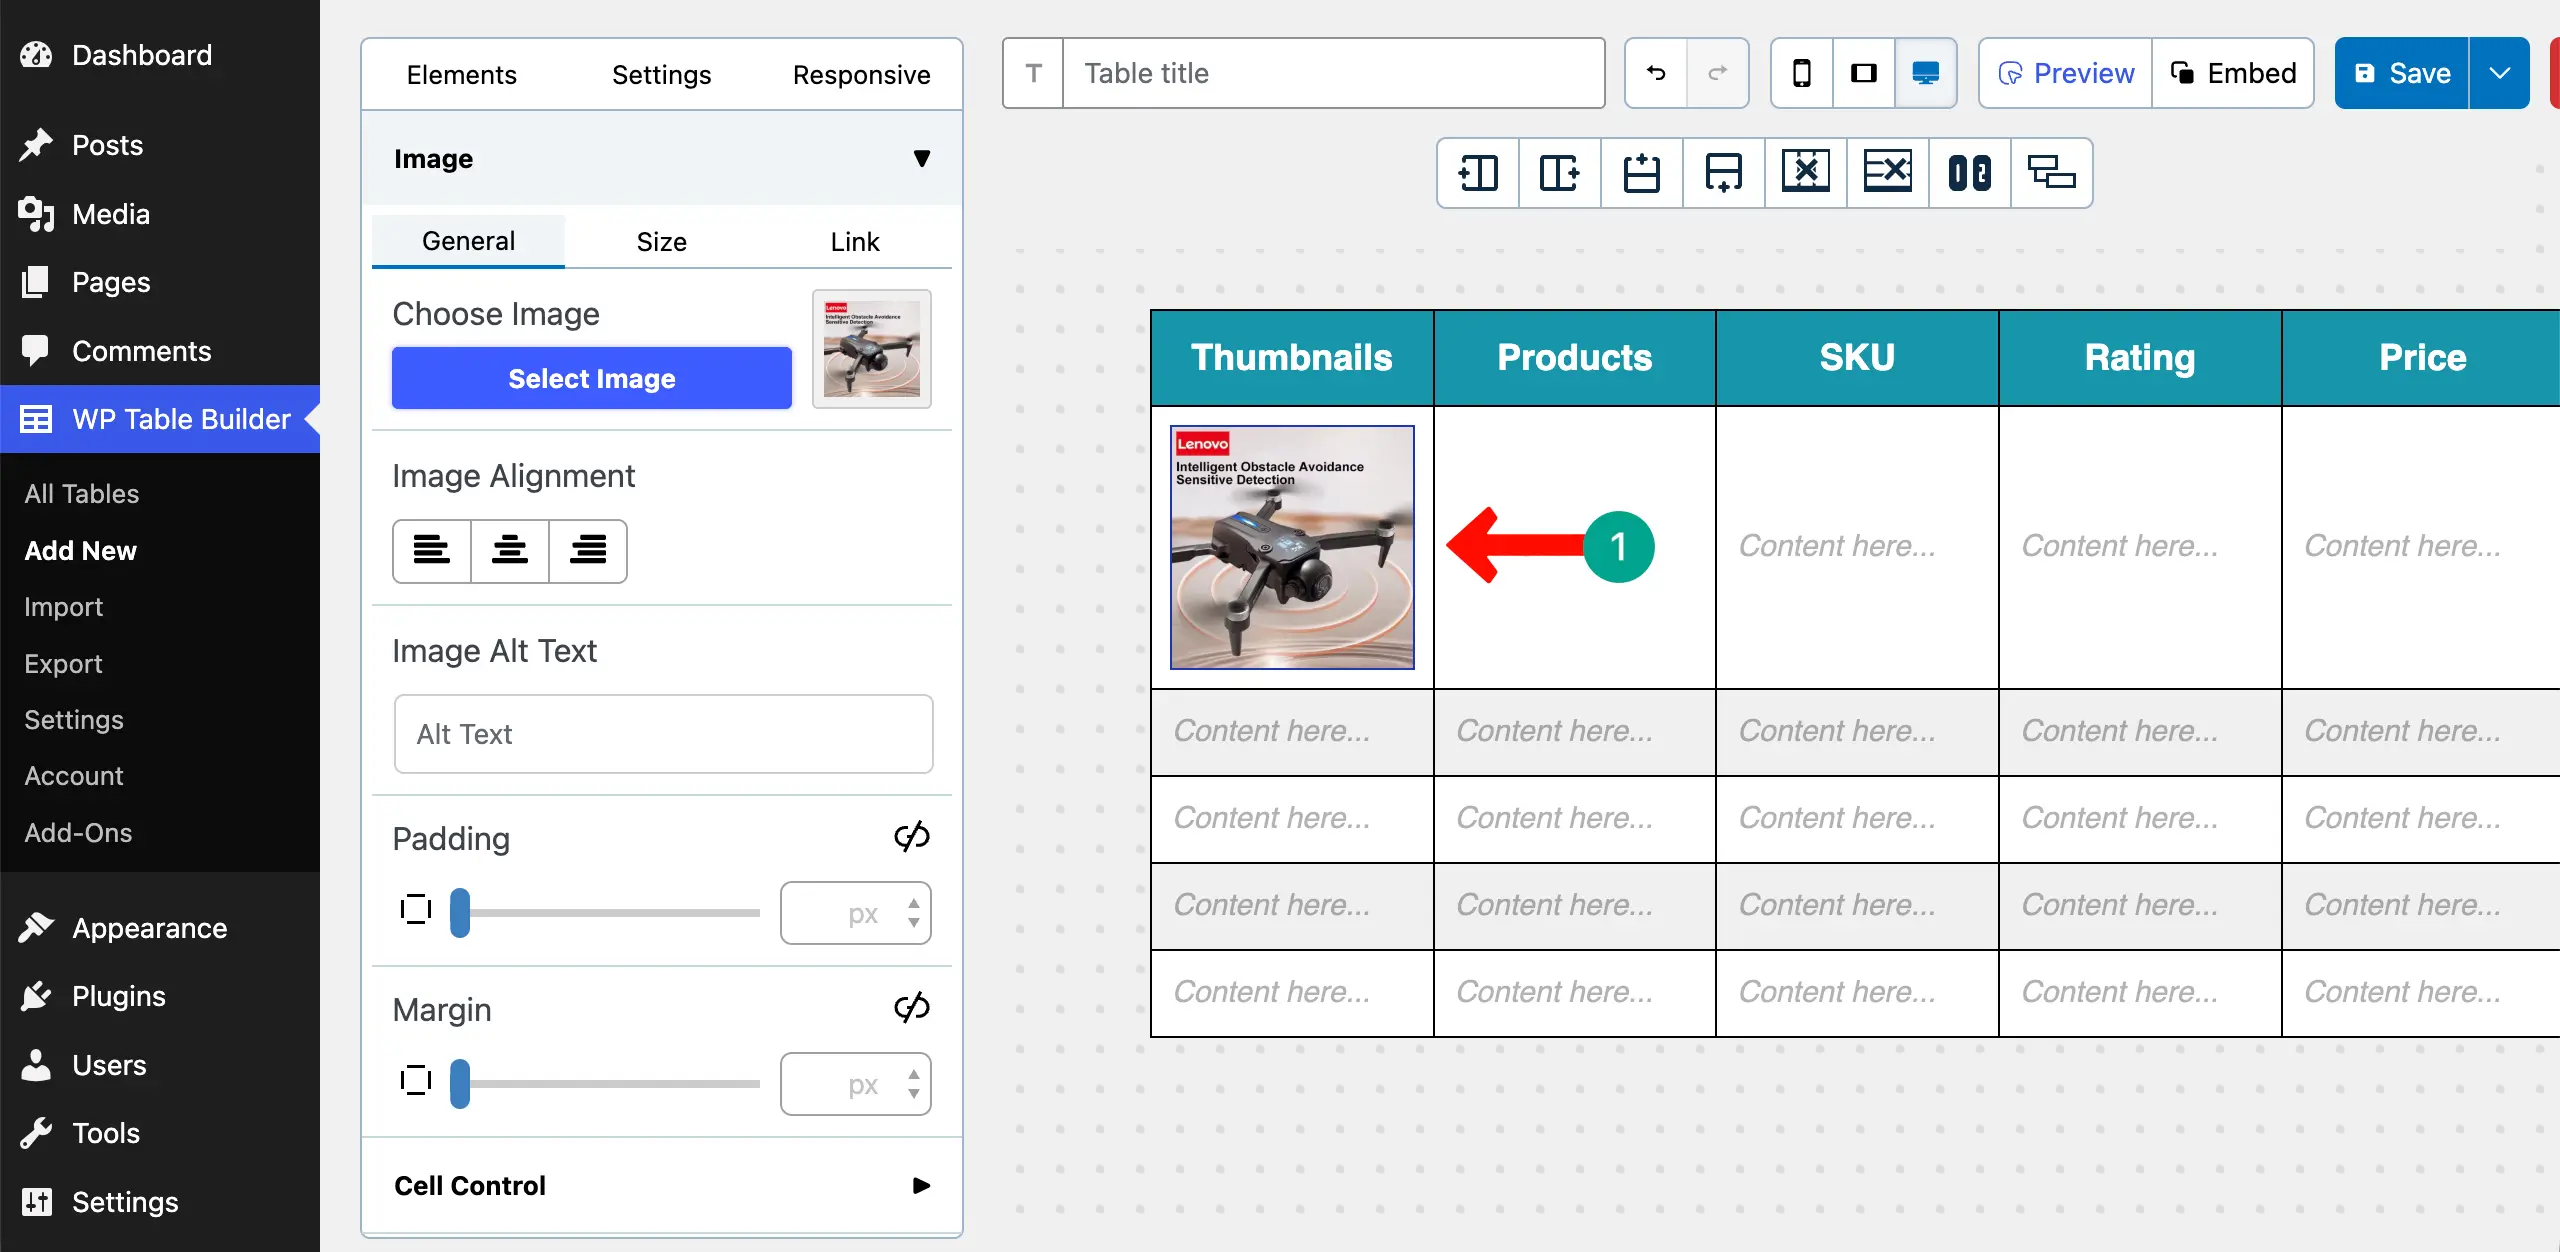
In the same way, add more thumbnails to the other rows of the table.
Explore how to create a feature comparison table in WordPress.
Step 05: Add Product Names
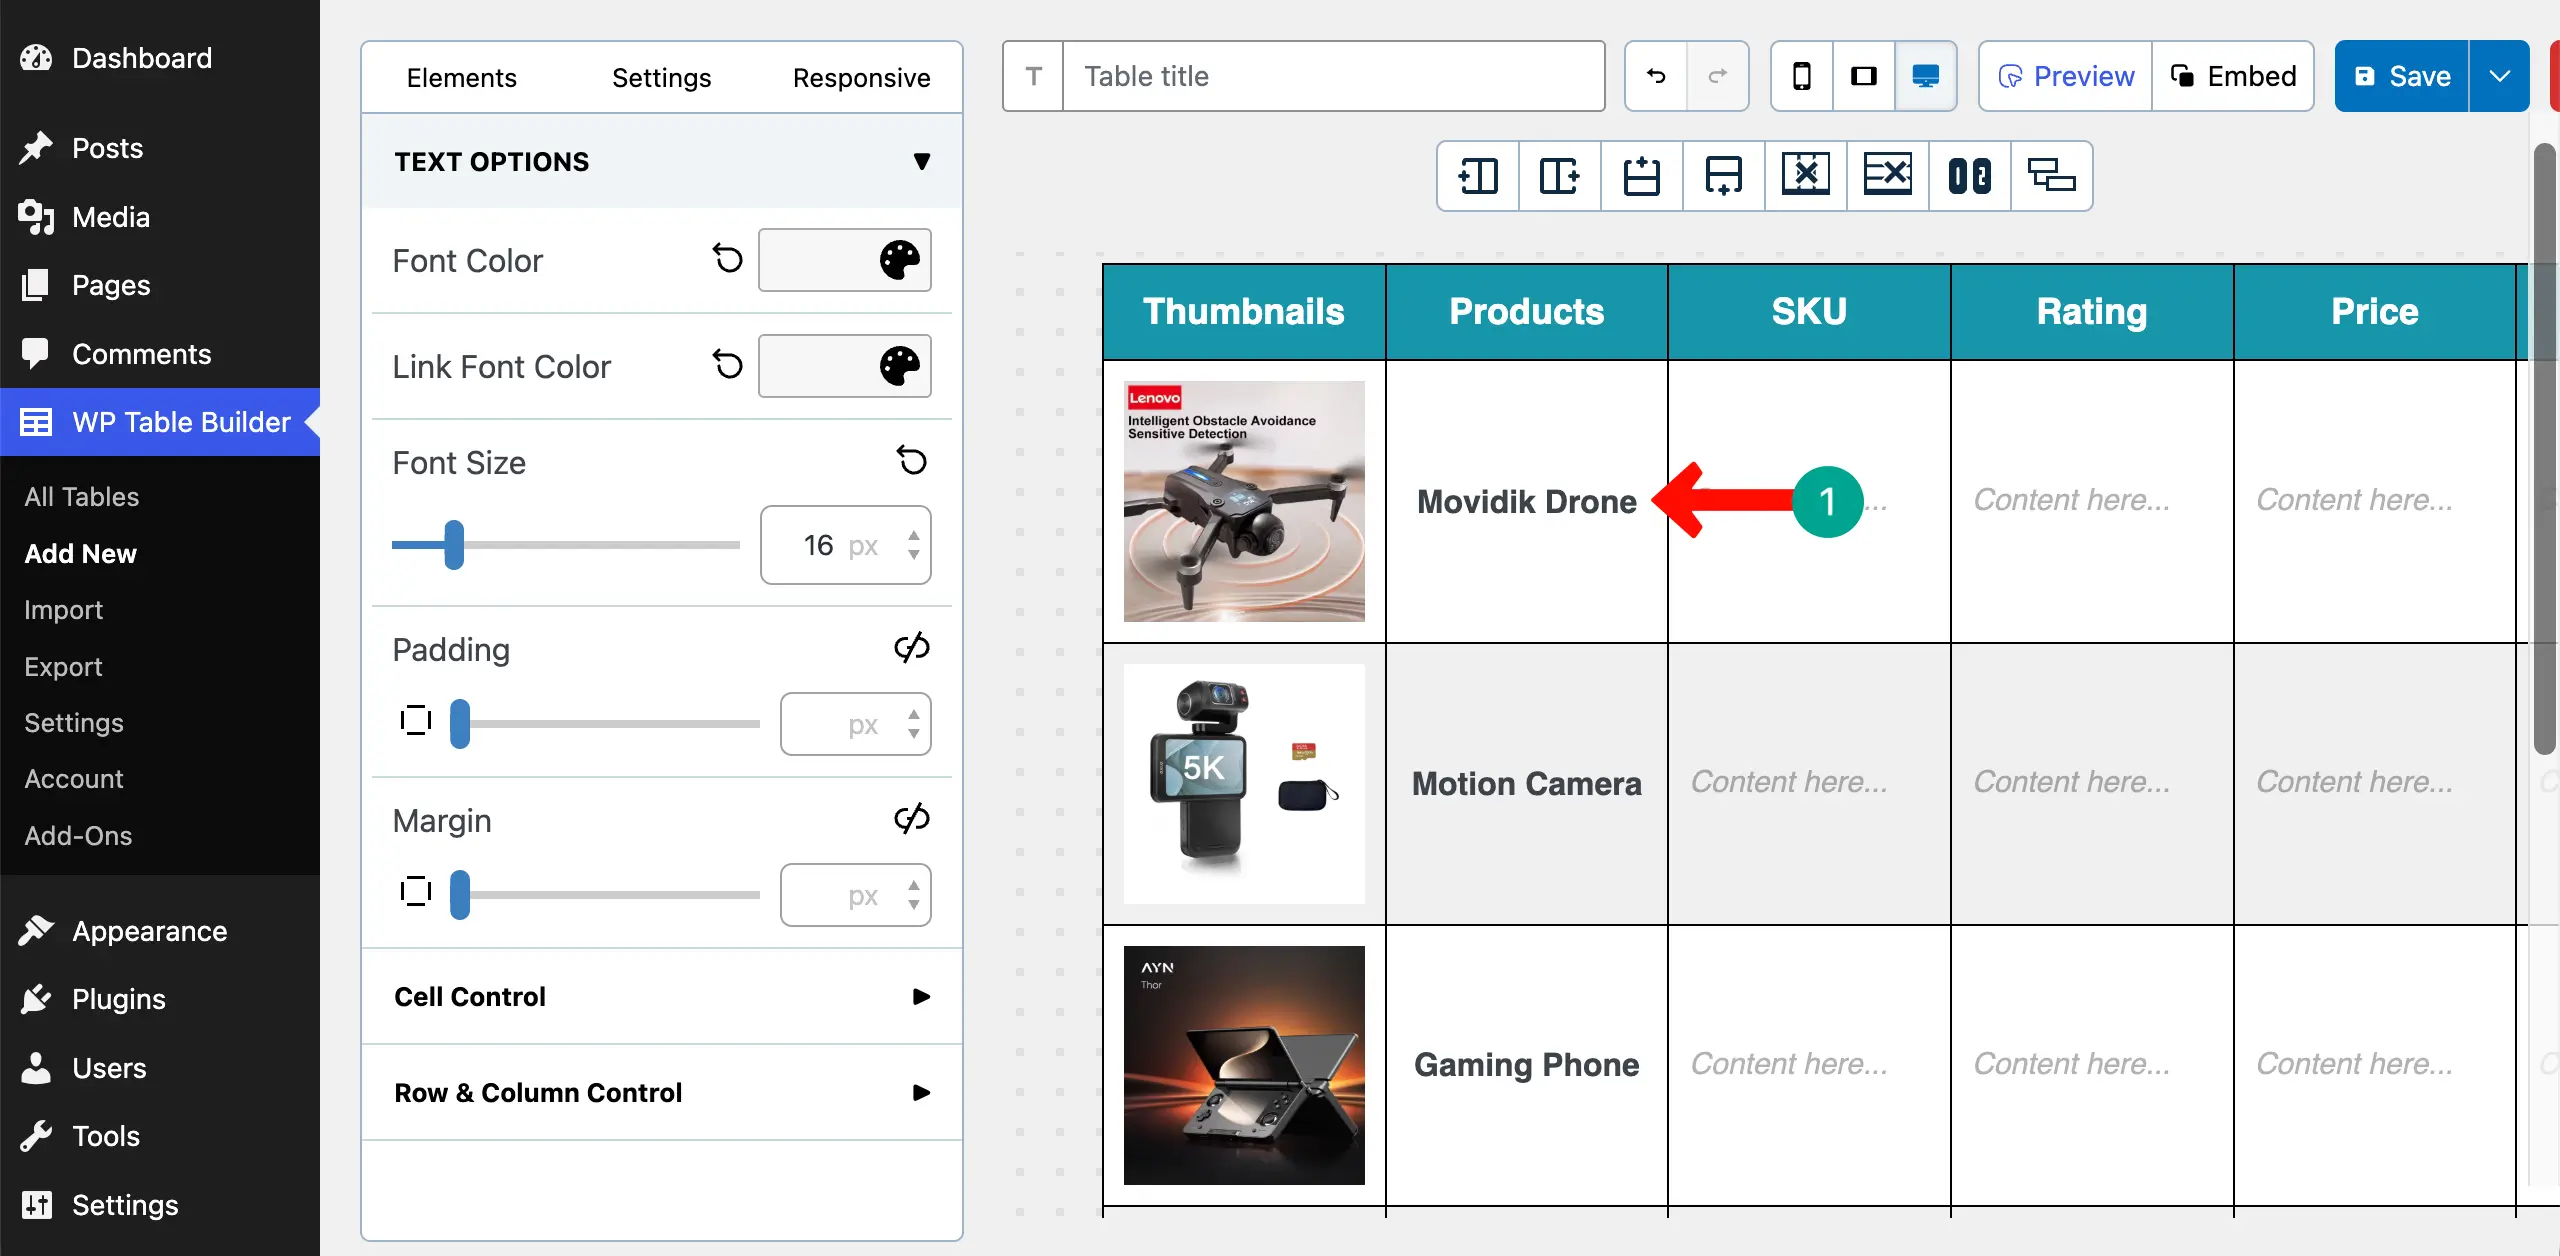
Under the Products column, write the names of the products. You don’t have to drag and drop the Text element to the cells, as the element is already there by default.
Step 06: Add SKU of the Products
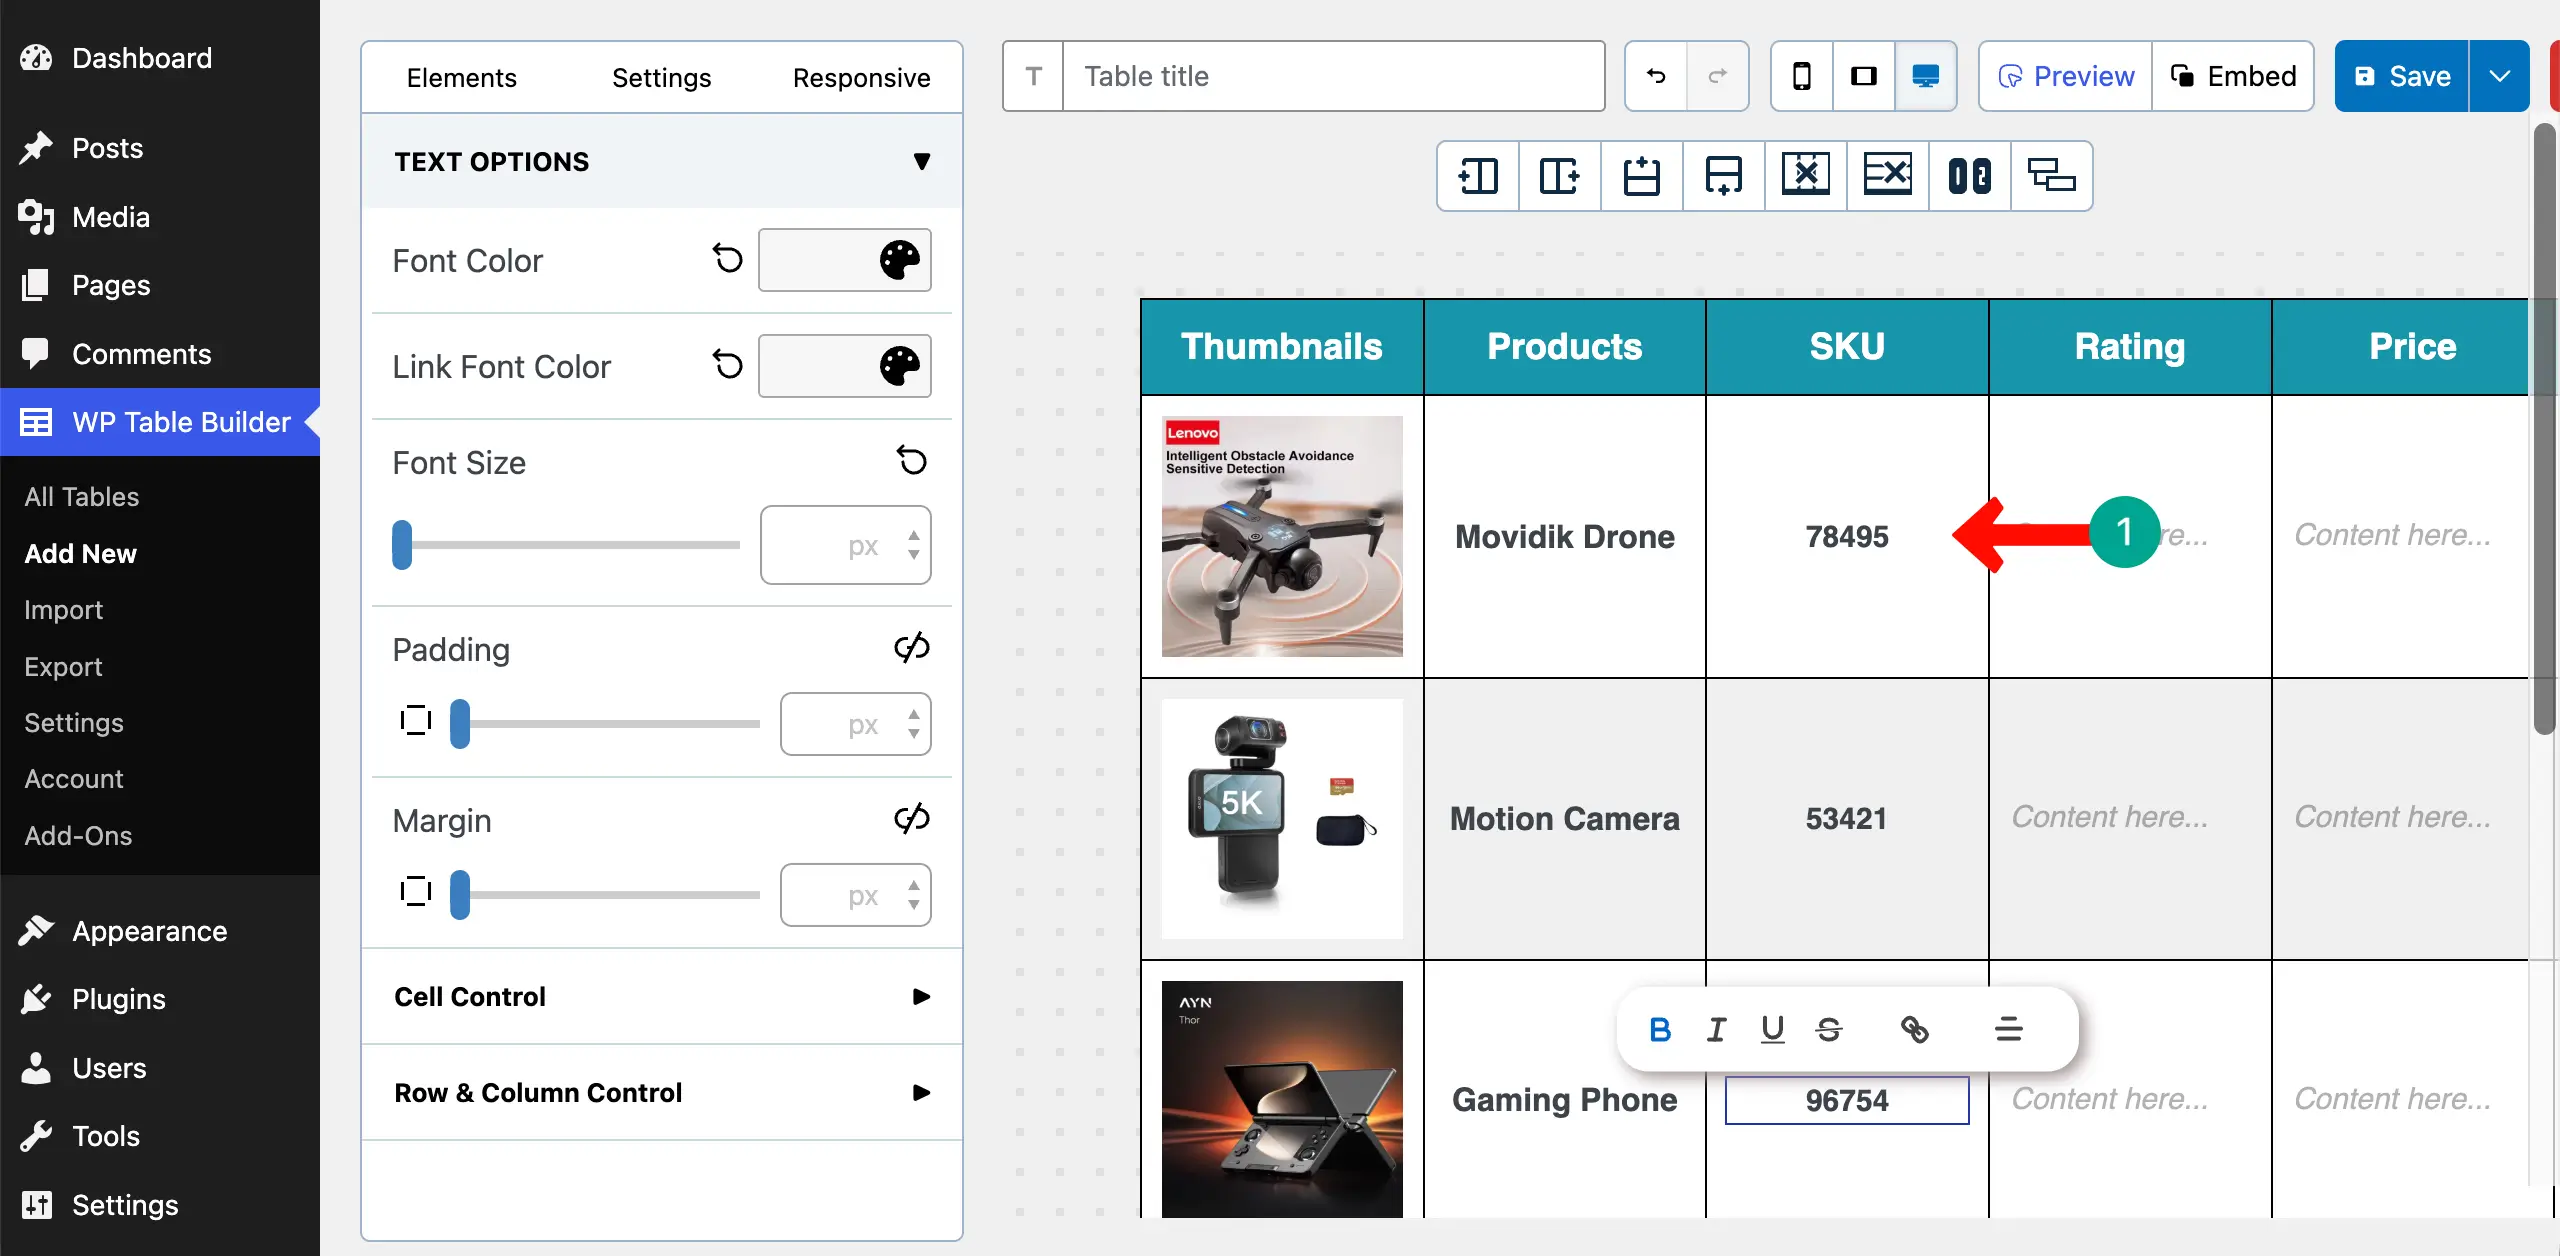
SKU (Stock Keeping Unit) is a unique code used by a store to identify and track a specific product in its inventory. Simply write the SKU codes of the products.
Step 07: Add Star Rating
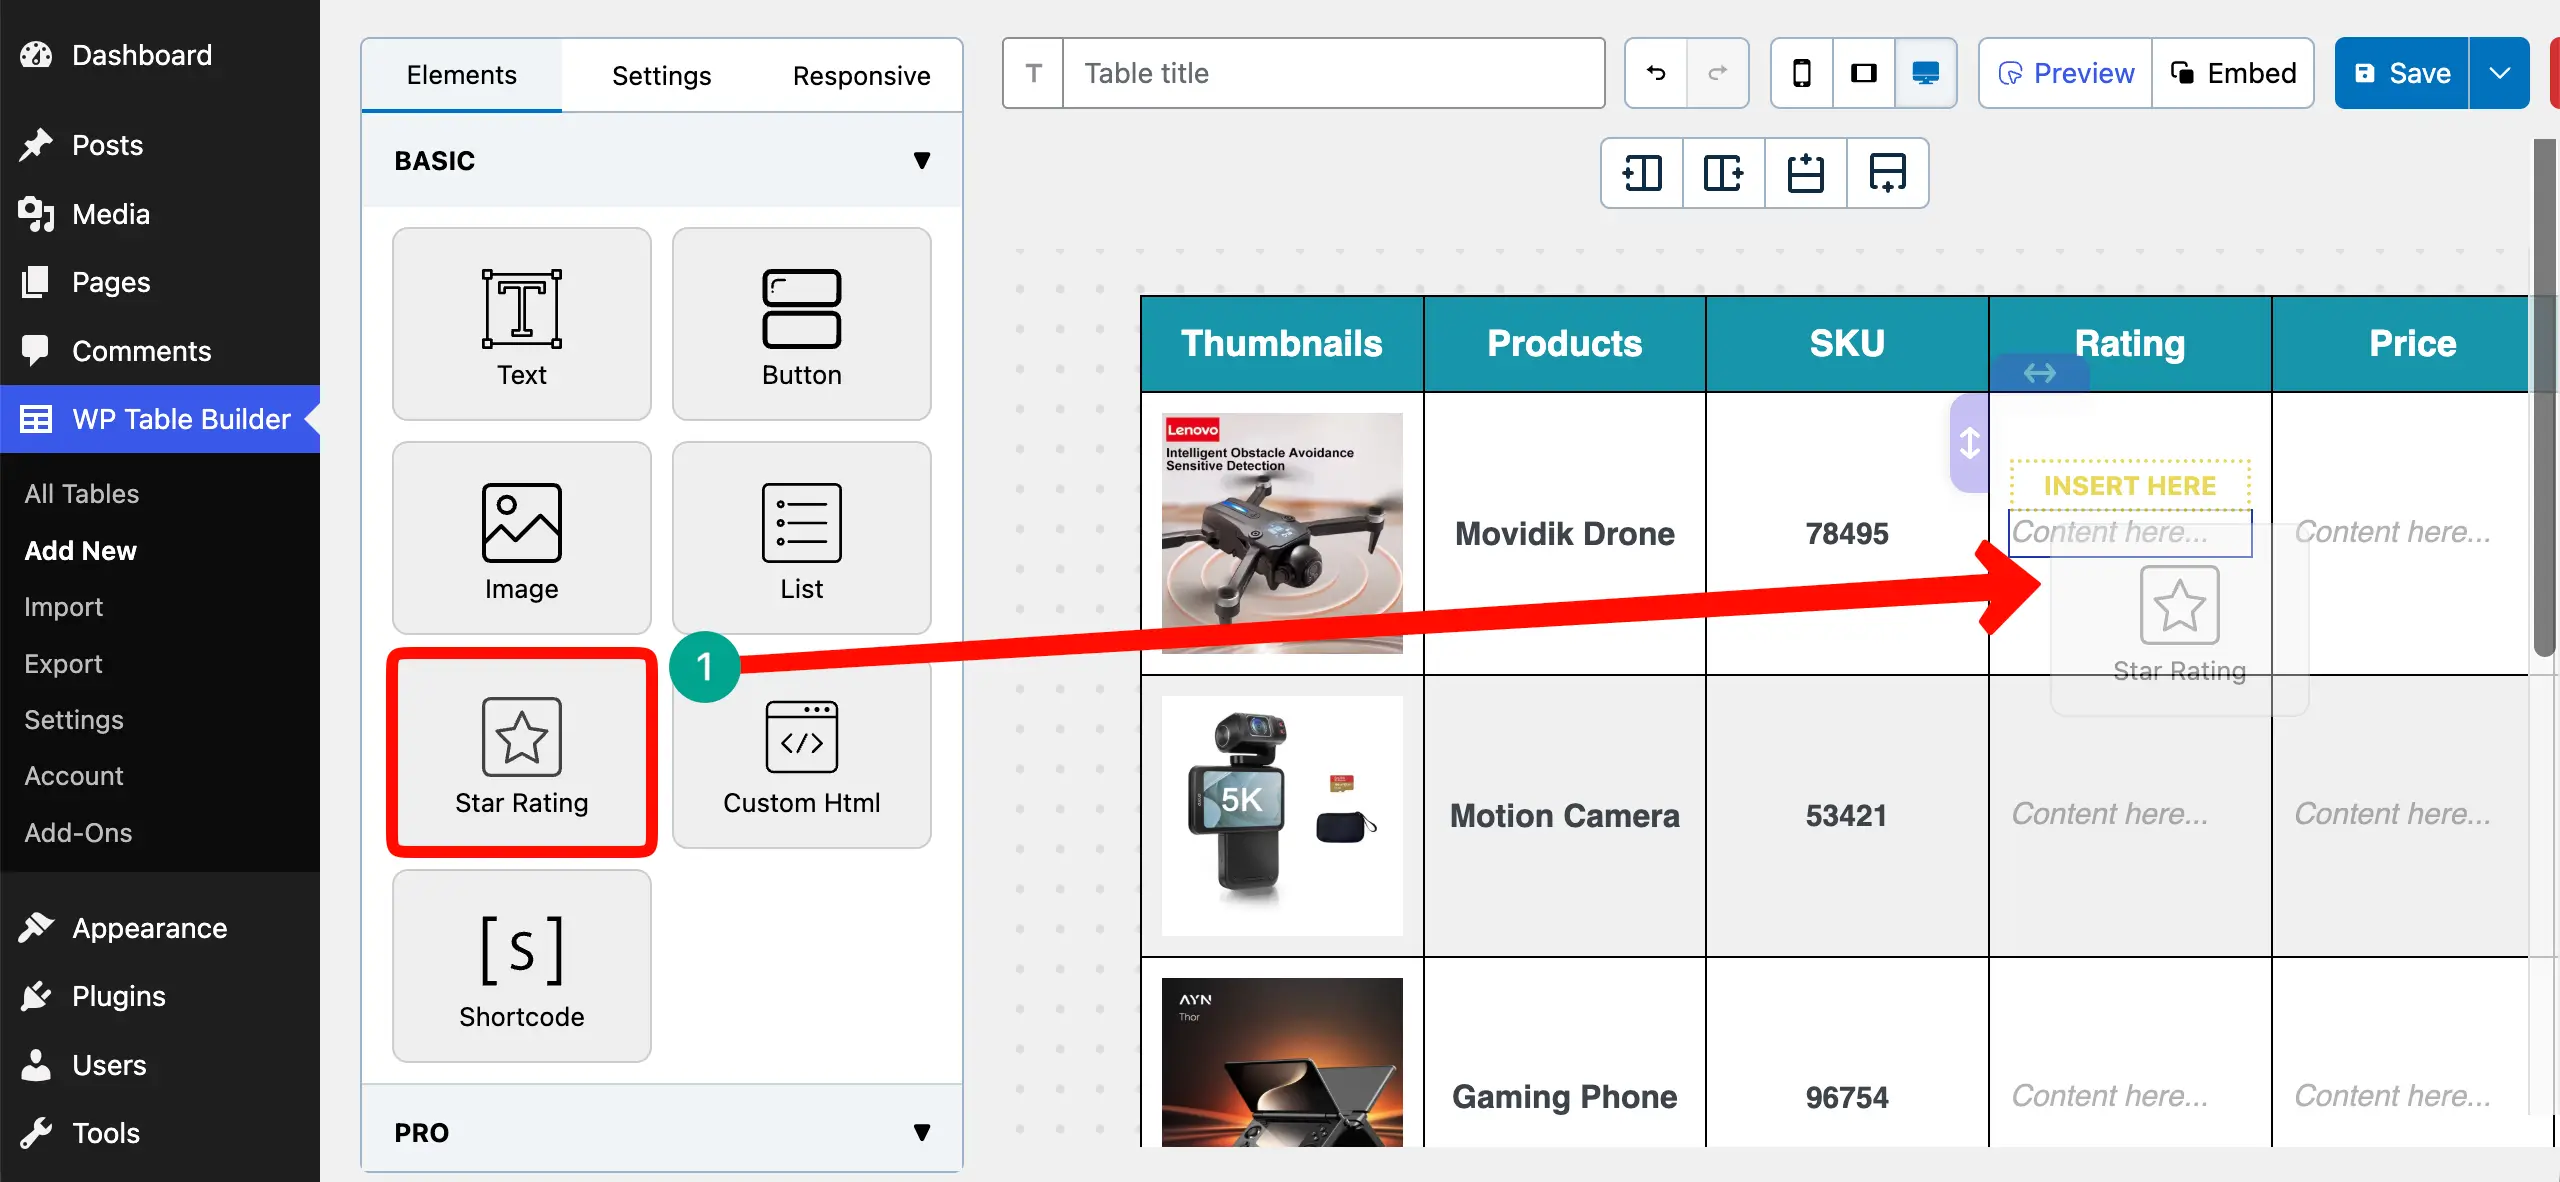
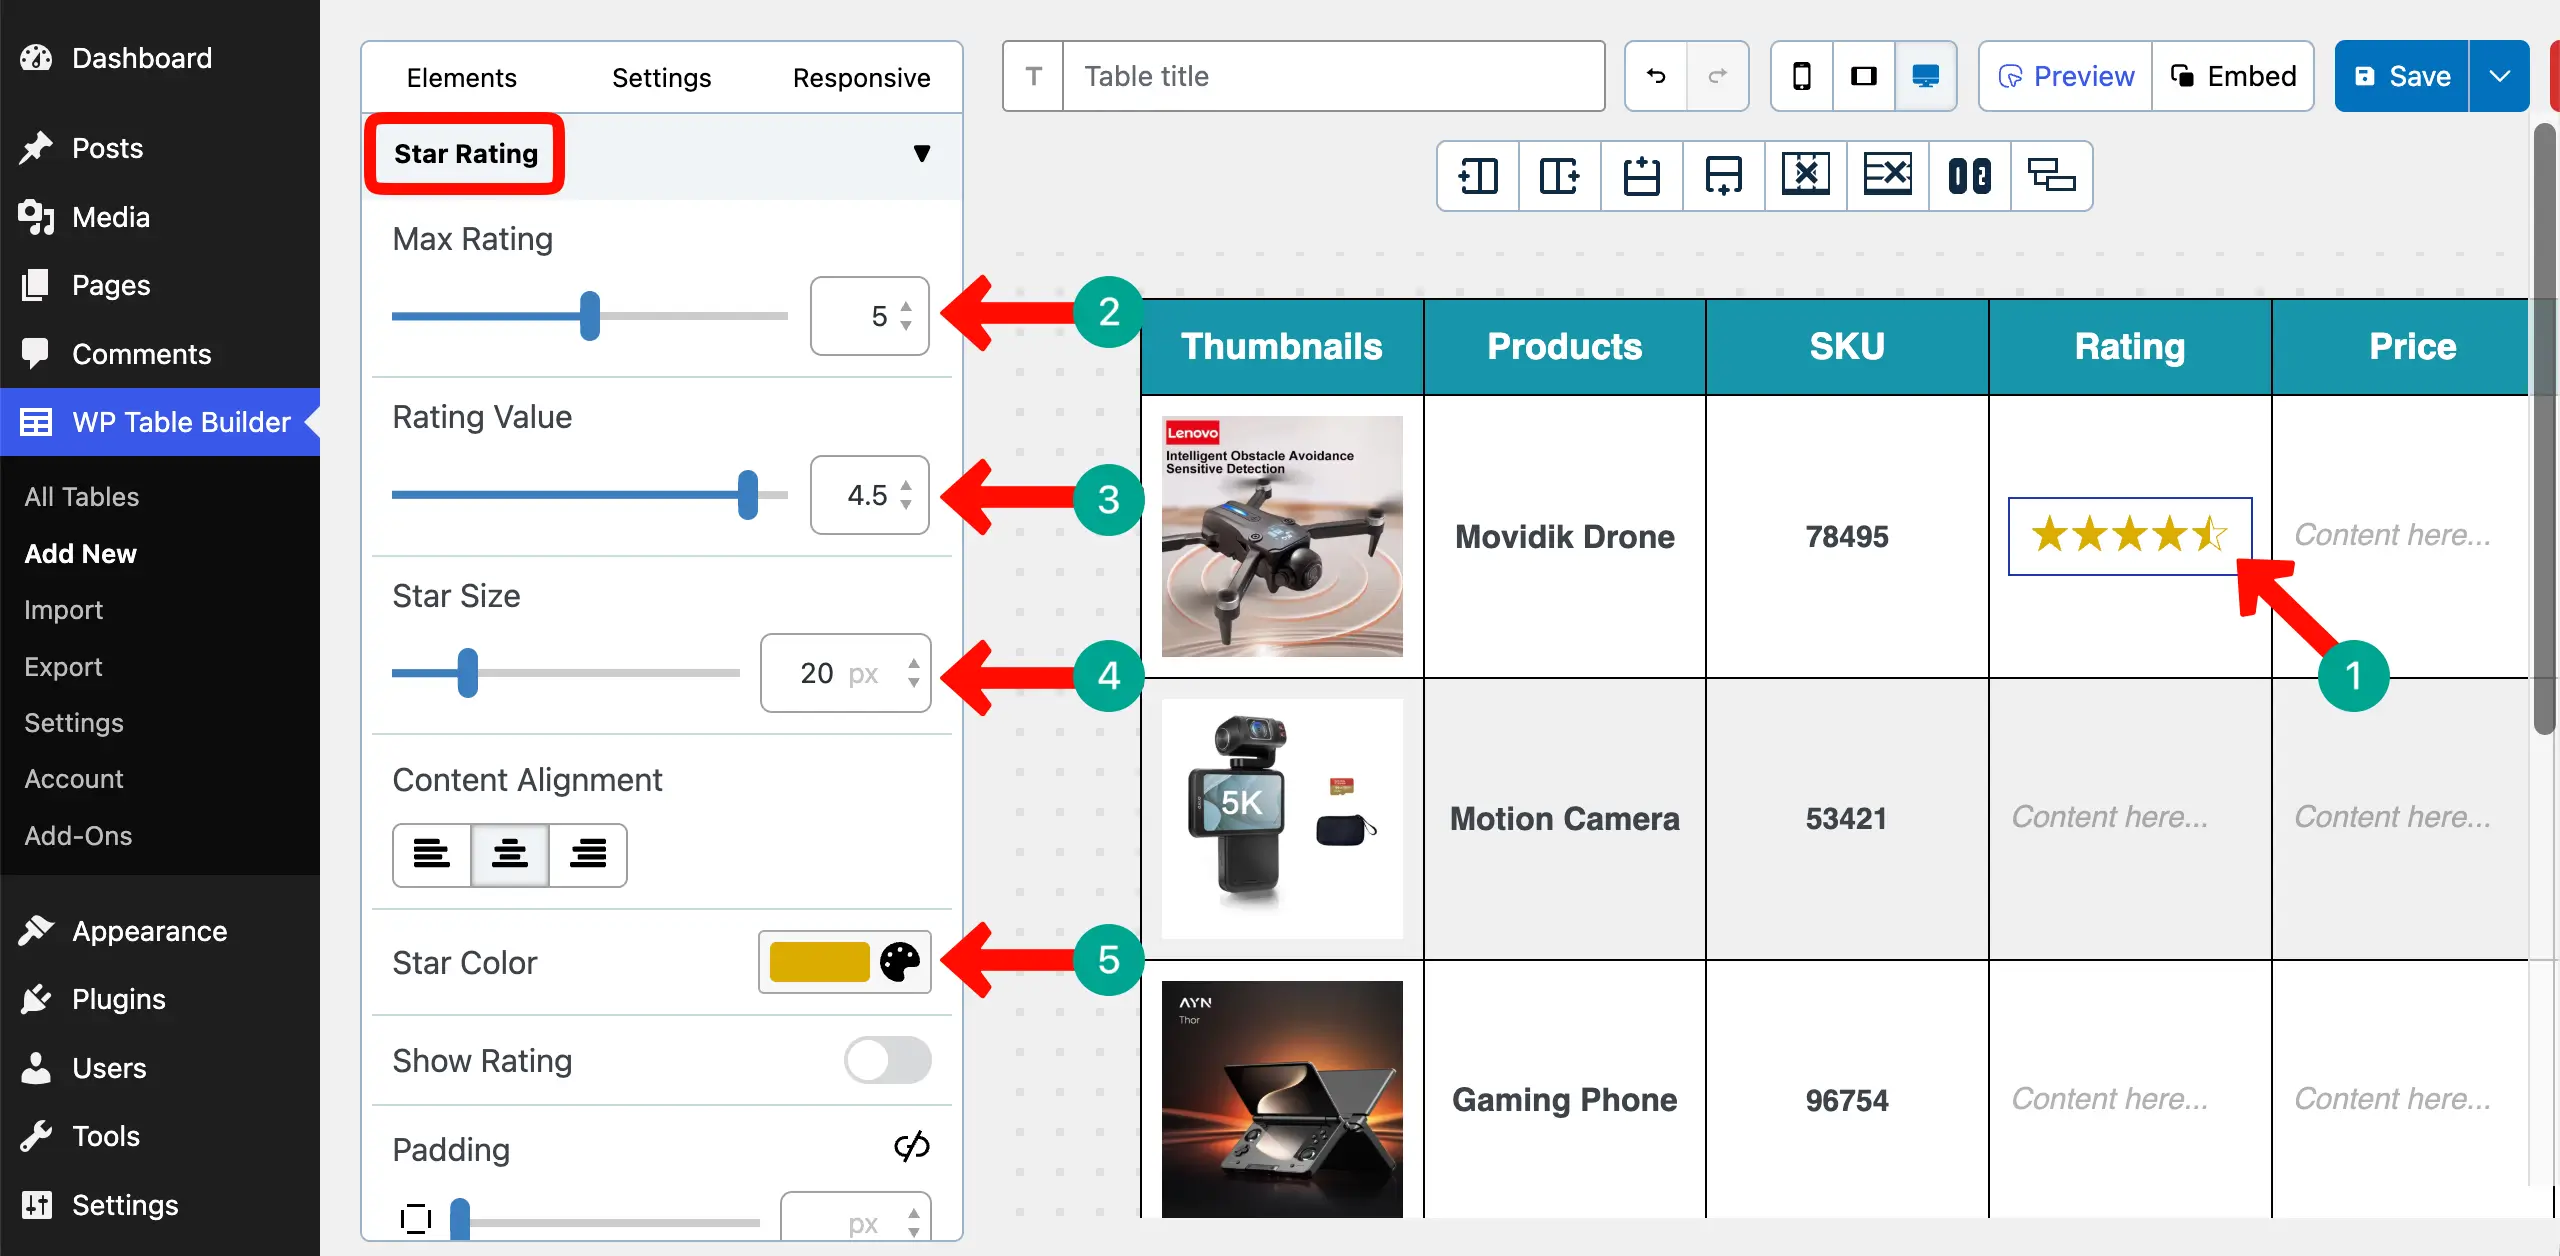
A star rating is a visual score, usually shown with 1 to 5 stars. It displays how customers have rated a product based on their experience. It should be added to the table because it builds trust, helps buyers quickly judge product quality.
Drag and drop the Star Rating element to the table cell.
From the left sidebar, you can set maximum stars, rating value, start size, and star color as you want.
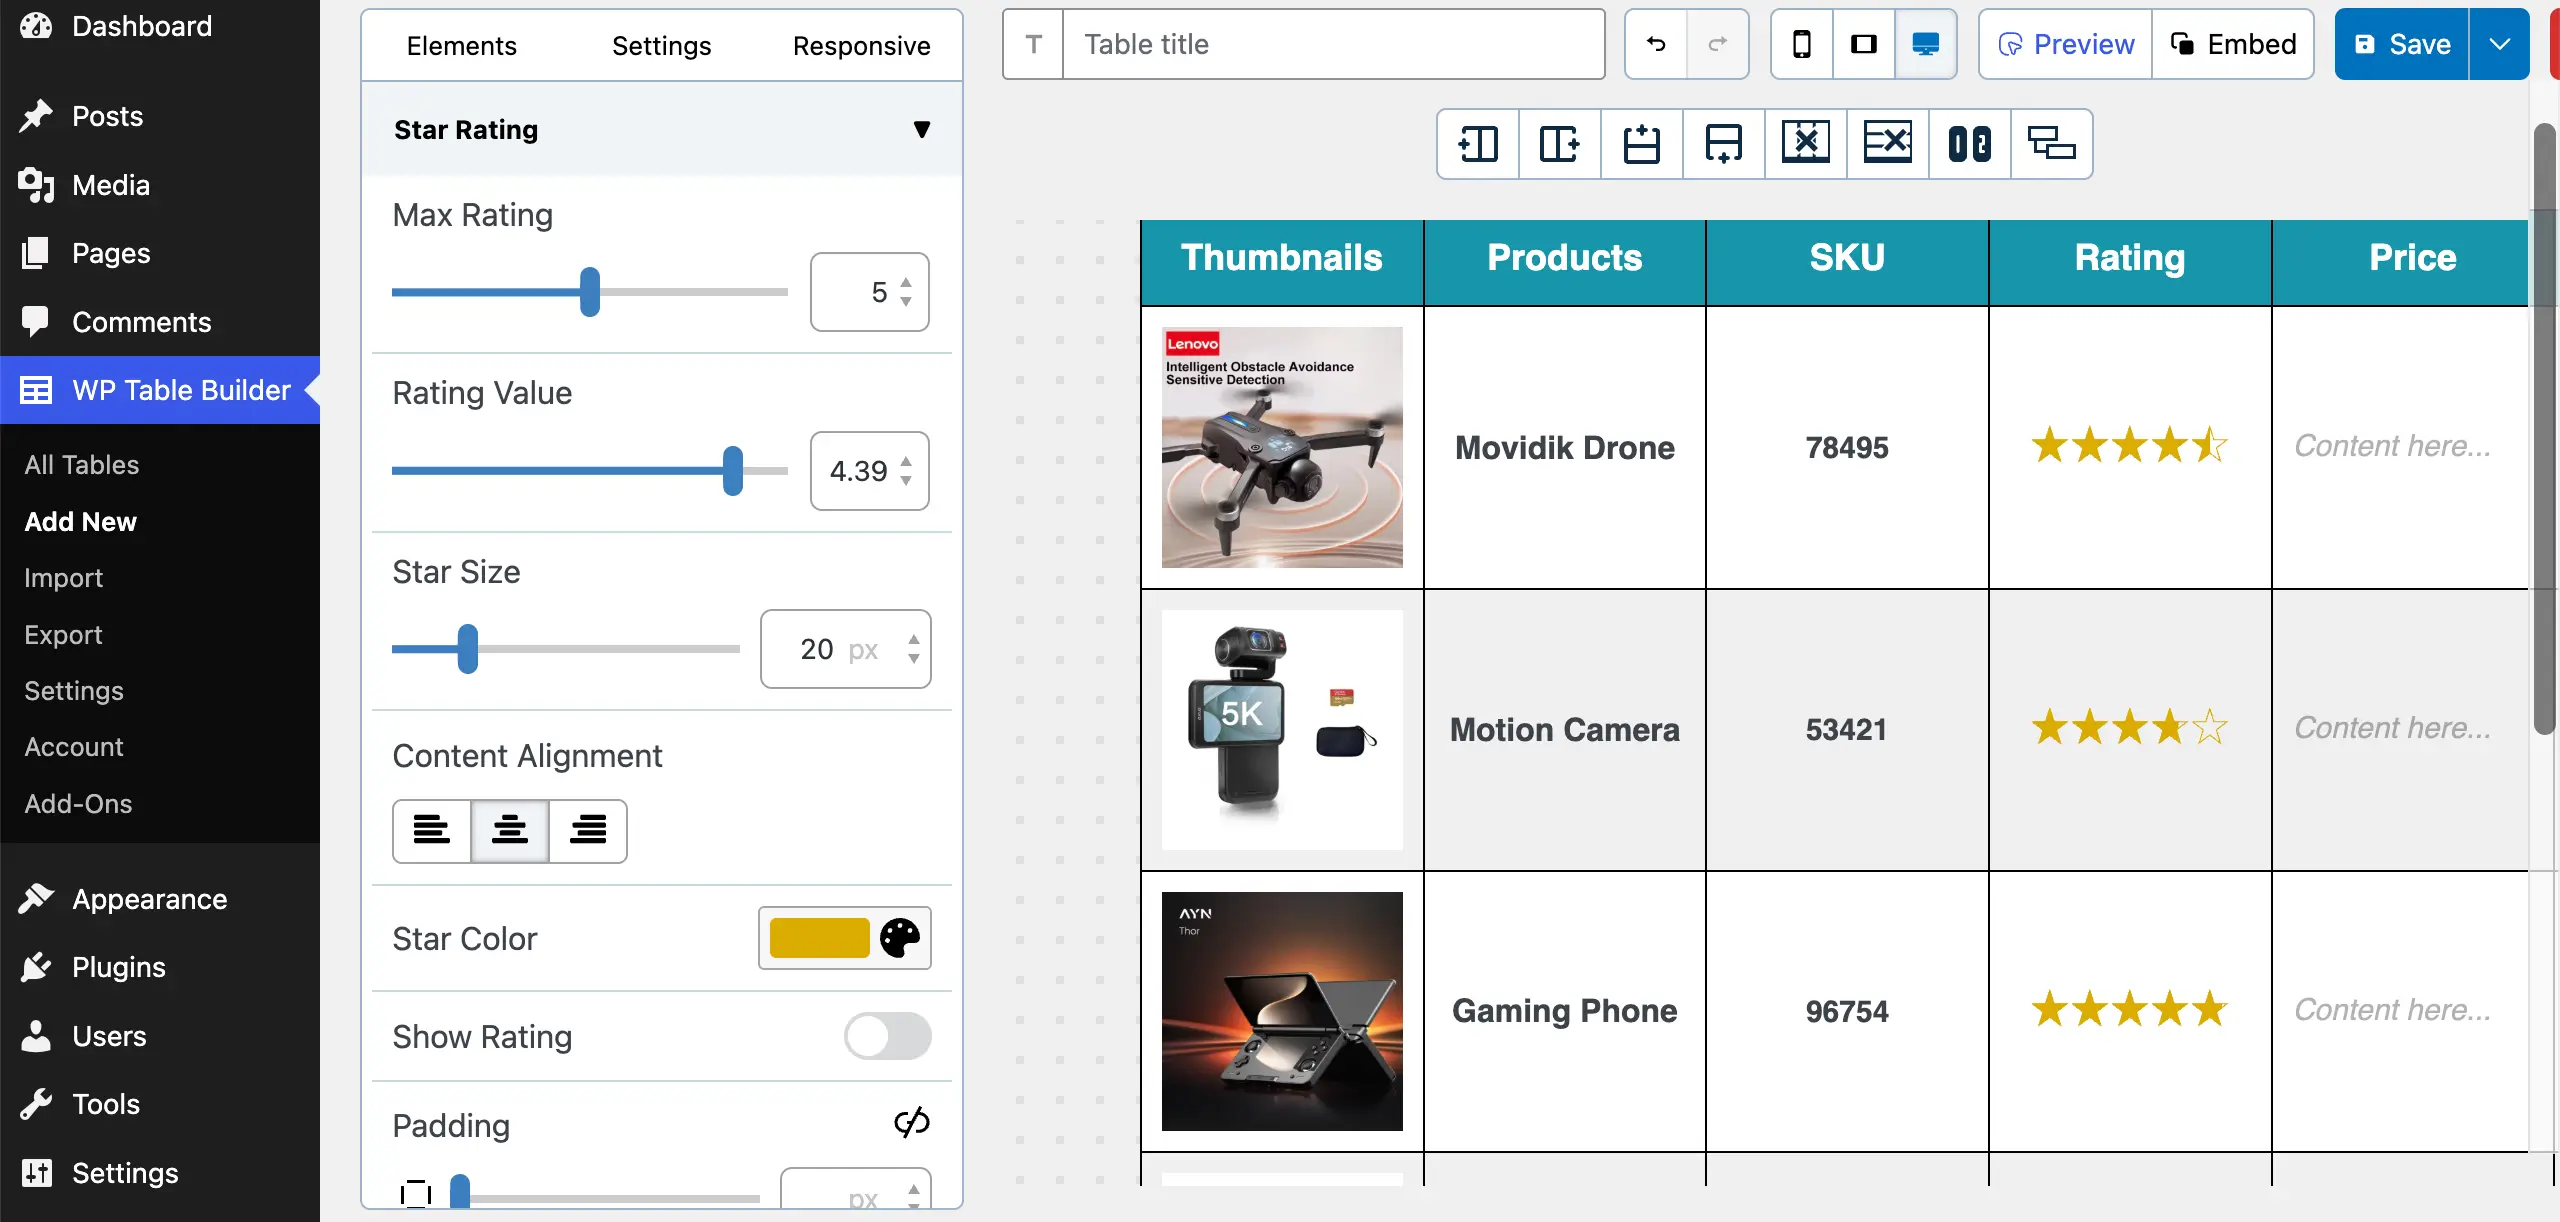
In the same way, add star ratings to more rows and do the individual customizations as needed.
Learn how to show multiple tables in the same block in WordPress.
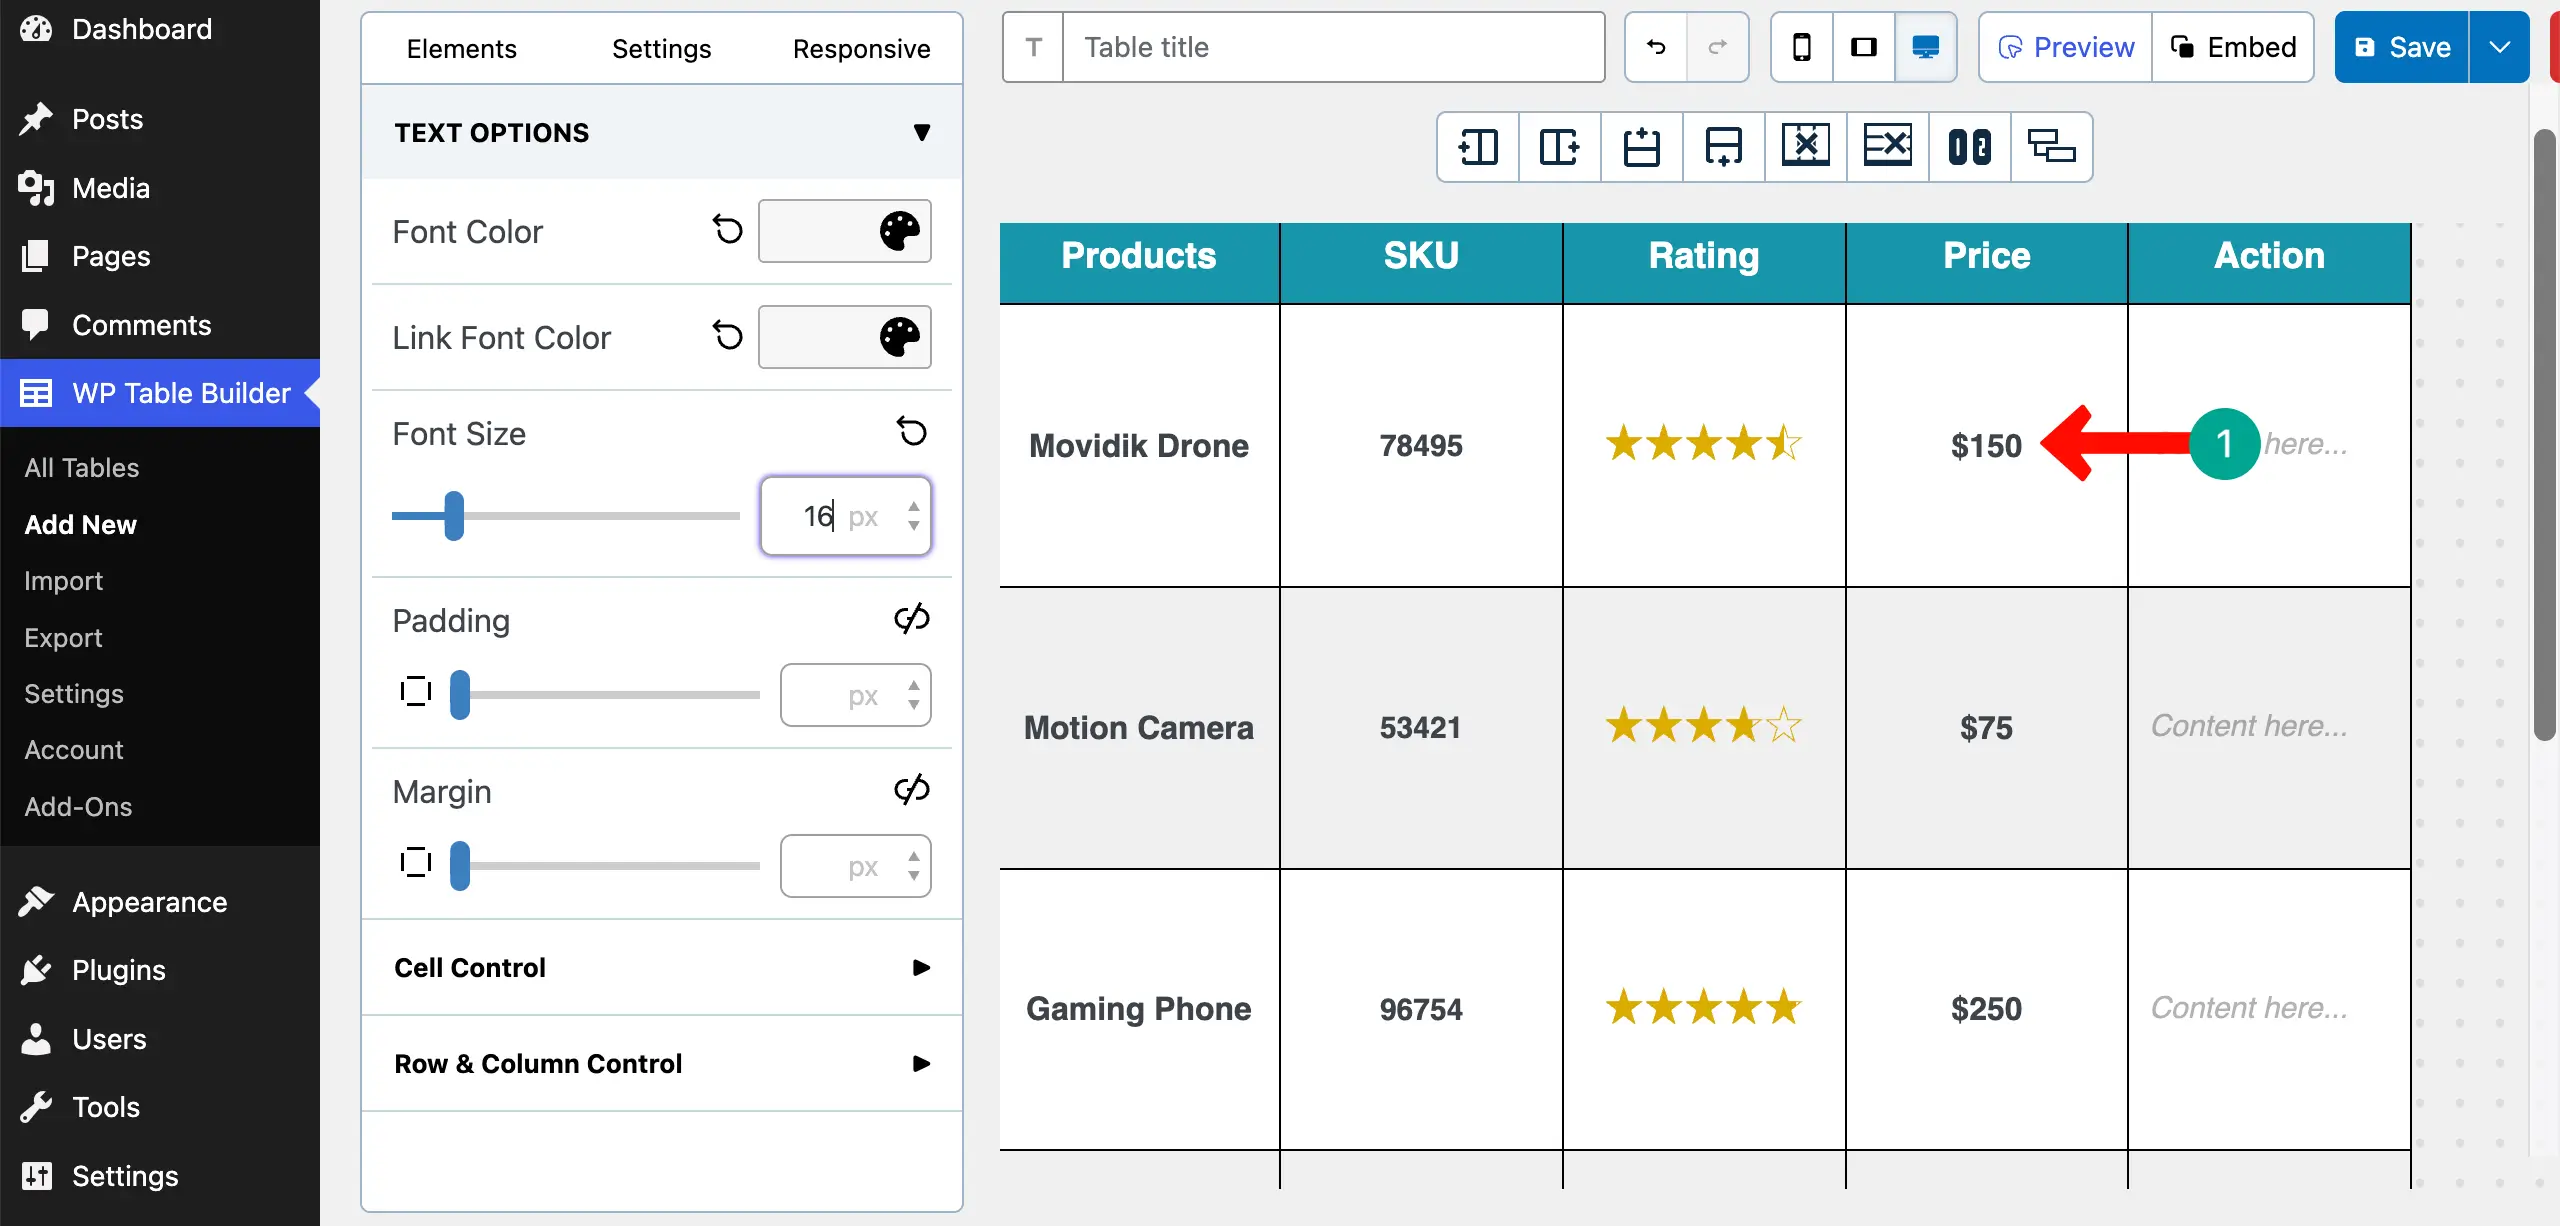
Step 08: Add Product Price
Simply add the prices of the products to the cells of the price column.
Step 09: Insert the Add to Cart Buttons
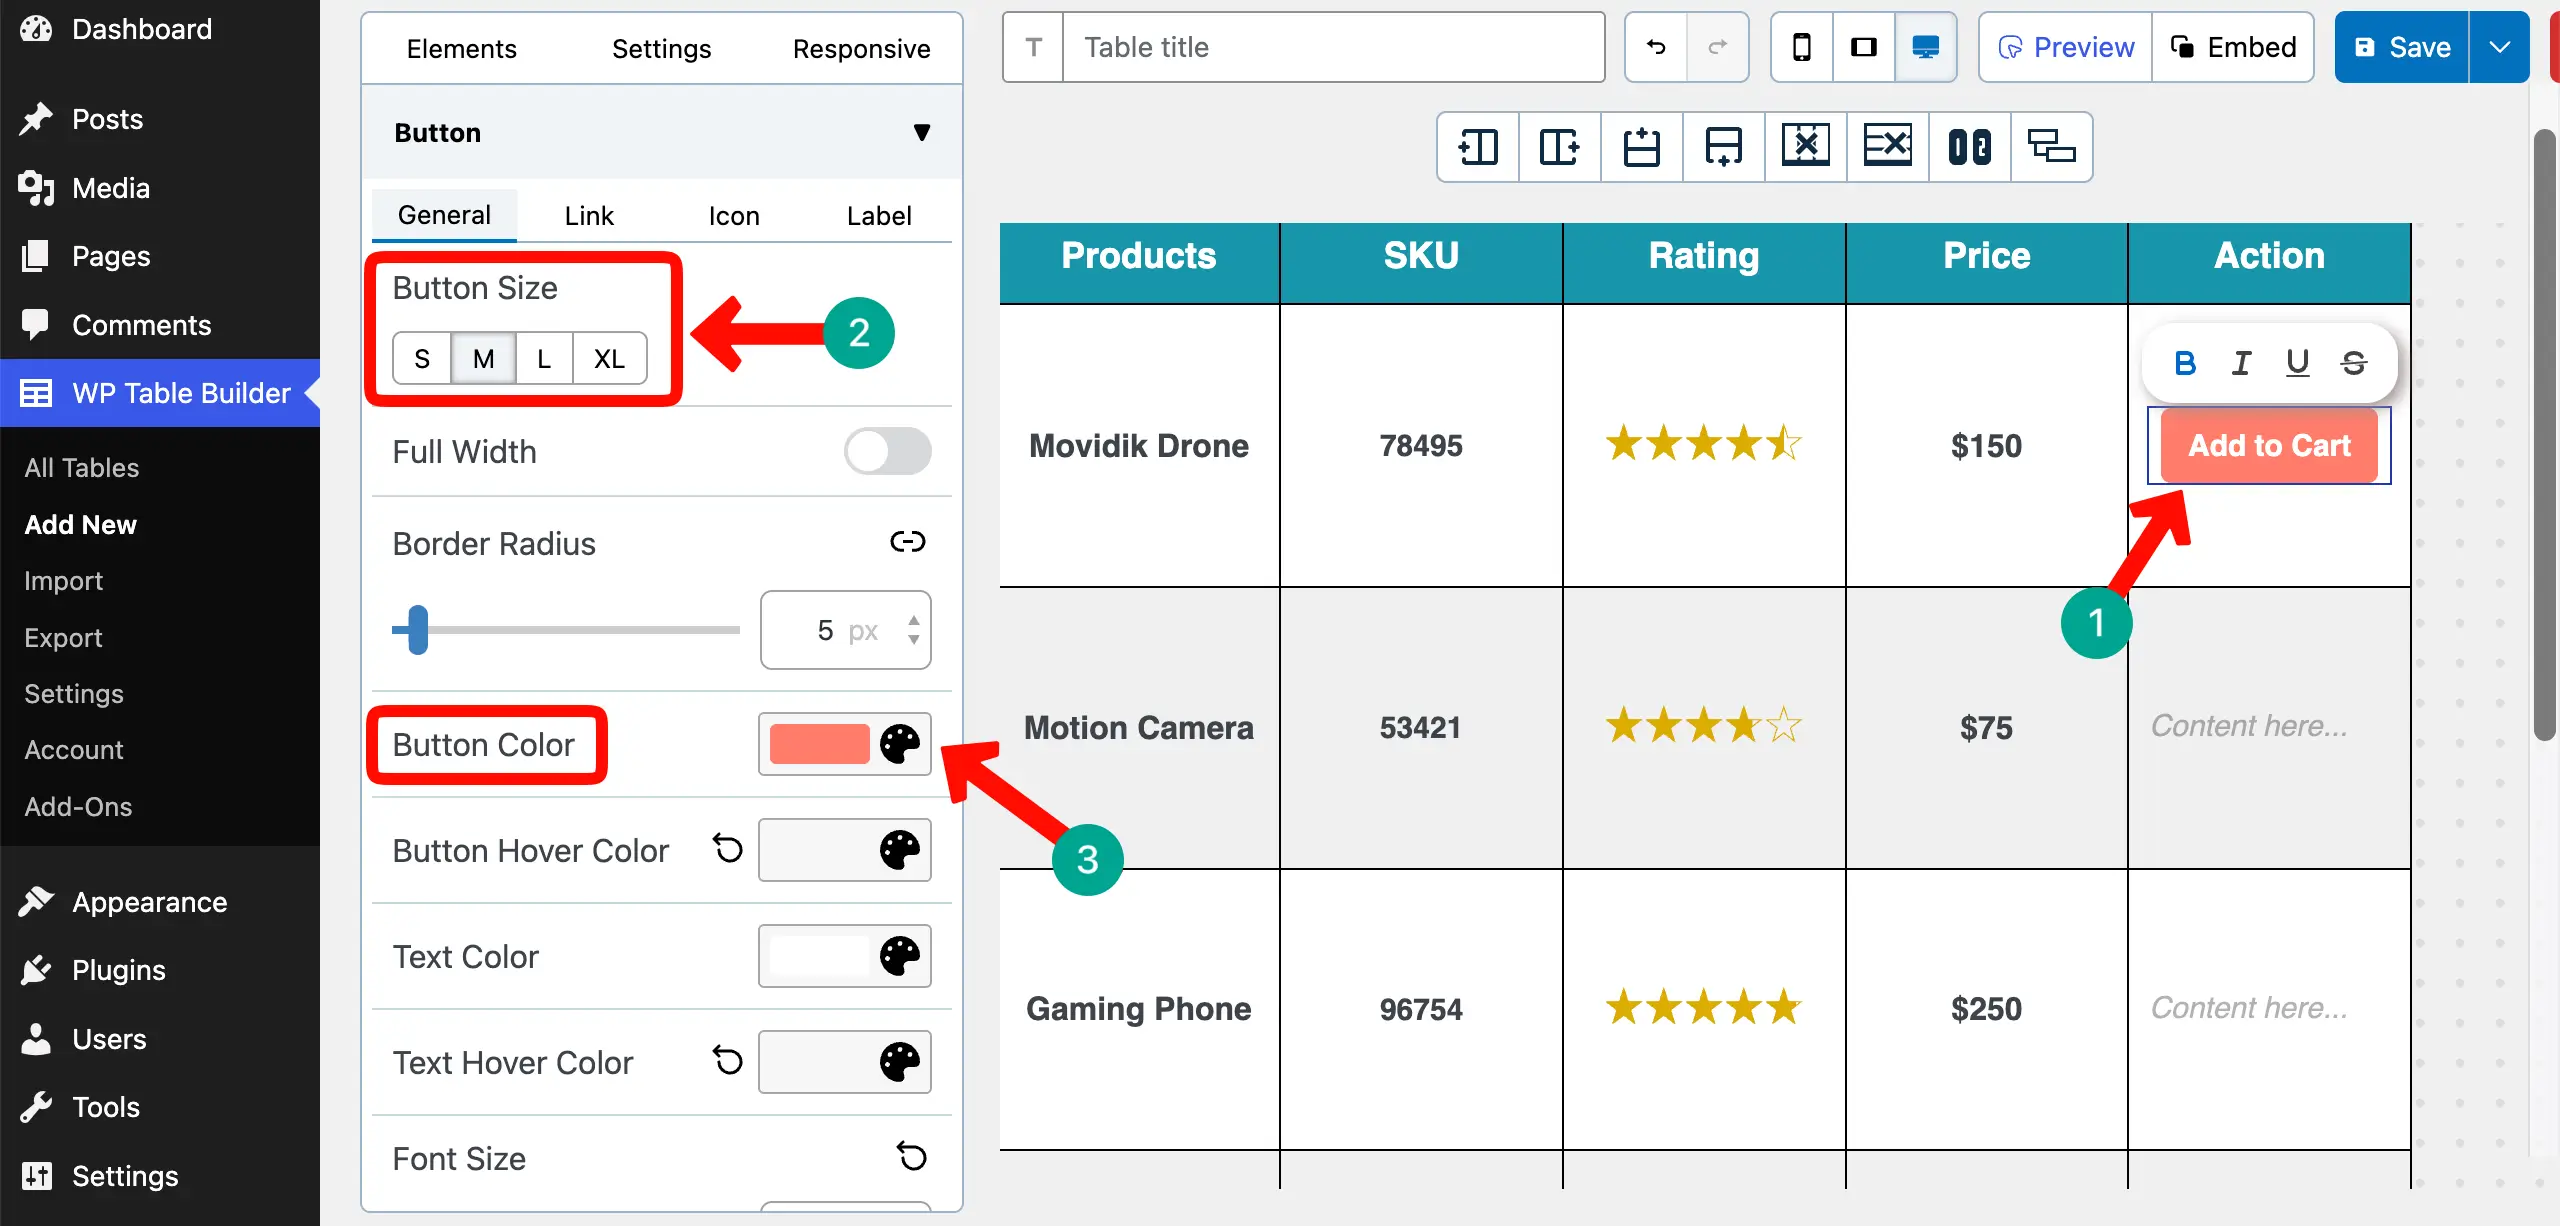
CTA buttons can help users visit the product or checkout page, which can contribute a lot to conversions. Drag and drop the Button element to the table.
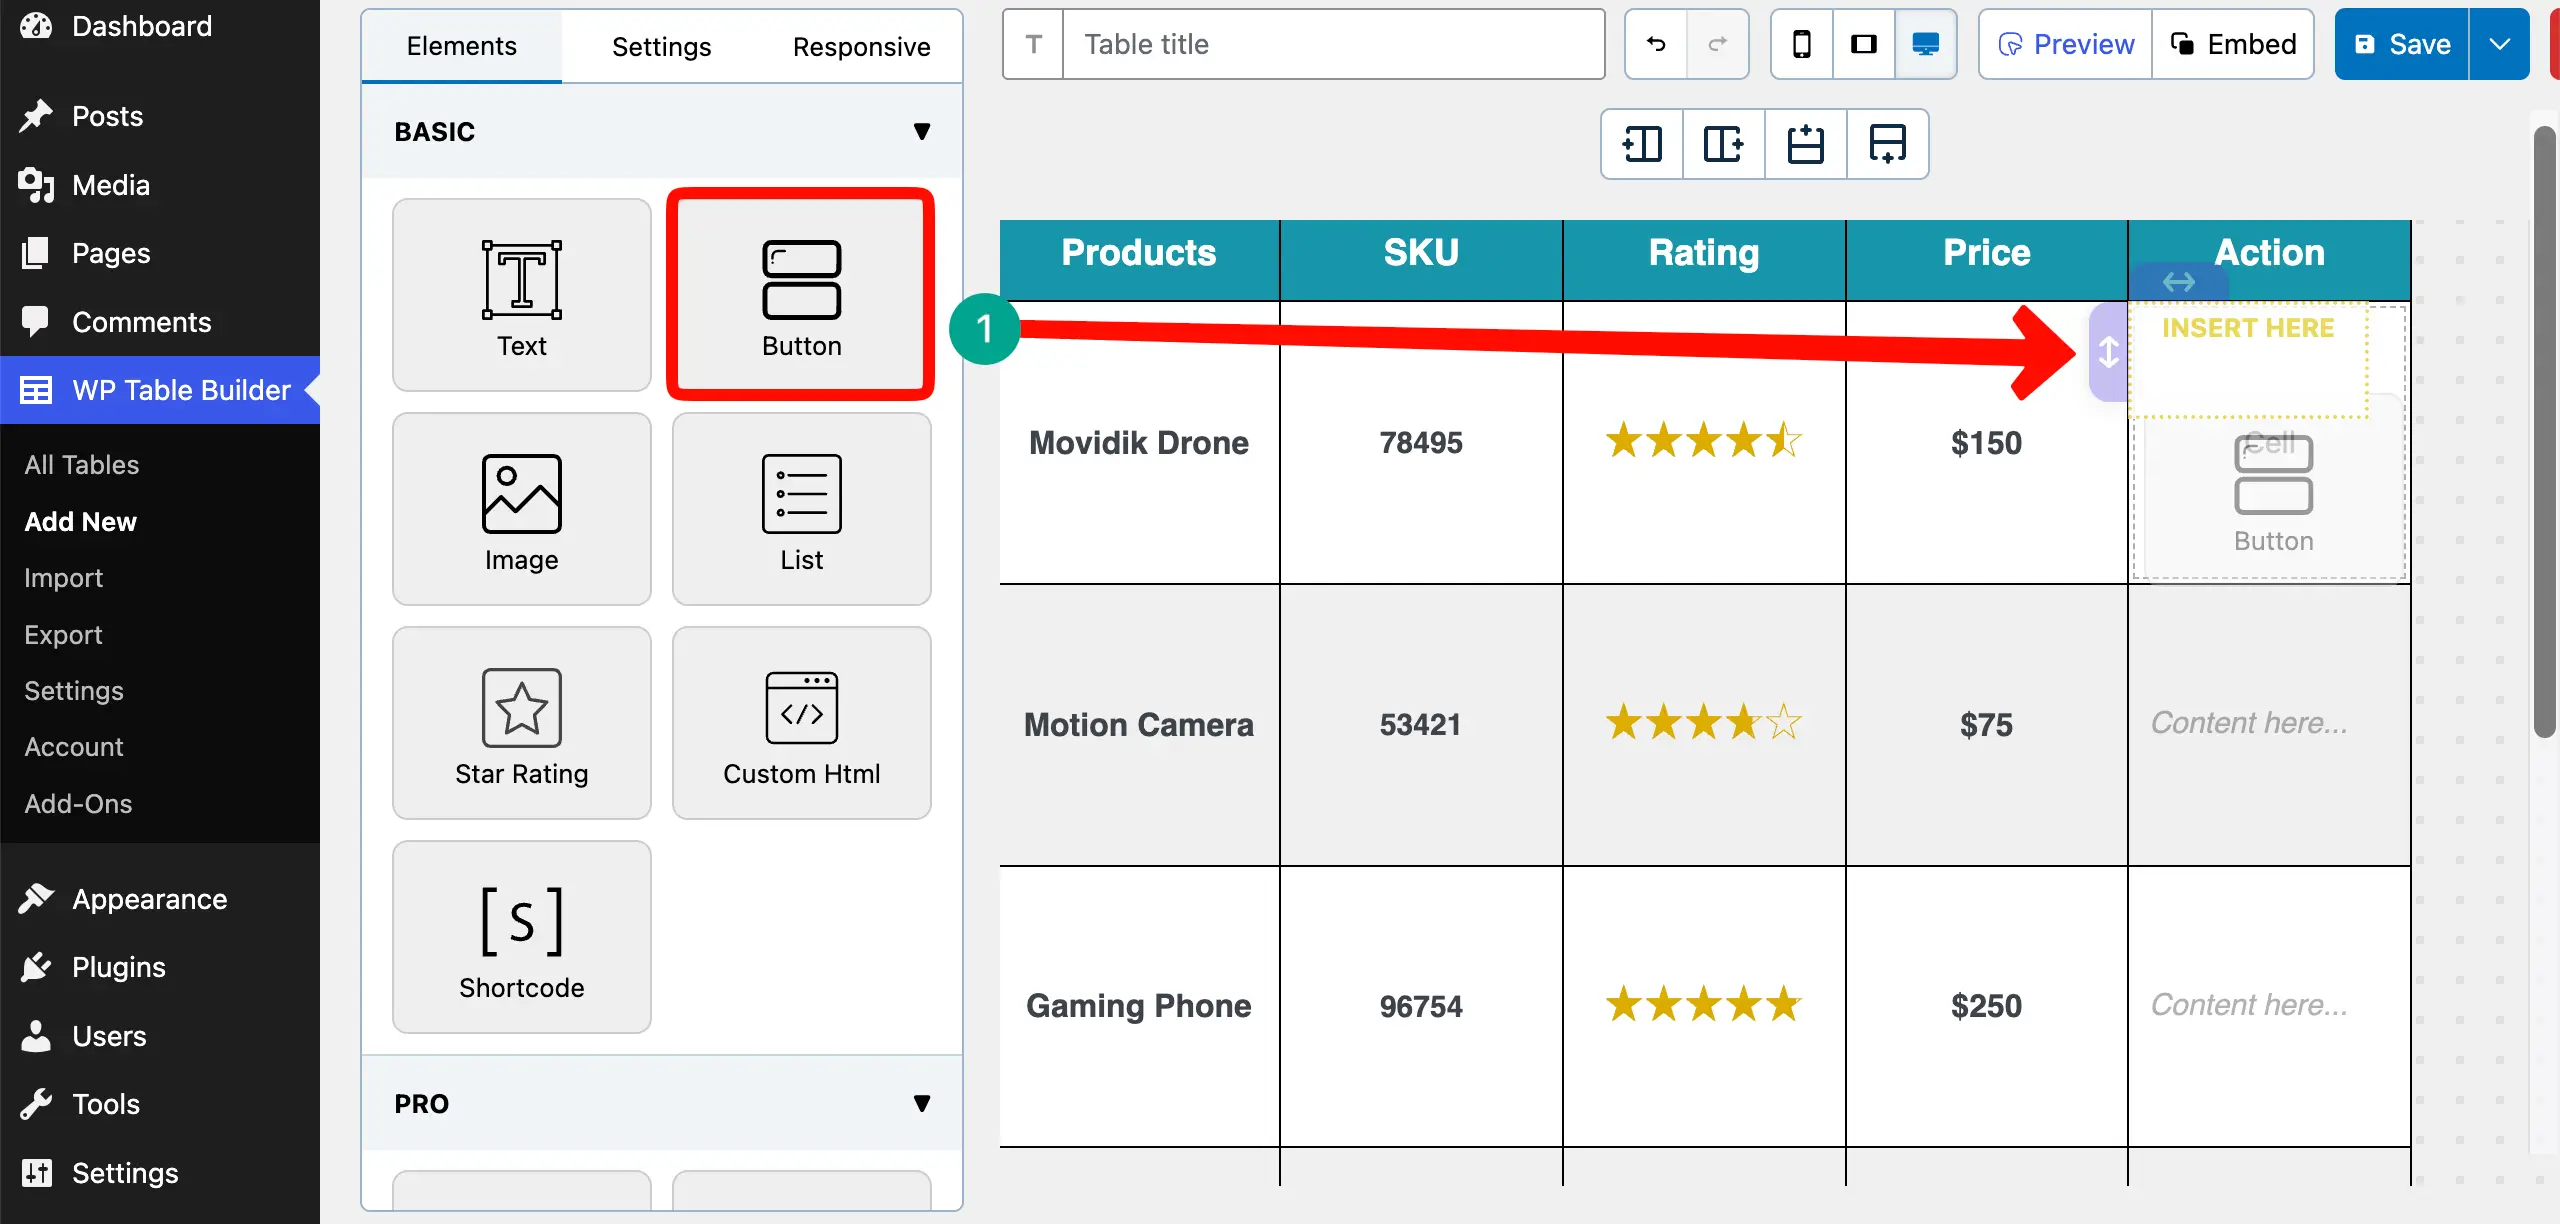
After the element is added, write a button copy, set a button size, and a button color.
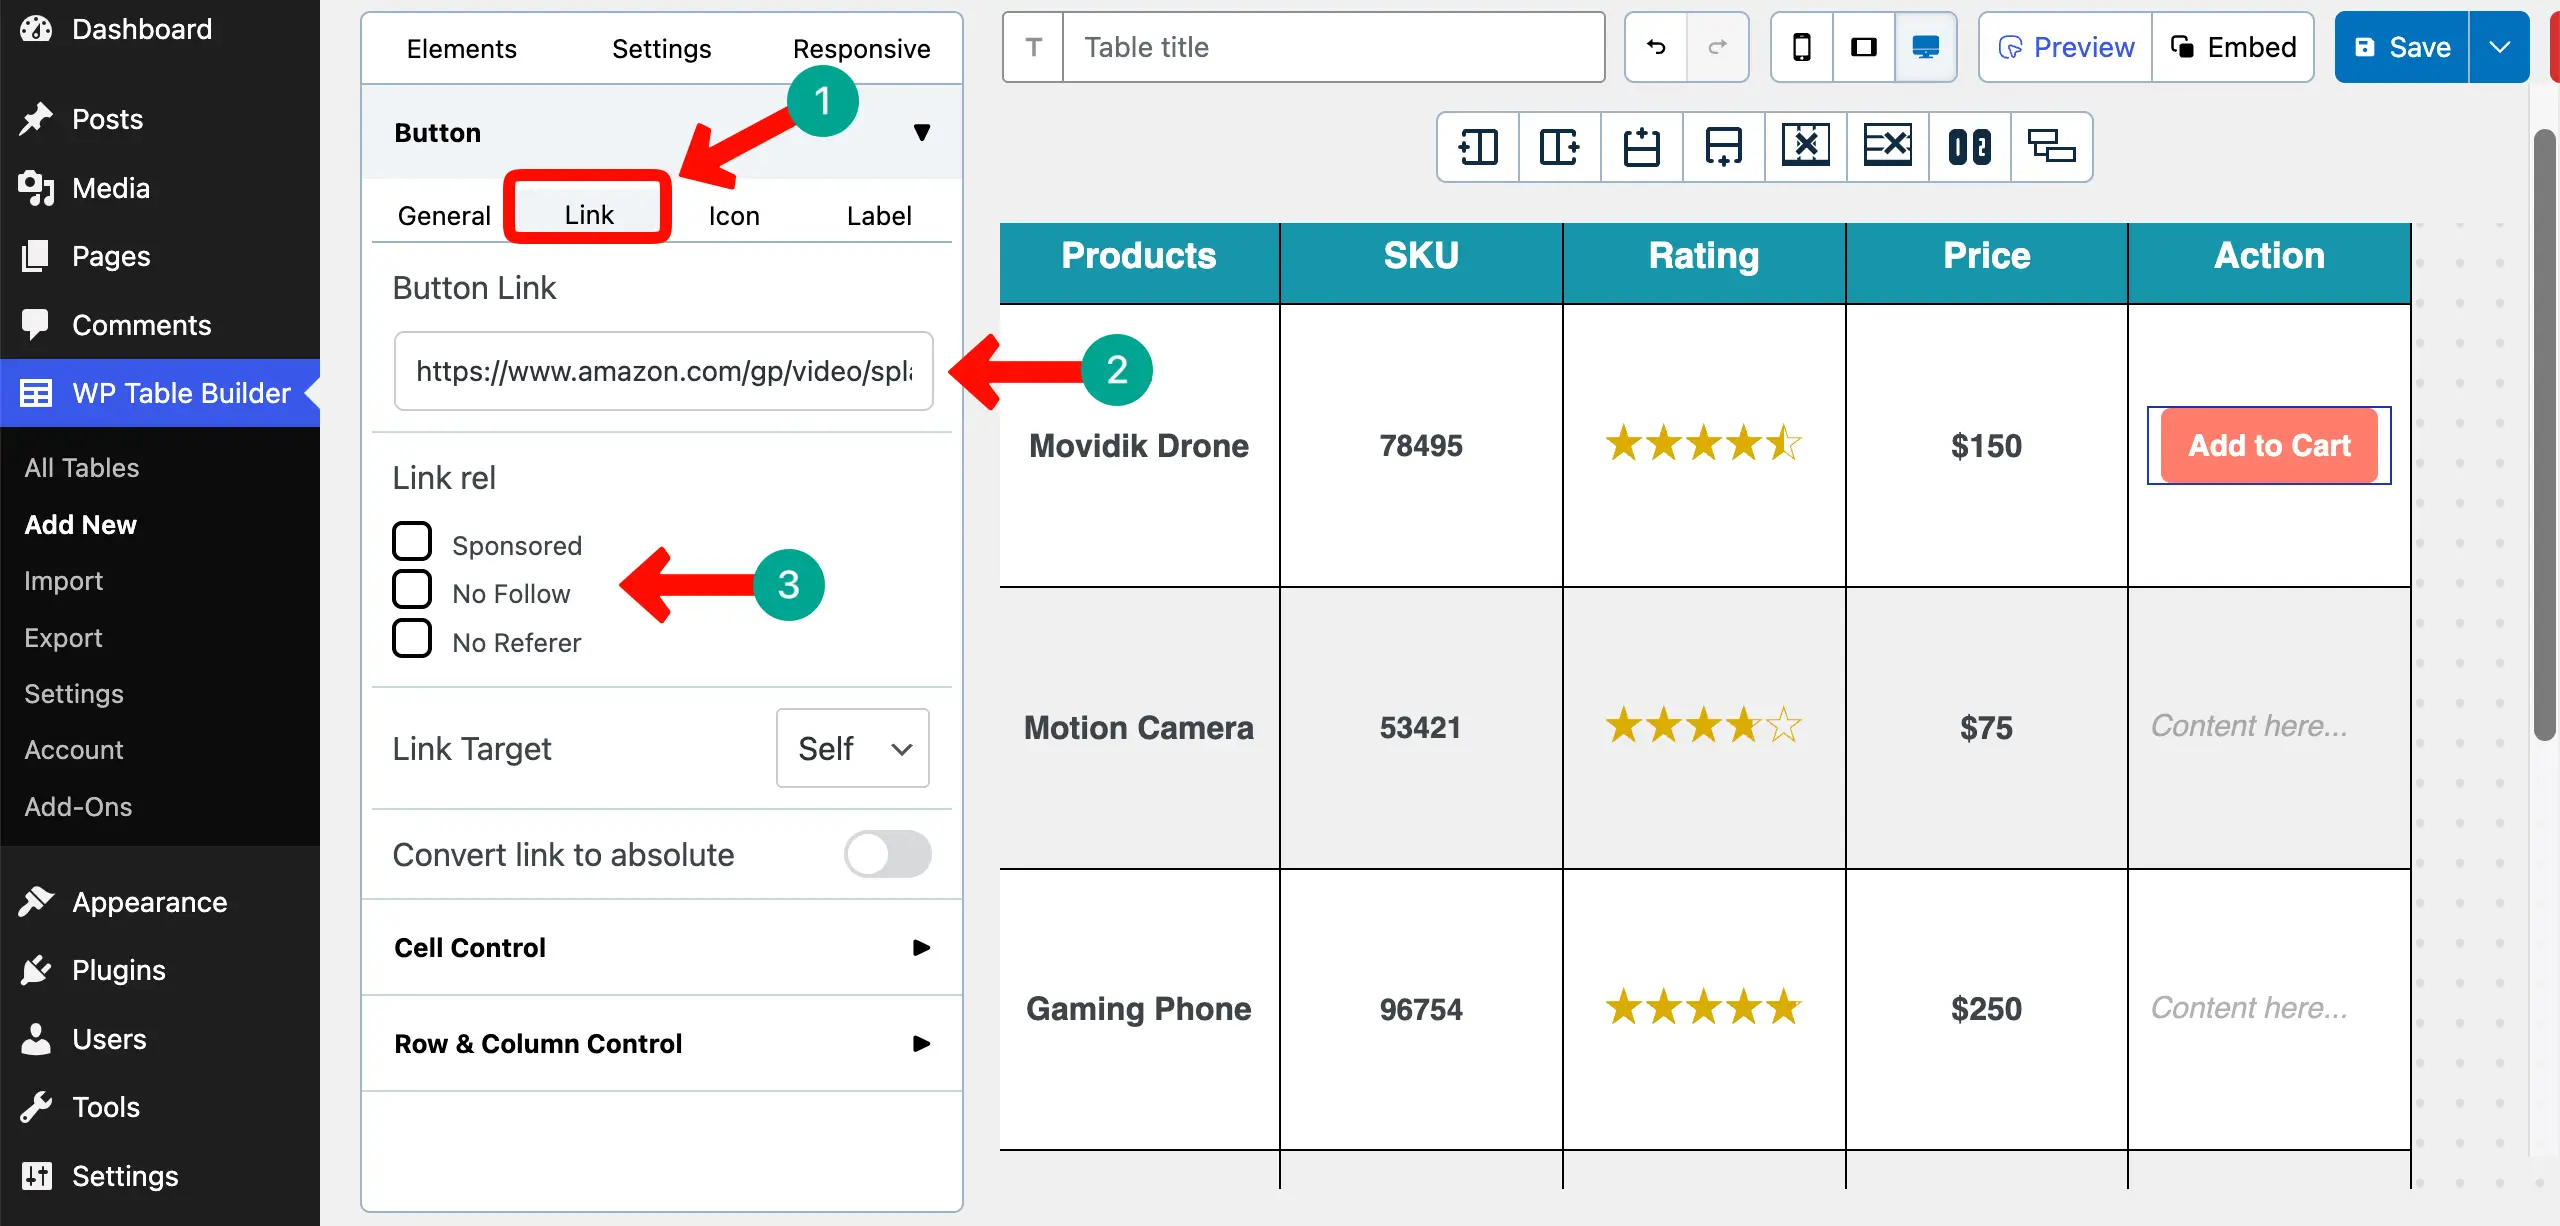
Come to the Link tab. Link the button to a destination post or page by pasting its link in the Button Link box.
Next, come to the Icon tab. From here, you can add an icon next to the copy within the button. You can also increase the icon size if needed.
Step 10: Style the Table for a Clean Product List
Hope all the informational parts of your table are done. Now, before publishing, let’s do some tweaks, customization, and stylization.
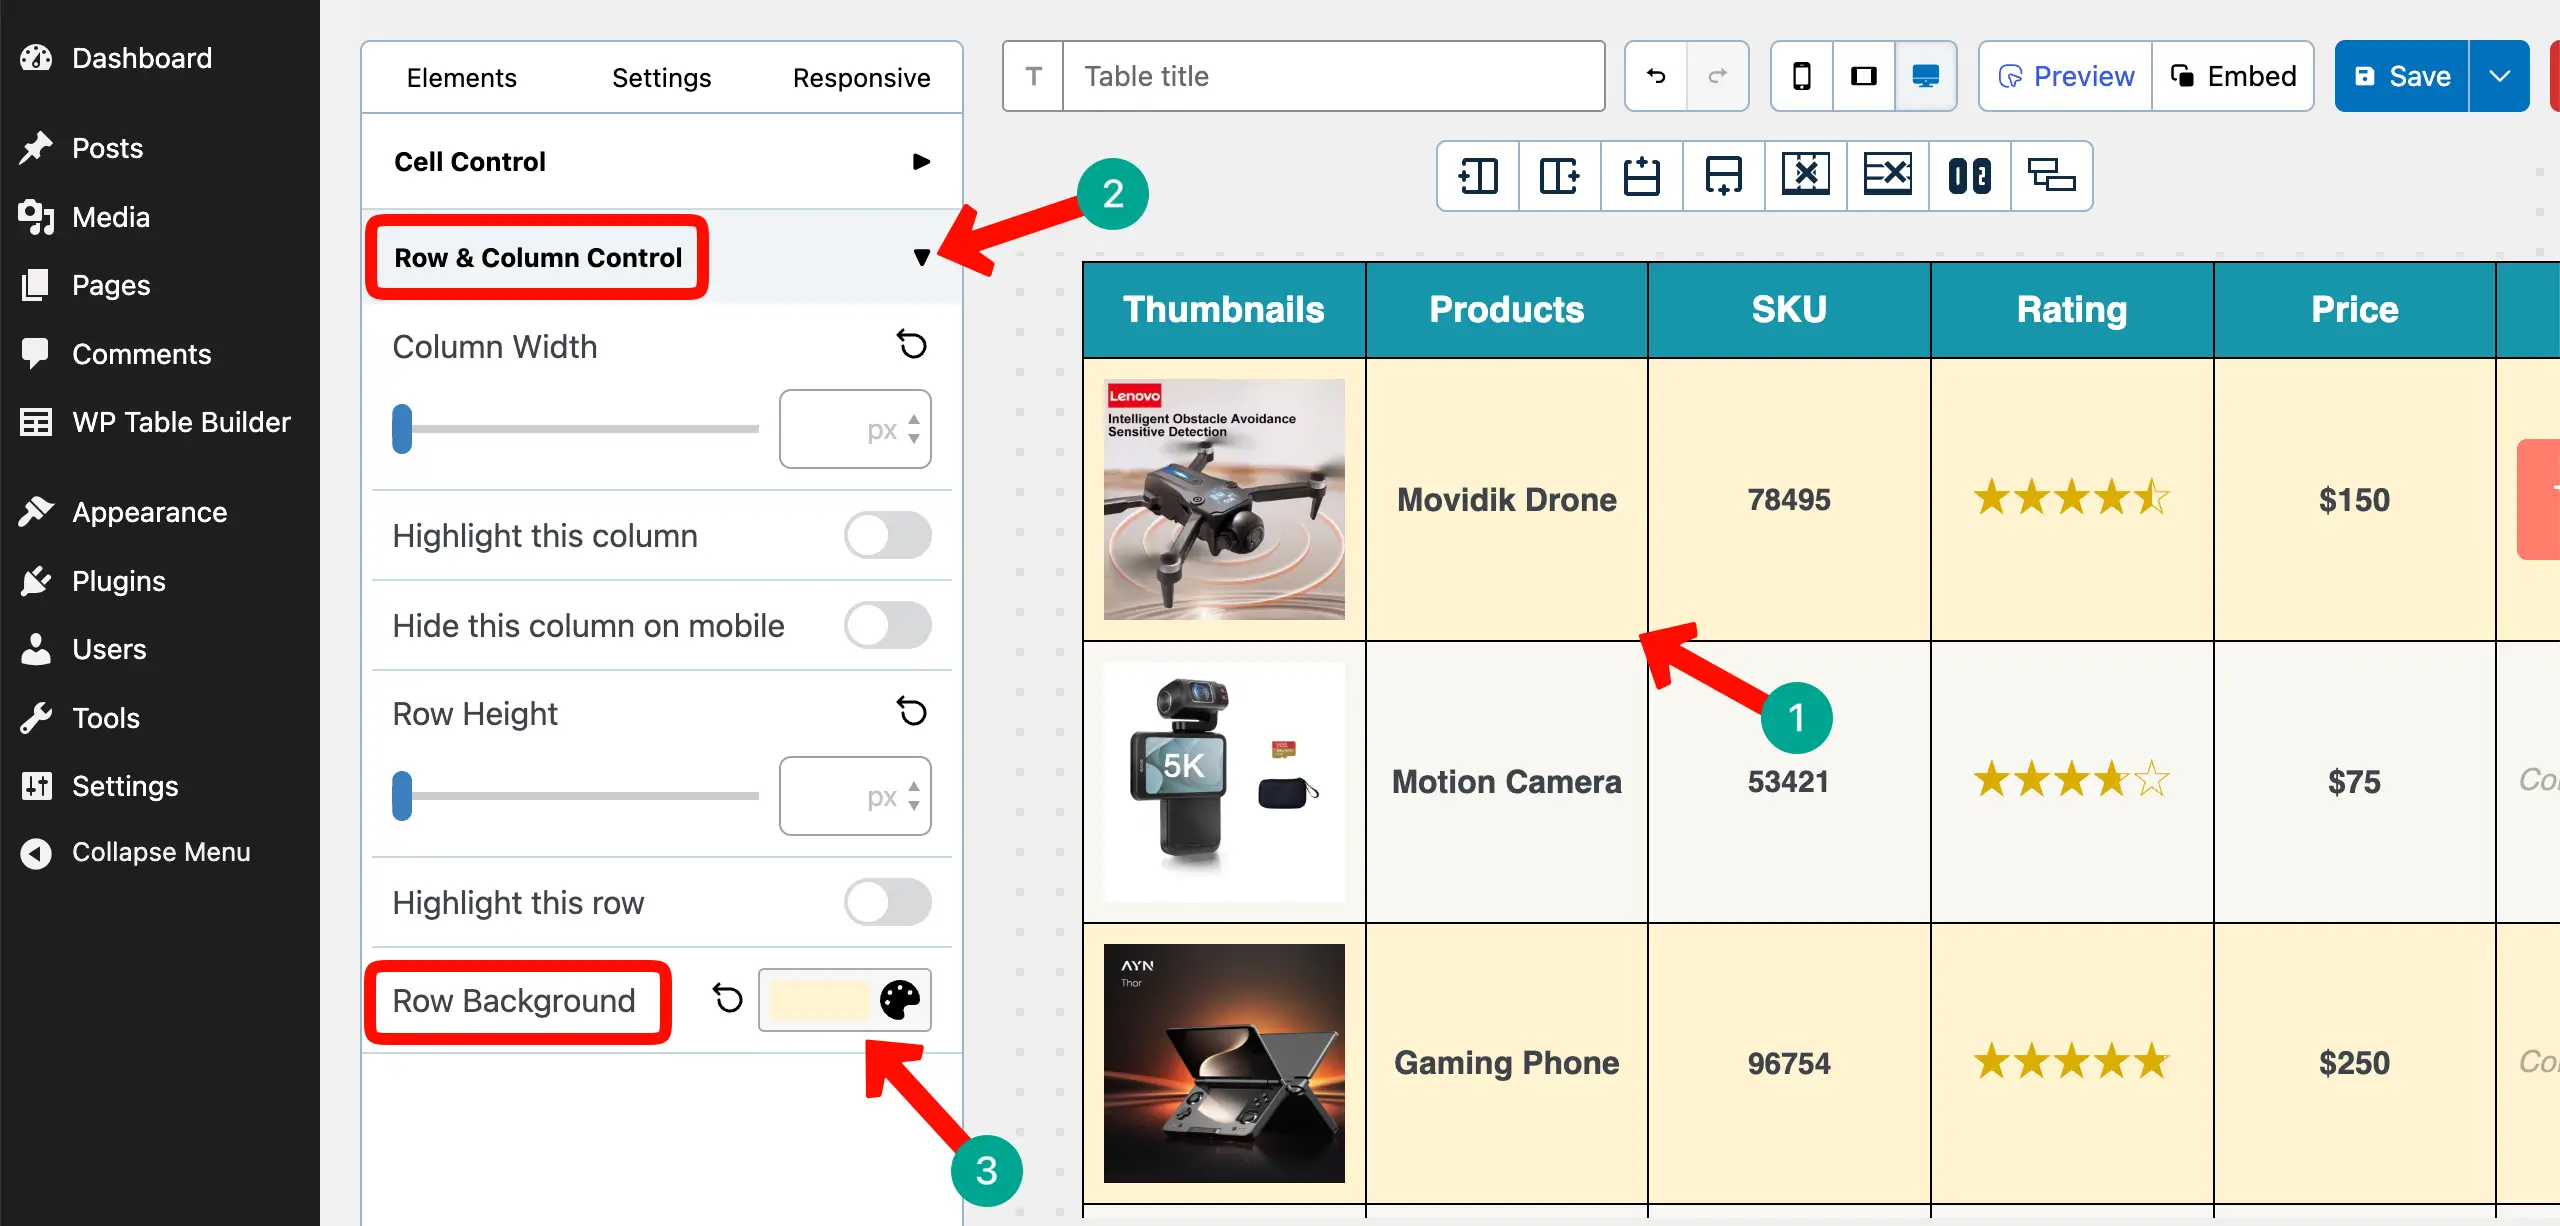
# Add Alternative Row Background Colors
Adding suitable alternative row background colors can make your table look extremely gorgeous. To do this, select a row, expand the Row & Column Control section, and set a Row Background color.
Do the same process for all the other rows.
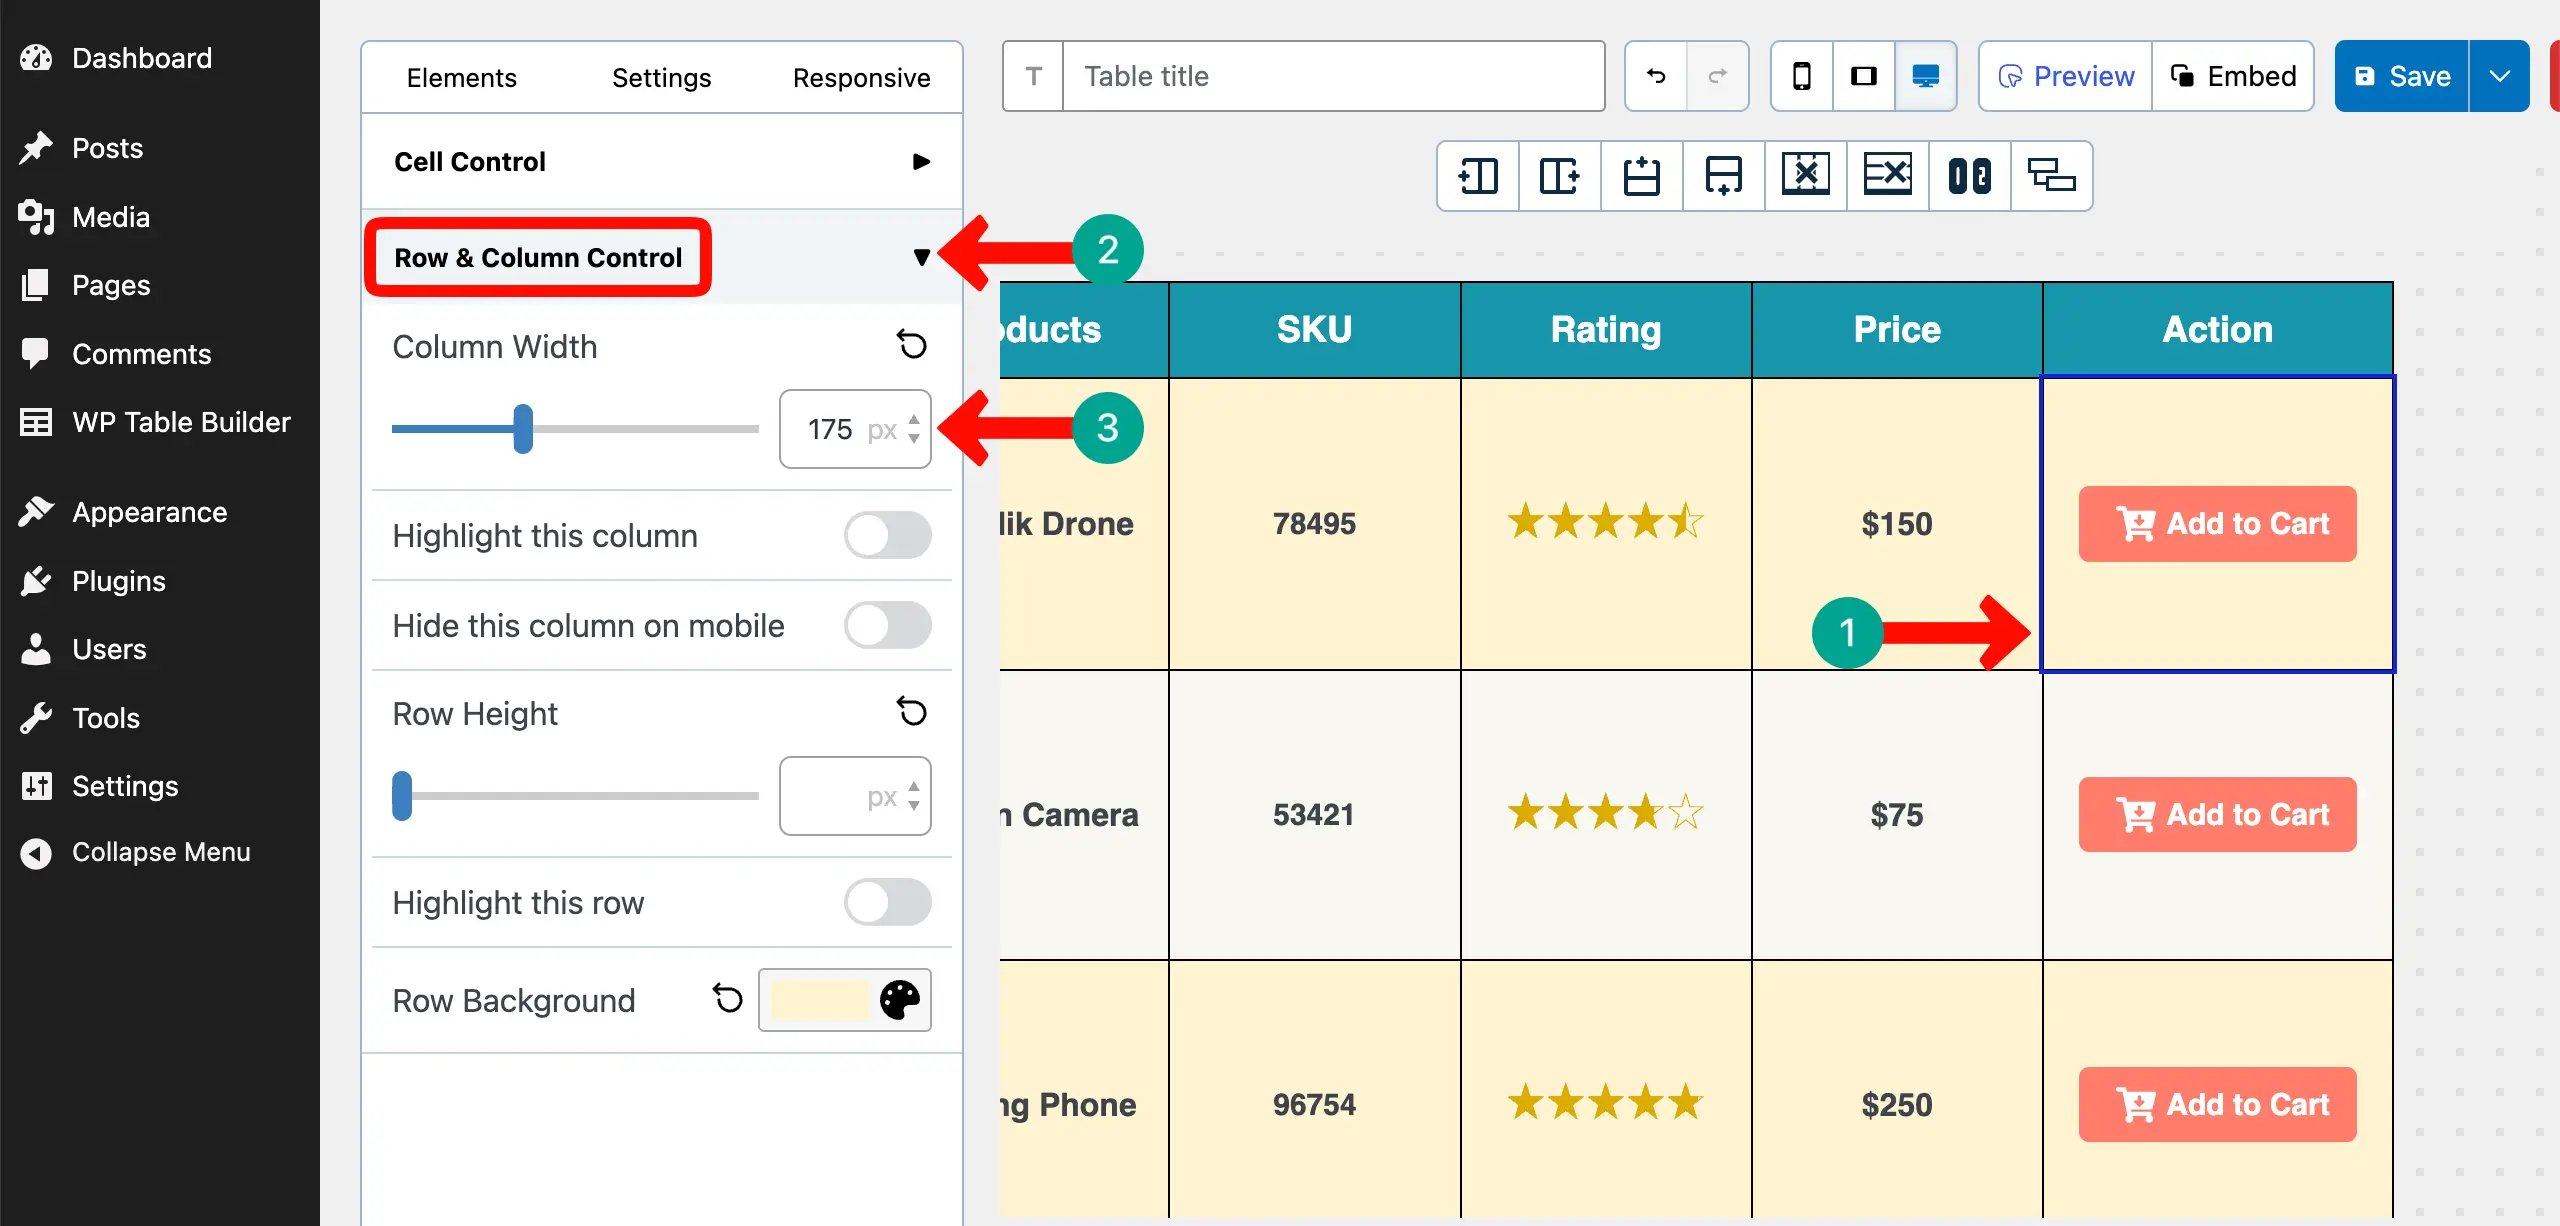
# Adjust Column Widths
Any particular column may require more width compared to others for displaying the content perfectly.
For example, above you saw that the CTA button appears in two lines as its copy and icon cannot be adjusted in the same line. So, we’ve decided to increase the width of the column.
Select the column, expand Row & Column Control, and increase the column width.
In the same way, you can modify cell paddings and alignment of the content throughout the table. Thus, you can create a custom WooCommerce product table in WordPress.
Step 11: Publish and Preview the Table
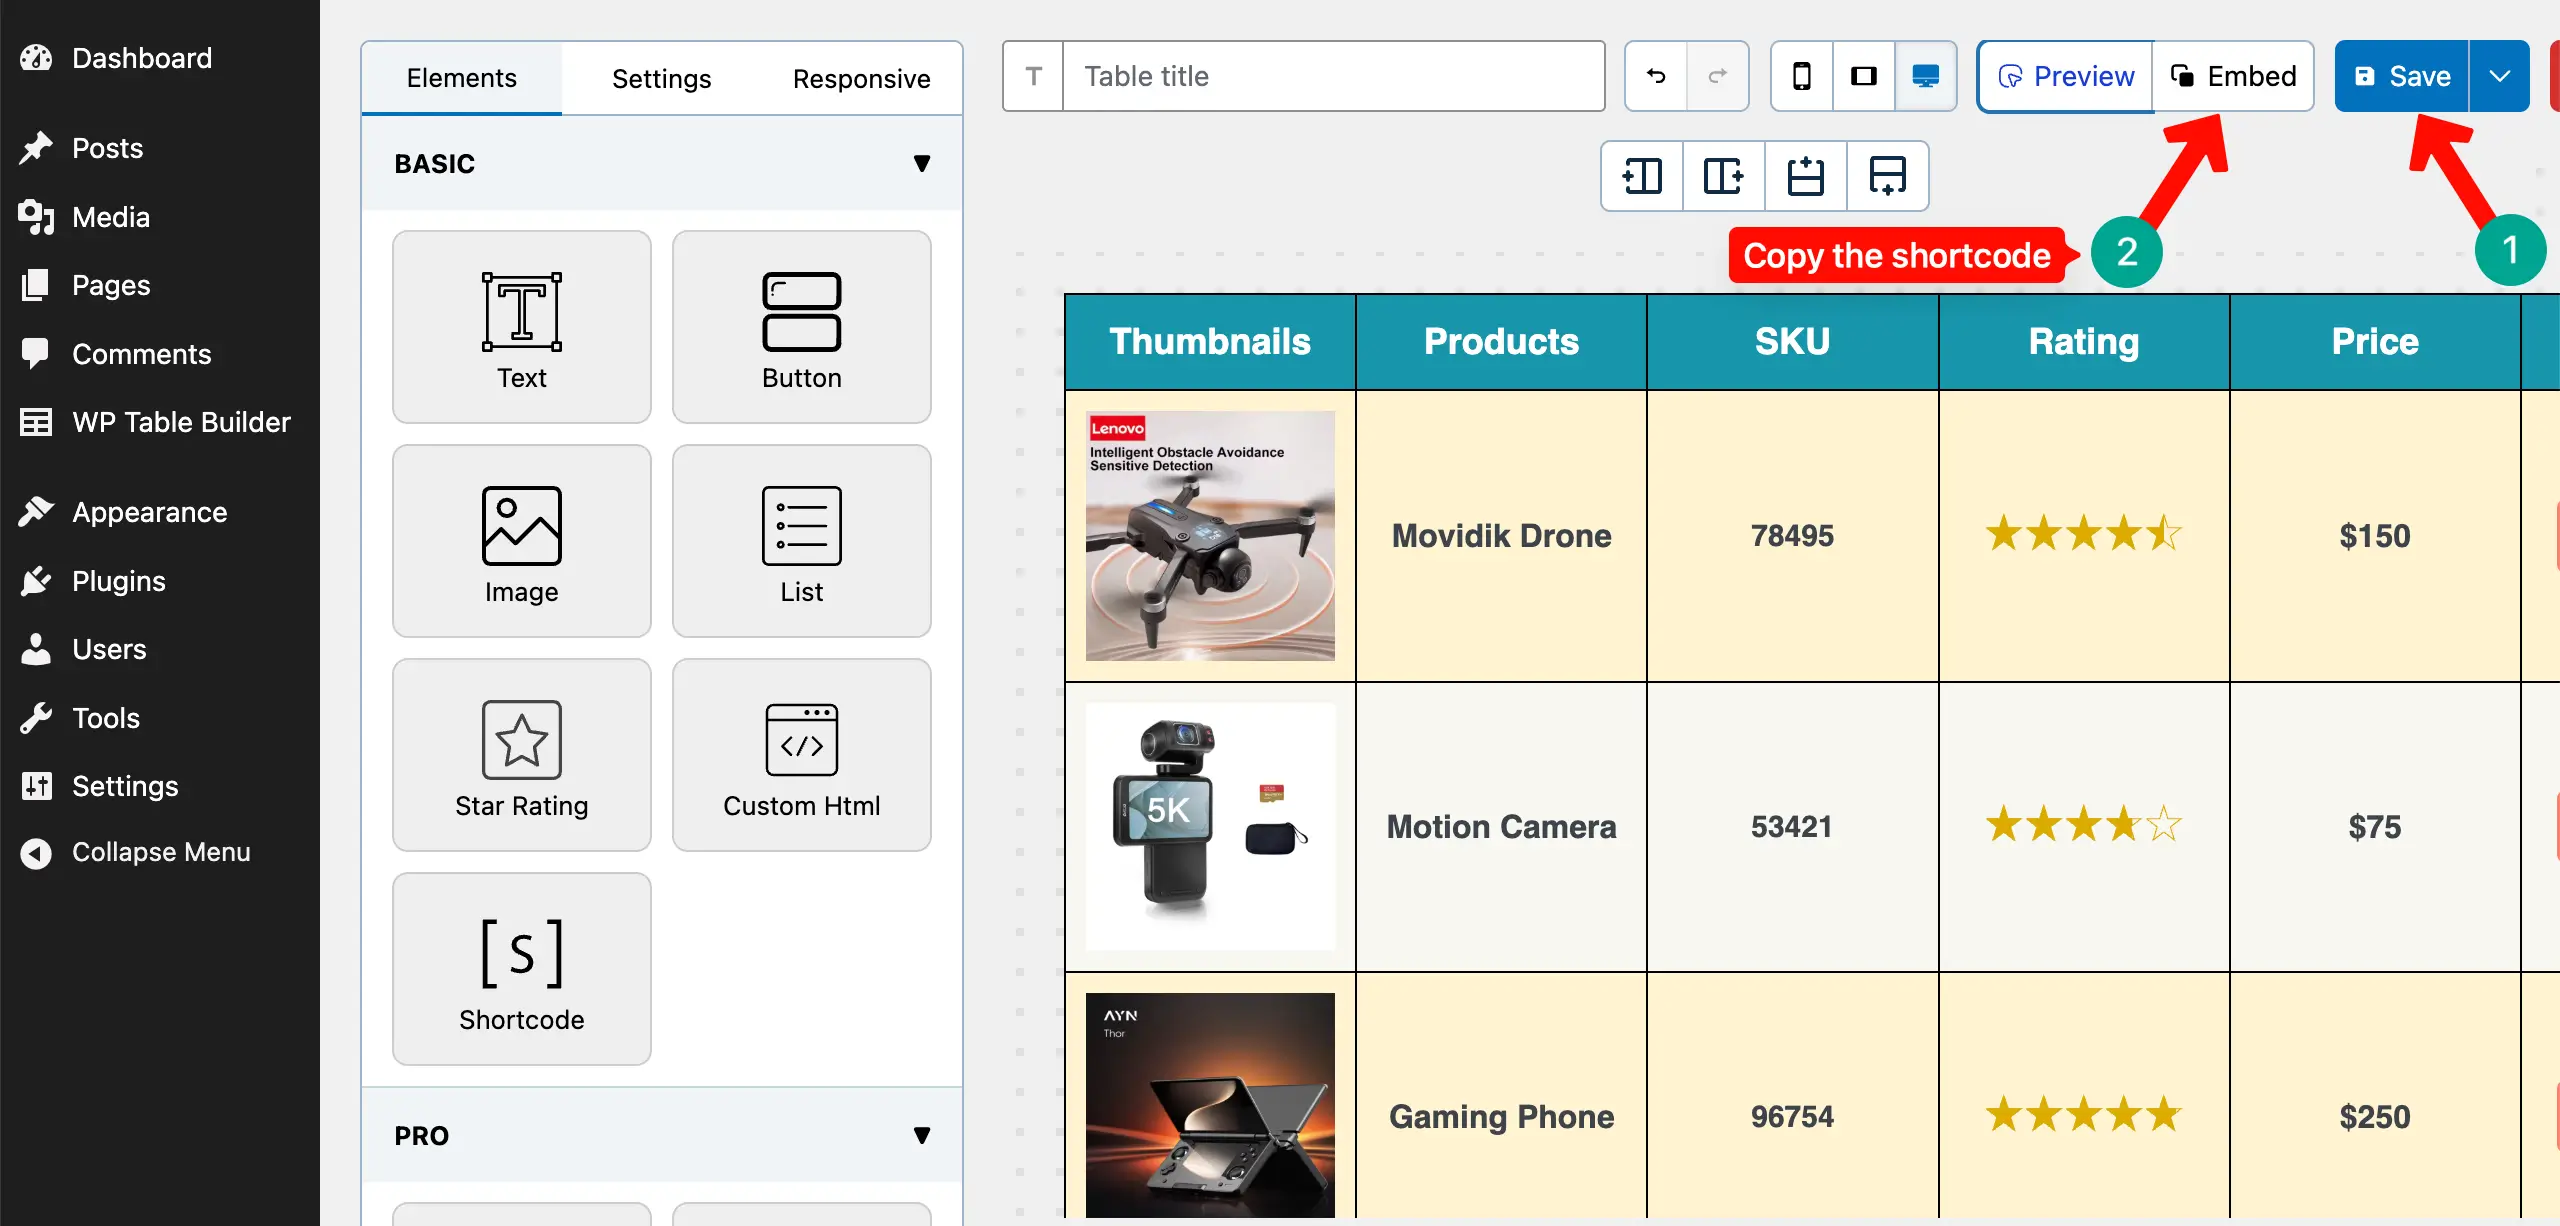
As already said, the plugin generates a shortcode for each table. Save the table and copy its shortcode by clicking the Embed button.
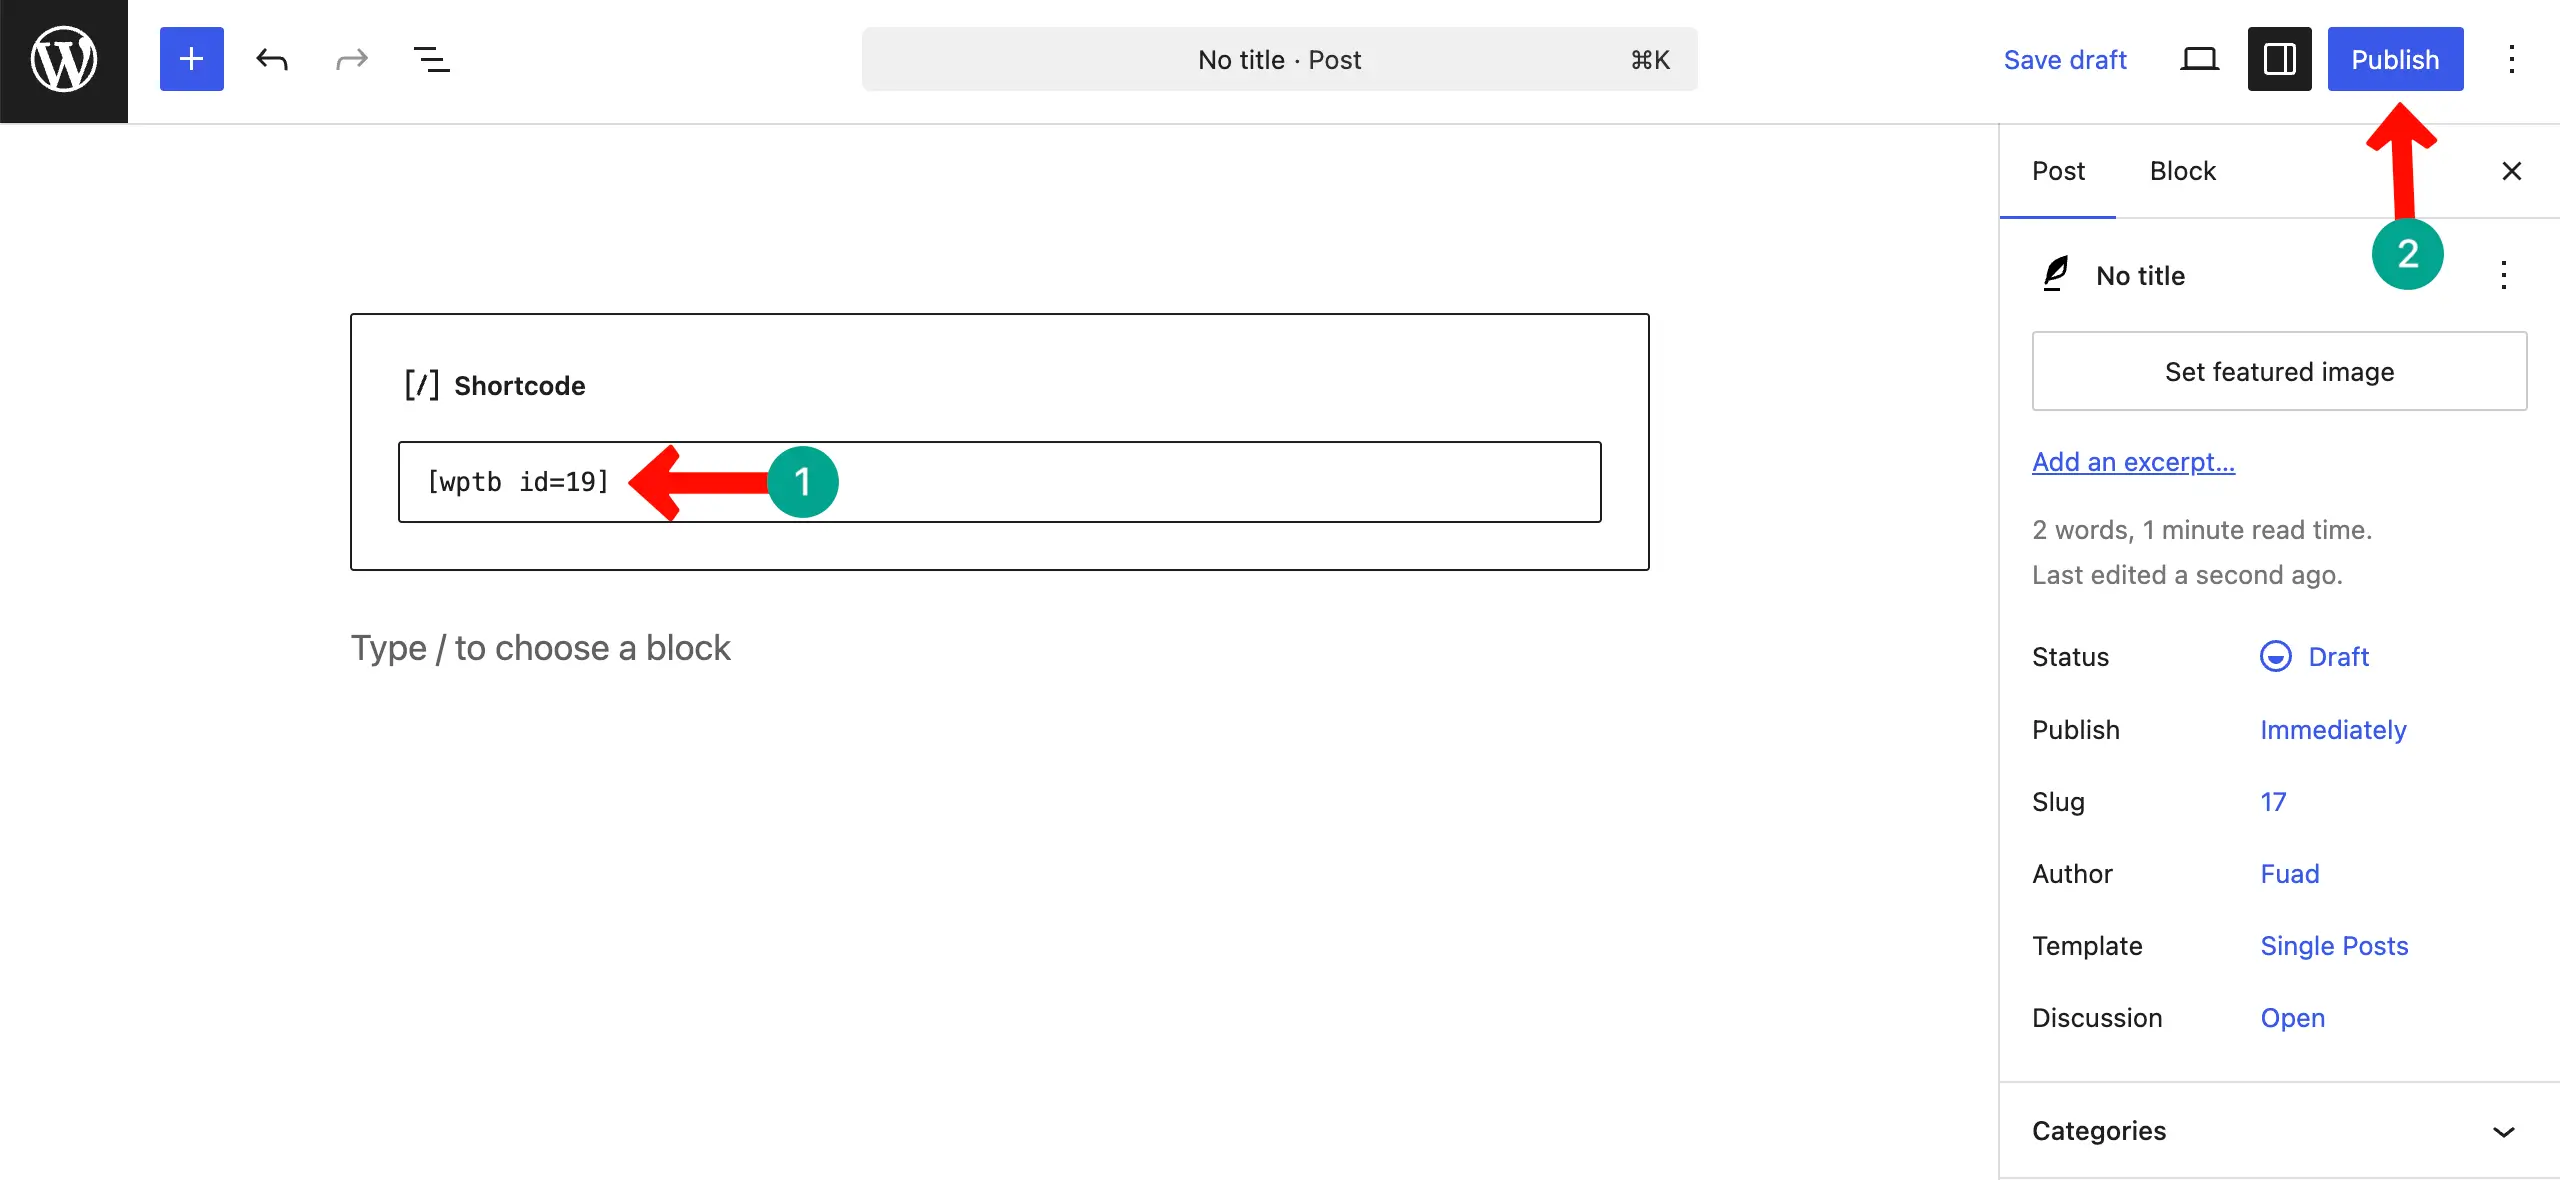
Open your post or page. Paste the shortcode of the table and publish it.
Come to the preview page. Check if the table looks good or not.

Final Words!
Creating a custom product table in WooCommerce is not just a design change. It’s a smart step to improve your online store. When you organize products with clear details like thumbnail, name, SKU, star rating, price, and Add to Cart button, you make shopping simple and smooth for your customers.
A clean table layout helps people compare products quickly and buy without confusion. Now it is your turn to apply what you have learned in this tutorial. Start building your own product table and give your store a fresh and professional look.
Small improvements like this can increase trust, boost sales, and make your store stand out from others. Take action today and turn your WooCommerce shop into a faster, smarter, and more user-friendly place to shop.
Leave a Reply
You must be logged in to post a comment.