
Displaying your clients’ logos on your website is one of the easiest ways to build instant trust and credibility.
Whether you run an agency, offer services, or work as a freelancer, showcasing logos of brands you’ve worked with helps visitors feel confident about choosing you. A clean logo grid works especially well on homepages, landing pages, and “Our Clients” sections.
In this tutorial, I’ll show you how to showcase clients’ logos in WordPress using the WP Table Builder plugin.
Why Use a Table for Client Logos?
Many people use sliders or galleries for logos, but tables have a few big advantages:
- Clean and structured layout
- Perfect alignment across rows and columns
- No autoplay or distraction
- Easy to control spacing, borders, and background
- Looks great on both desktop and mobile
WP Table Builder lets you create responsive logo grids with full design control. Follow these simple steps:
Step 1: Install and Activate the WP Table Builder Plugin
First, you need to install the plugin.
- Go to WordPress Dashboard → Plugins → Add New
- Search for WP Table Builder
- Click Install Now, then Activate
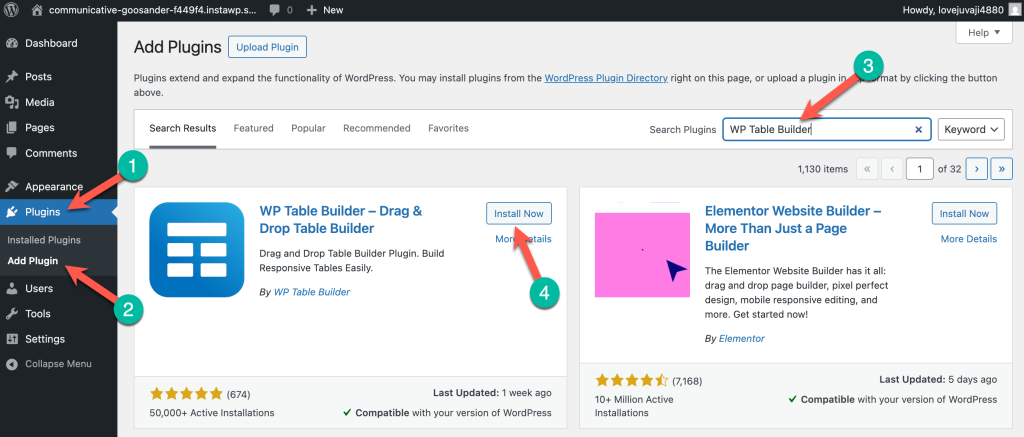
Once activated, you’ll see a new WP Table Builder menu in your dashboard.
Step 2: Add a New Table and Choose the Number of Rows & Columns
Now let’s create the table that will hold your logos.
- Go to WP Table Builder → Add New
- Choose how many rows and columns you need
- For example, 3 rows × 4 columns works great for 12 logos
- Click Create New
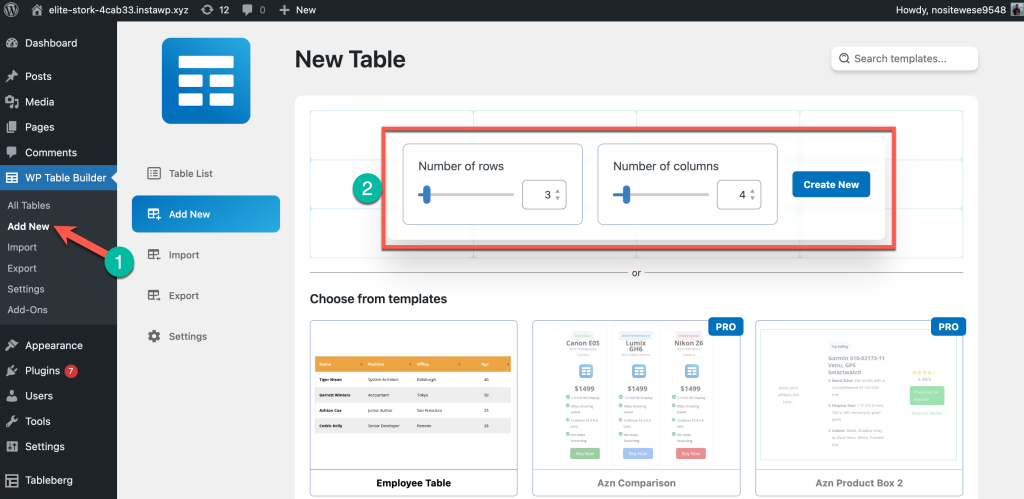
This will open the table editor.
Step 3: Add Client Logos Inside the Table Cells
By default, each cell contains a Paragraph element. We’ll replace that with images.
- Delete the default Paragraph element
- Drag and drop the Image element into the cell
- Upload or select your client logo from the Media Library
- Resize and align the image as needed
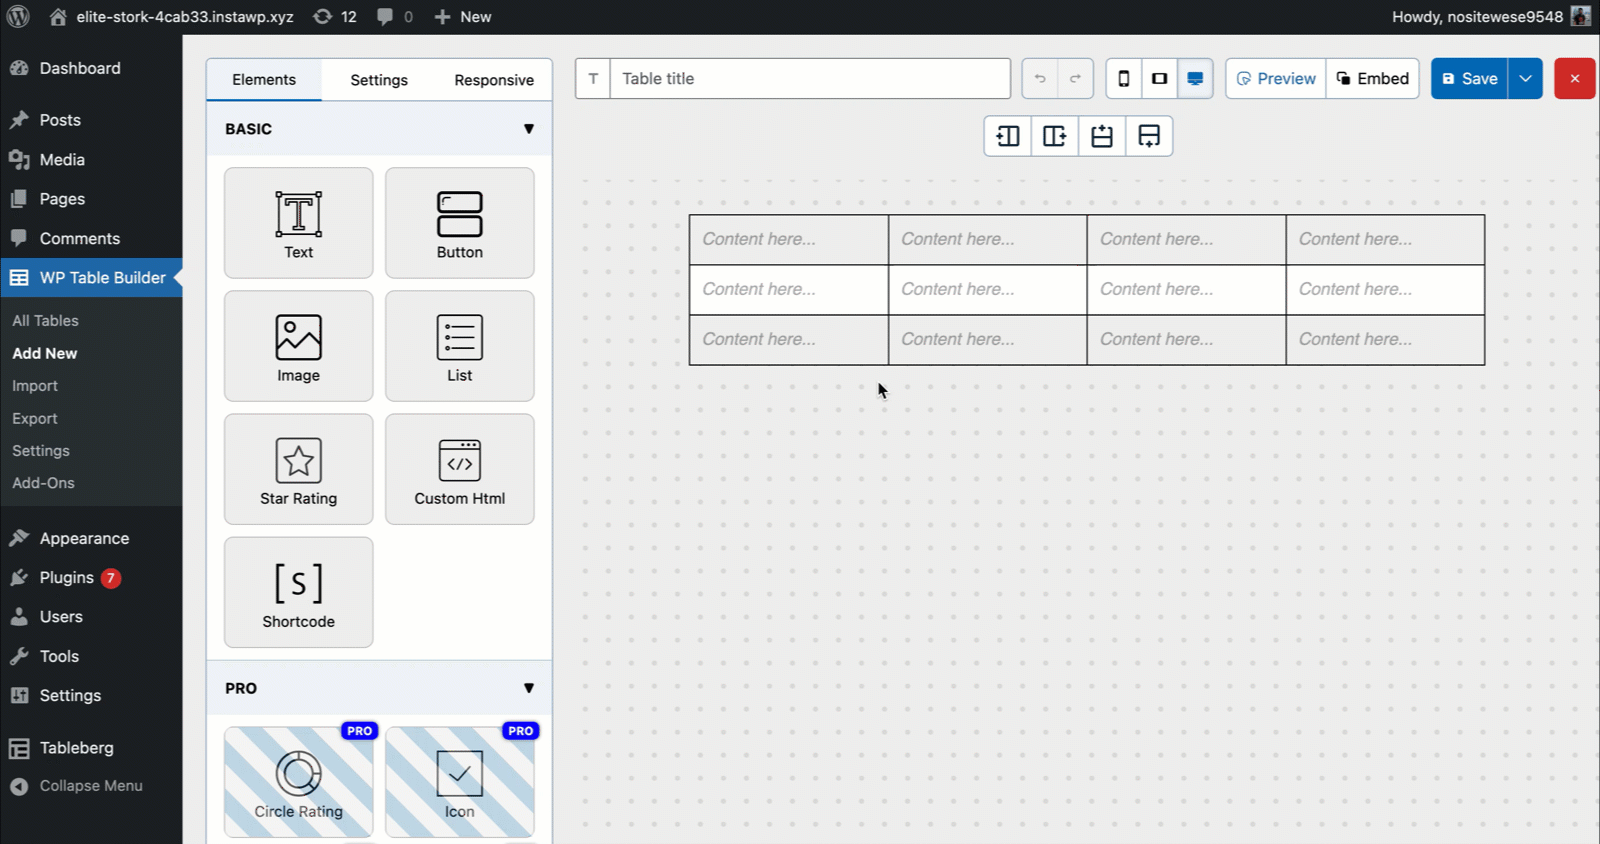
Repeat this process for each cell until all logos are added.
💡 Tip: Use logos with transparent backgrounds (PNG or SVG) for the best visual result.
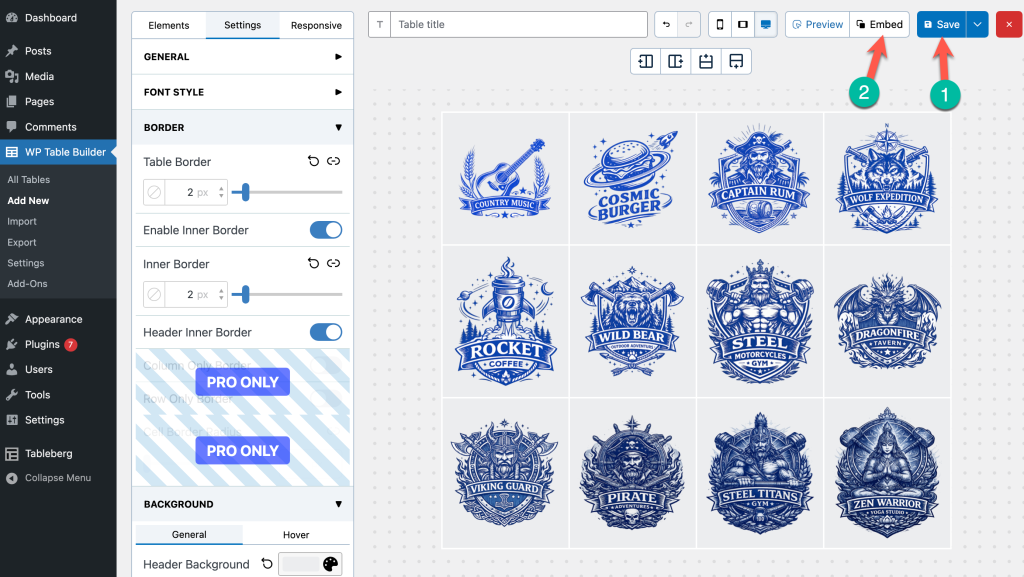
Step 4: Change the Table Border and Background Colors
Now let’s make the logo grid look clean and professional.
- Go to the Settings tab on the left
- Open the Border section
- Adjust table border thickness or remove it entirely
- Enable or disable inner borders
- Scroll to the Background section
- Set header, odd row, or even row background colors
- Light gray or white works best for logo showcases

This step helps your logos stand out without overwhelming the design.
Step 5: Save and Embed the Table in WordPress
Once your logo table looks good, it’s time to display it on your site.
Click Save in the top-right corner and click on the Embed button to copy the shortcode.
No go to the post or page and paste the shortcode.
That’s it! Your client logos are now live on your website 🎉
Where to Use Client Logo Tables
Here are a few great places to showcase your logos:
- Homepage “Trusted By” section
- Service or landing pages
- About page
- Proposal or sales pages
- Case study pages
A well-placed logo grid can significantly improve conversion rates and trust signals.
Final Thoughts
Showcasing client logos doesn’t have to be complicated.
With WP Table Builder, you can create a clean, responsive, and professional logo showcase in minutes—without touching any code.
If you want full control over layout, spacing, and styling, using a table for client logos is one of the most reliable approaches in WordPress.
If you have any questions or want to explore more creative table layouts, feel free to experiment inside WP Table Builder—you’ll be surprised how flexible it is.
Leave a Reply
You must be logged in to post a comment.