If you build websites with Elementor, you already know it comes with a built-in Pricing Table widget. It works well for simple pricing sections. But sometimes you may want better layout flexibility, advanced row and column control, which aren’t always available in default widgets.
WP Table Builder could be very useful in such situations. It helps you create fully custom tables with more structure and design freedom. You can highlight specific columns, compare multiple plans side by side, manage large tables, and import data via CSV files.
Even though WP Table Builder does not have a direct Elementor widget, you can still add any table to your page using a simple shortcode. In this guide, you will learn how to add a custom pricing table in Elementor using the WP Table Builder plugin.
How to Add a Custom Pricing Table in Elementor with WP Table Builder
WP Table Builder is a drag-and-drop table builder plugin. Like Elementor, you’ll get many elements on the left bar. By dragging and dropping them, you can add different types of content to the table. So, in this plugin, you will get a feeling similar to Elementor.
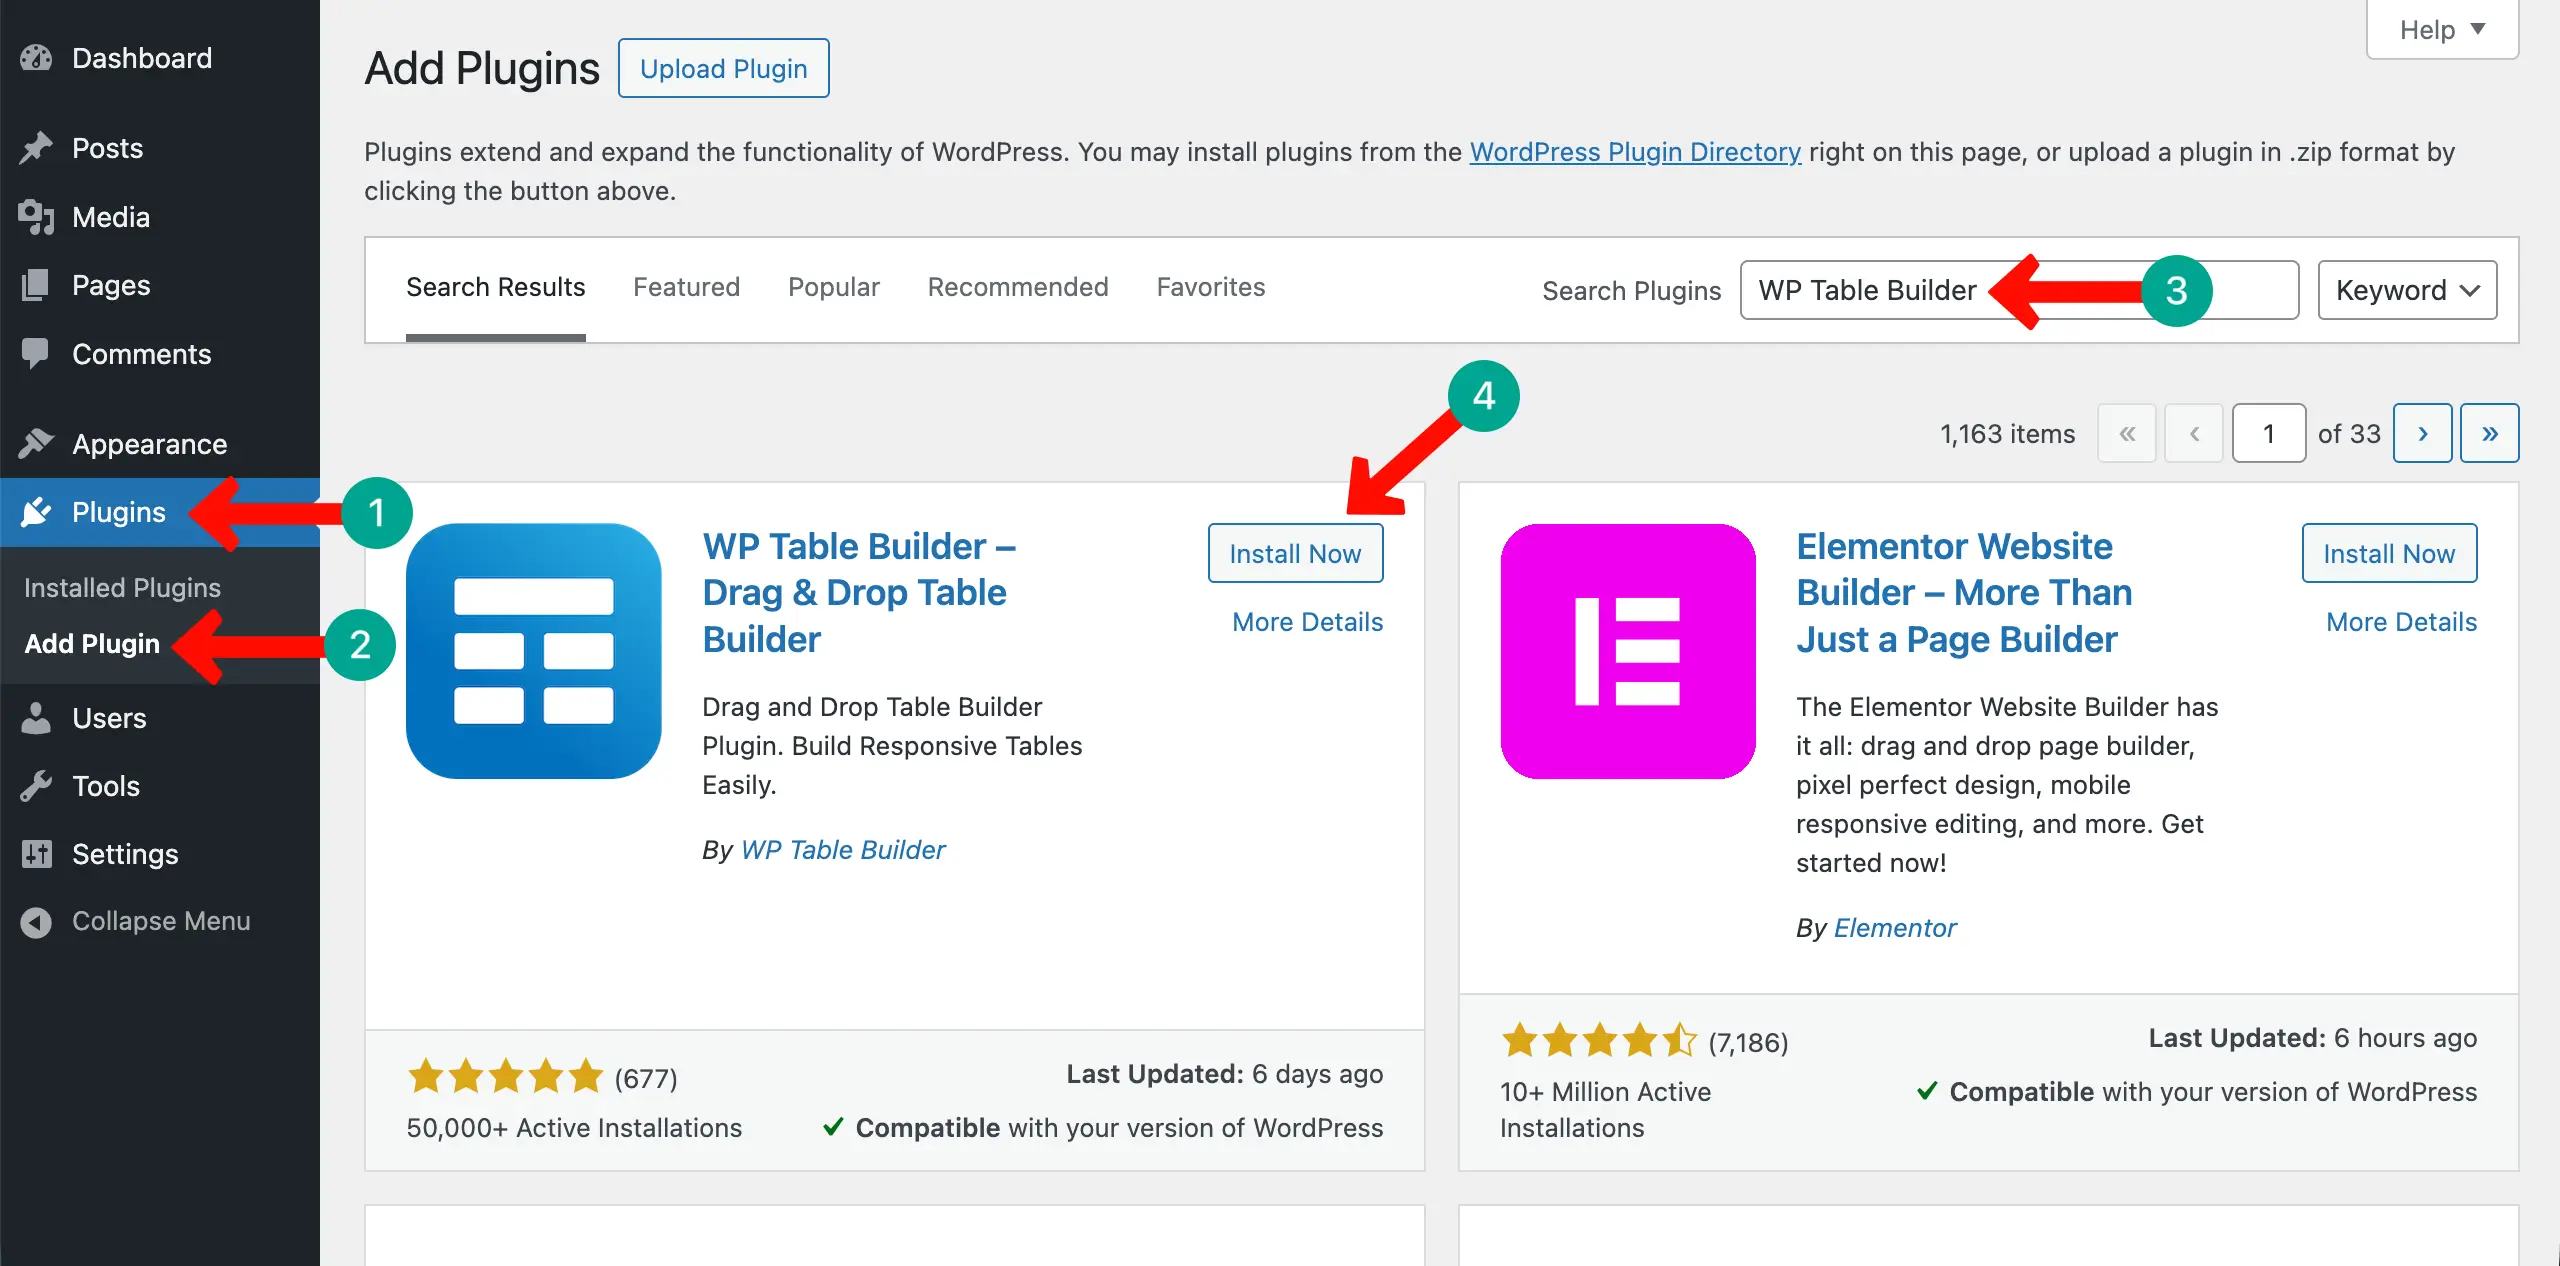
Step 01: Install the WP Table Builder Plugin
Go to Plugins > Add Plugin. Type WP Table Builder in the search box. Install and activate once you see it.
WP Table Builder has a premium version available. For creating highly complex tables, you will need the premium version. You can get it by clicking the button below.
Follow the steps below after installing the plugin.
Step 02: Create Your Pricing Table in WP Table Builder
Hope you have the WP Table Builder plugin installed on your site. If not, you have to do it to continue the following steps. Once the plugin is installed and activated on your site, navigate to WP Table Builder > Add New.
Define the number of rows and columns you want for the table to create its layout.
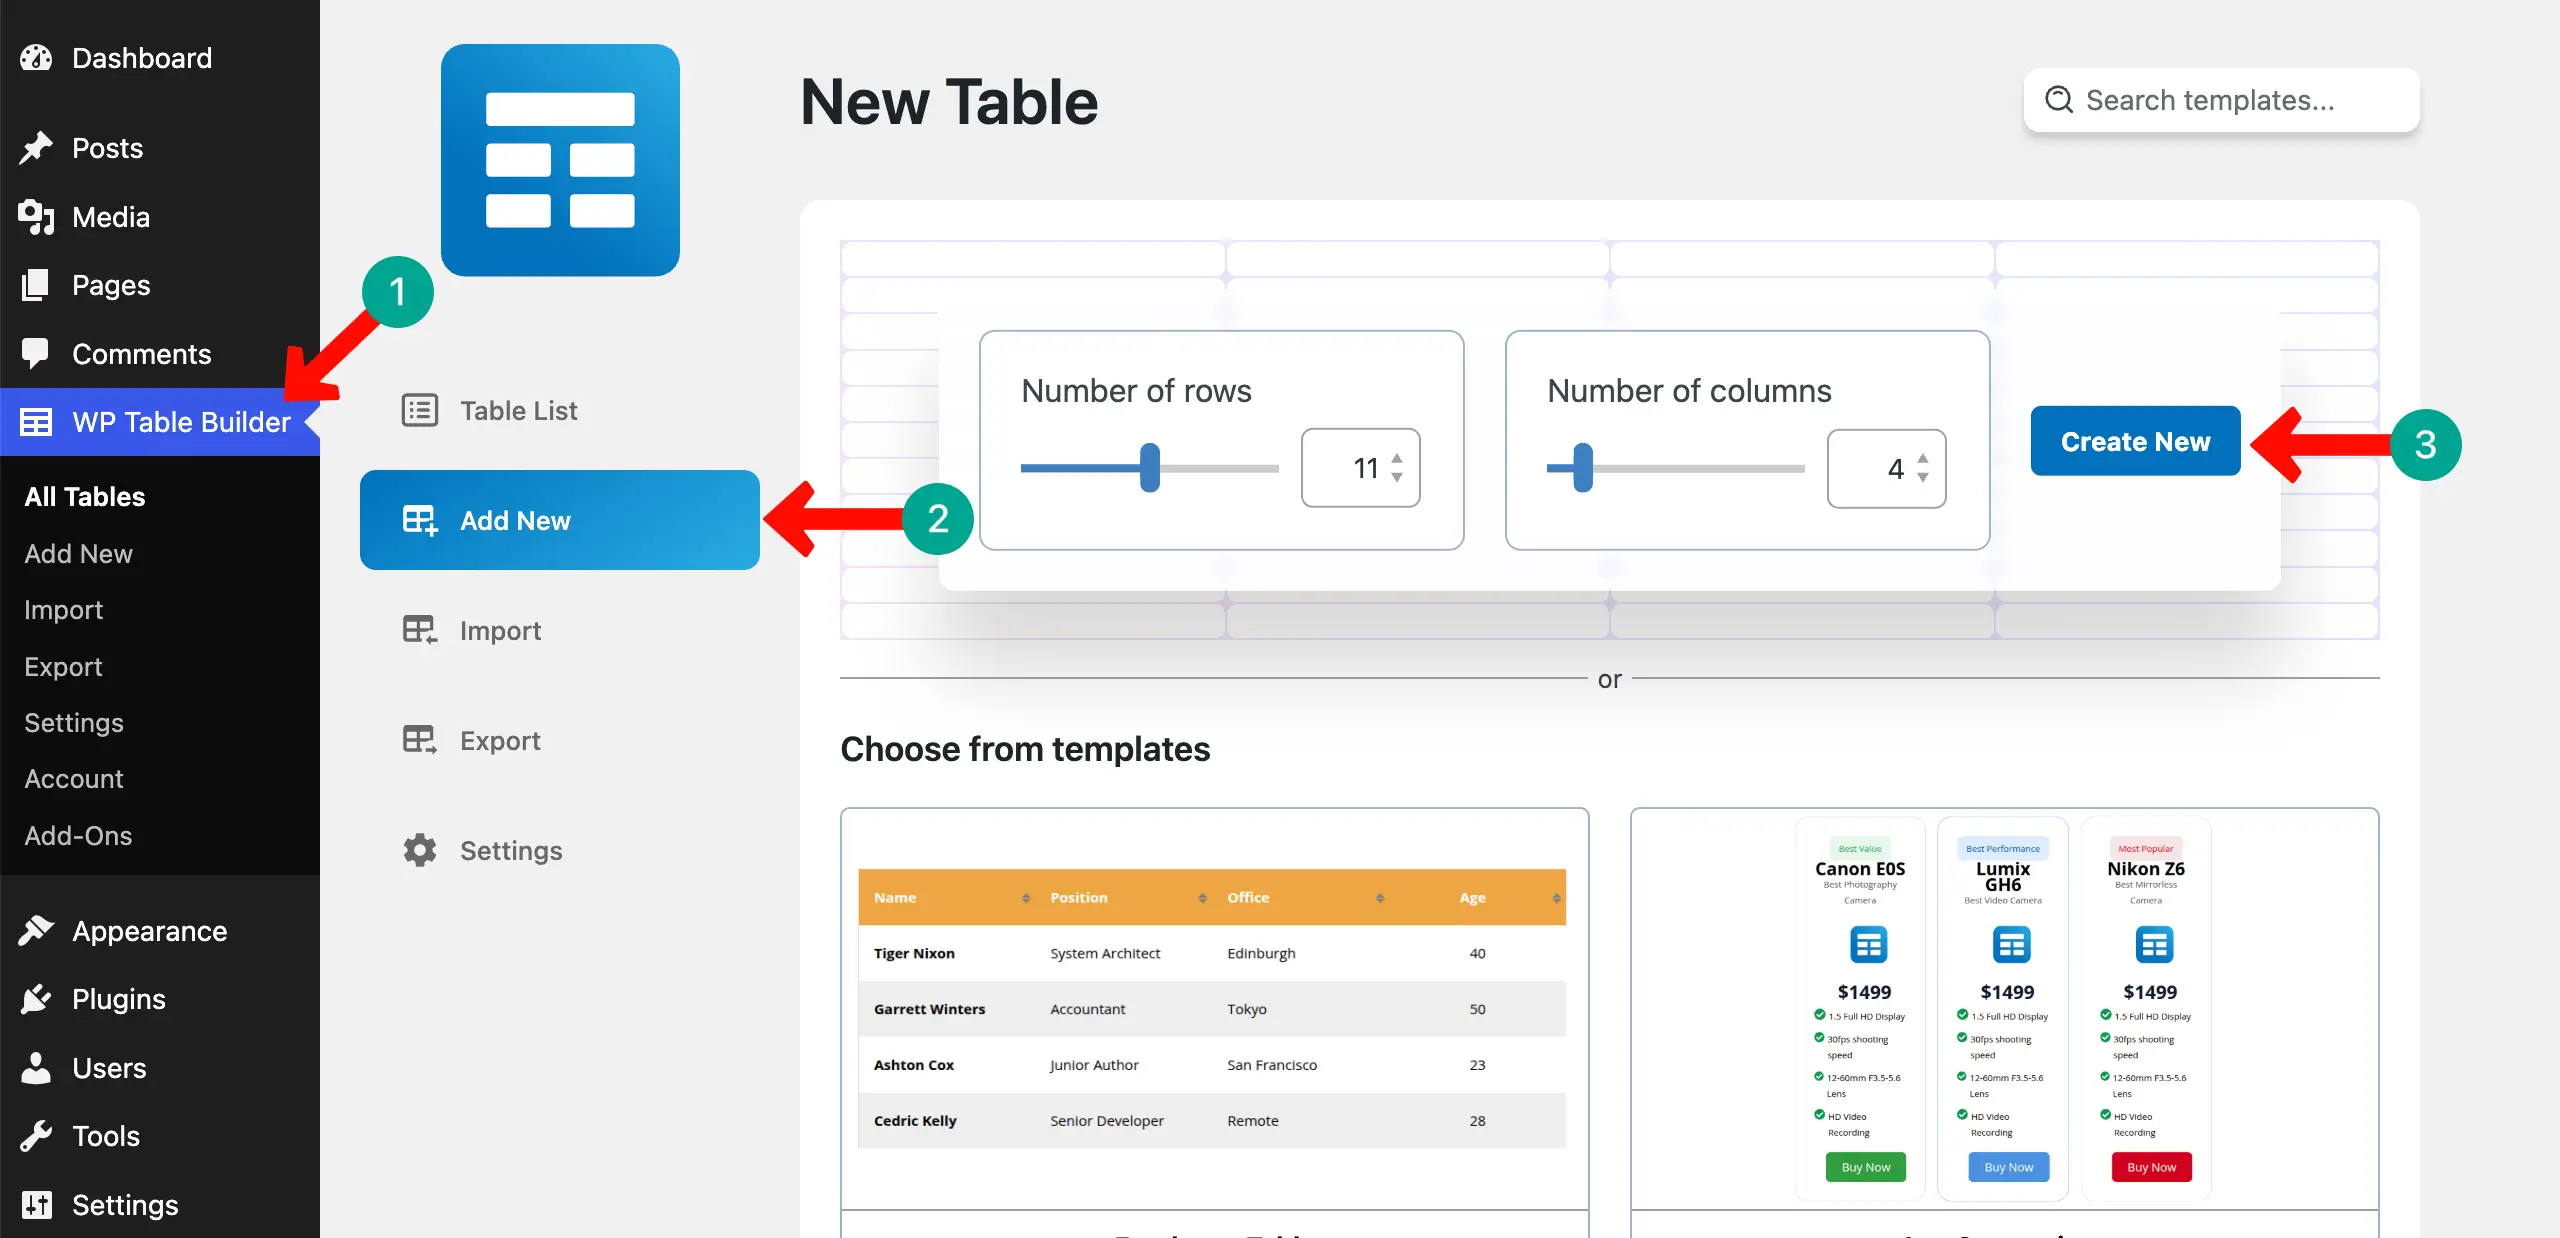
The layout for the pricing table will be prepared right away.
We’re not explaining here in detail the process because we already have several blog and tutorial posts on it. Explore how to create a pricing table using the WP Table Builder plugin.
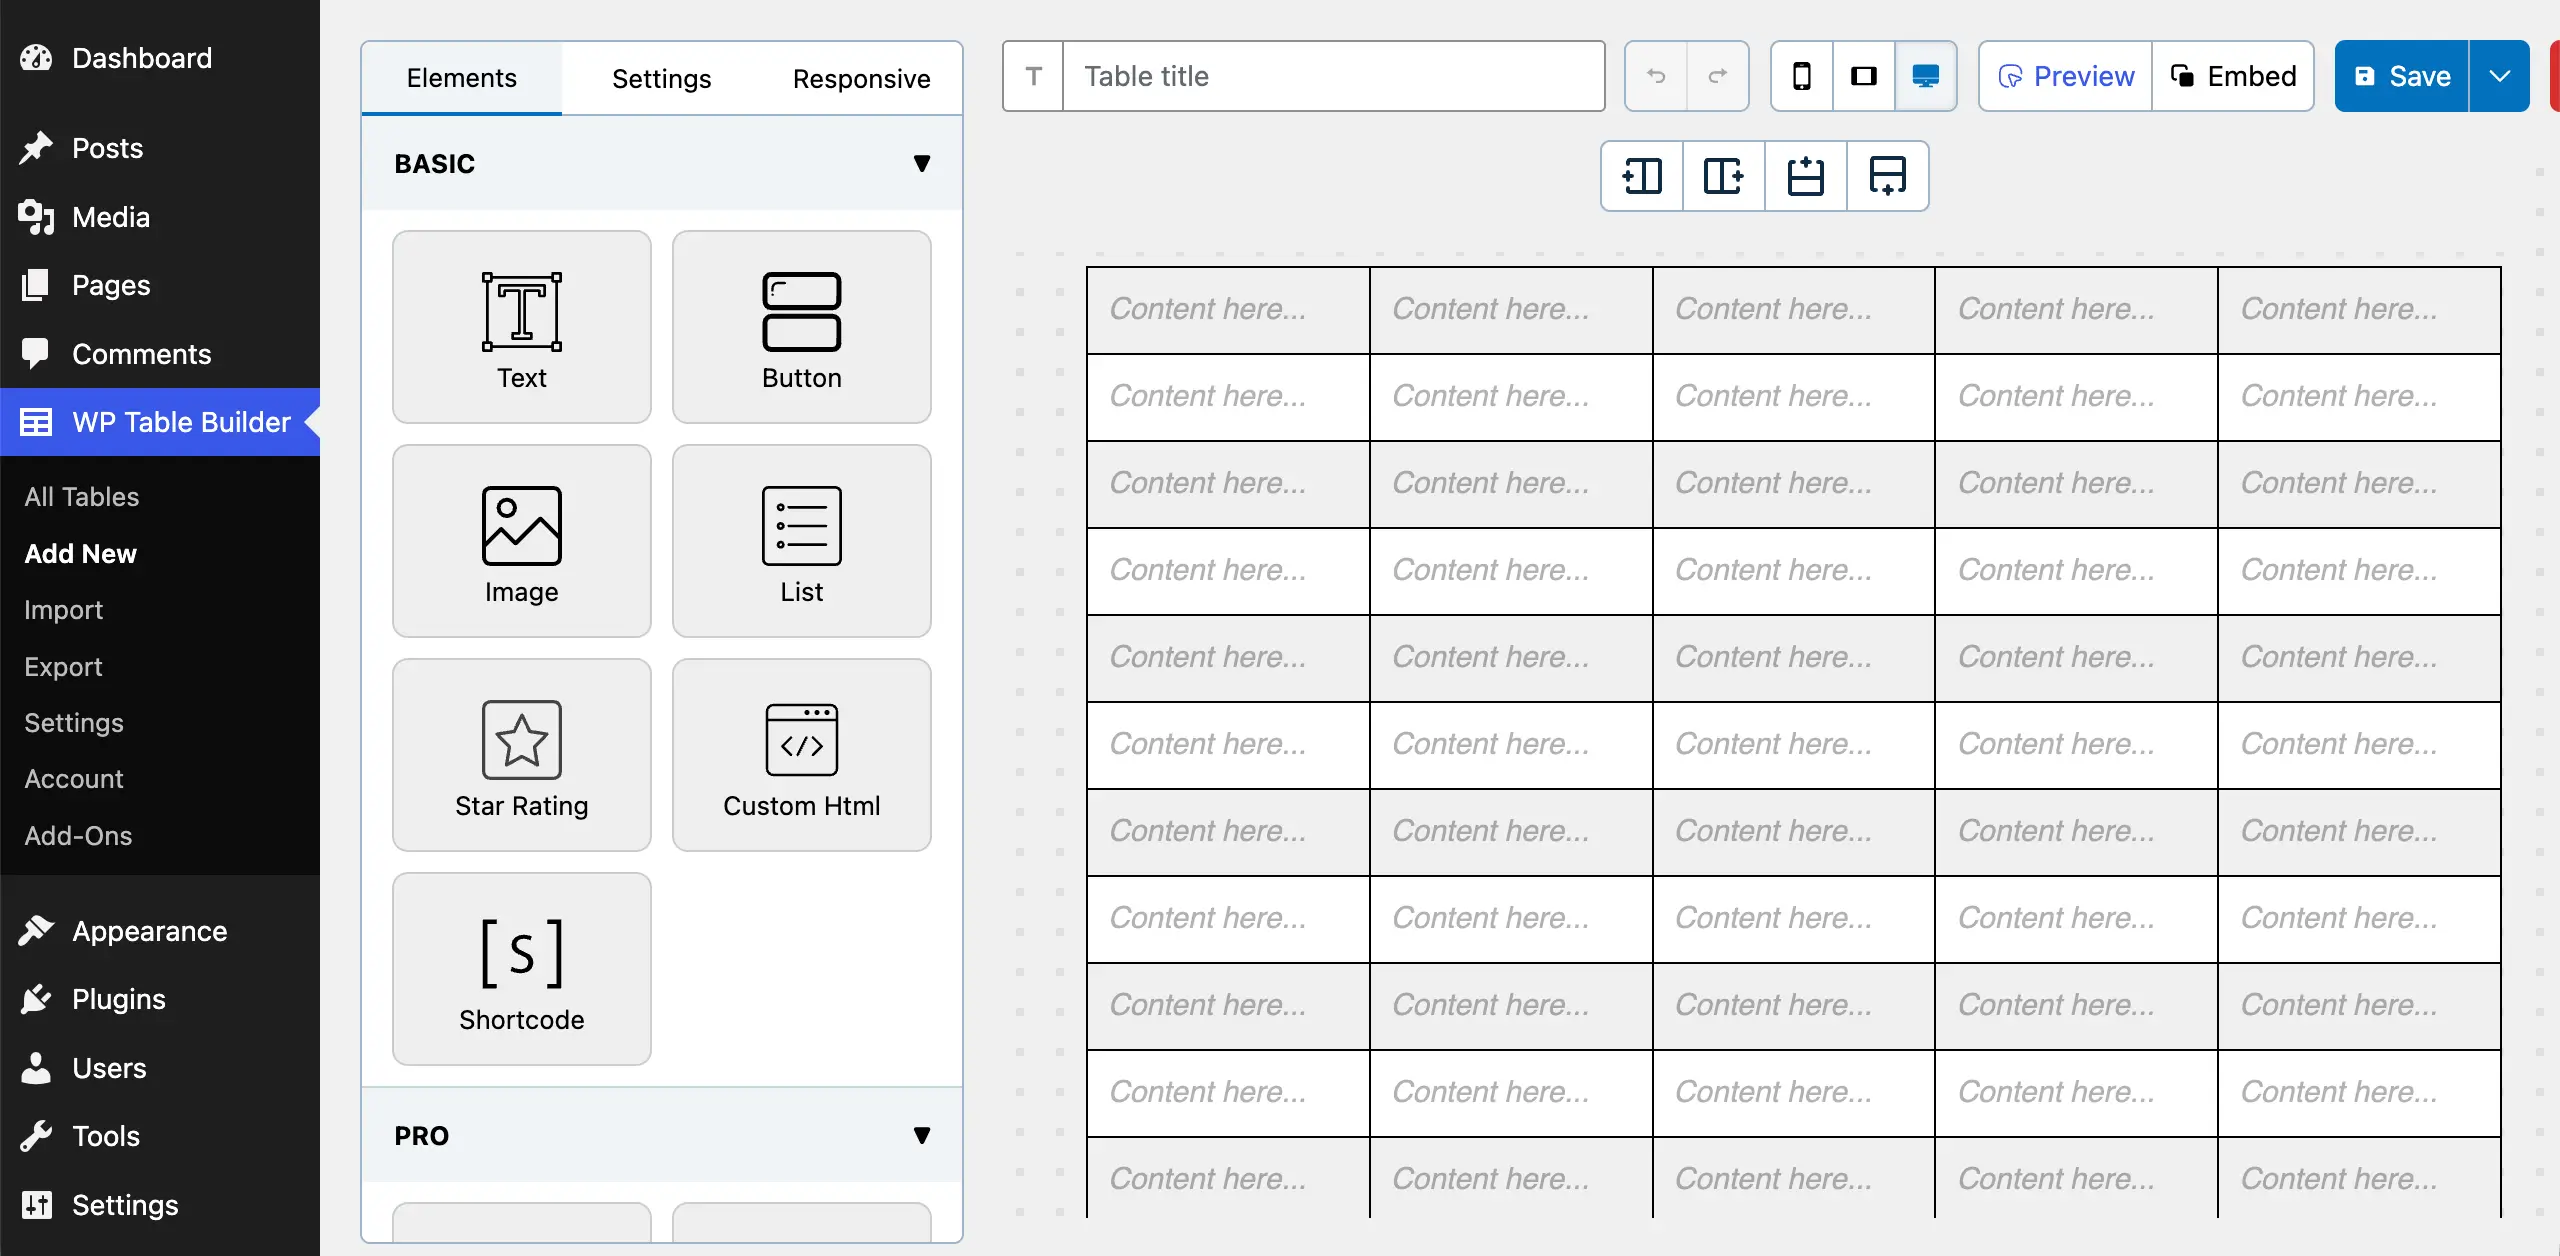
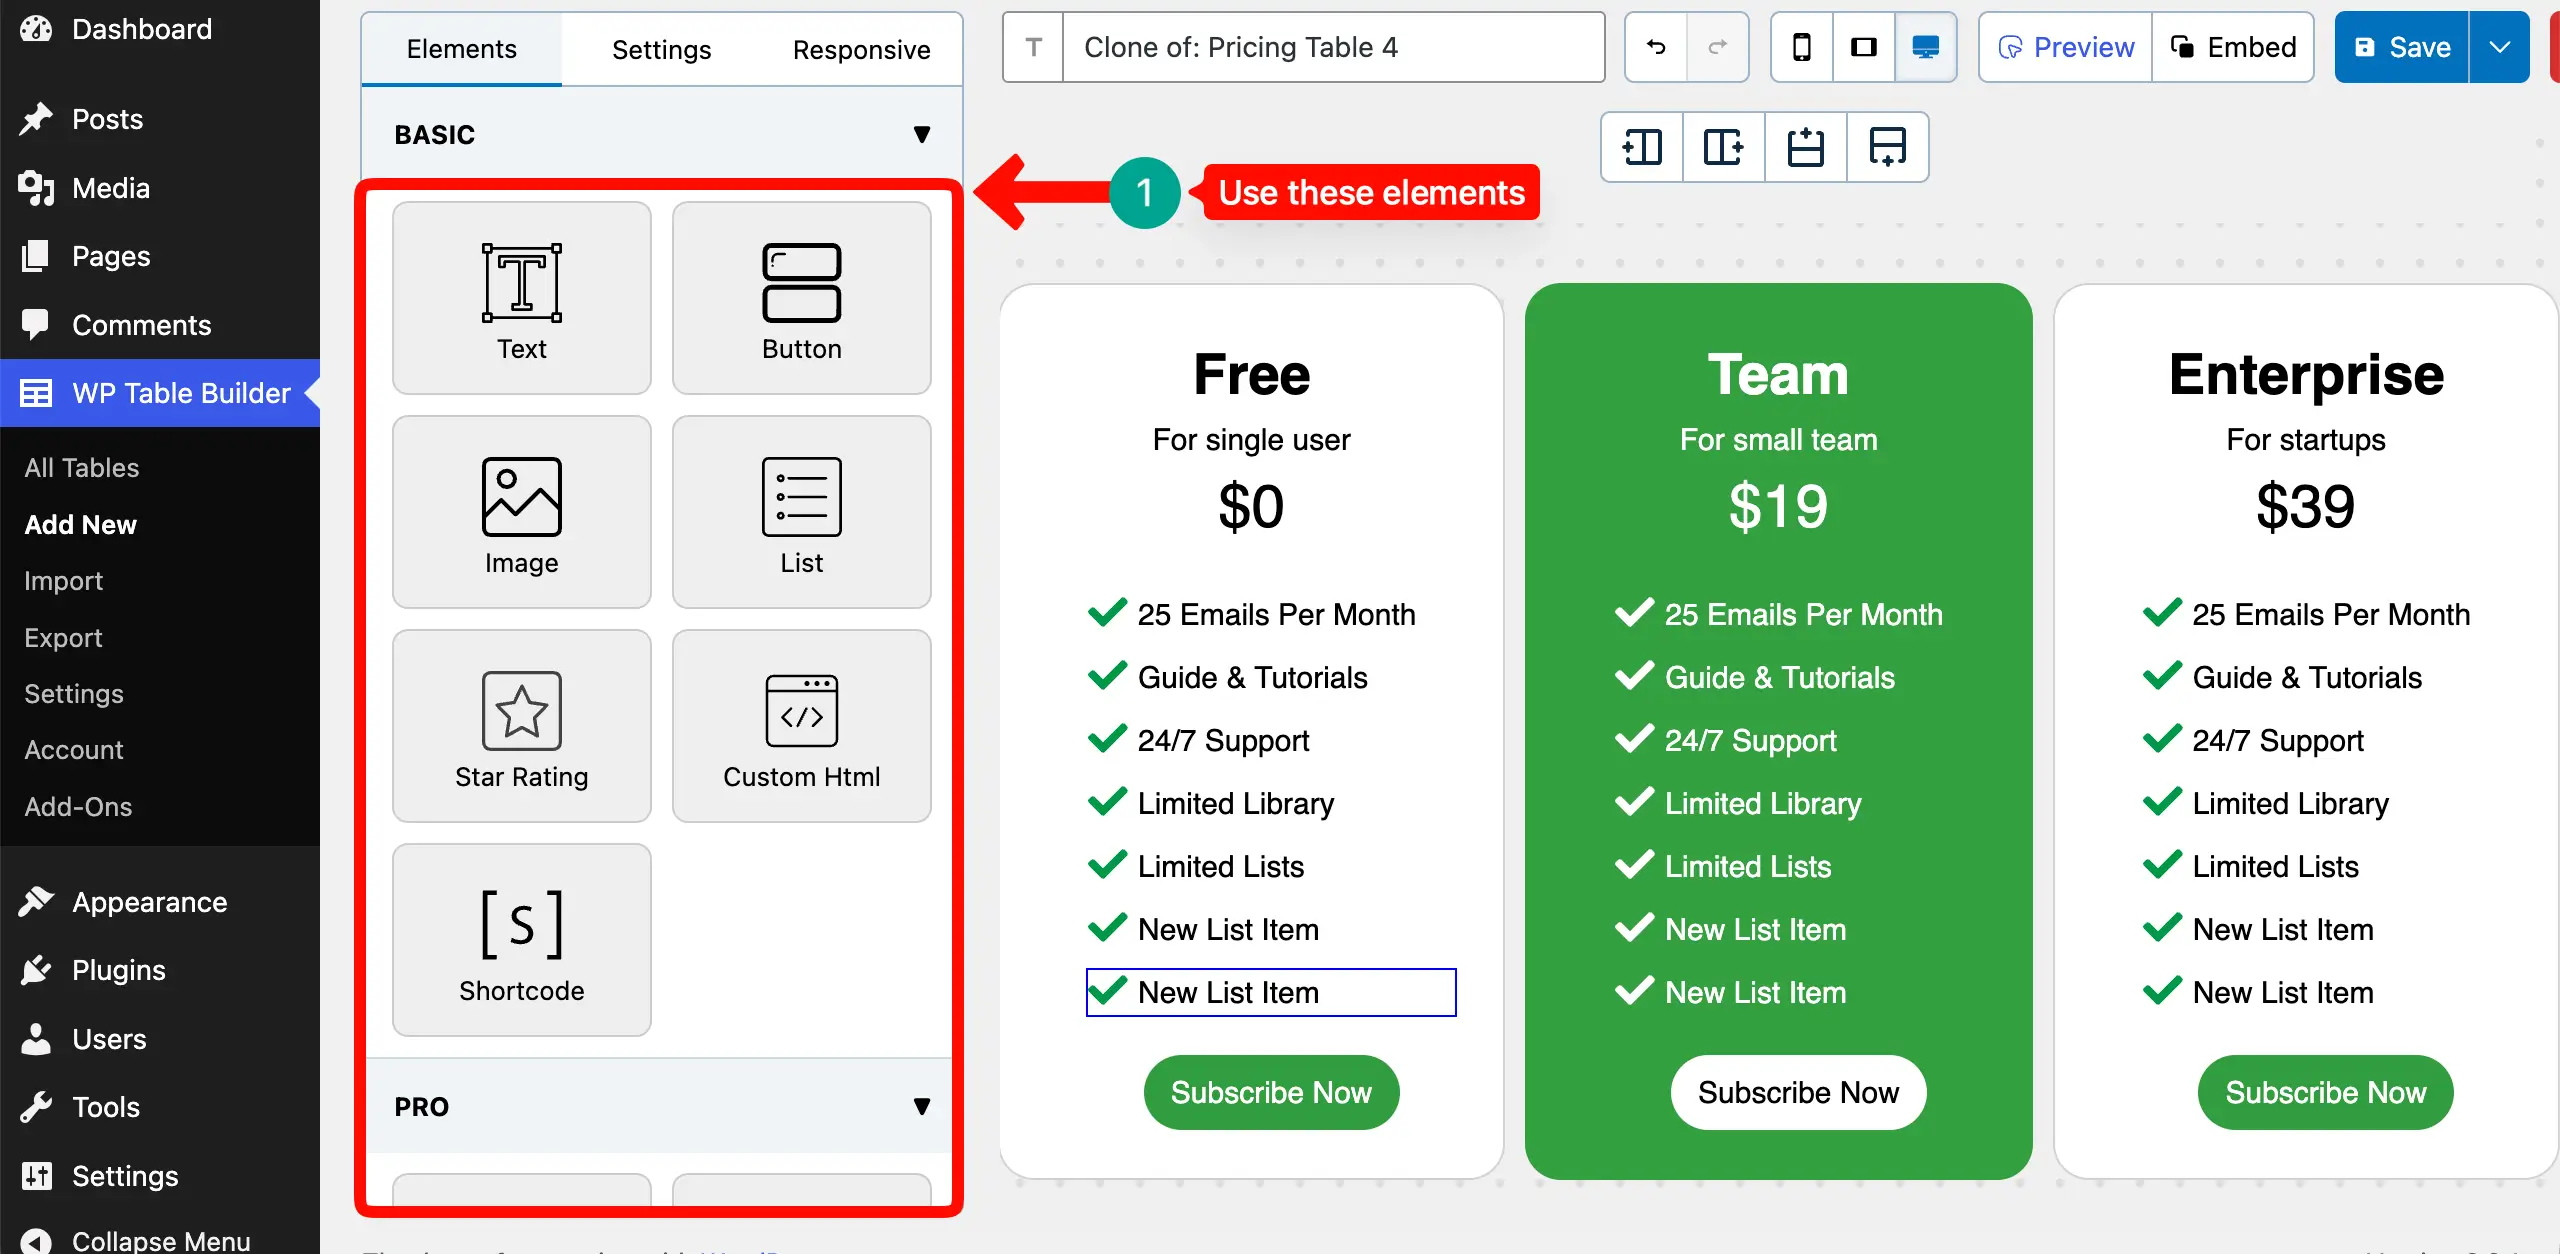
The plugin offers you numerous elements that you can drag and drop on the table to add different types of content. It will give you a feeling like Elementor. We’ll show you how to add the pricing table to Elementor using the following one.
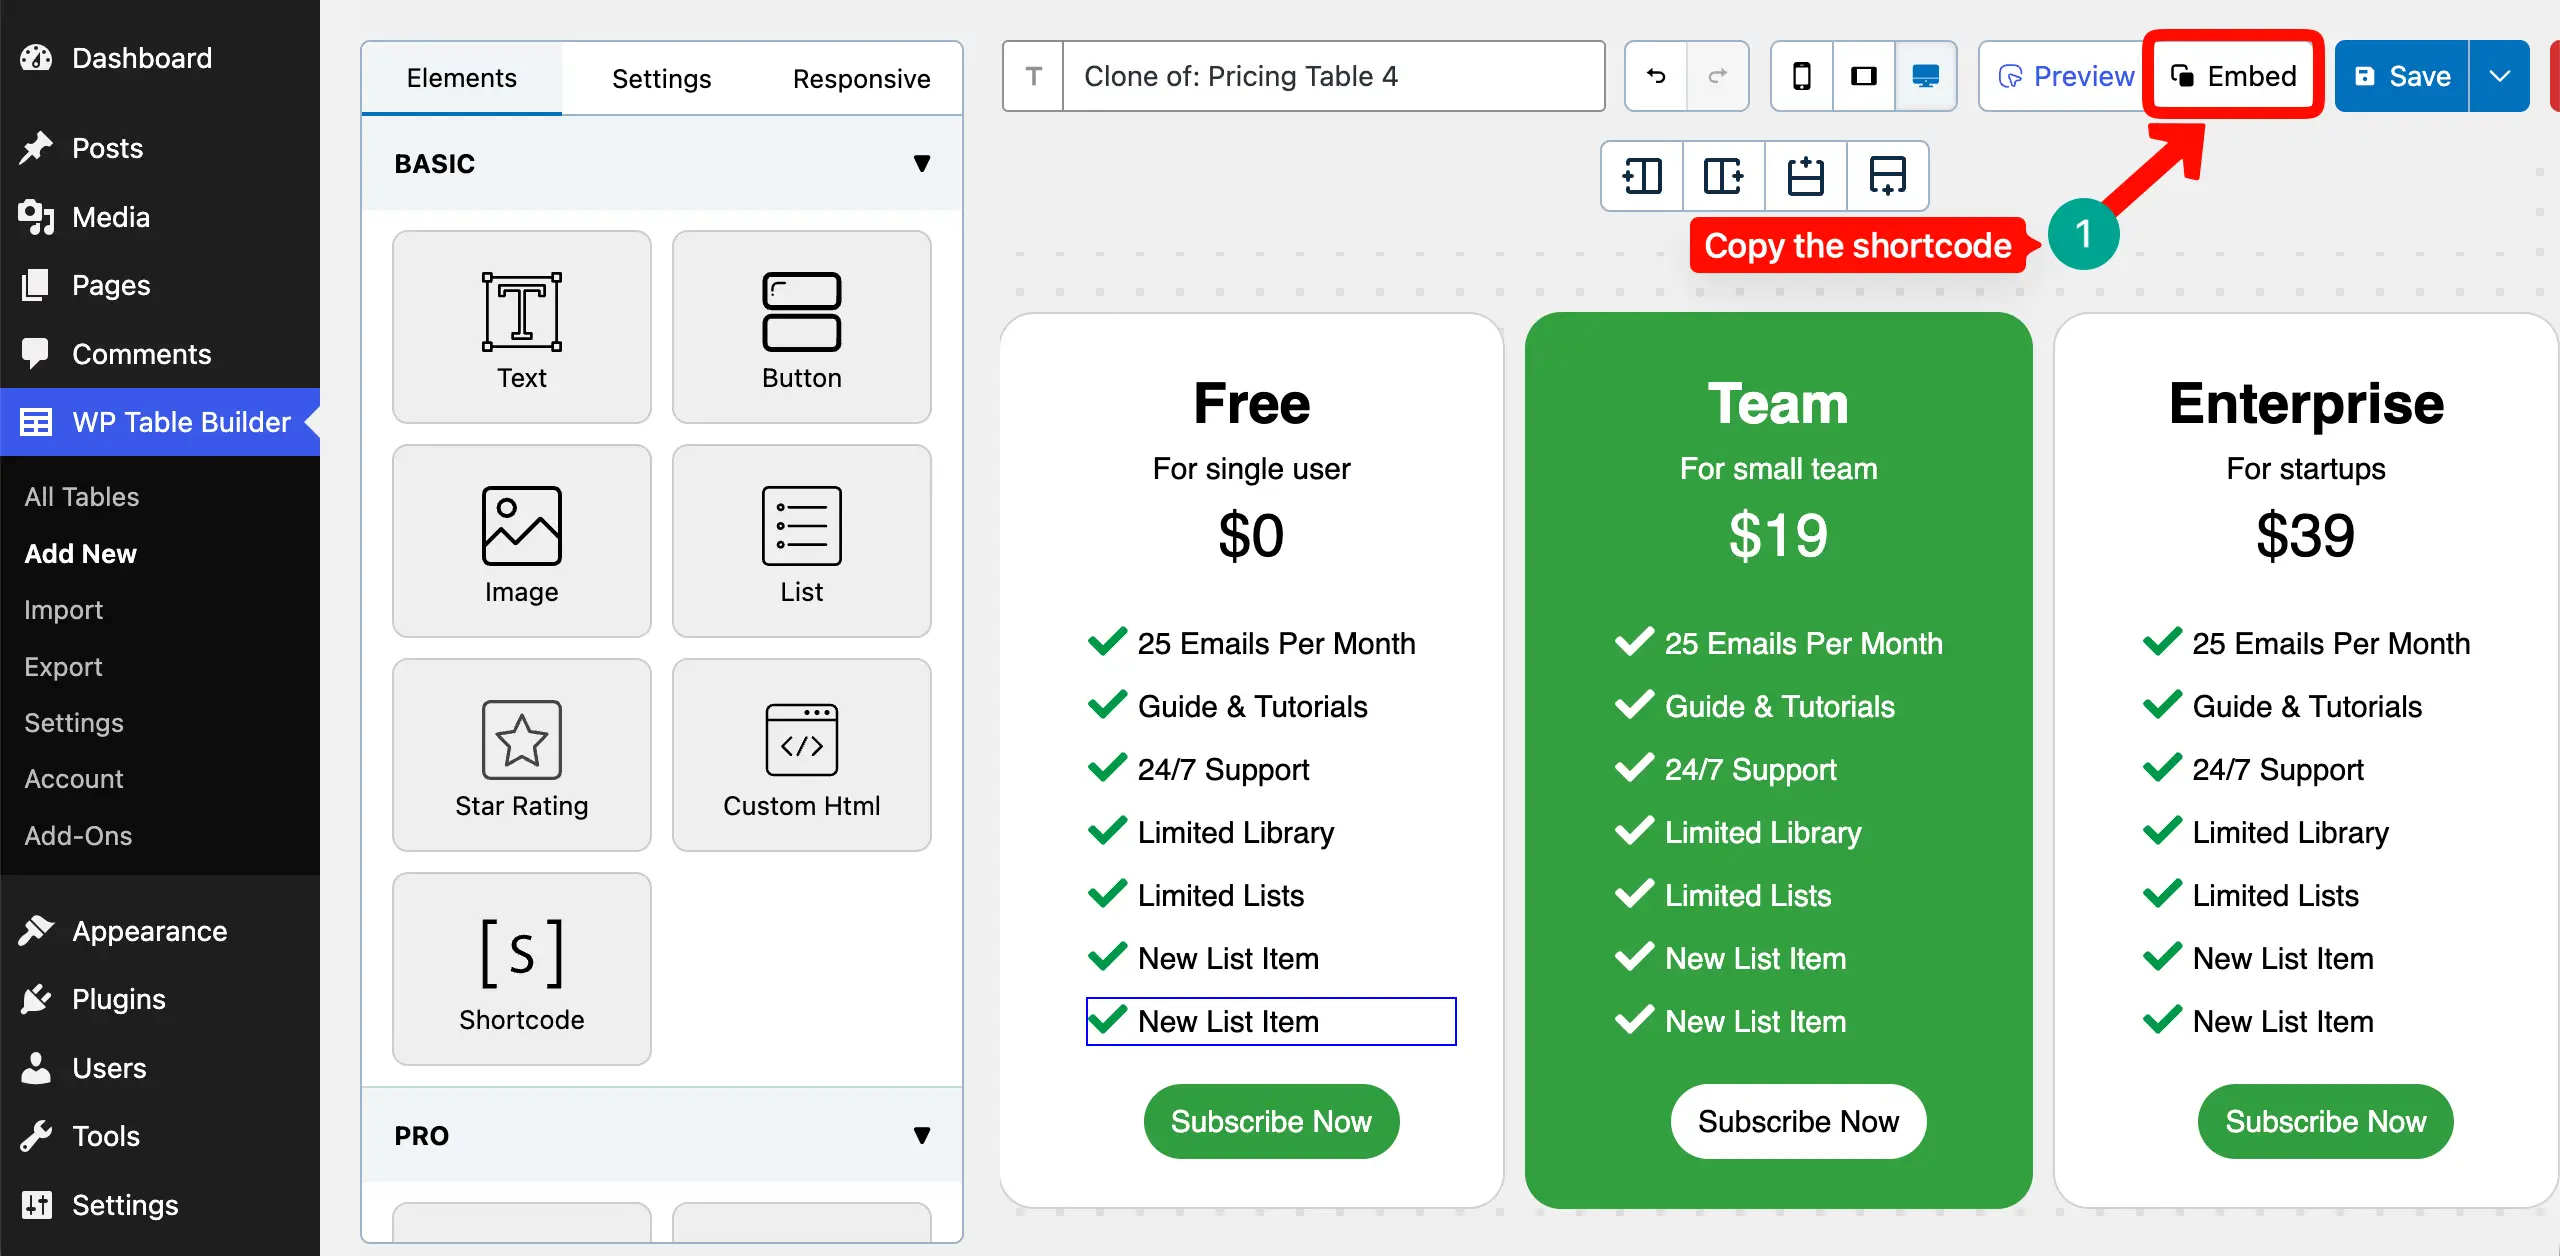
Step 03: Copy the Table Shortcode
First, save the table. Then, copy its shortcode by clicking the Embed button on top.
Learn how to import a CSV file into WordPress and display it as a table.
Step 04: Open Elementor Editor
Now, open your post or page with the Elementor editor. Come to the place where you want to display the table.

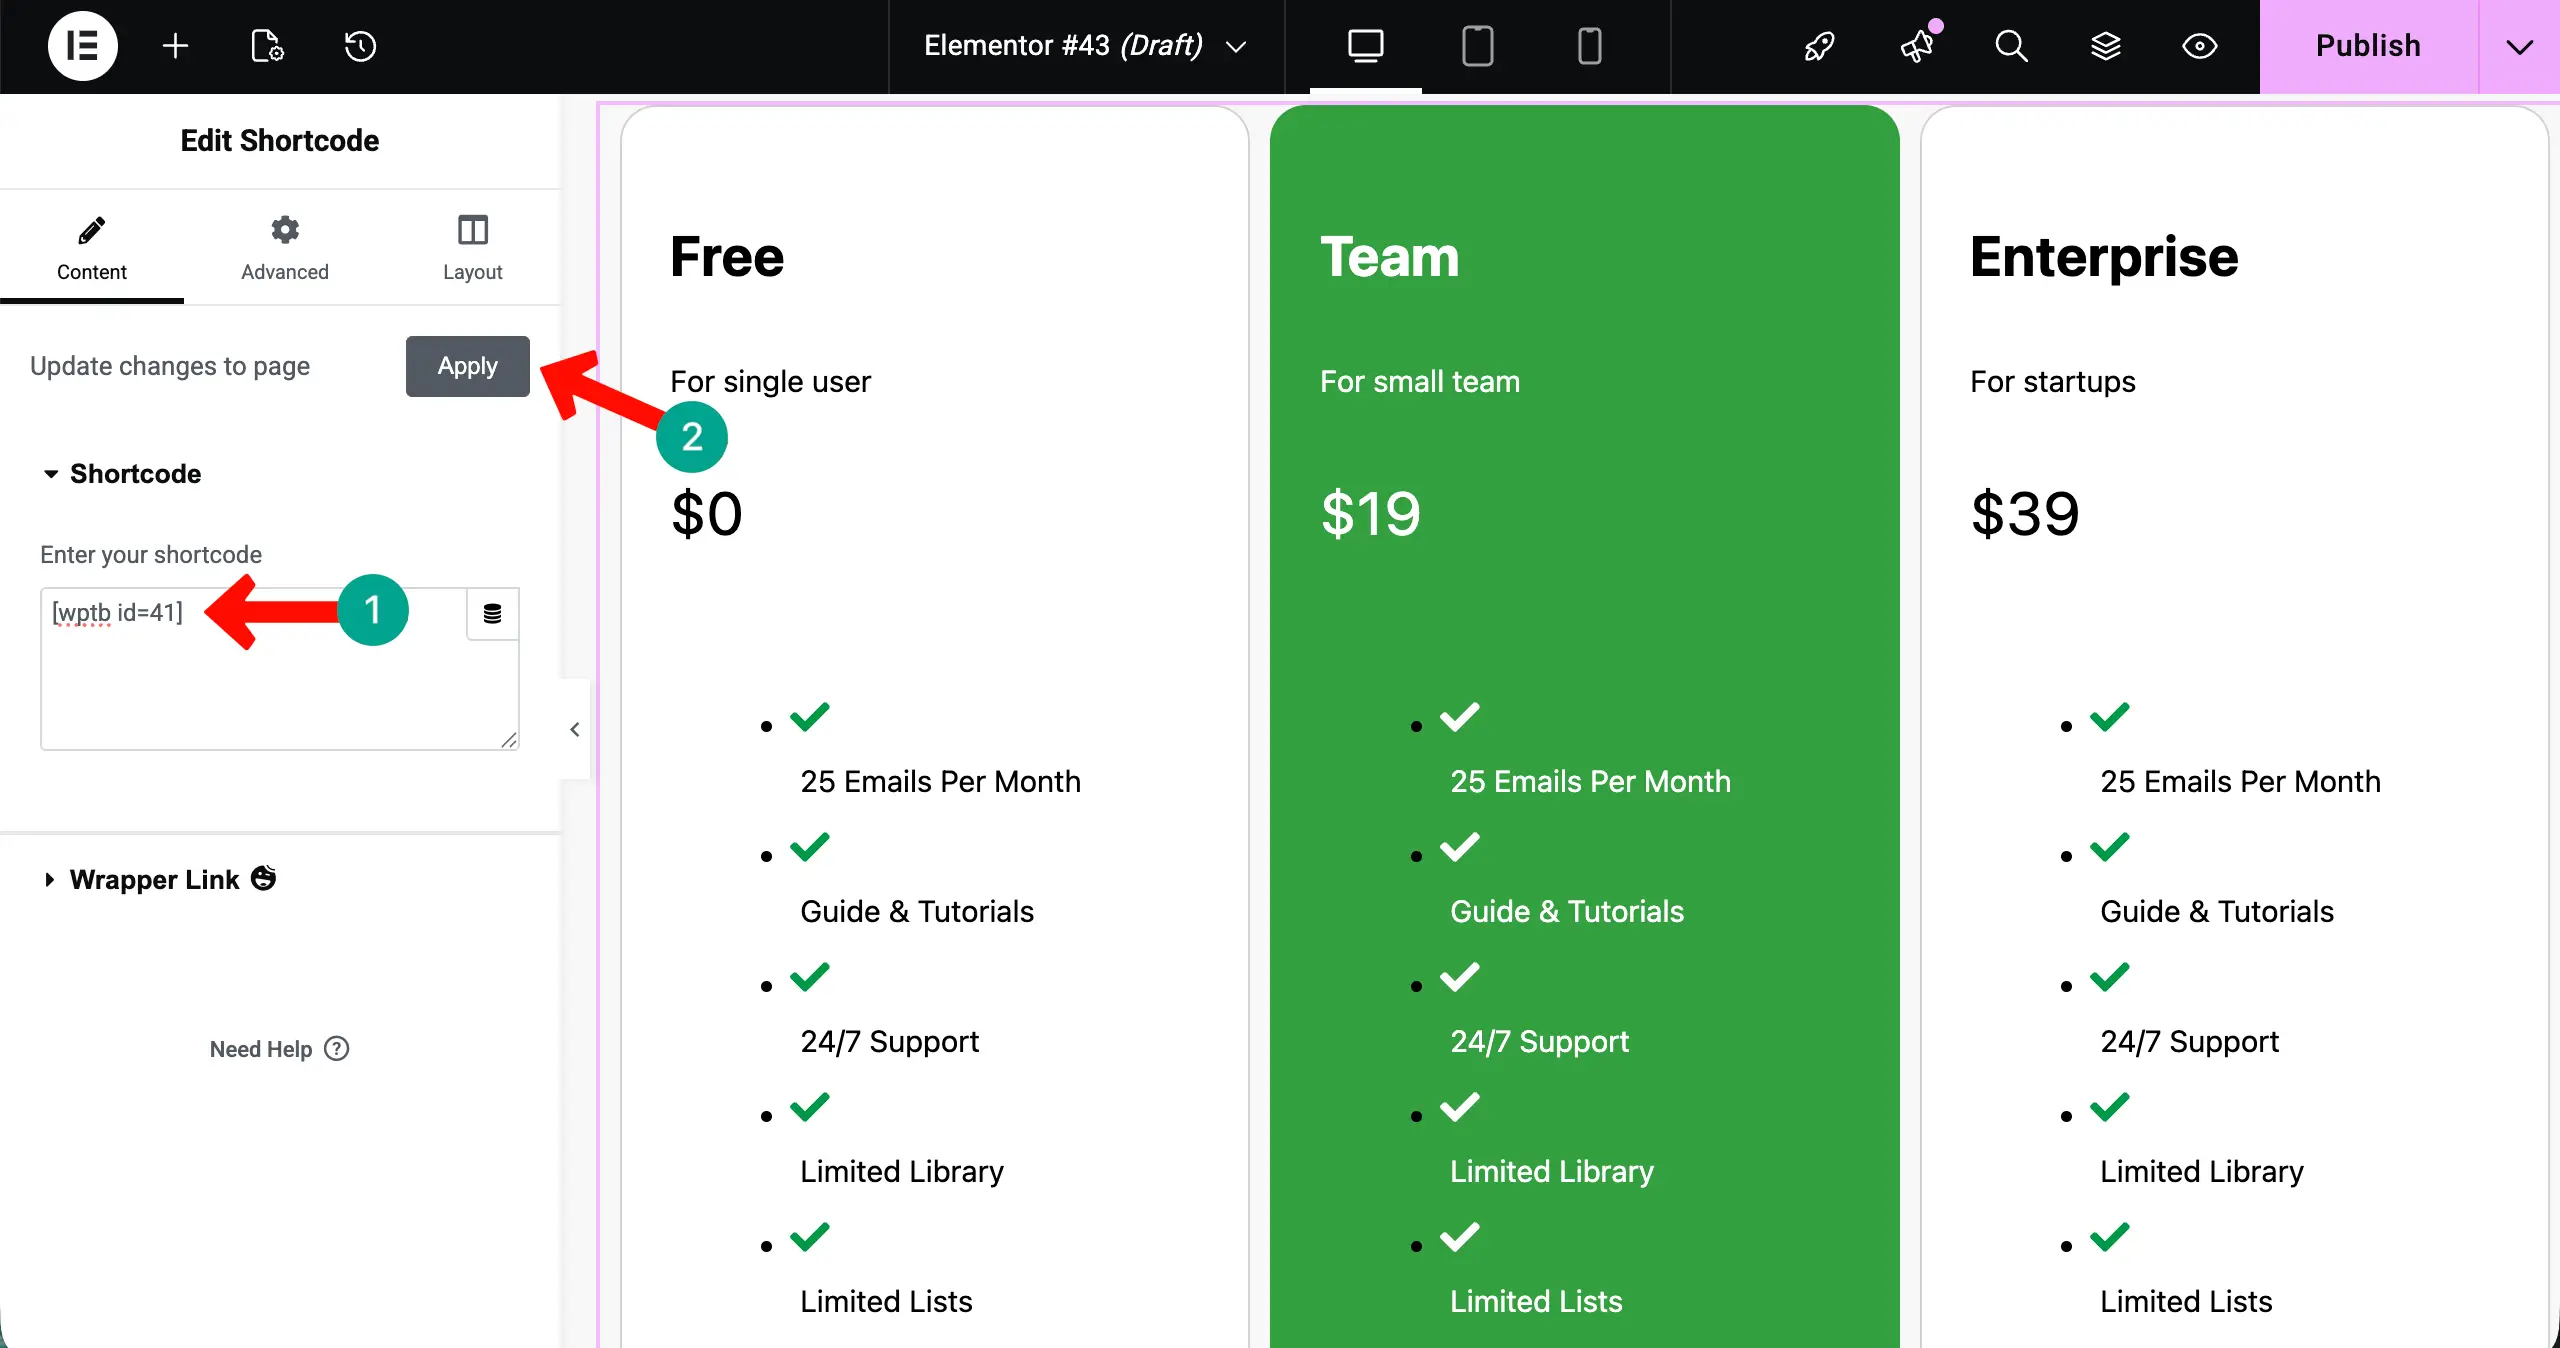
Step 05: Drag the Shortcode Widget into Elementor
Find the Shortcode widget on the Elementor panel and drag it to the canvas as we have shown in the screenshot below.

Paste the shortcode in the respective box on the panel. Then, hit the Apply button.
Note: The table may look broken in the editor. But don’t worry. Check it on the preview page.
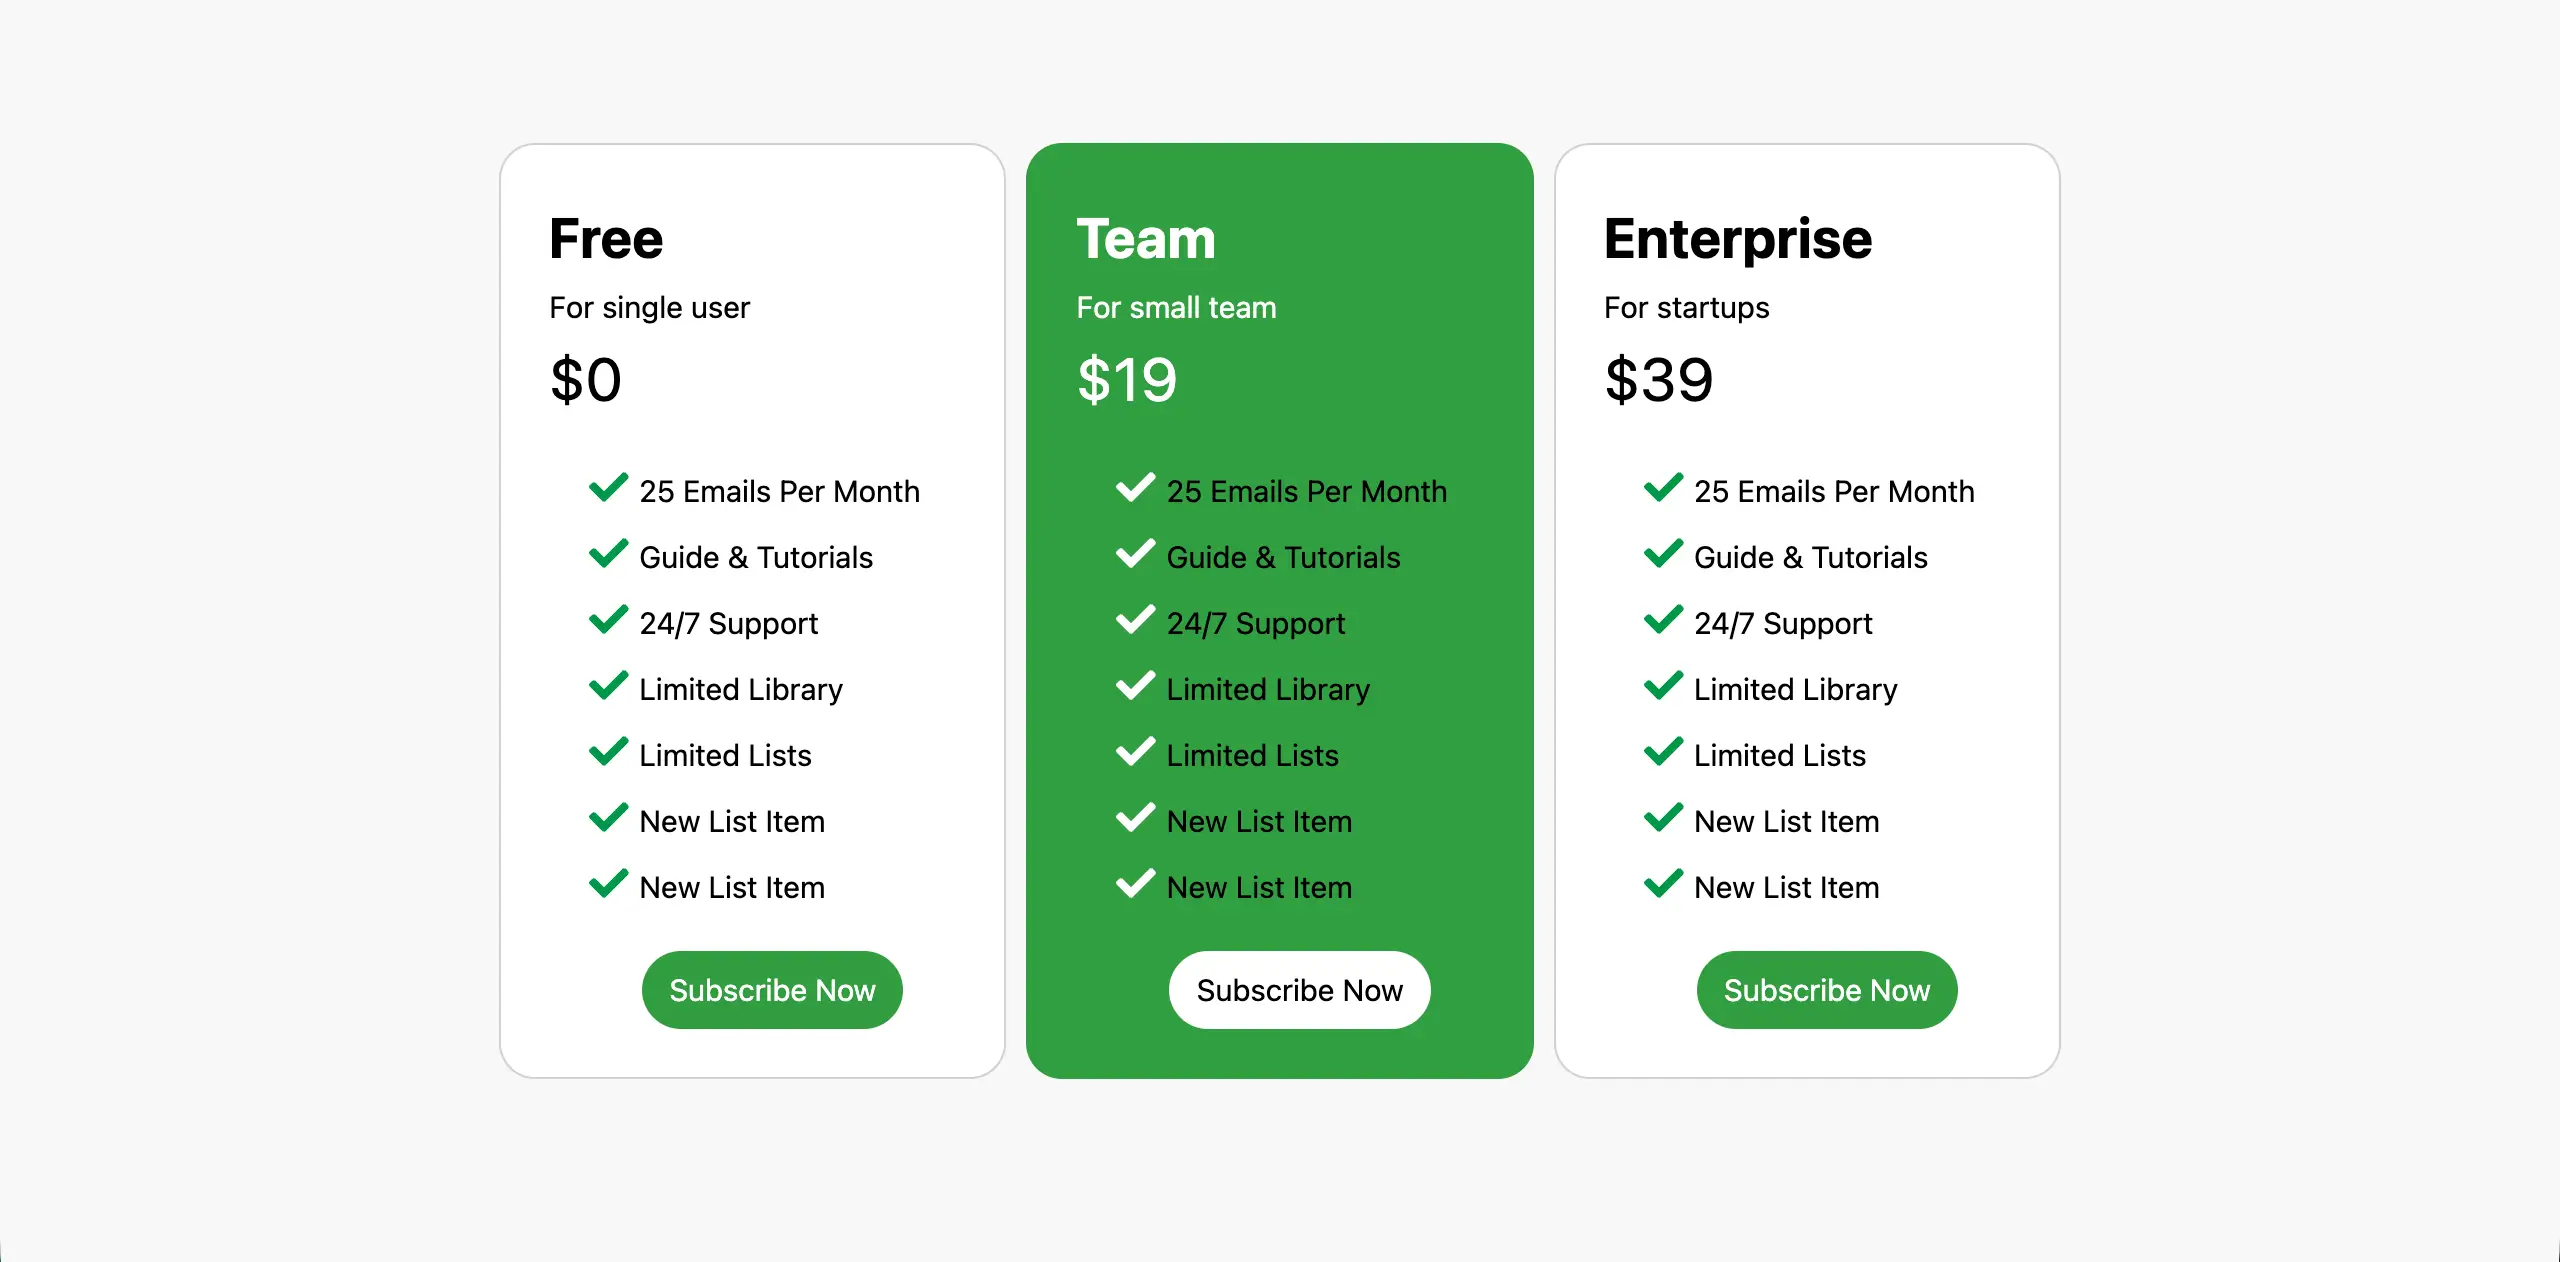
On the preview page, you can see that the table looks absolutely fine. So, once again, don’t worry if the table looks broken on the canvas after pasting the shortcode from WP Table Builder.
Let’s check how to create a custom WooCommerce product table in WordPress.
Step 06: Adjust Layout Inside Elementor
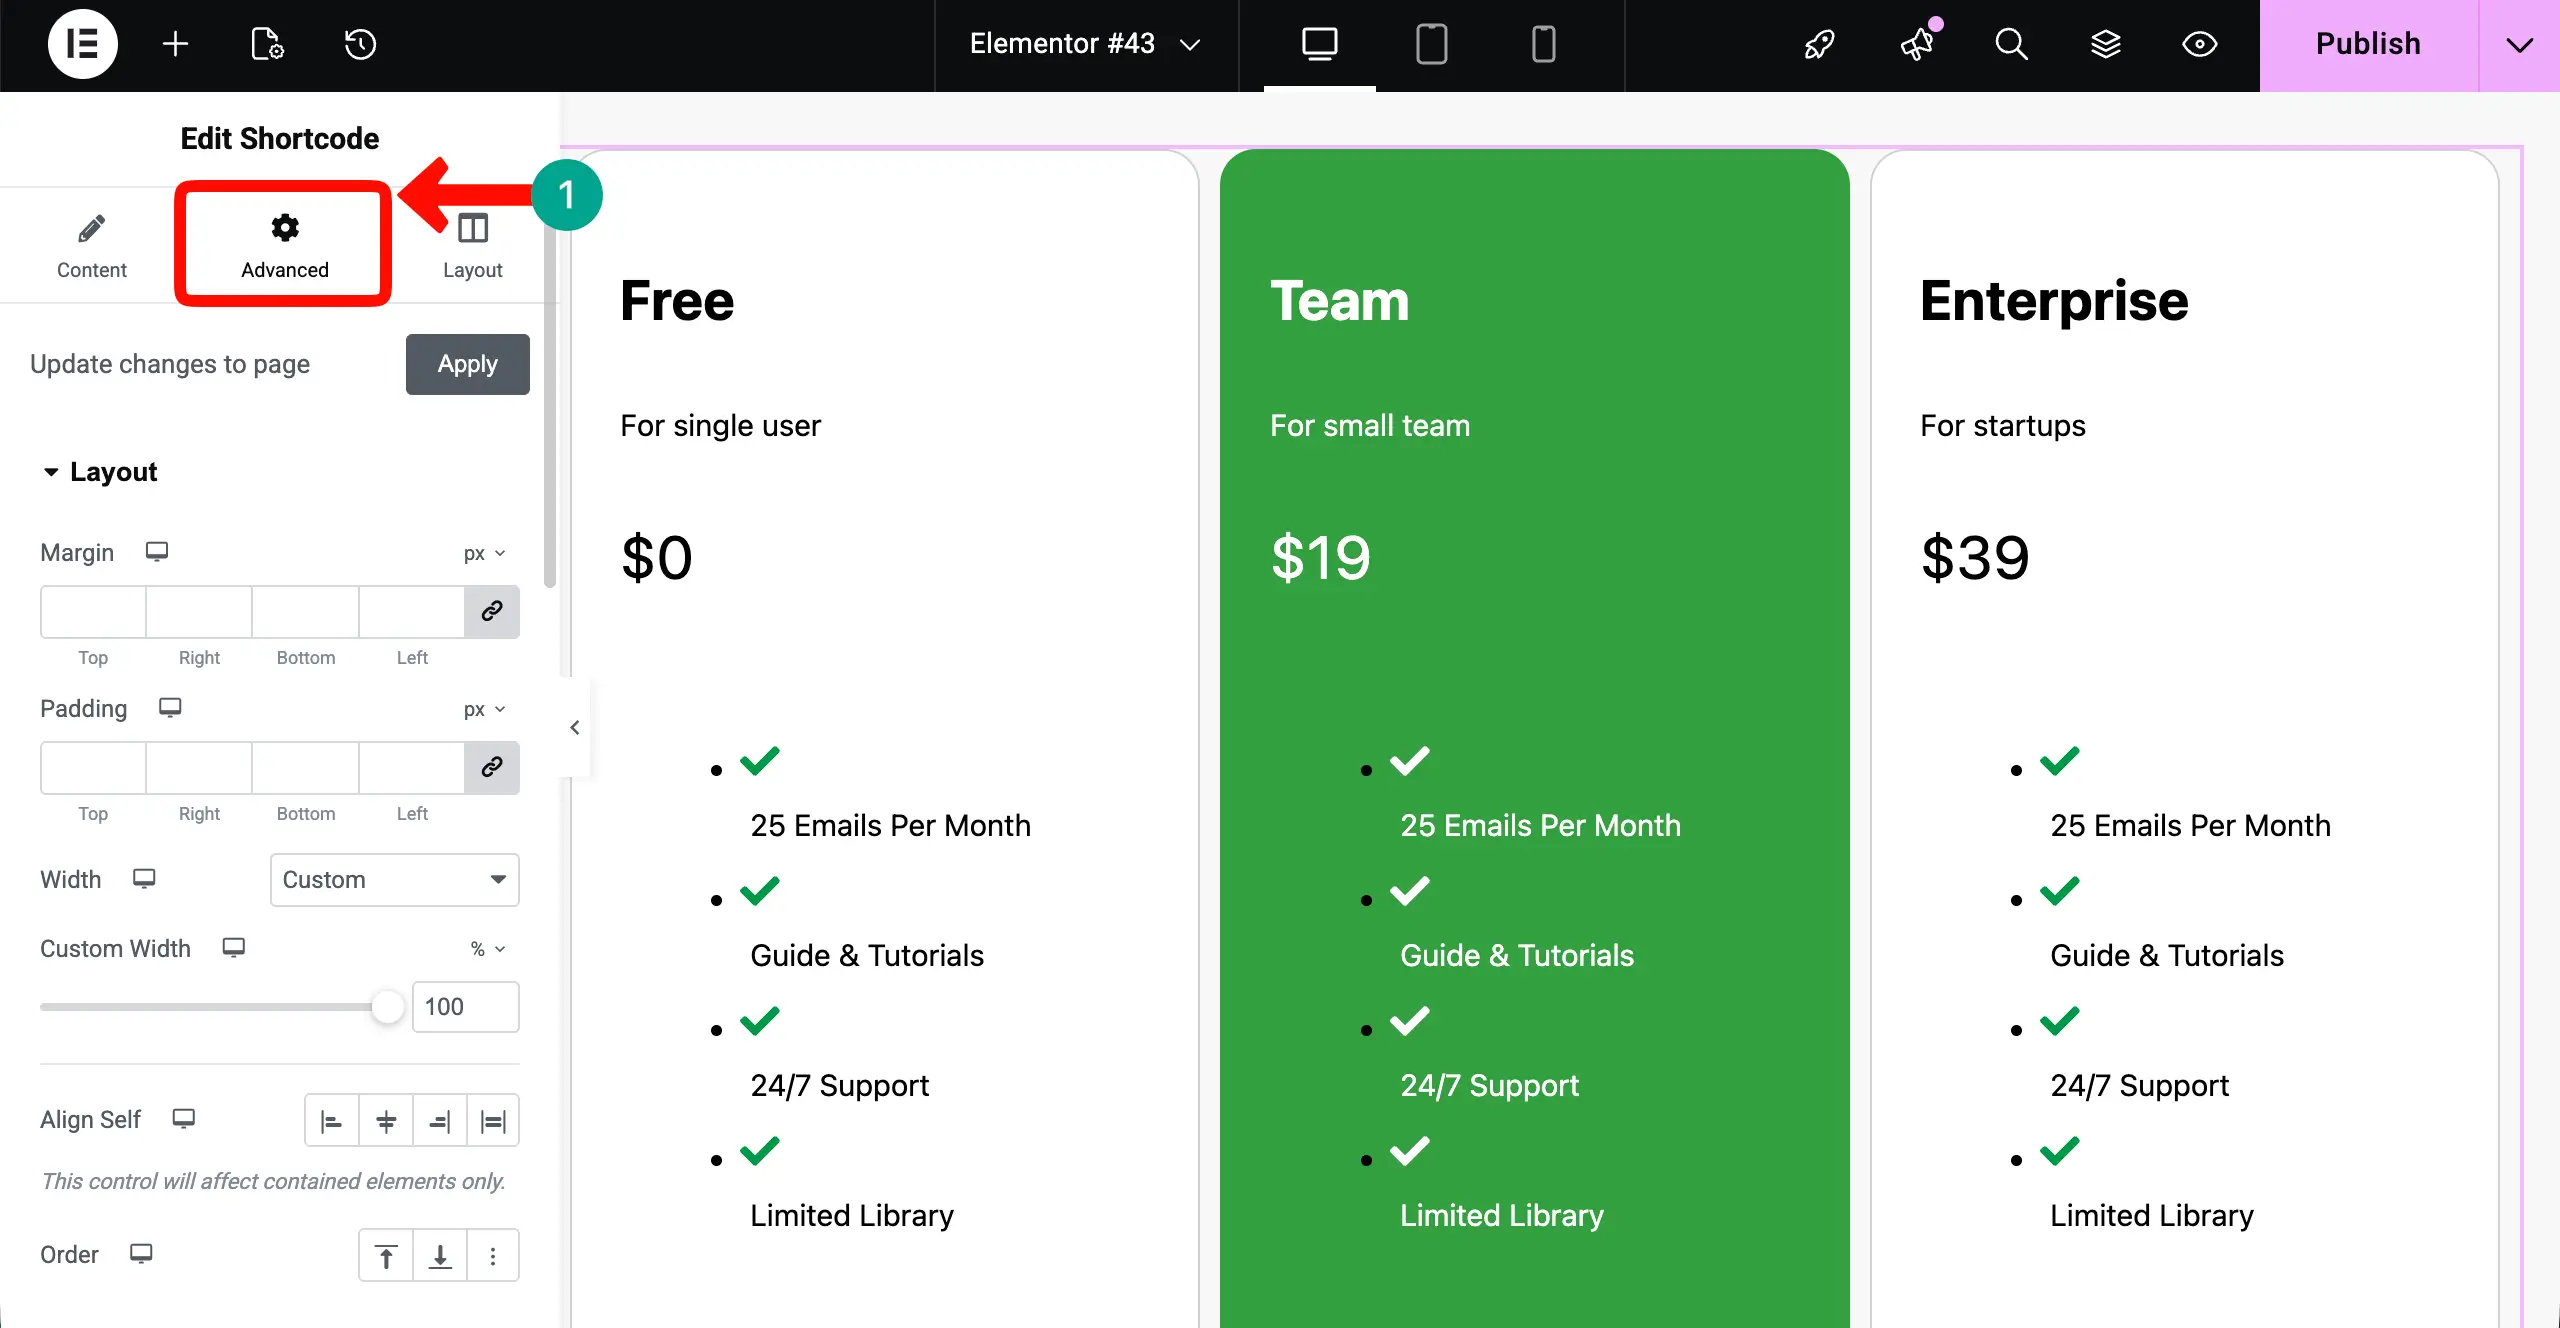
Now, you may want to modify the layout of the section. It’s very simple, as you do with any other Elementor widget or section.
Just go to the Advanced tab. You can change its margin, padding, width, alignment, z-index, and any other thing available in this tab. Hope you can do this alone.
Thus, you can add a custom pricing table to Elementor after creating it with the WP Table Builder plugin. Explore how to create a feature comparison table in WordPress.
Enabling Responsive Behavior on the Table
When using WP Table Builder with Elementor, you have two layers of options to make your table mobile responsive. Because each plugin has its own set of mobile responsiveness settings. Let’s see them.
Responsive Behavior of WP Table Builder
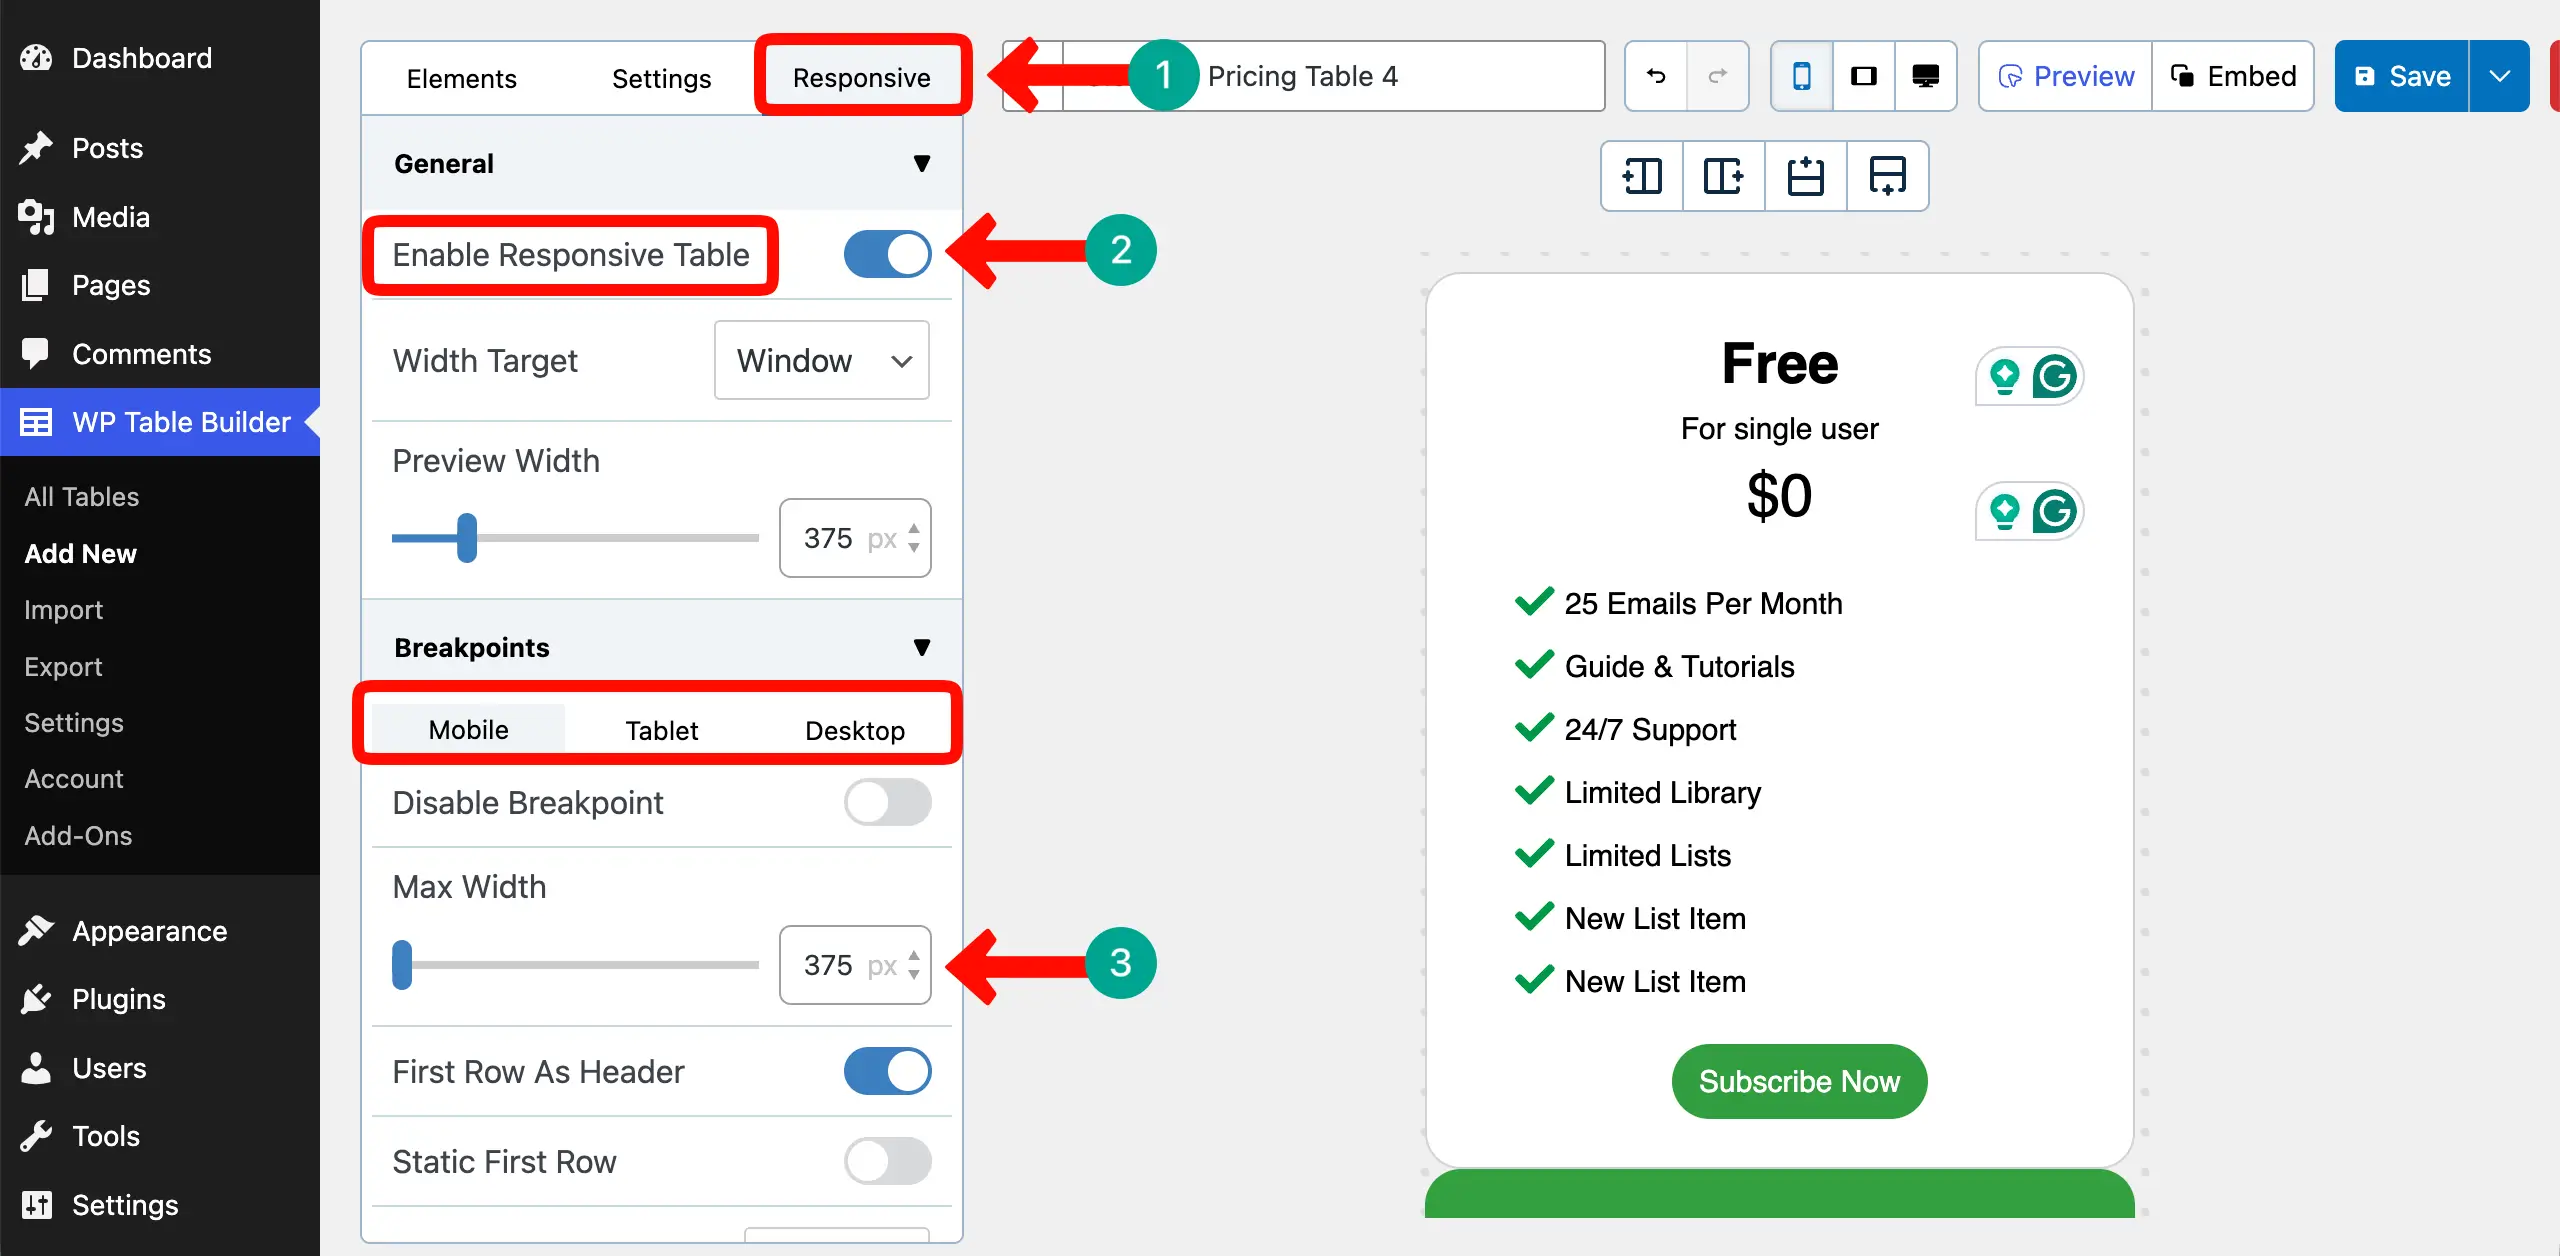
Go to the Responsive tab. You will get options to set different widths separately for each device type. Besides, there is a default width already set. You can overwrite it if needed.
For example, once we have enabled it, the layout for the mobile device type has automatically changed, as you can see in the screenshot below.
Learn how to create a mobile-responsive table in WordPress.
Responsive Behavior of Elementor
On the Elementor canvas, come to the Advanced tab. Expand the Responsive section by scrolling down the tab. You can hide this table for any respective screensize by toggling the button.
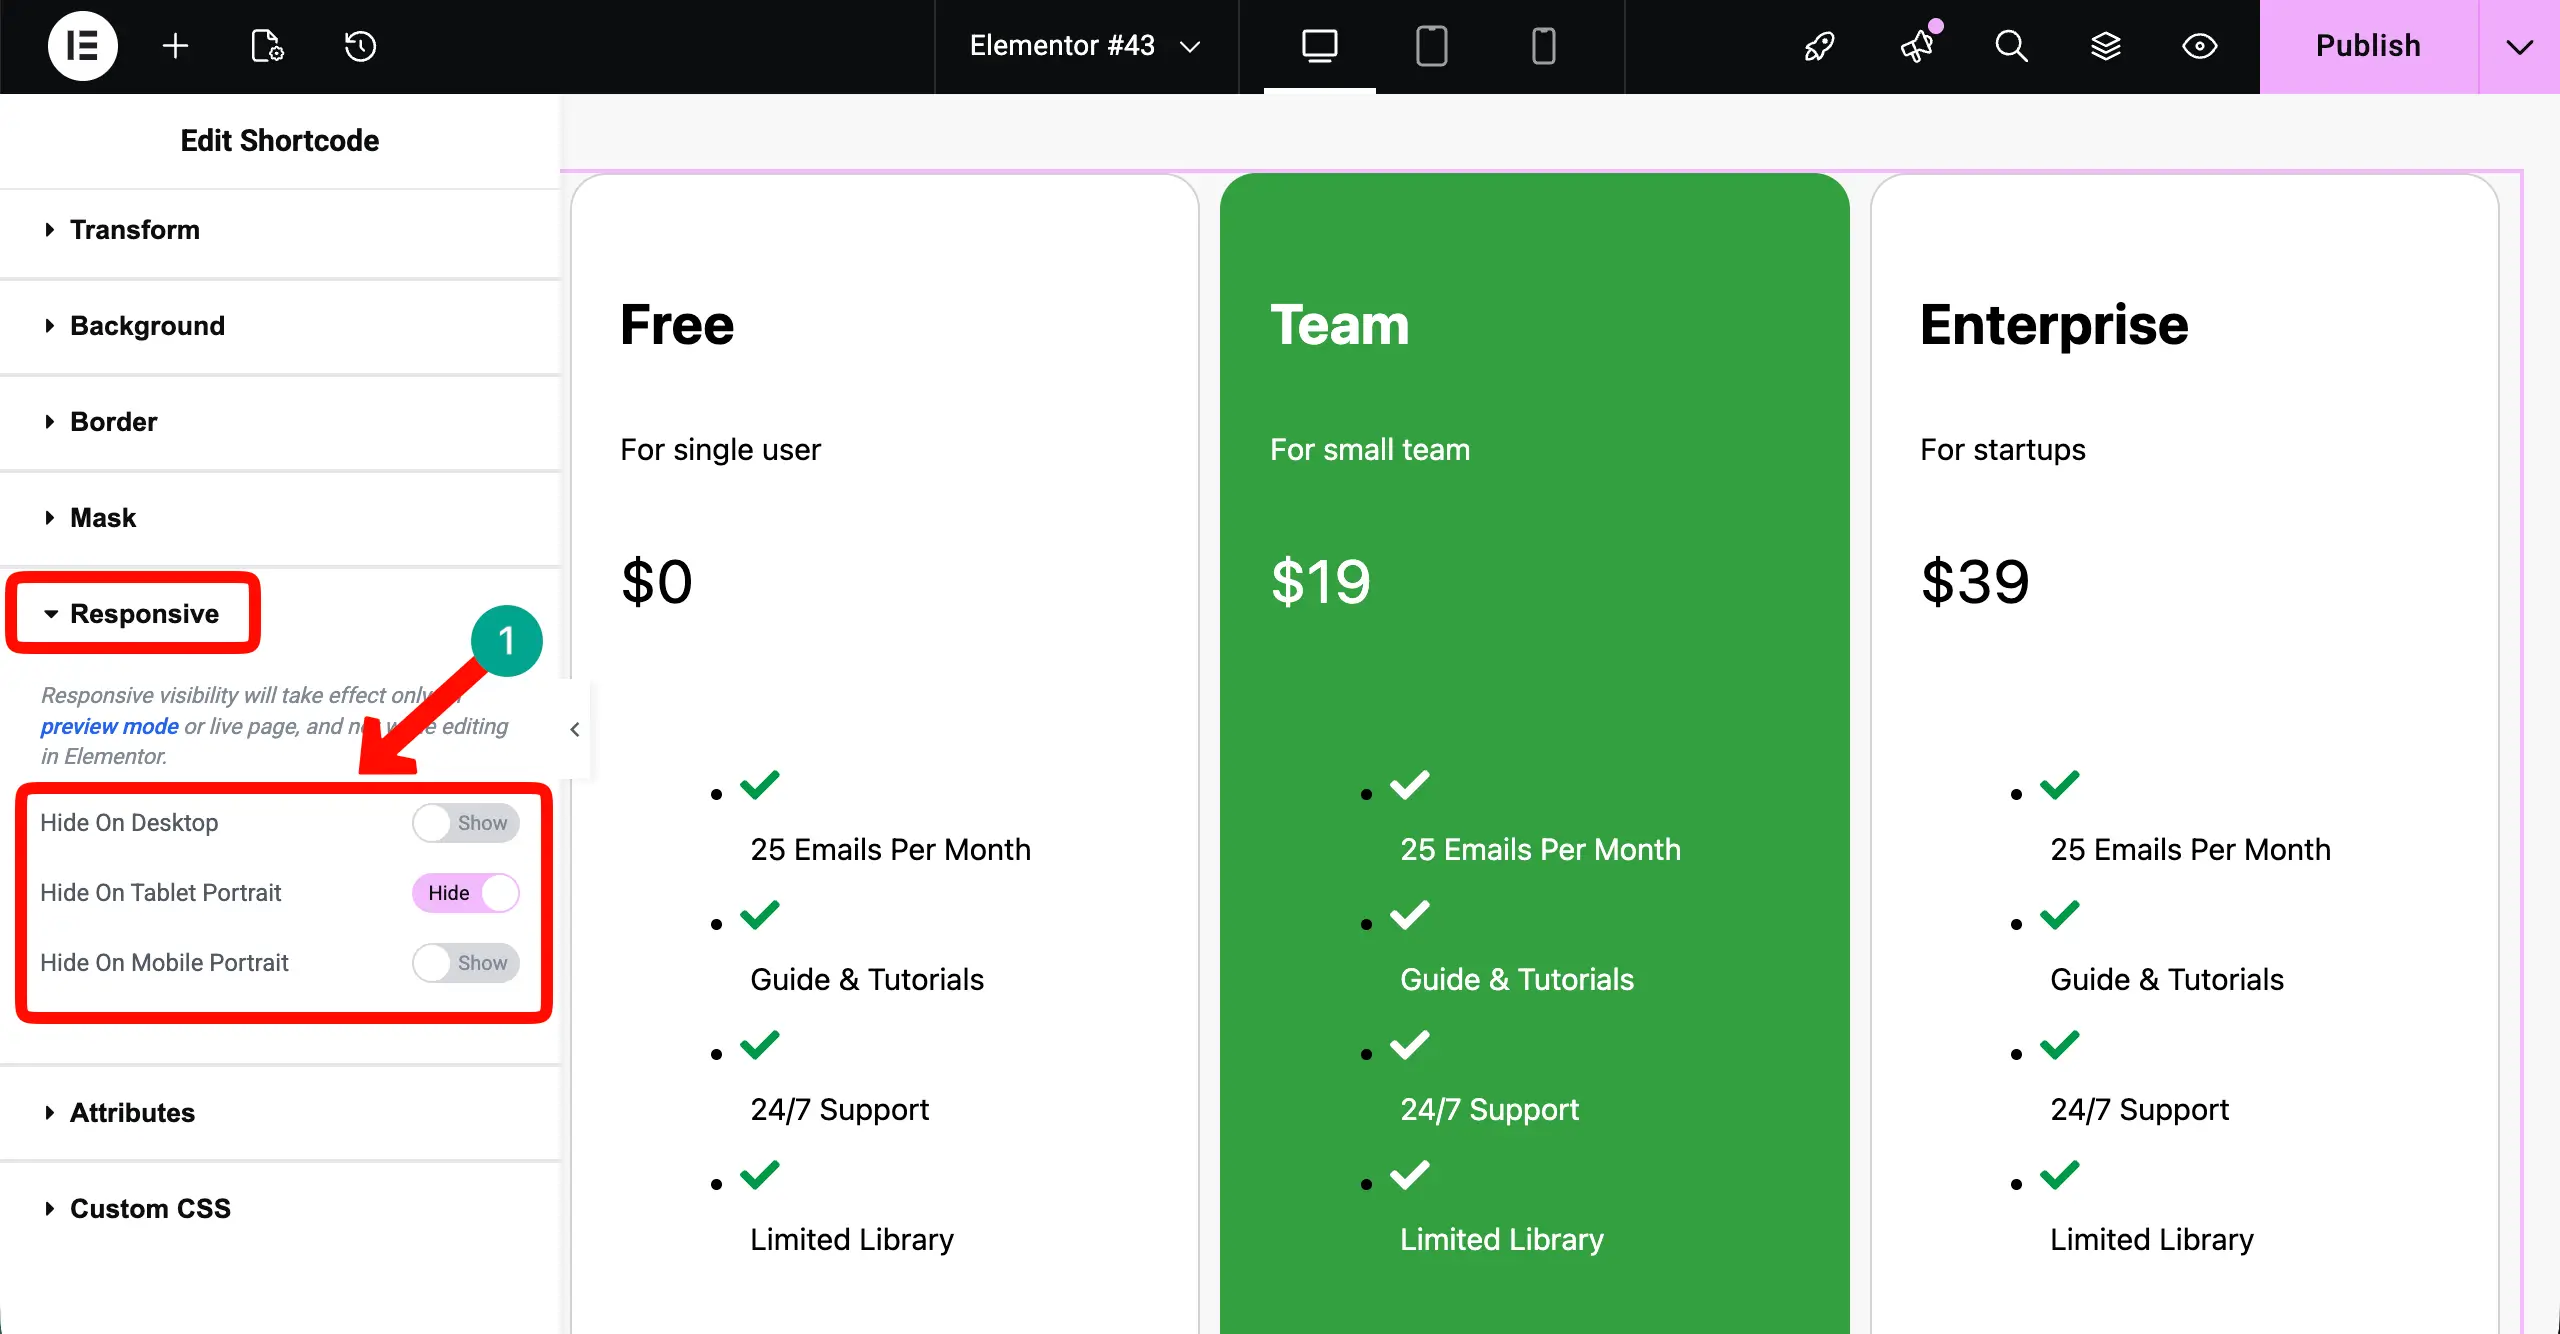
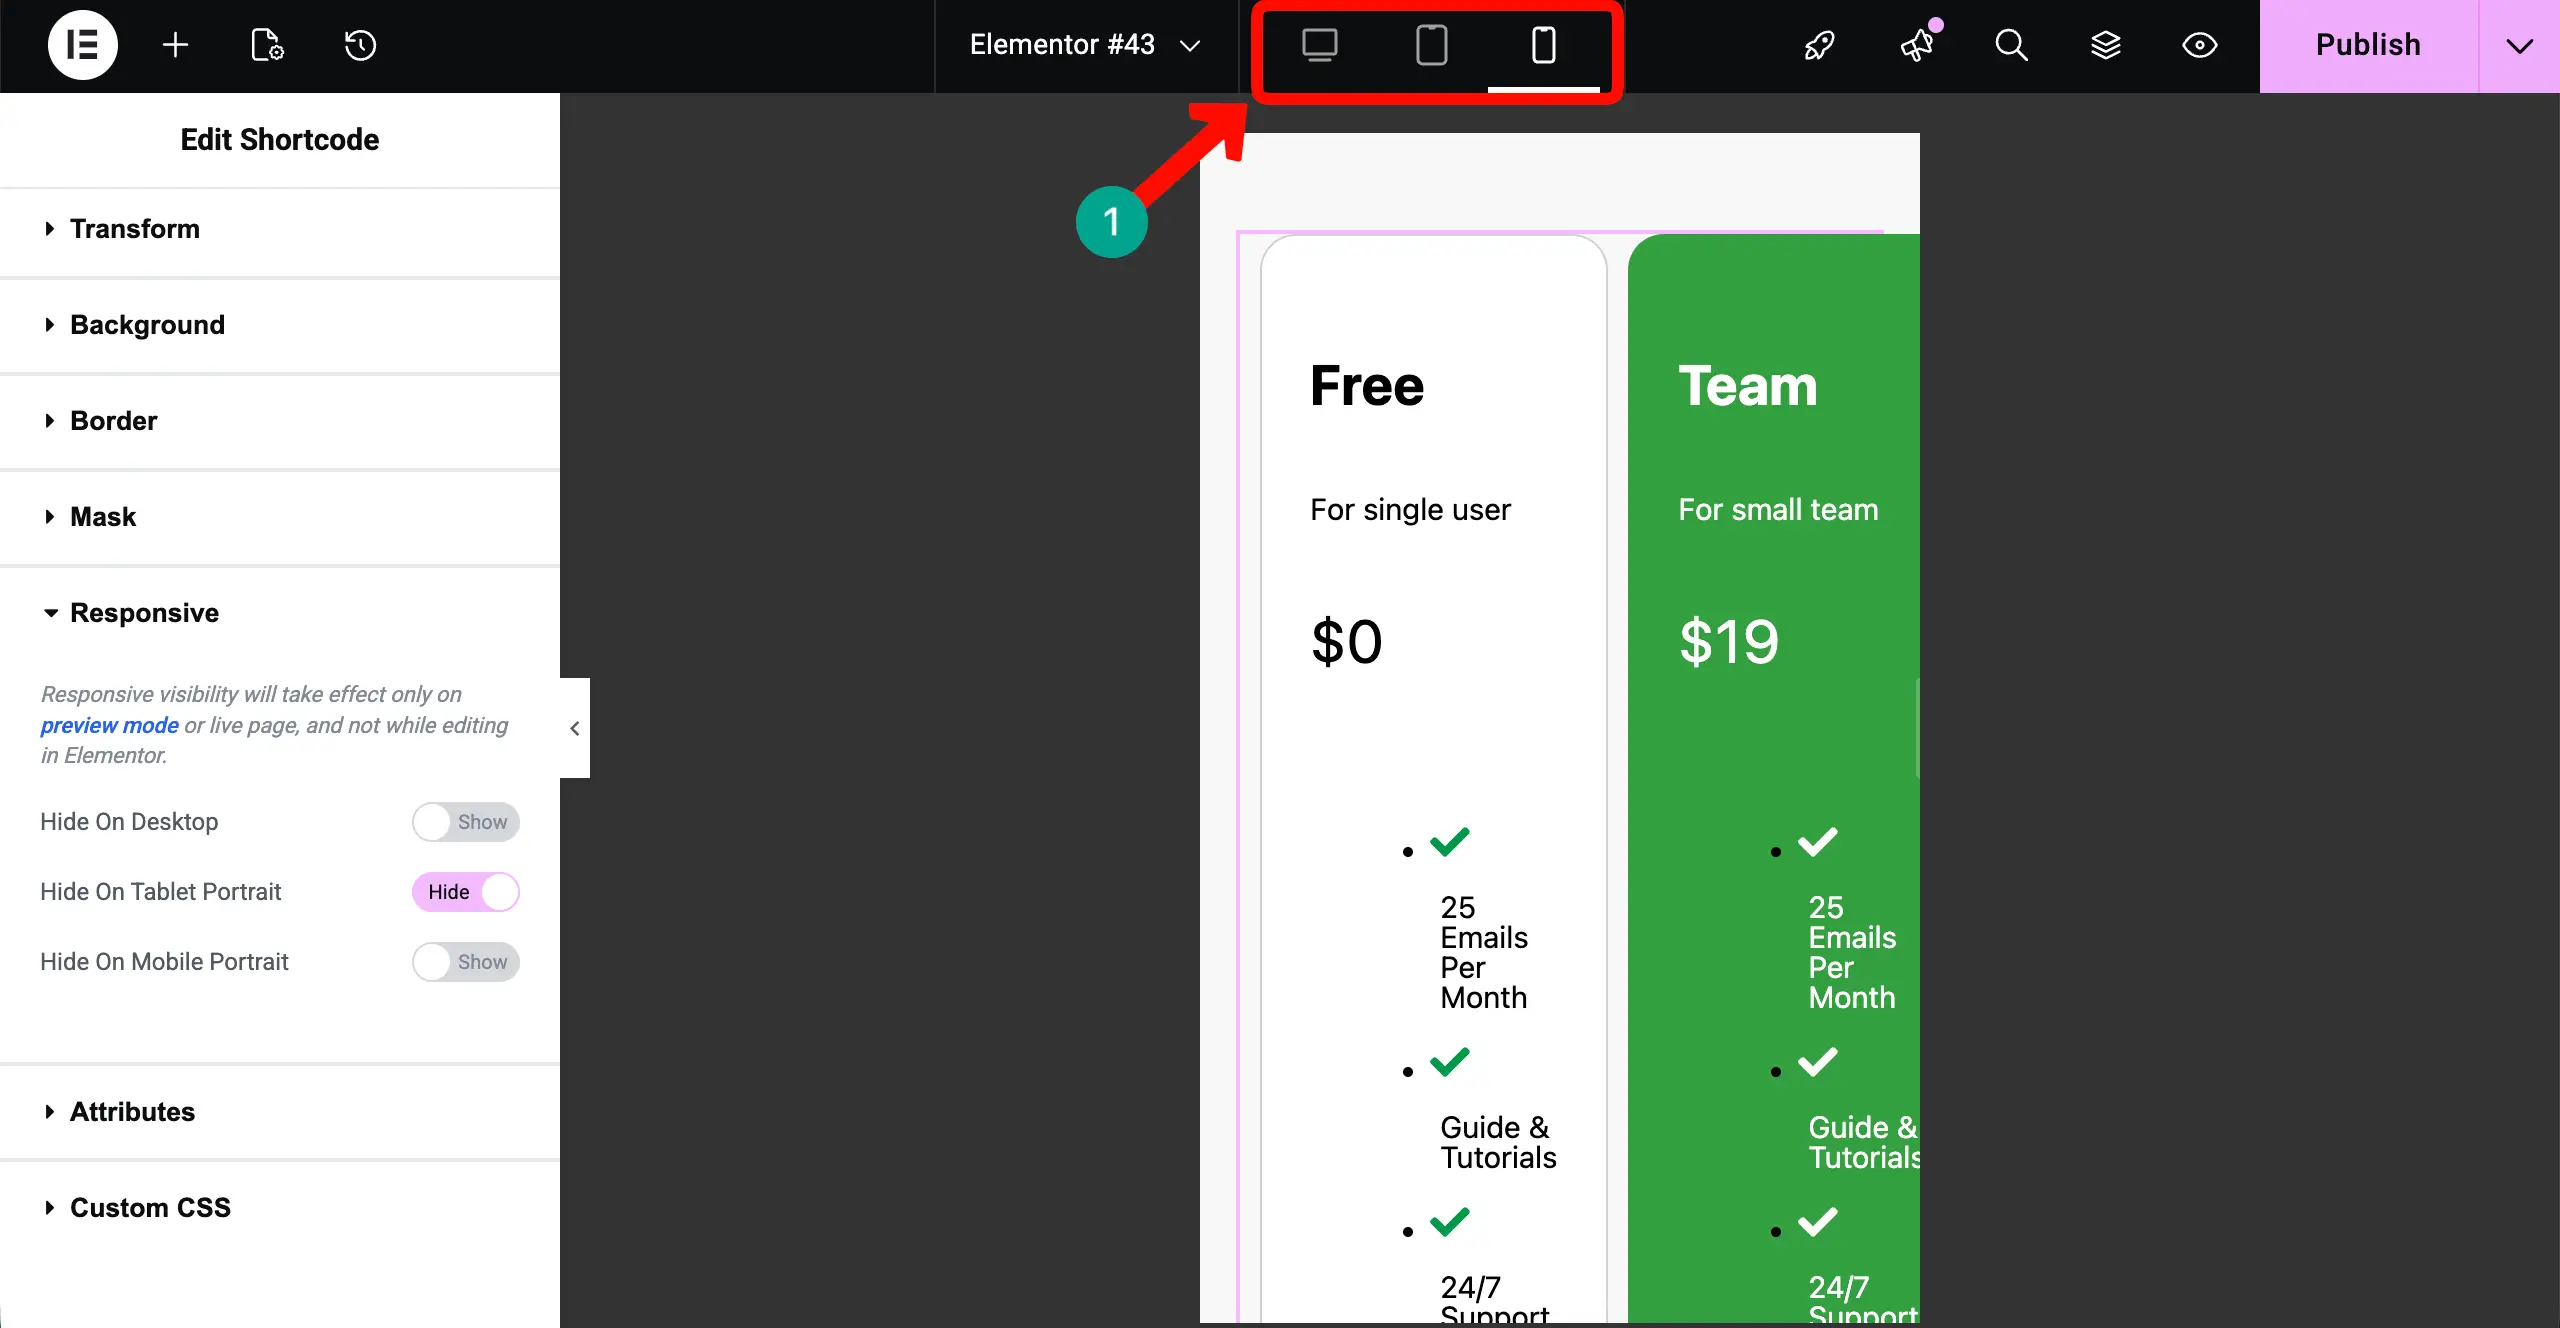
You can even switch between different screen sizes and set custom layout settings by using the options as shown below.
Note: As you have already made mobile-responsive settings on the editor of WP Table Builder, you shouldn’t make any changes to this option on Elementor.
Thus, you can make your pricing table mobile responsive.
Why Use WP Table Builder Instead of Elementor’s Pricing Widget?
Elementor’s built-in Pricing Table widget is good for simple pricing cards. It is perfect for small businesses that need to display only two or three plans. When it comes to displaying lots of information with a complex layout, you definitely need WP Table Builder. It’s useful for:
a. Feature Comparison Rows
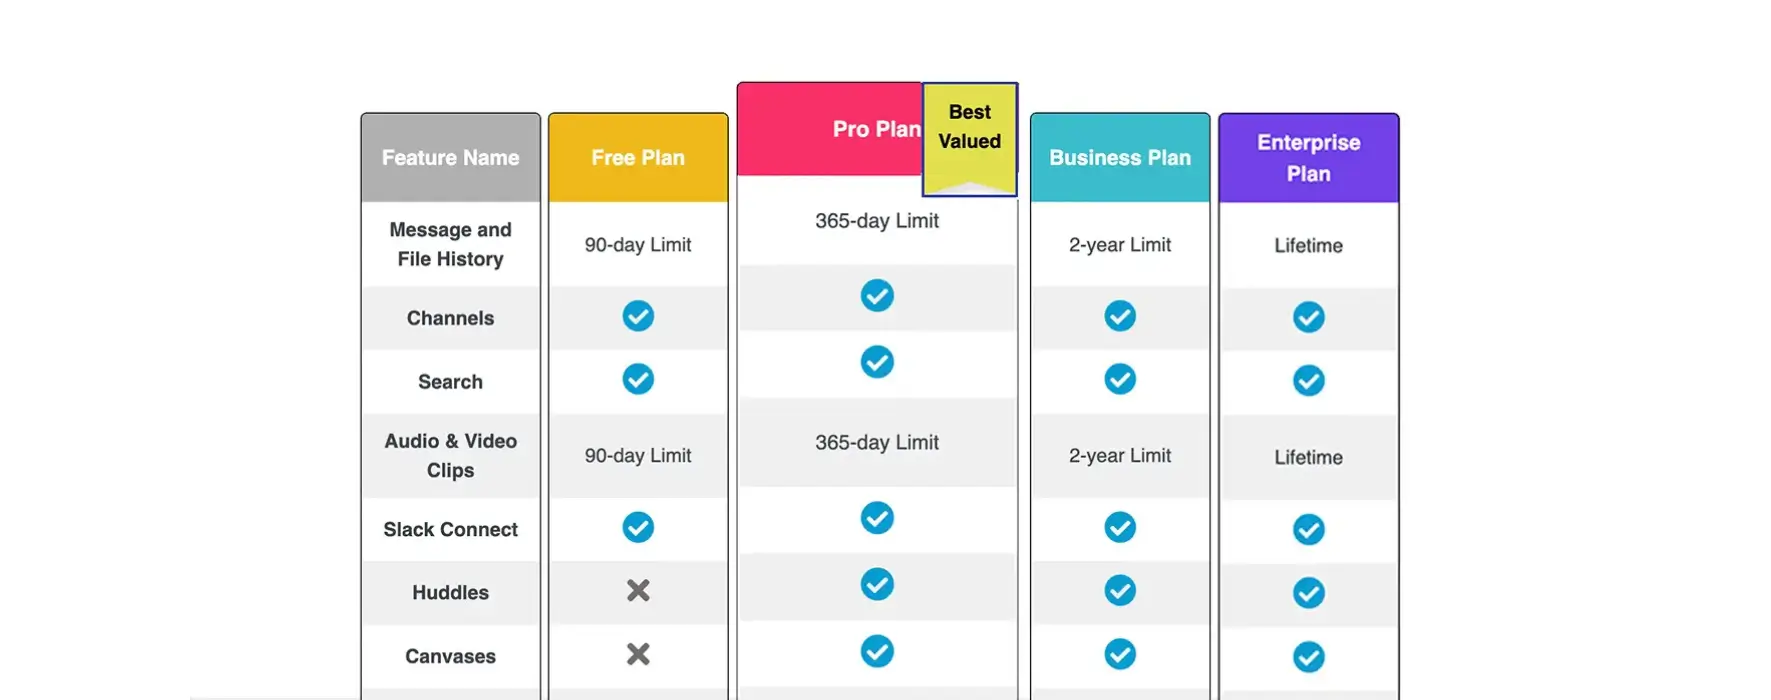
If you need feature comparison rows, WP Table Builder gives you better control. You can create rows where each feature is clearly listed in the first column, and all plans are compared side by side. This makes it easier for users to scan and understand differences between plans.
b. Column Highlighting
For column highlighting, WP Table Builder makes the job simple. You can visually highlight a specific column to show the most popular or recommended plan. This works very well in comparison tables where you want to guide users toward one option.
c. Sticky Header
If you need a sticky header, structured tables work better. With large pricing tables, a sticky header keeps the plan names visible while users scroll down. This improves user experience, especially when the table contains many features.
d. Make Rows and Columns Sortable
If you have 100+ rows and columns, making the table sortable can remarkably increase its user-friendliness. WP Table Builder has this feature, which helps organize table content and make it easier to read. But in Elementor, card-style layouts become long and boring.
e. Mixed Content Inside Cells
Not only texts. You can add various other types of content to the table, like icons, buttons, images, ribbons, HTML, styled lists, ratings, badges, etc., inside each cell. This gives you more flexibility than a fixed pricing card layout. This can help your content become more readable.
f. LLM-friendly layouts
It is also useful for structured, LLM-friendly layouts. Tables are built clearly and organized. Search engines and AI tools can better understand structured data in rows and columns. This can help your content become more readable and machine-friendly.
Common Mistakes to Avoid
When adding a custom pricing table inside Elementor, many users make small mistakes that can break the layout or design. These mistakes are easy to fix if you know what to watch for. Let’s look at the most common ones so you can avoid them.

1. Trying to Edit Table Cells Inside Elementor
Once you insert the table using a shortcode, you cannot edit the table content directly inside Elementor. The table is controlled by WP Table Builder. If you try to change text or structure, always go back to WP Table Builder to edit rows, columns, or cell content.
2. Forgetting to Adjust Section Width
Sometimes the table looks squeezed or misaligned. This usually happens because the Elementor section width is set to boxed or has padding. Make sure you adjust the section to full width if needed. Also, check column padding and margins to give the table enough space.
3. Overriding Table Styles with Elementor CSS
If you add custom CSS in Elementor, it can sometimes override the table’s original design. This may break borders, spacing, or colors. Be careful when adding global styles. Try to style the table inside WP Table Builder first before applying extra CSS.
Explore the best WordPress table builder plugins.
4. Using Too Many Nested Containers
Too many nested containers can make the layout heavy and difficult to manage. It can also affect responsiveness. Keep your structure simple. Add the table inside a clean section with minimal containers for better performance and easier control.
Conclusion
Creating a custom pricing table does not have to be hard. With WP Table Builder and Elementor, you can build pricing sections that are clear, structured, and powerful. You are not limited to simple cards anymore. Everything is now just at your fingertips.
You can design detailed comparison tables, highlight your best plan, and organize large feature lists in a clean way. This gives your visitors more clarity and helps them make faster decisions. Now, if you have any questions unanswered, mention them in the comment box below.
Leave a Reply
You must be logged in to post a comment.