A pricing table is the place where visitors stop browsing and start thinking about buying a product. When users reach the price page, they no longer ask what your product does. They ask some serious questions: Which plan is right for me? Is this worth the price? Can I trust this decision?
A high-converting pricing table gives clear answers to these questions. It shows the differences between plans, highlighting the best option. It removes doubt. It helps users compare features fast and understand value at a glance.
When the layout is clean and the message is clear, people feel more confident to choose a plan. In this post, we’ll cover a step-by-step guide on how to create a high-converting pricing table in WordPress. Be with us till the end!
How to Create a High-Converting Pricing Table: Step-by-Step
Now, in this section, we’ll cover a detailed guide on how to create a high-converting pricing table, explaining each step with screenshots. Hope you will be able to follow and do the same on your website to create any pricing tables after that.
Step 01: Decide the Structure of Your Pricing Table
Before you start to create any table, there are several points you must check to ensure. They are:
- Decide the Structure of Your Pricing Table
This is more important than colors, fonts, or button styles. The way you organize your plans directly affects how people make decisions. A clear structure makes users feel guided. A messy structure makes them feel confused. So, take time to plan it first.
- Best Practices for the Pricing Table
Most pricing tables usually have three plans. Place your main or recommended plan in the middle. Also, don’t forget to highlight your recommended plan in a way that easily catches the eyes of potential buyers. We’ll show how to do it below.
- Give Each Plan a Clear Role
You should give each plan a specific role that it will serve. For example, the Free or Basic plan should focus on lowering the barrier to entry. The Pro or Yearly plan should be designed as the best value option. The Lifetime plan should target serious buyers who want a long-term solution.
Step 02: Install and activate WP Table Builder
The default Table block lacks many advanced features that you need to create a high-converting pricing table. To overcome this limitation, you need an additional plugin. WP Table Builder is such a plugin that you can use in this regard.
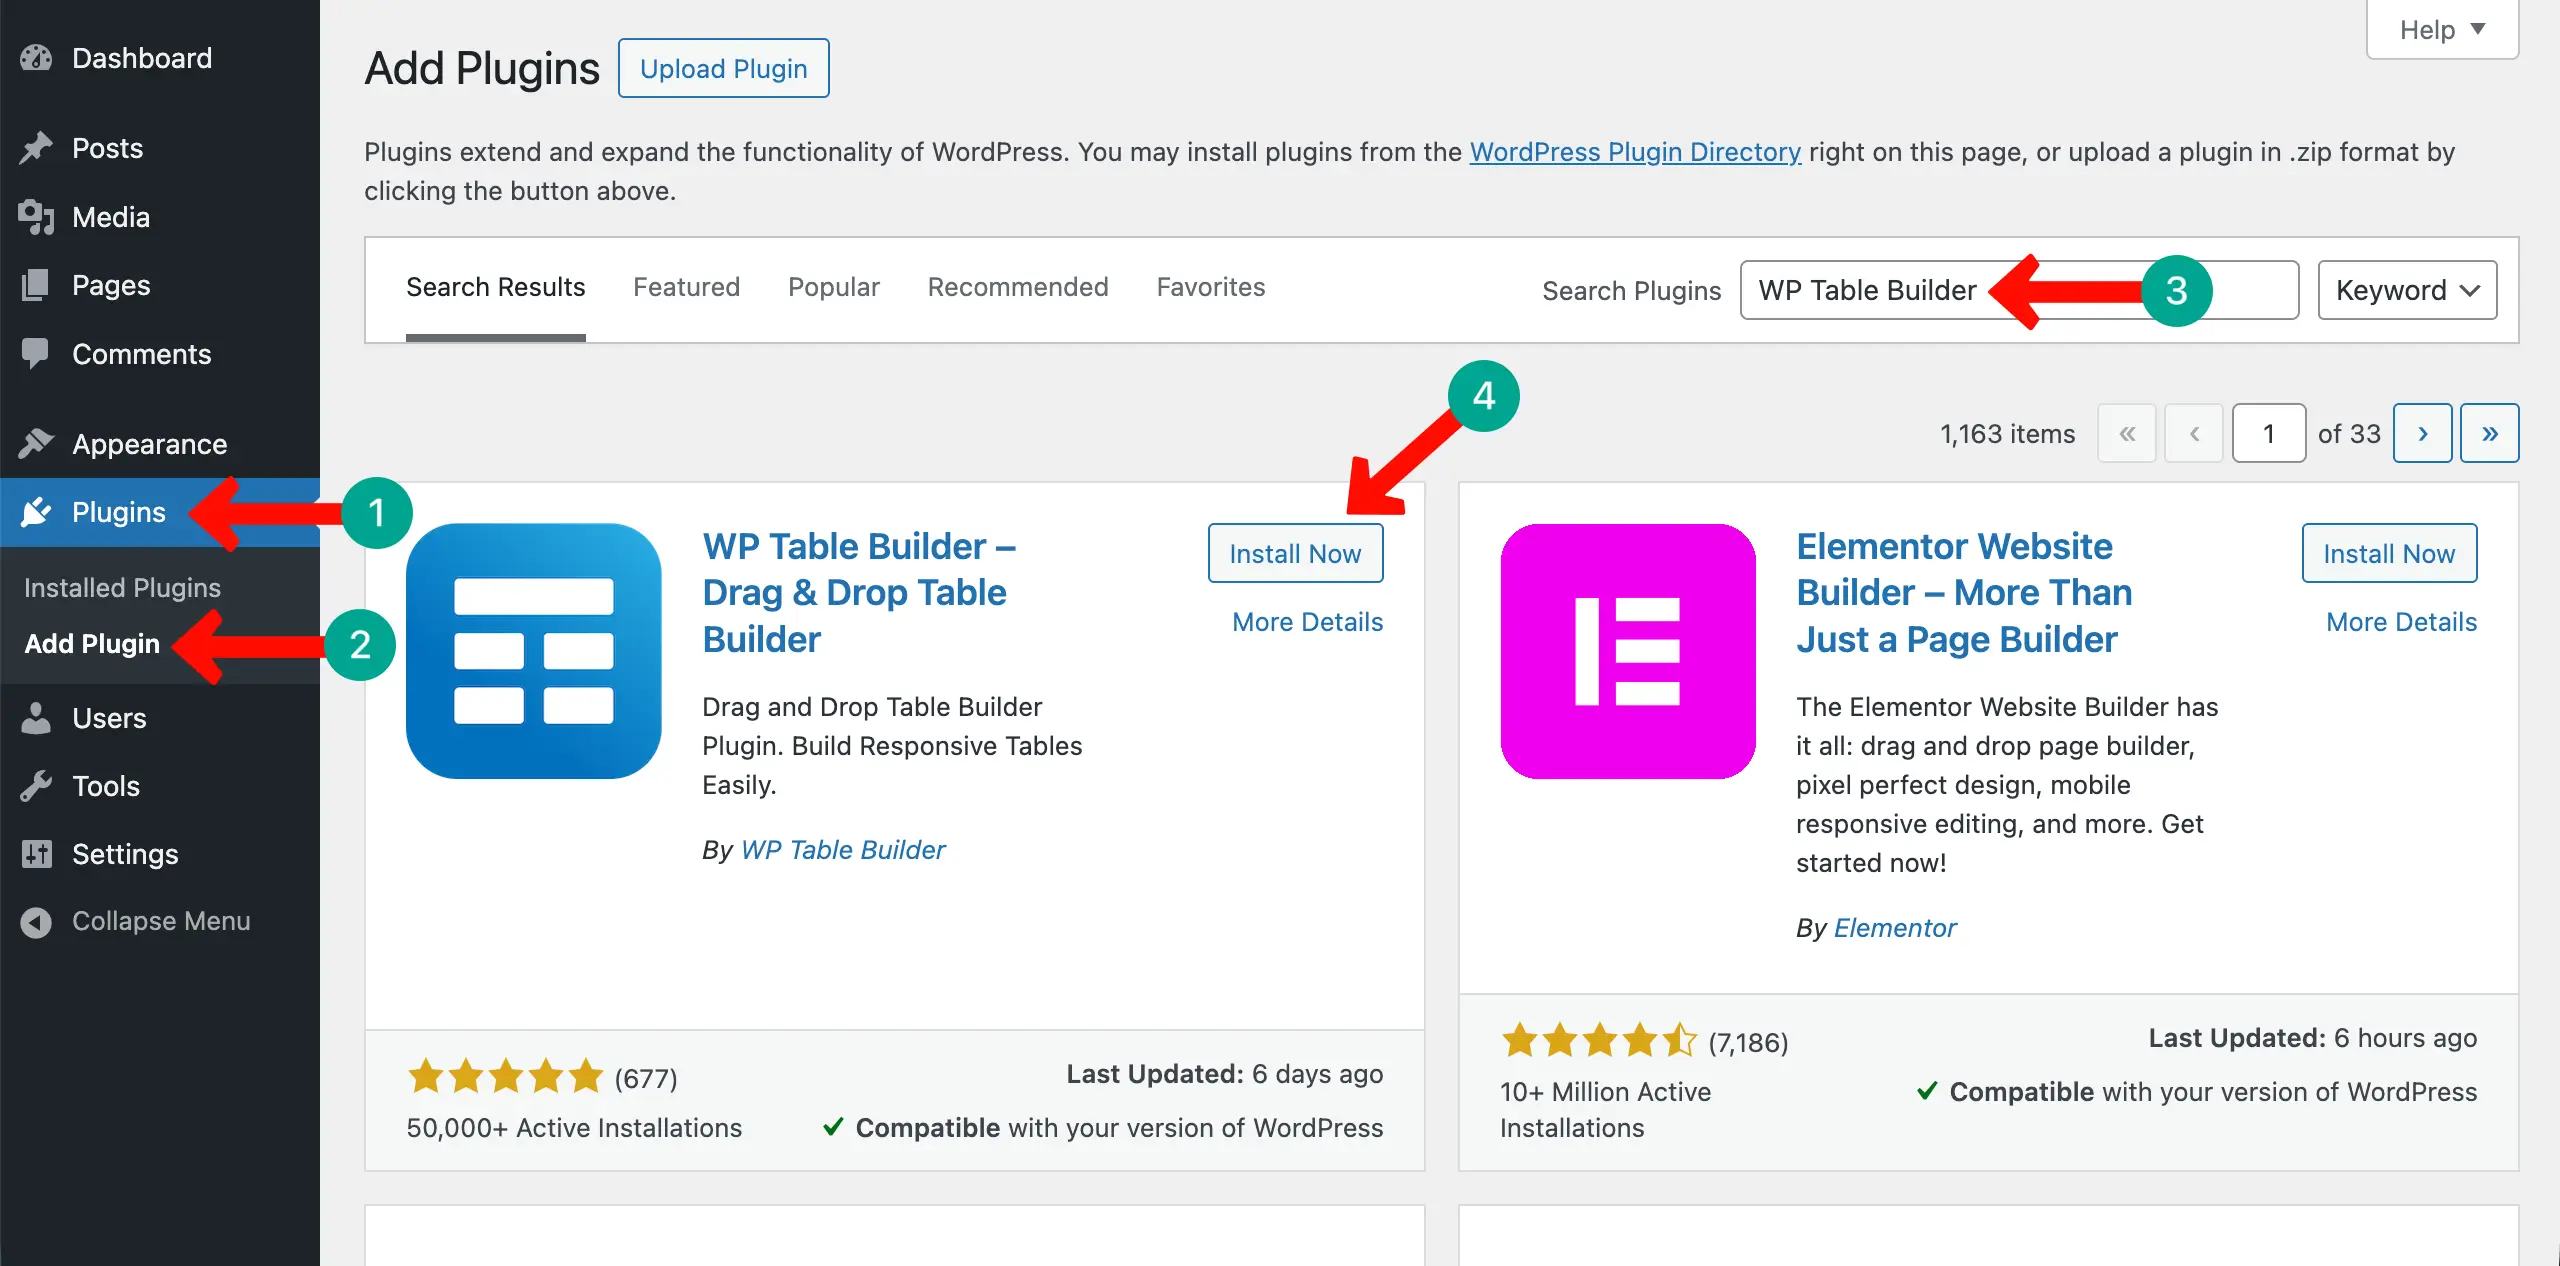
It’s a drag-and-drop table builder plugin and extremely user-friendly. Navigate to Plugins > Add Plugin. Type WP Table Builder in the search box. Once the plugin appears, install and activate it.
Step 3: Create a New Table and Define Columns
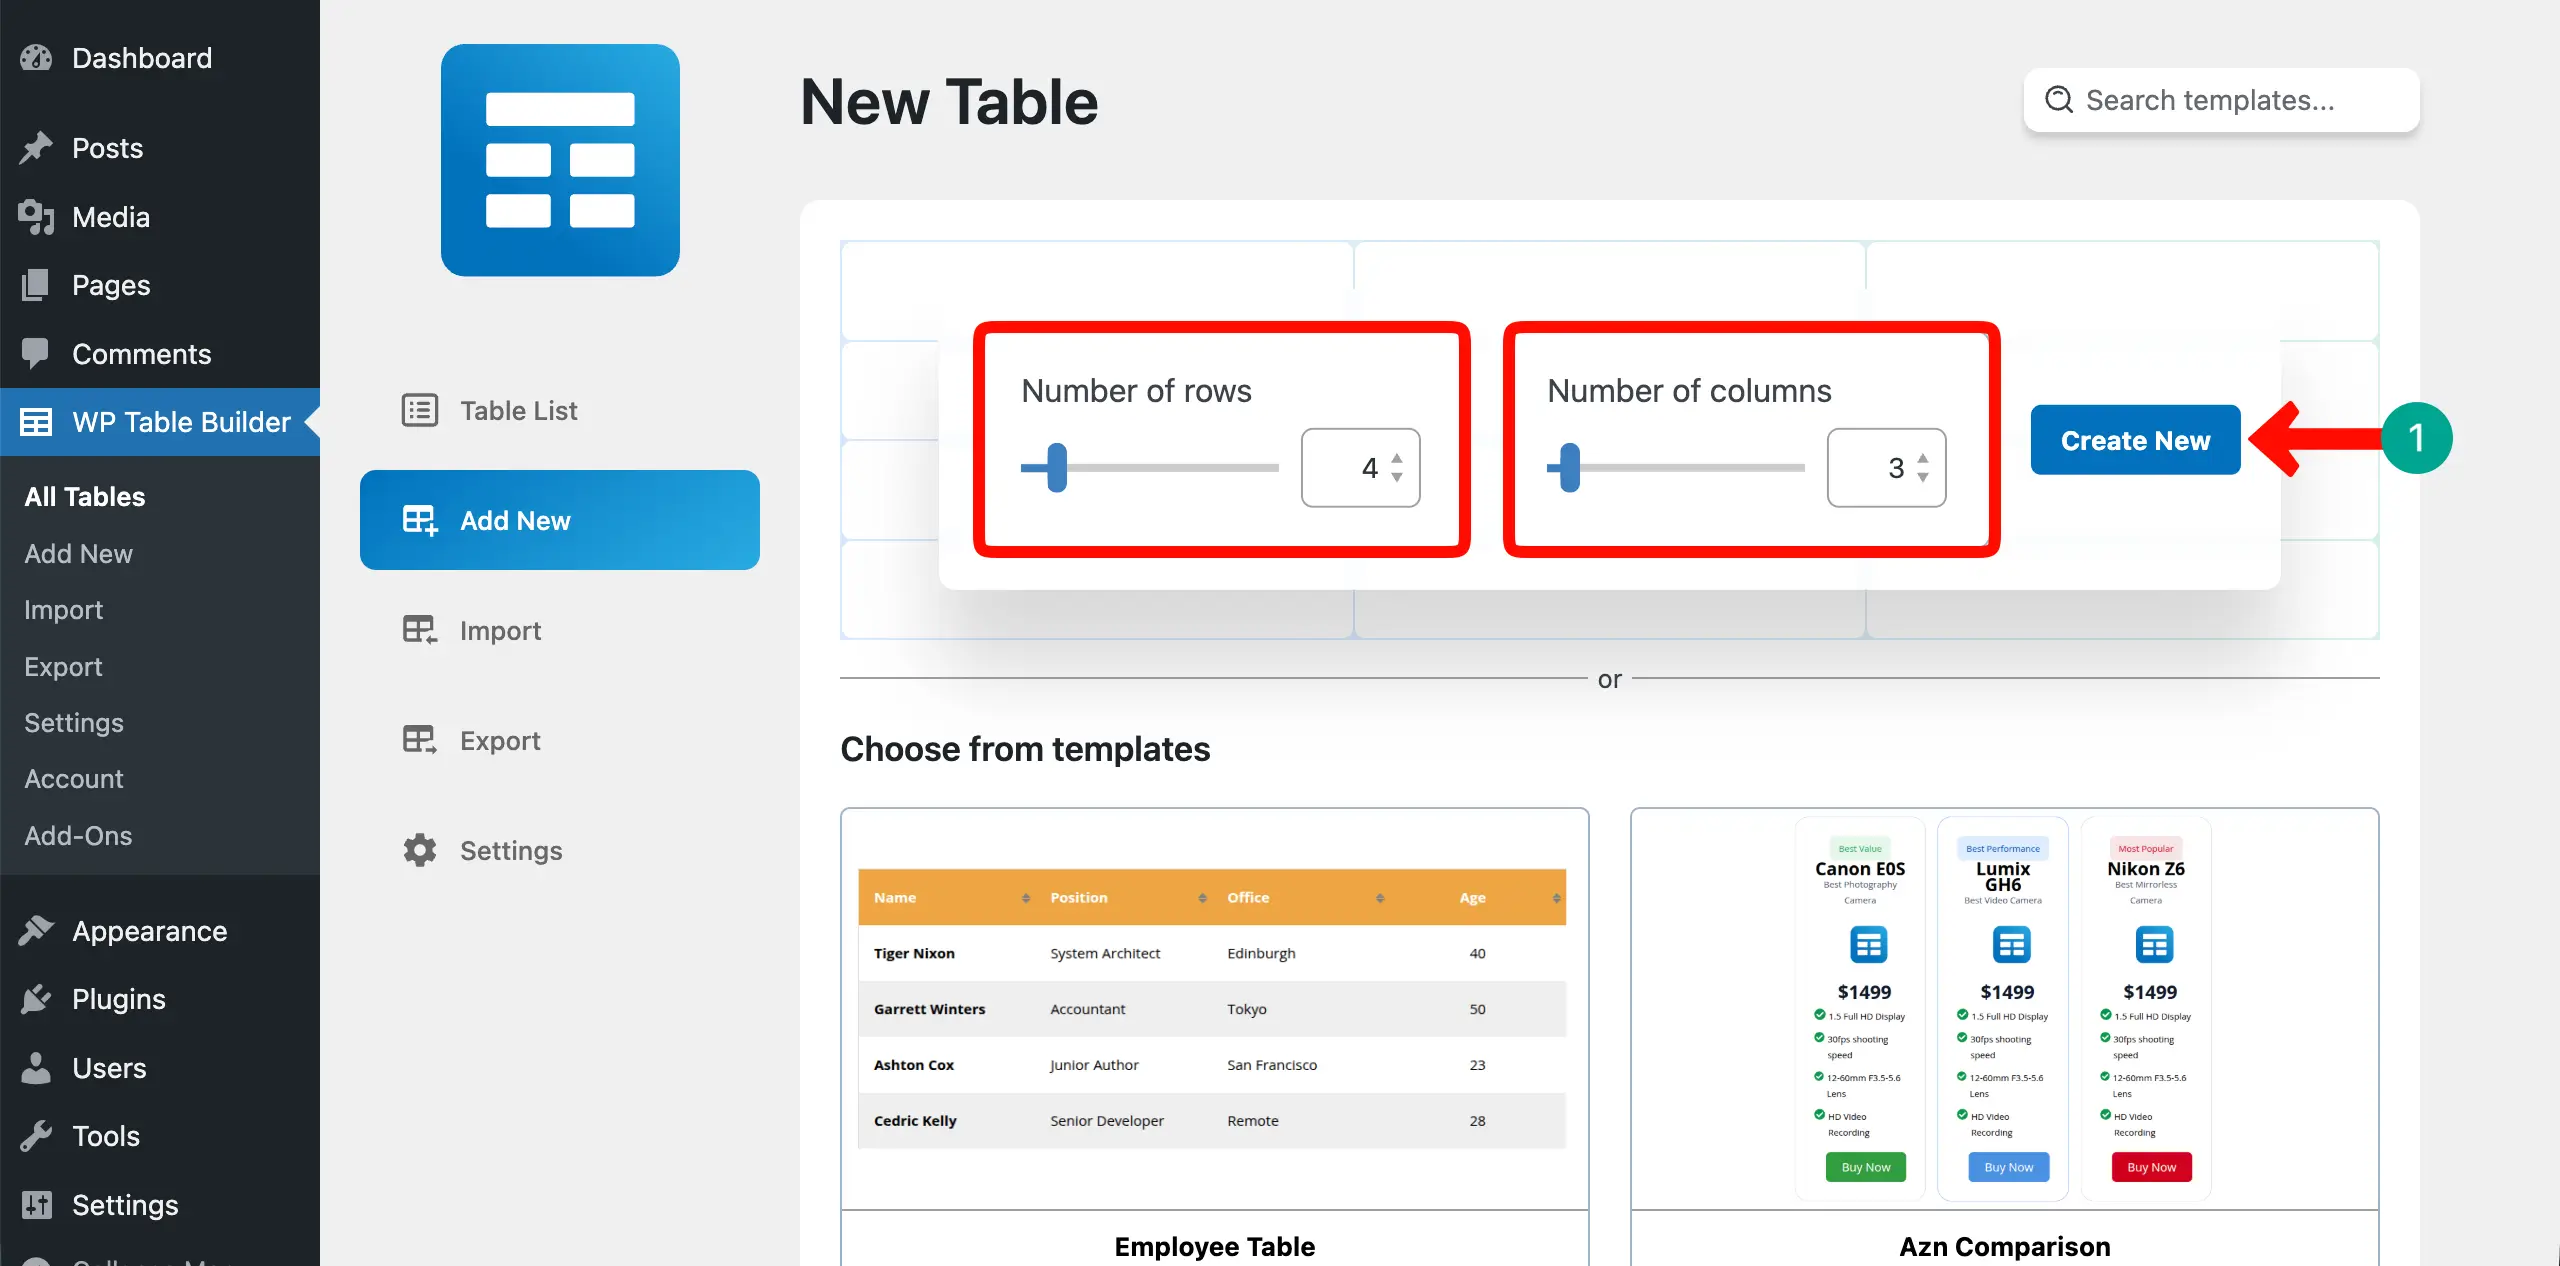
Once the plugin is installed, you’ll see a new menu has been added to the admin bar. Go to WP Table Builder > Add New.
You may build the table from scratch or use a readymade template. You’ll see lots of prebuilt templates if you scroll the page.

If you want to create the table from scratch, define the number of rows and columns you want. Then, hit the Create New button.
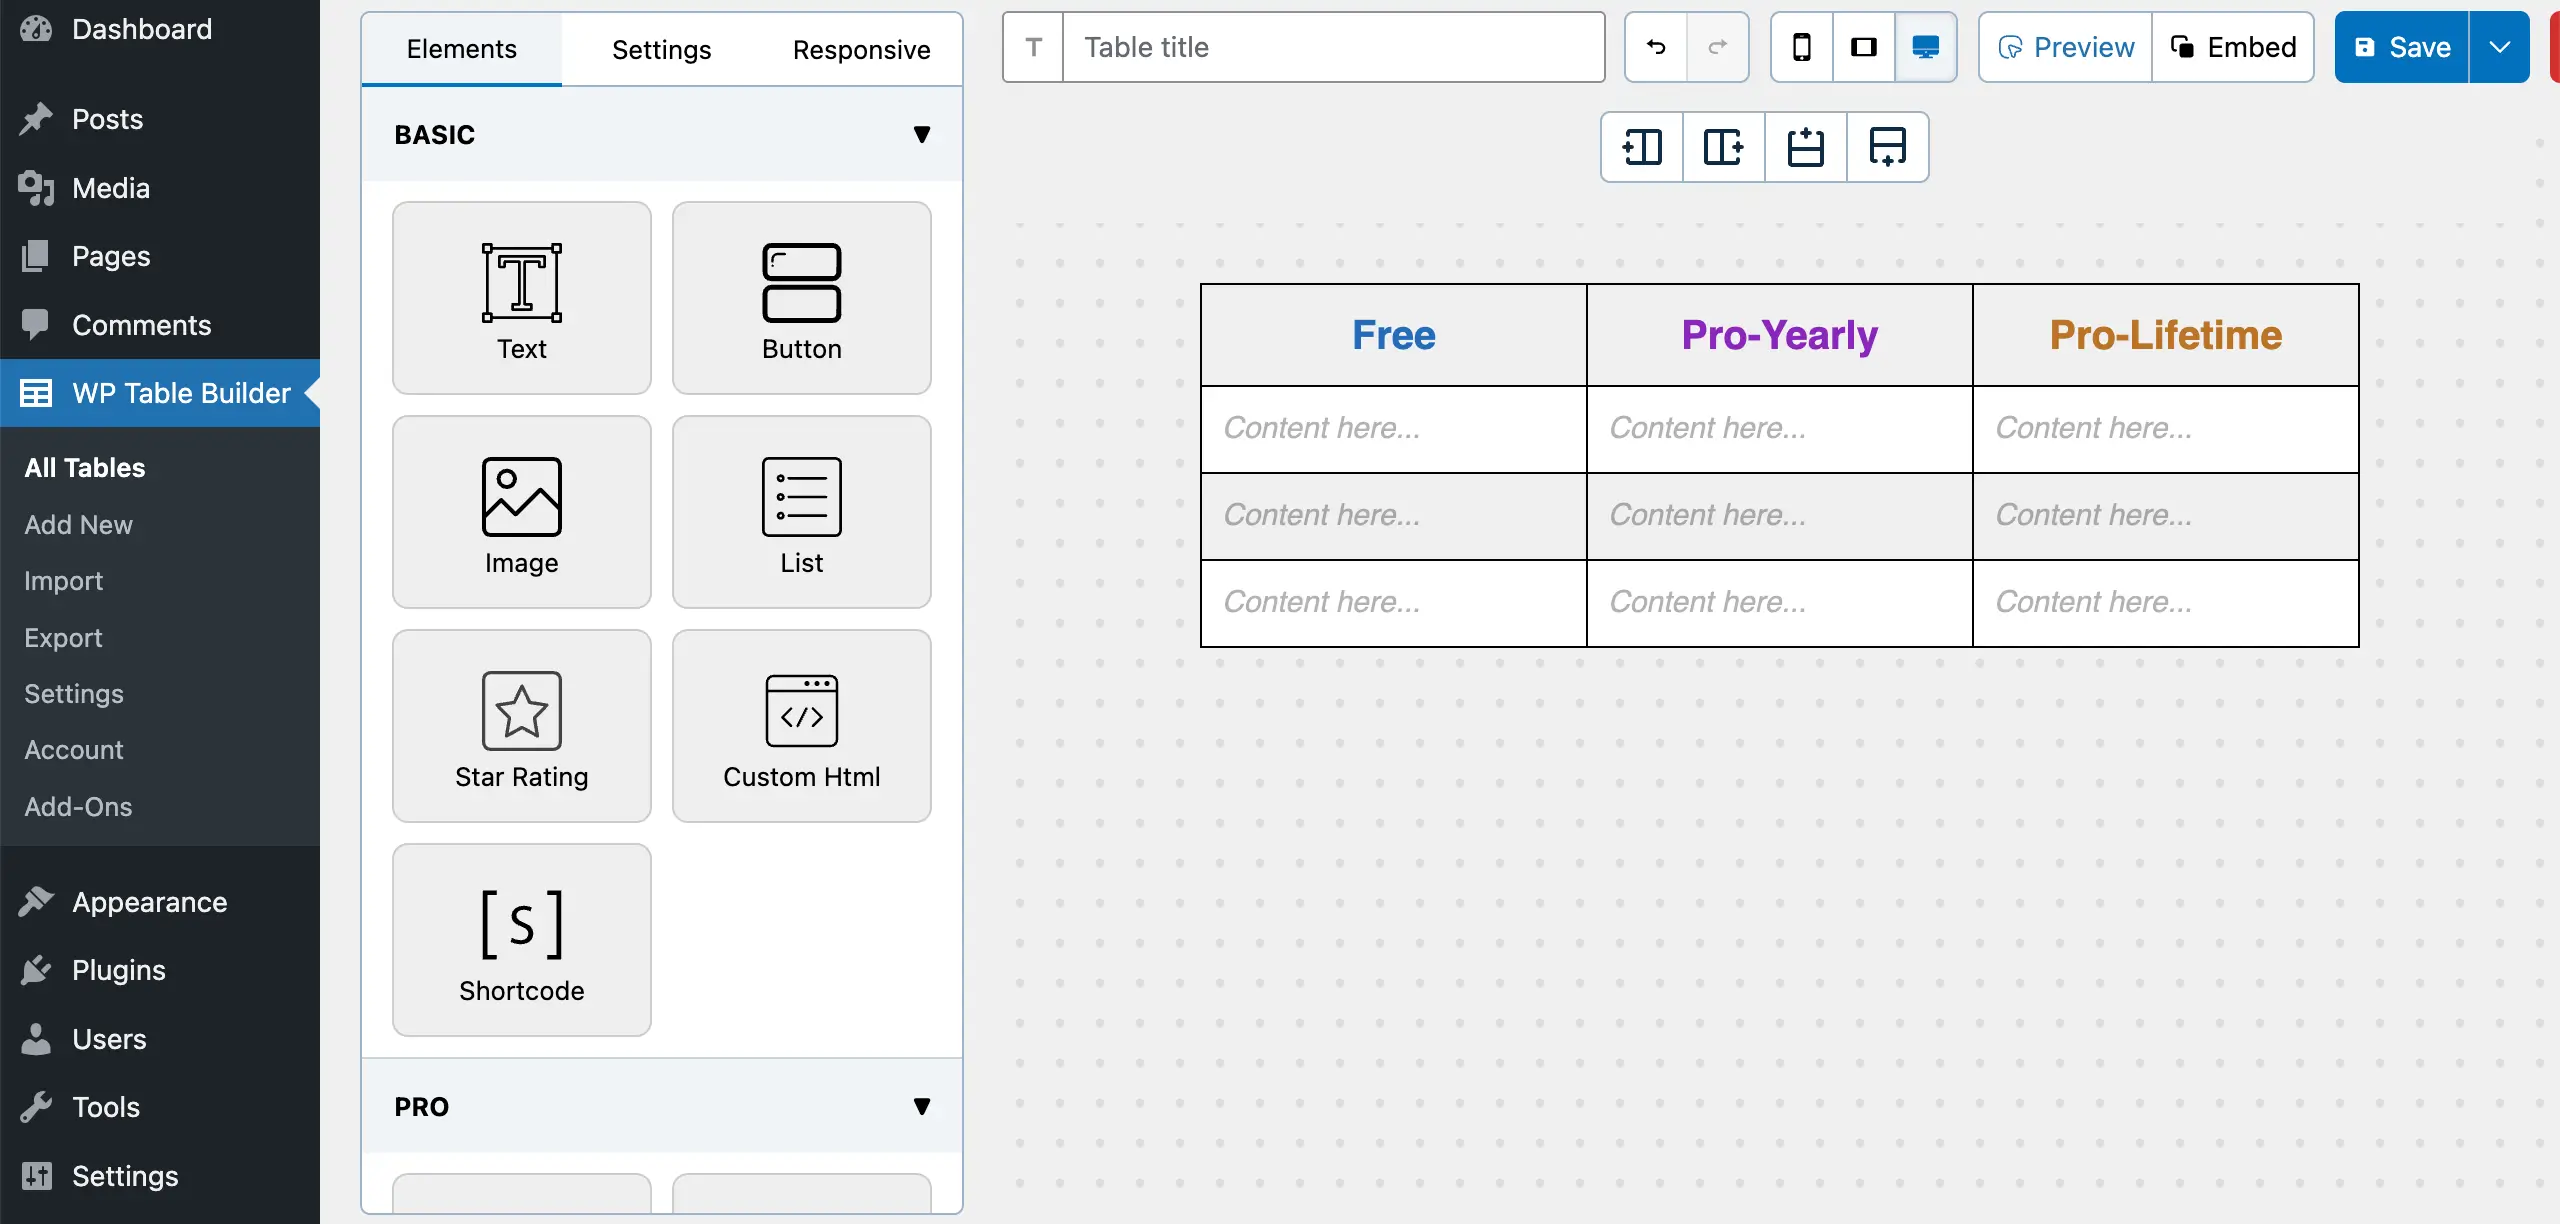
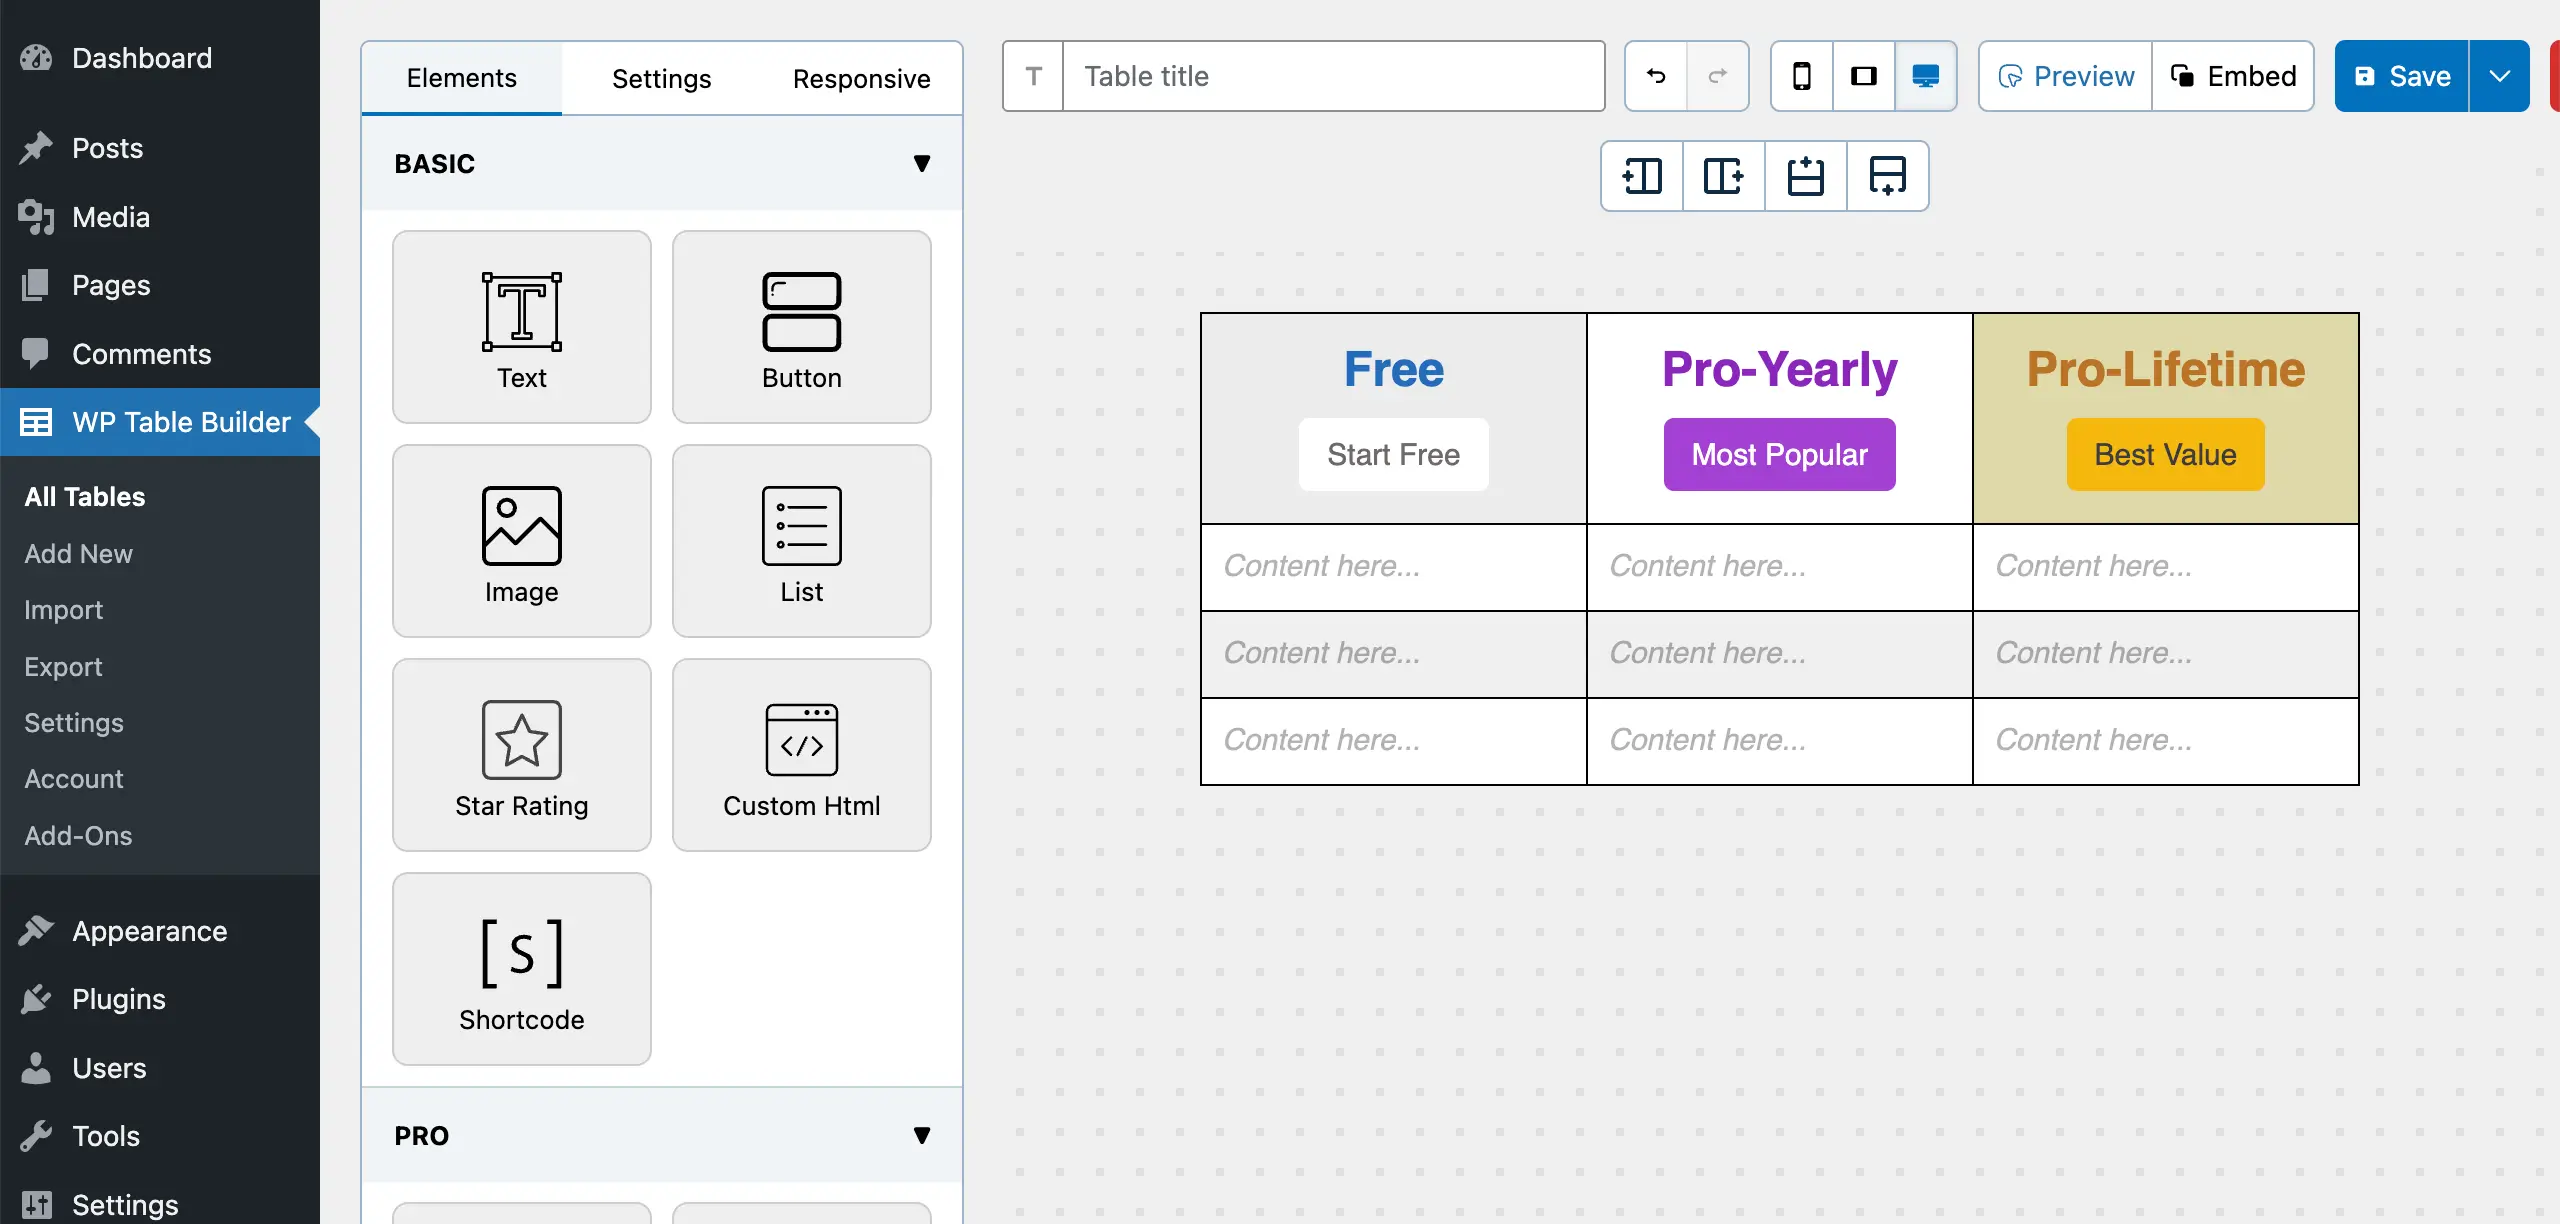
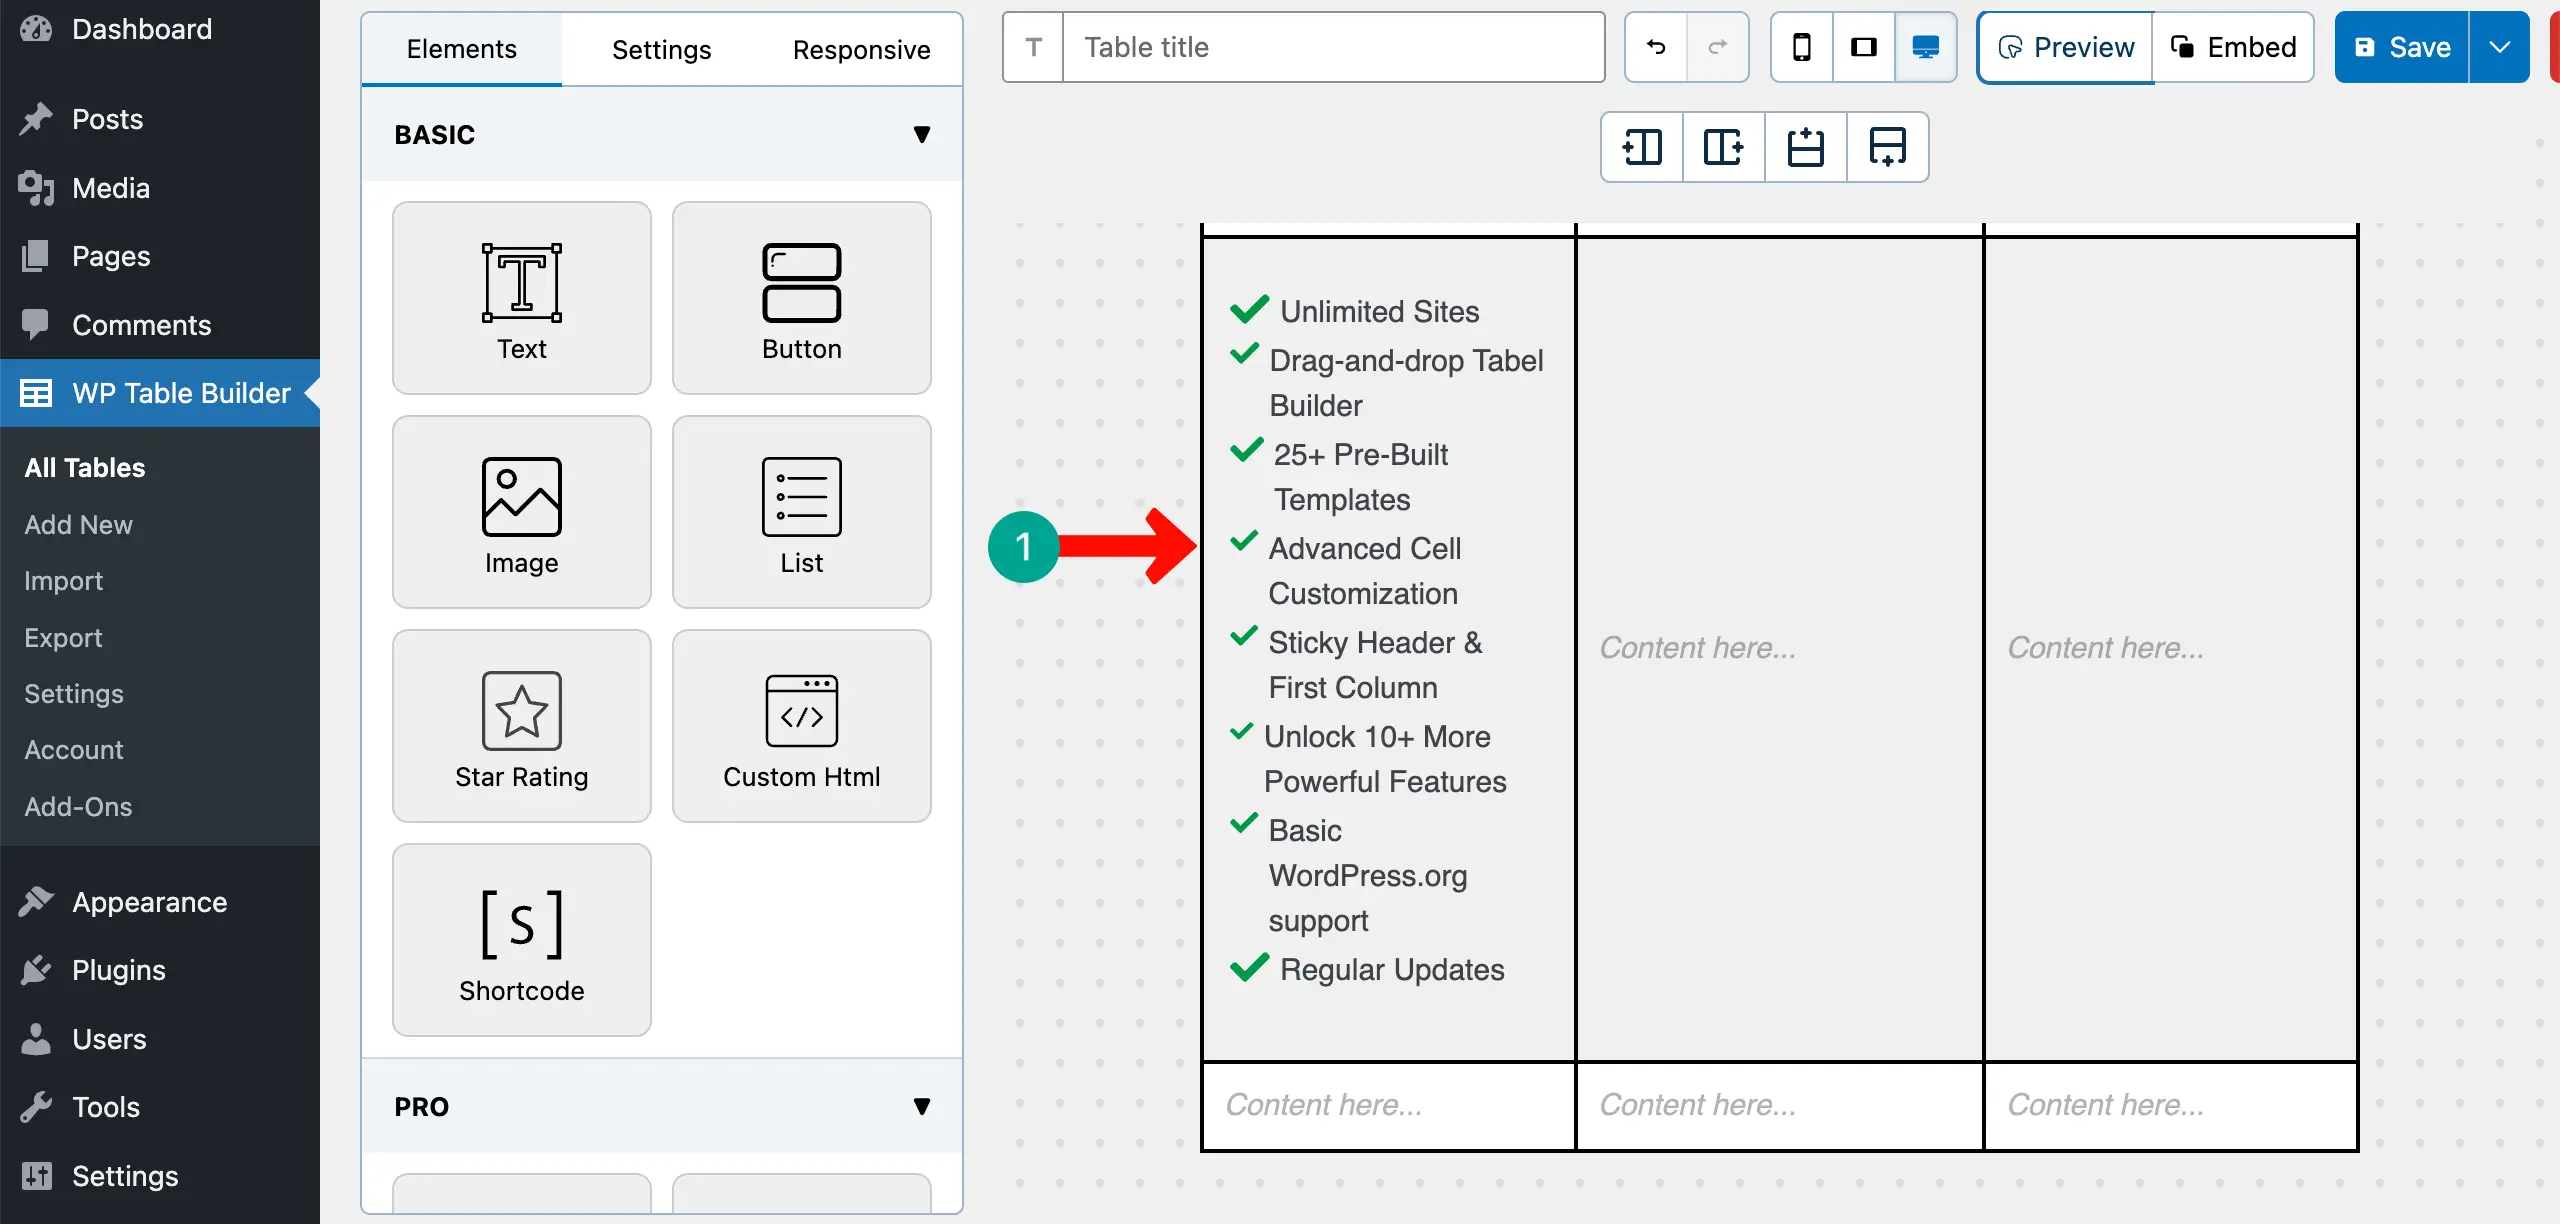
A canvas will open up. You’ll see various elements on the left side. You have to drag-and-drop the necessary elements from the left to the table to add the type of content you want.

Step 4: Add Plan Names and Short Labels
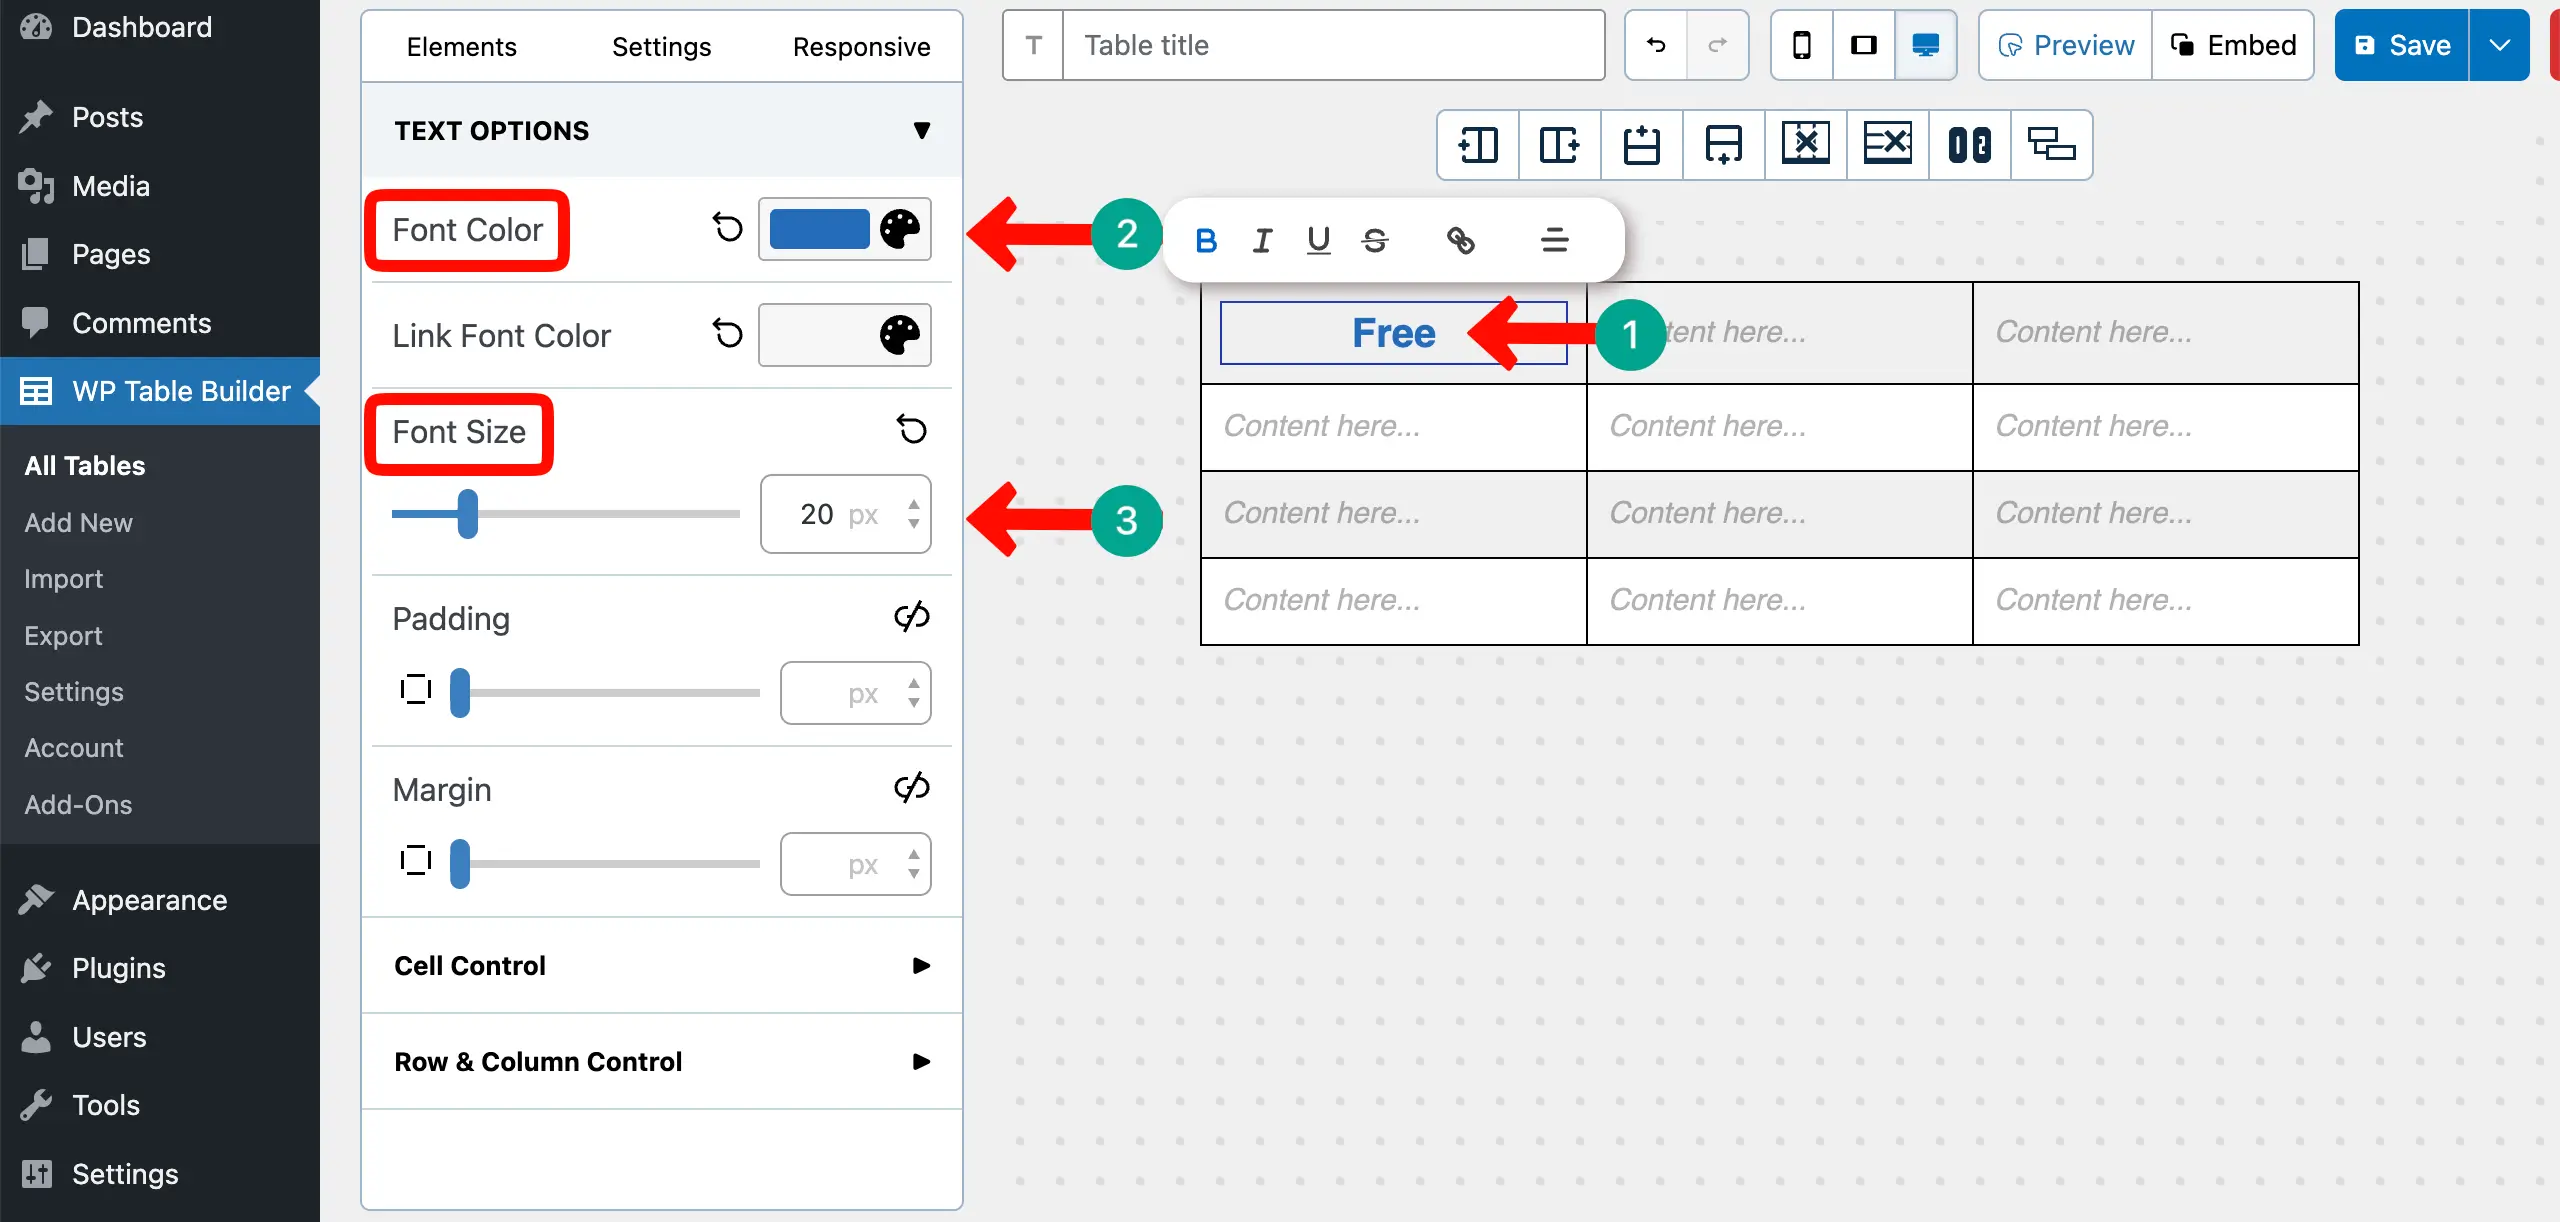
Place your cursor on the first cell. You’ll be able to write. Give a name to the column. You can even change the font size and color of the text using the options on the left.
In the same way, give names to the other columns of the table.
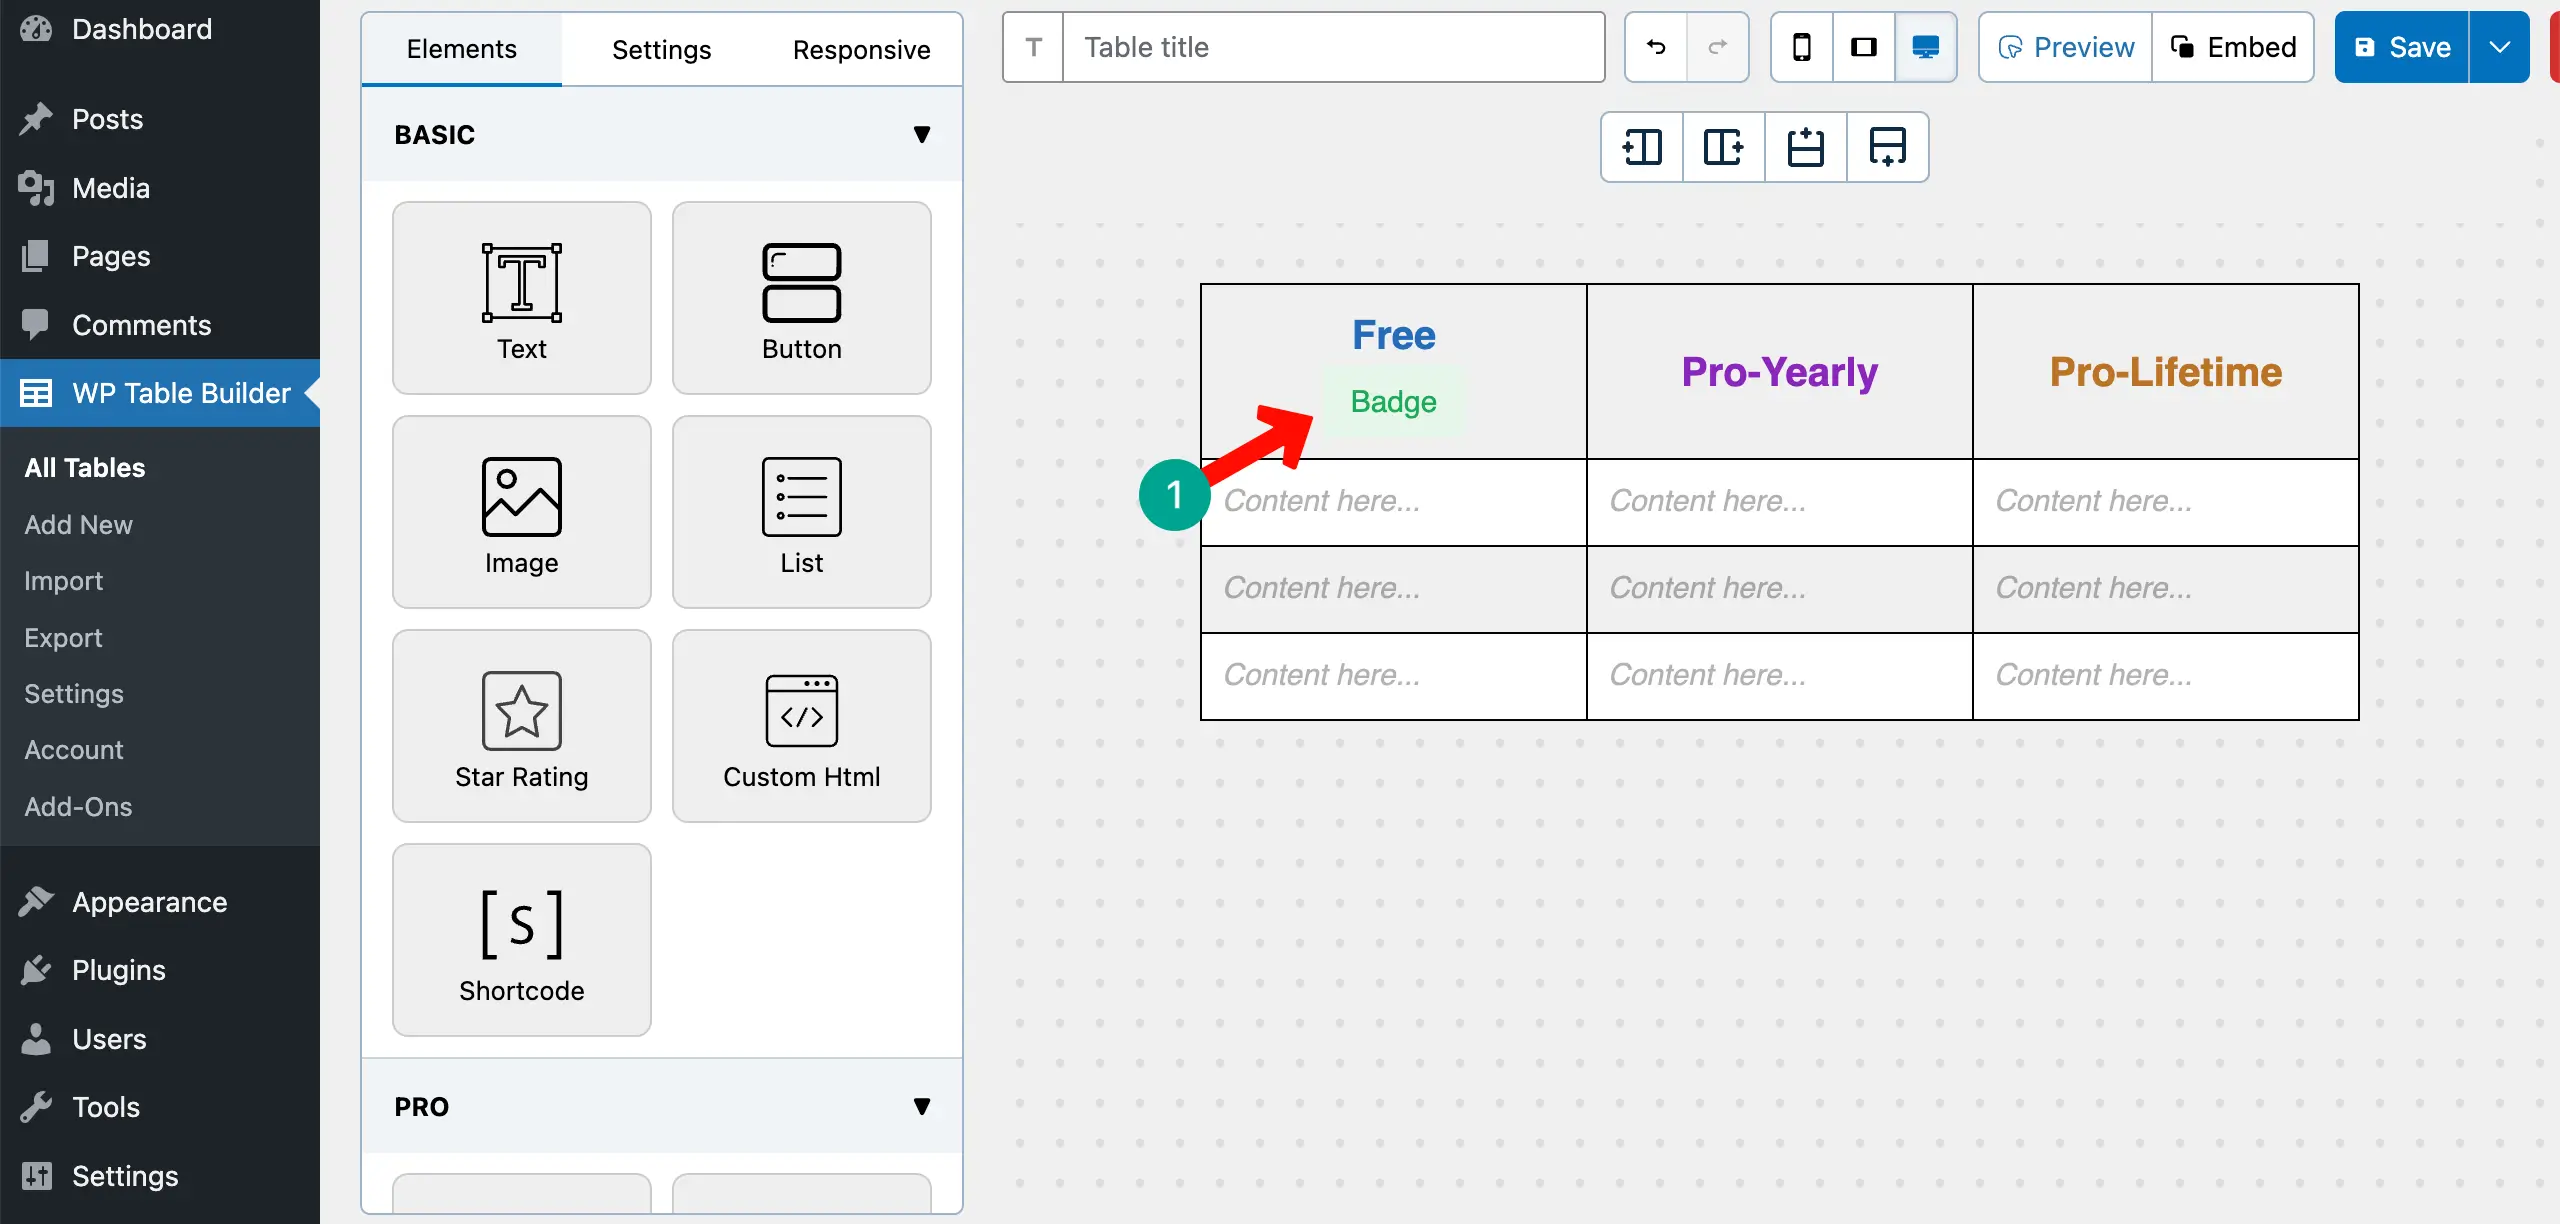
# Add Short Label
The short label should have a different appearance from the column names. Drag-and-drop the Badge element below the column name.
The Badge element will appear instantly with a default appearance.
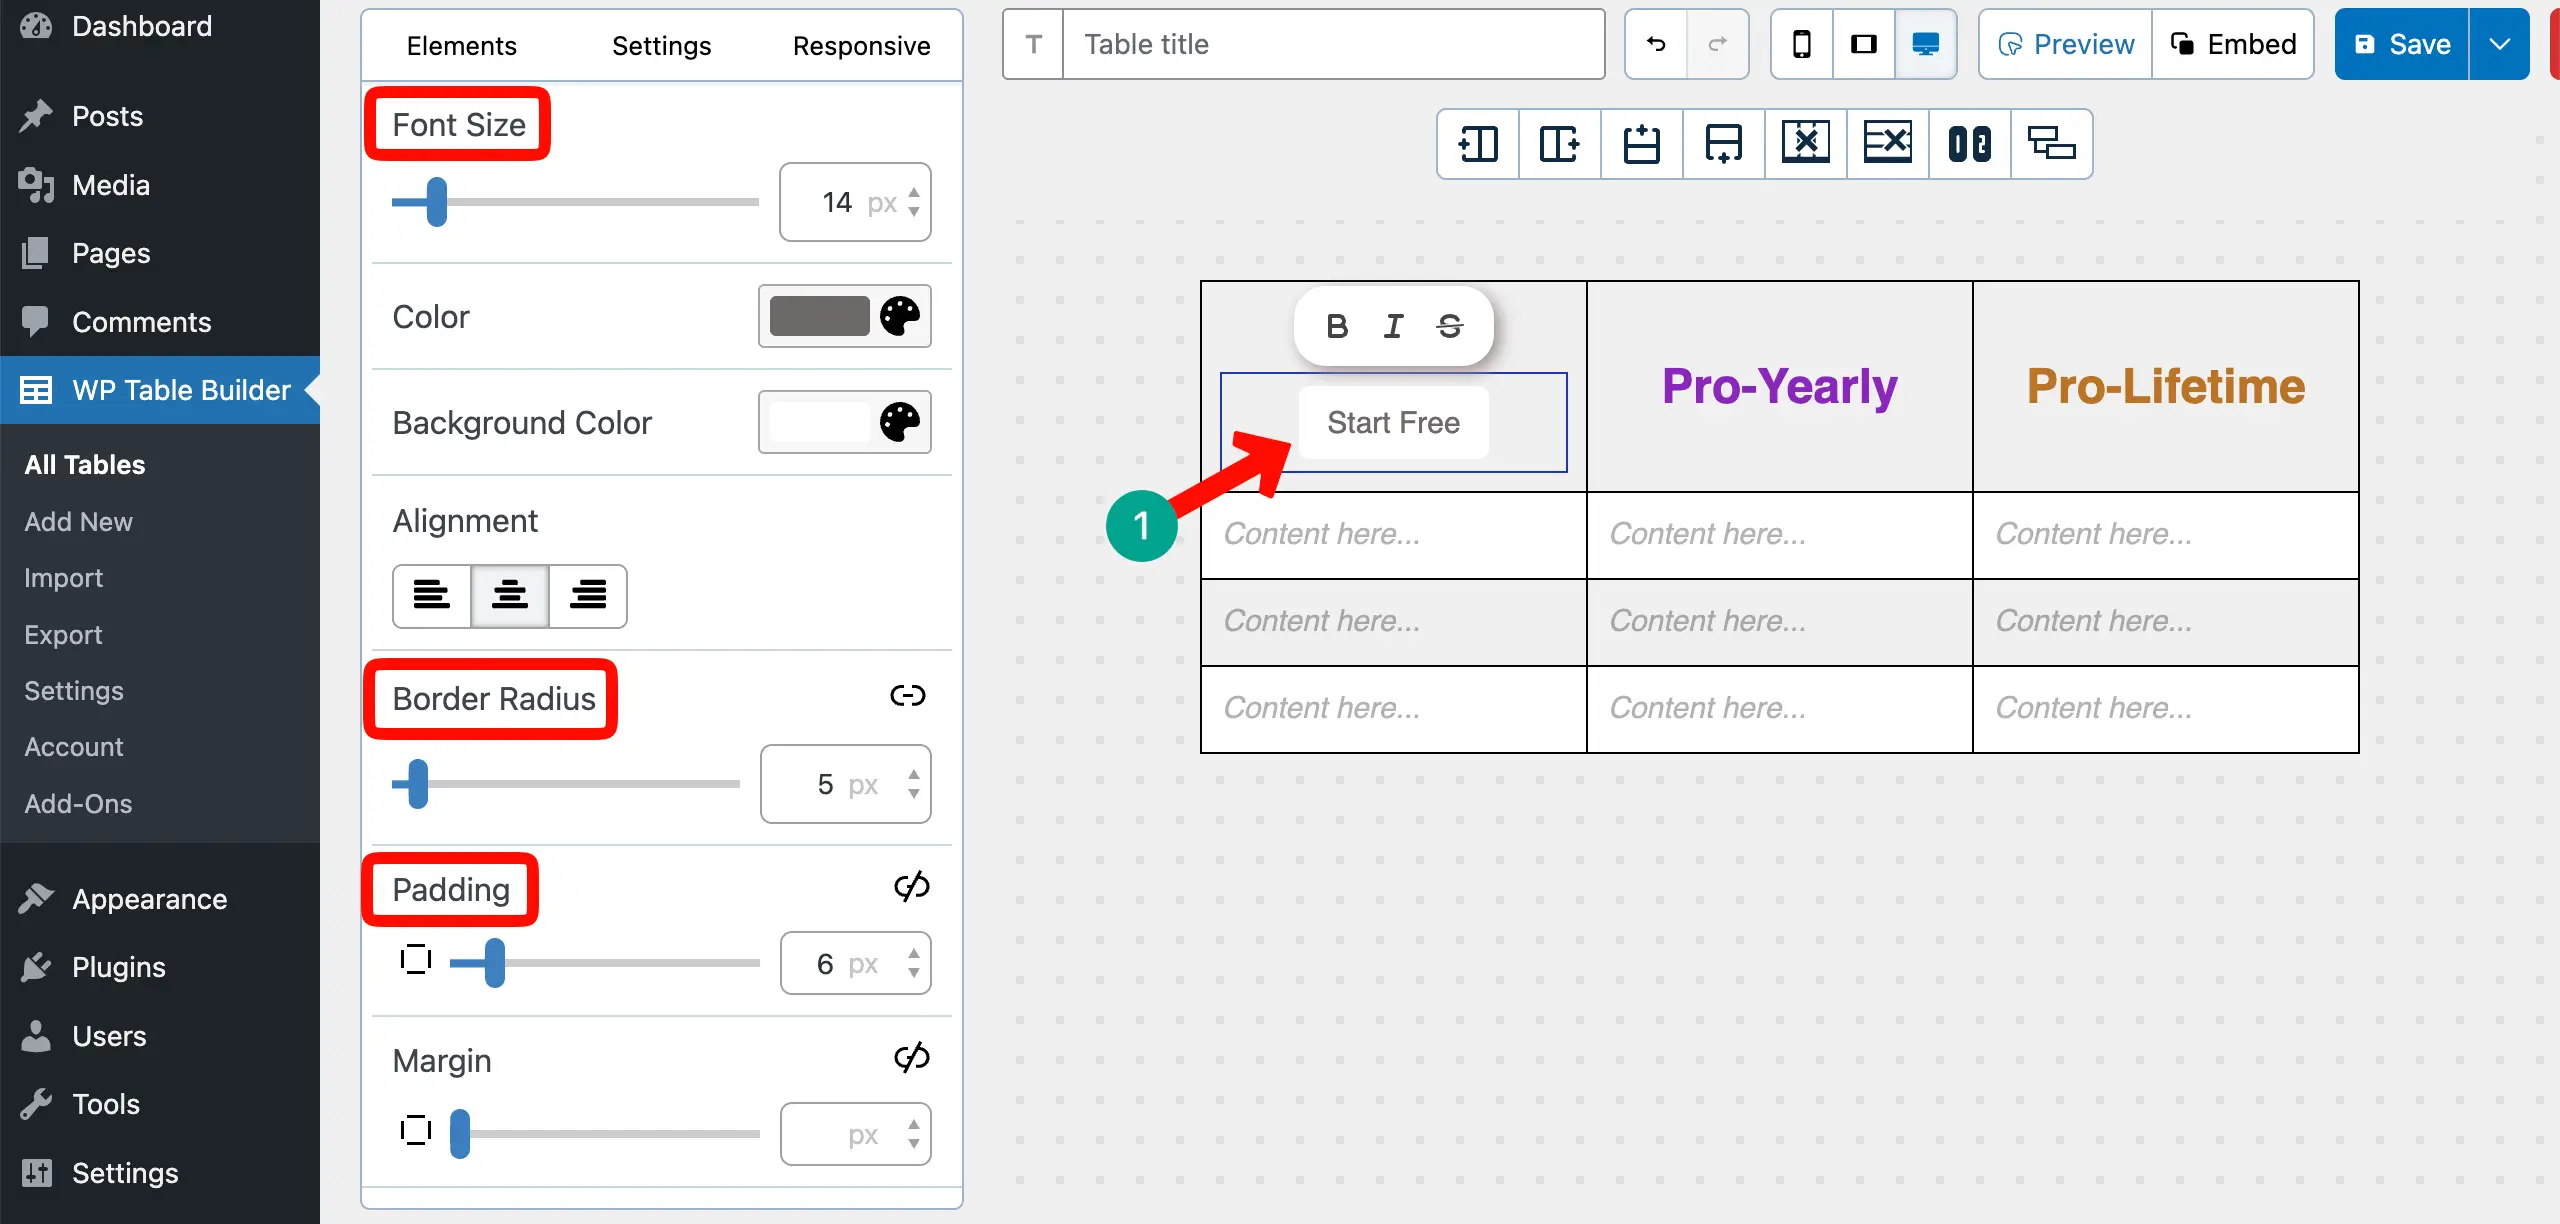
Customize the font size, border radius, alignment, and padding to make the badge item look good on the column.
In the same way, add labels to all the columns with proper stylization.
# Add Background Colors to the Top Cells
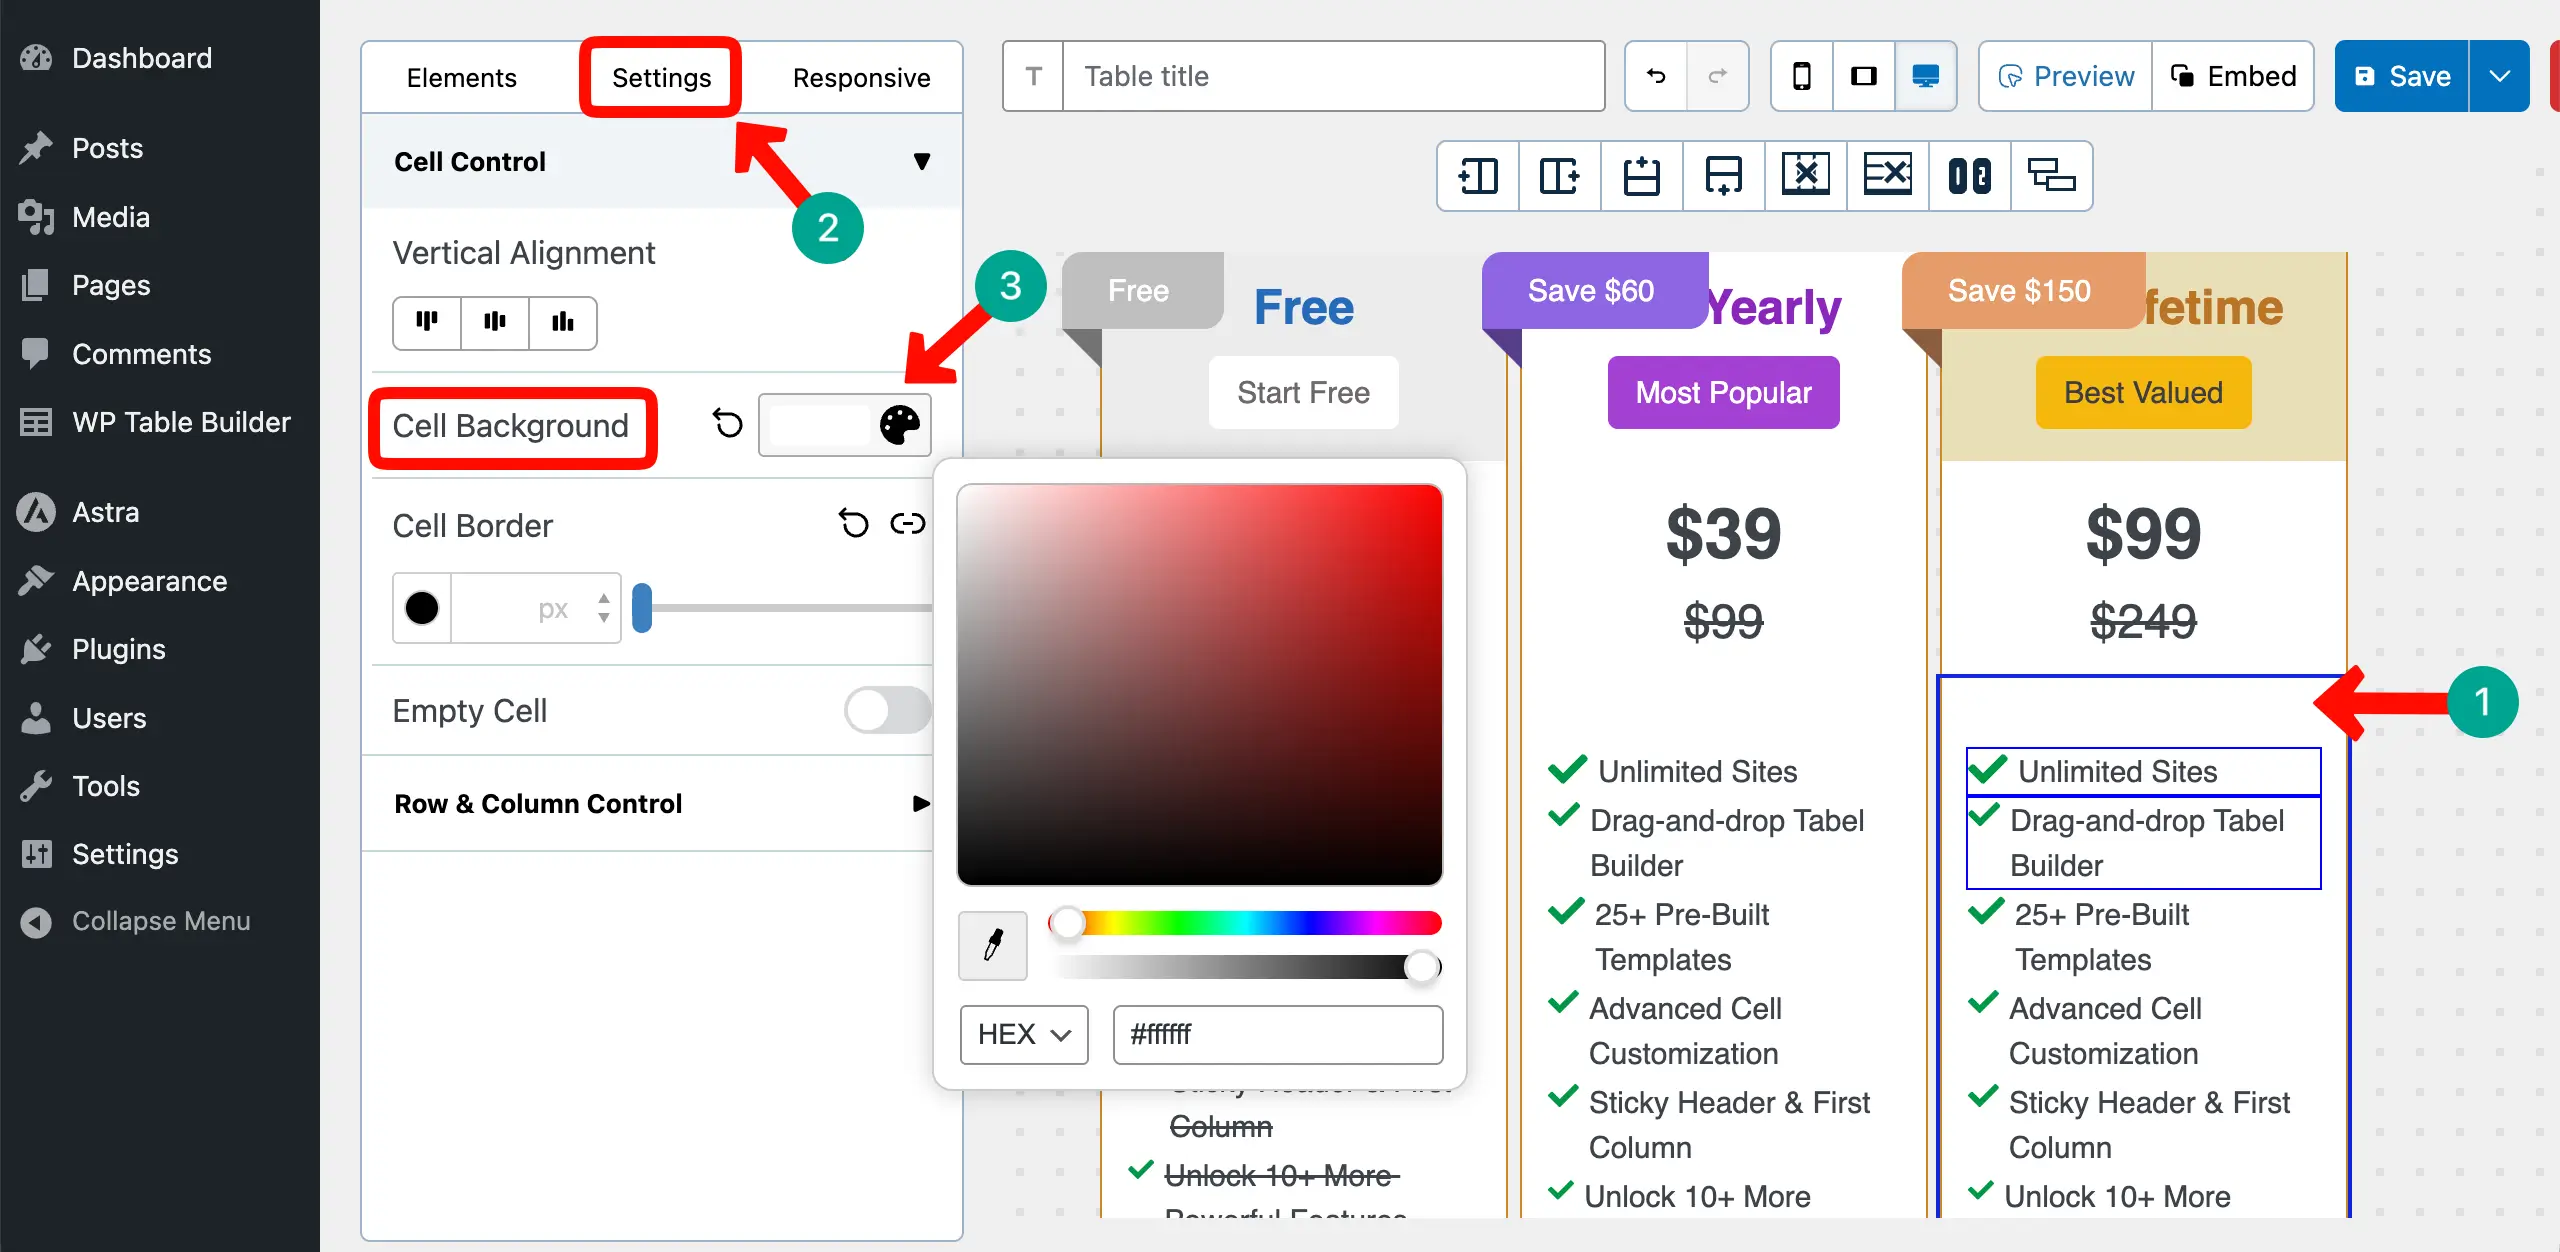
You can add background colors to the cells one-by-one as you need. To do this, select the top cell. Expand the Cell Control section on the left side. Set the Cell Background color you want.
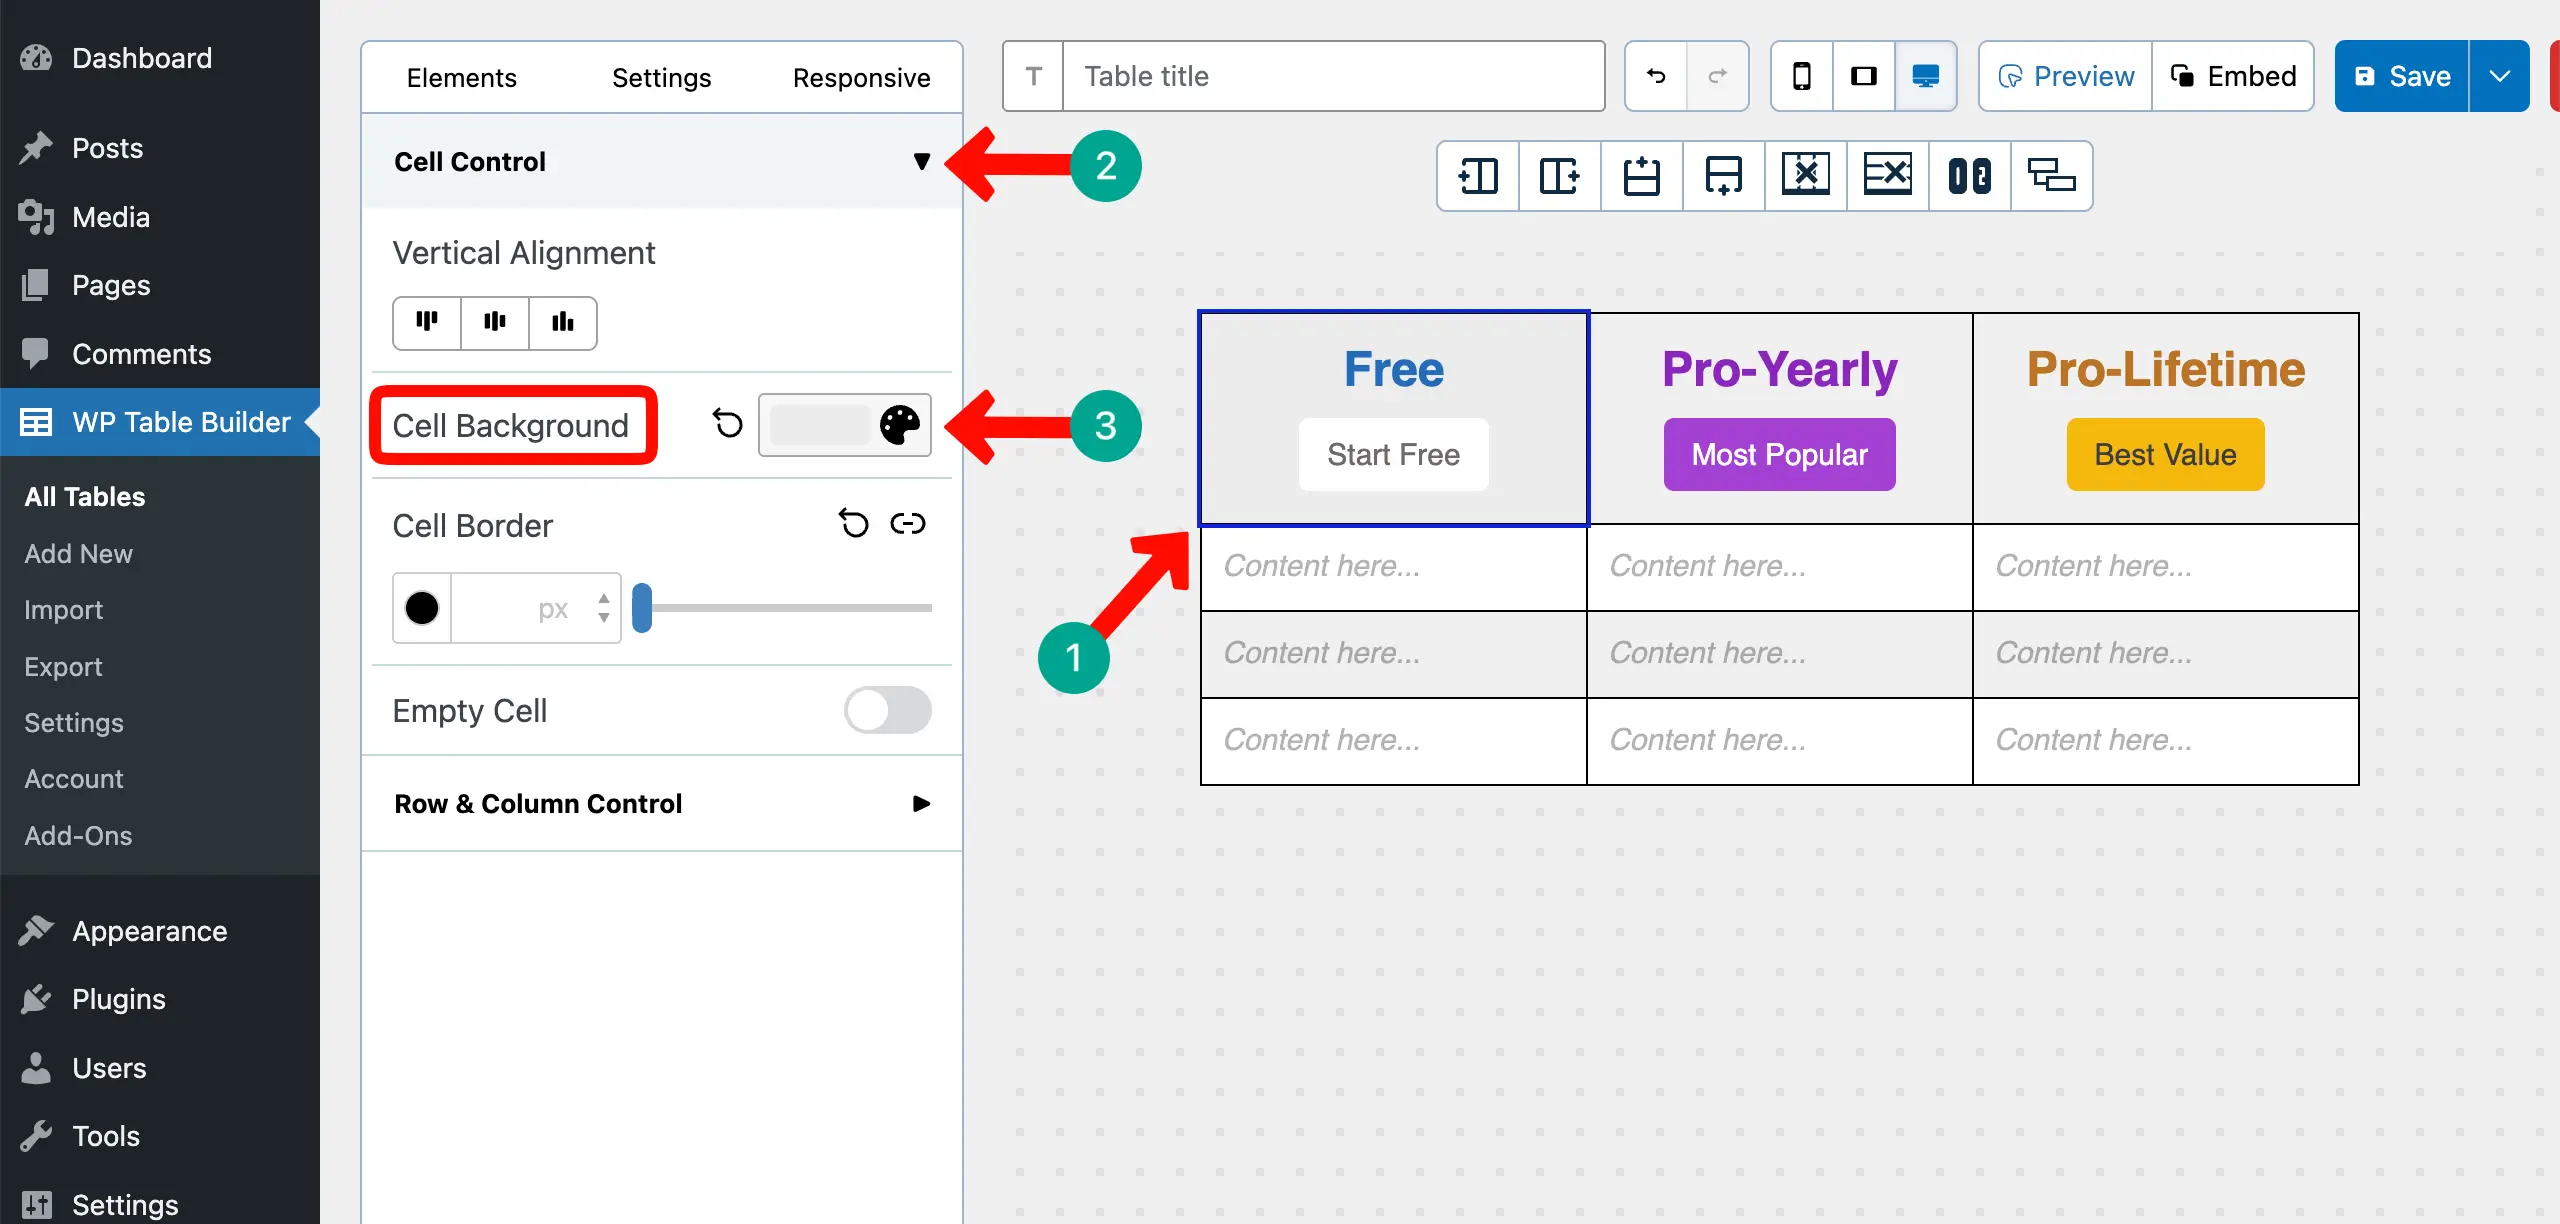
In the same way, add different colors to the background of the table cells.
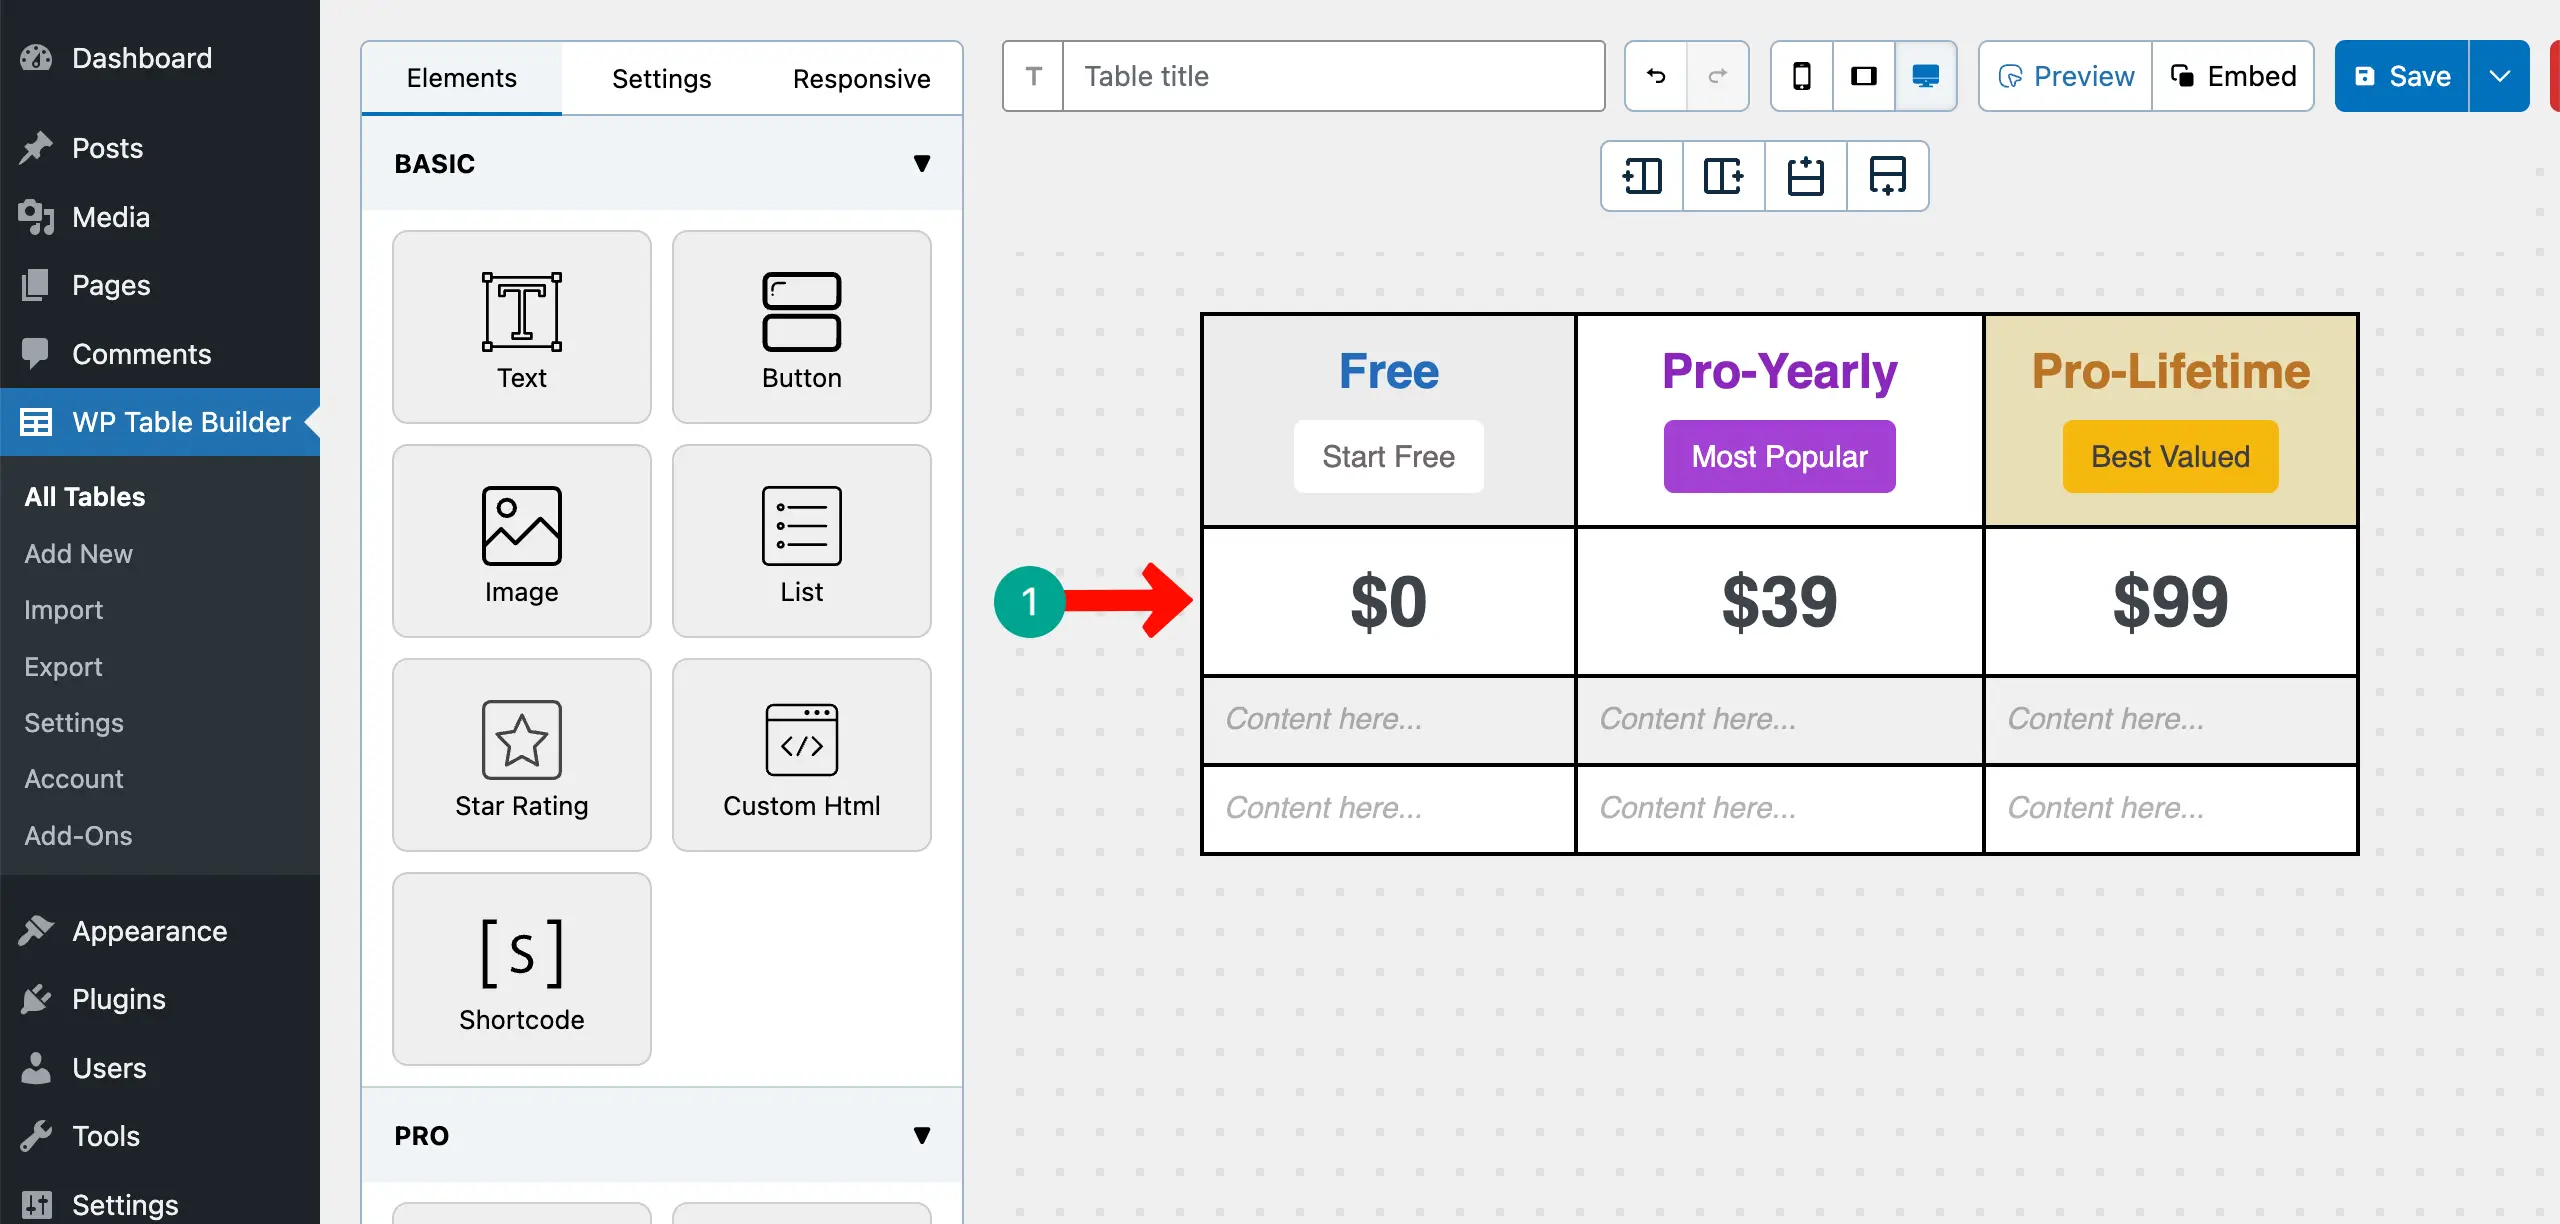
Step 5: Add Pricing and Optional Crossed-Out Prices
Simply place your pricing figures in the respective columns of the table. You can make them bold and increase their font size.
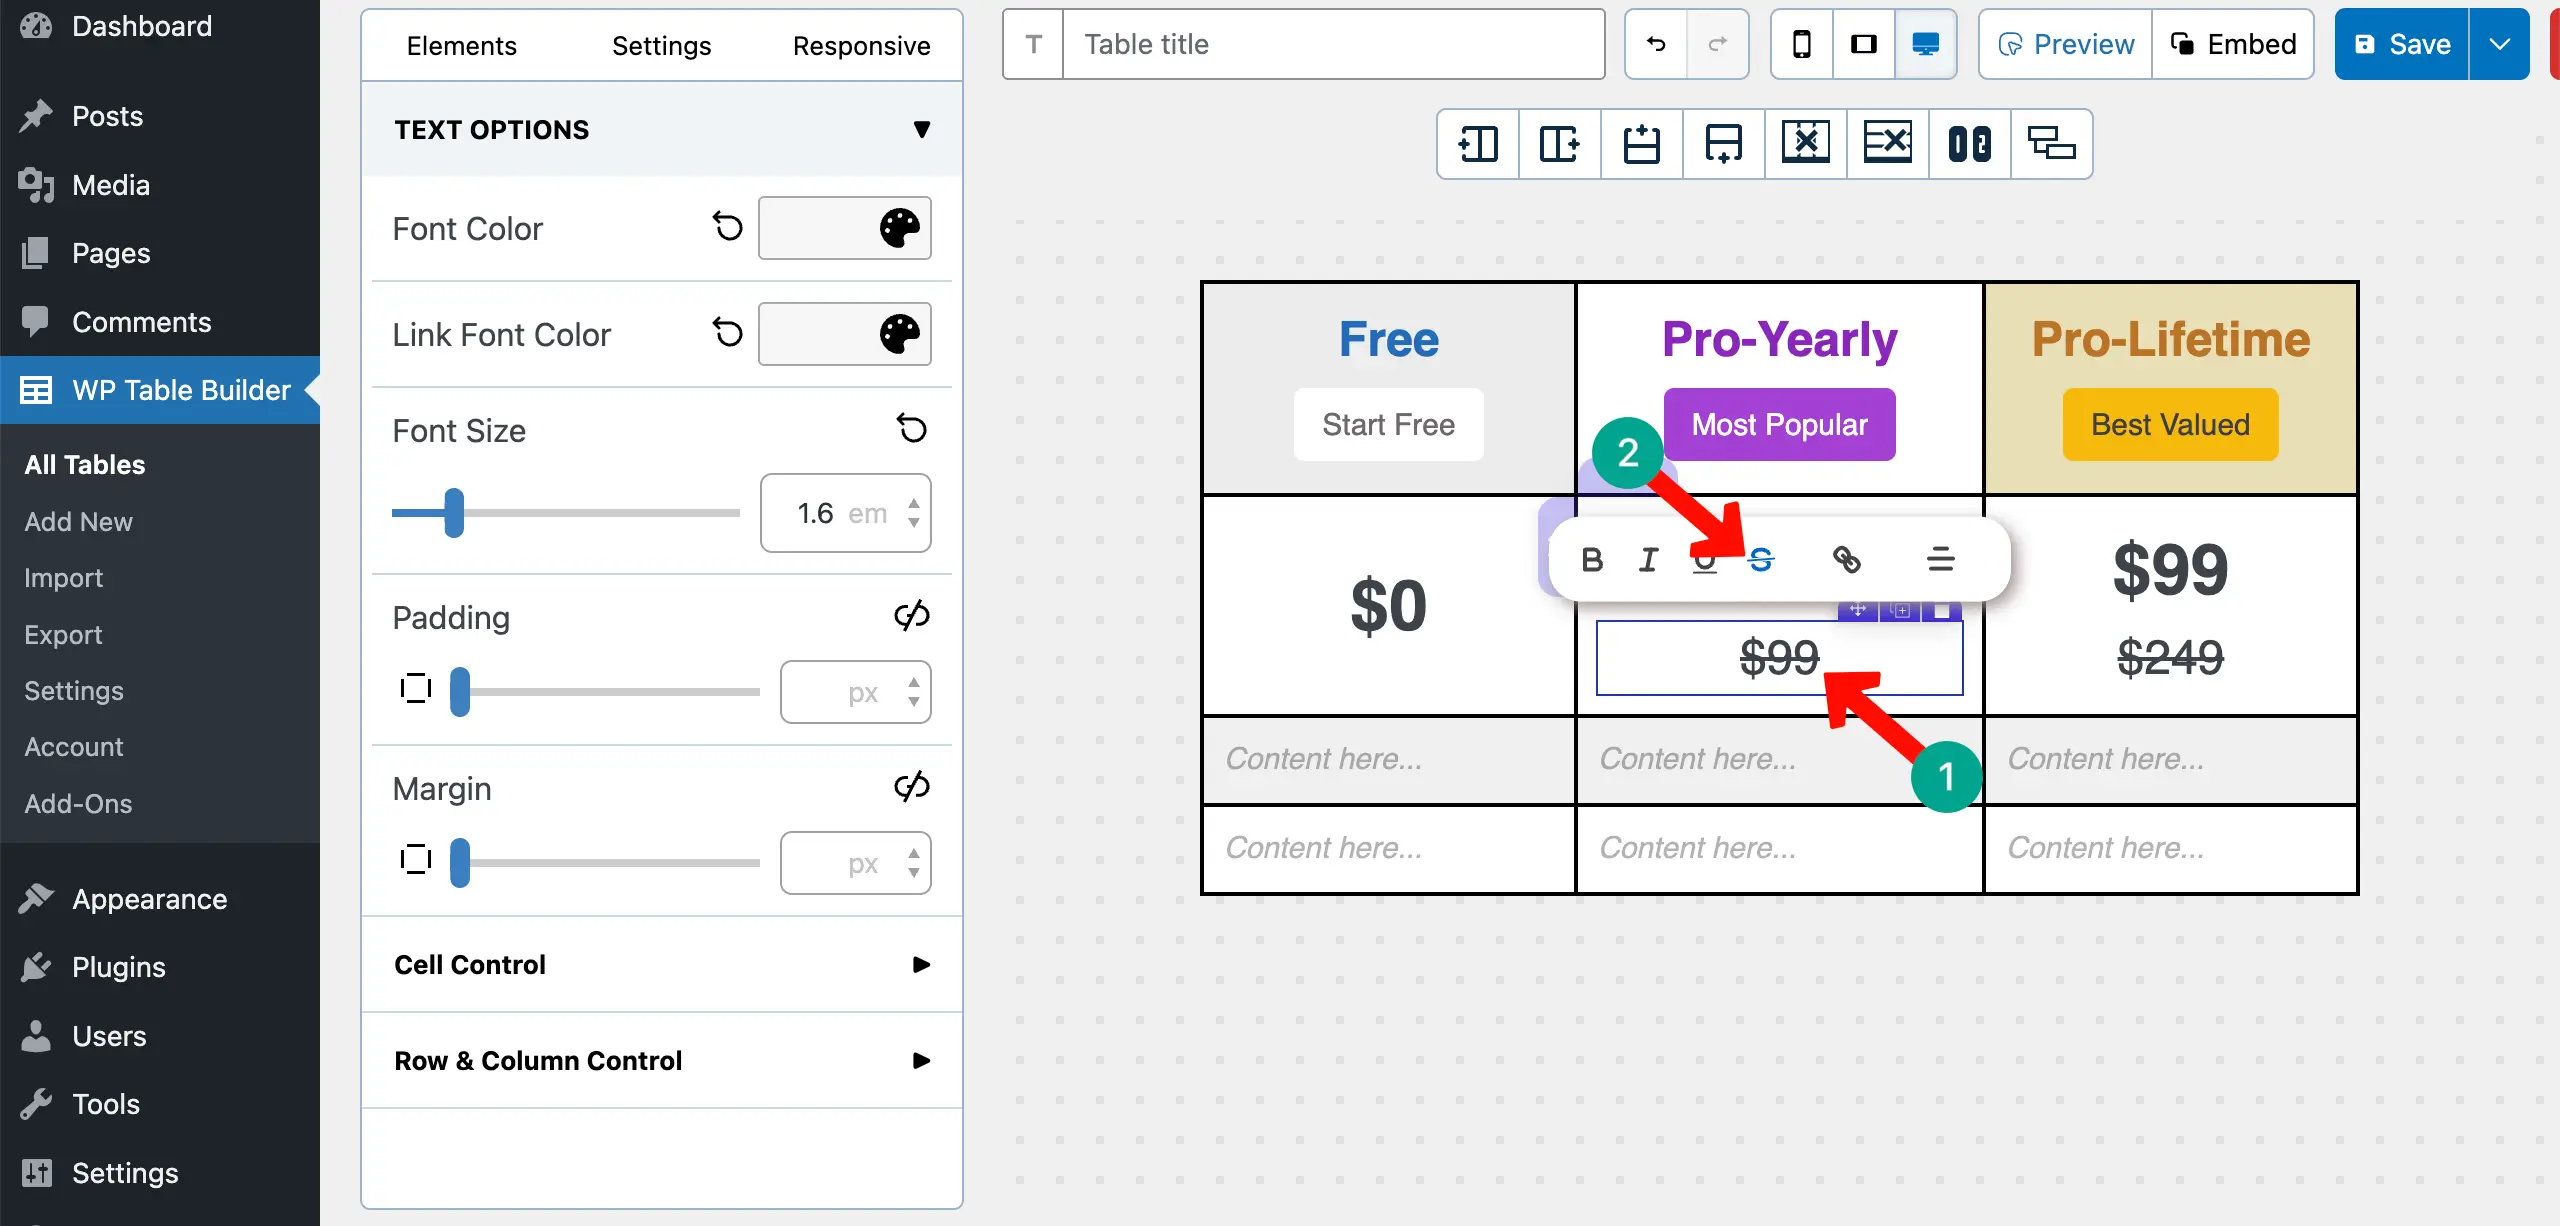
You can add a crossed-out price right under the main pricing using the strikethrough feature seen in the toolbar. Clear pricing removes uncertainty. Crossed-out prices reinforce perceived value without extra copy.
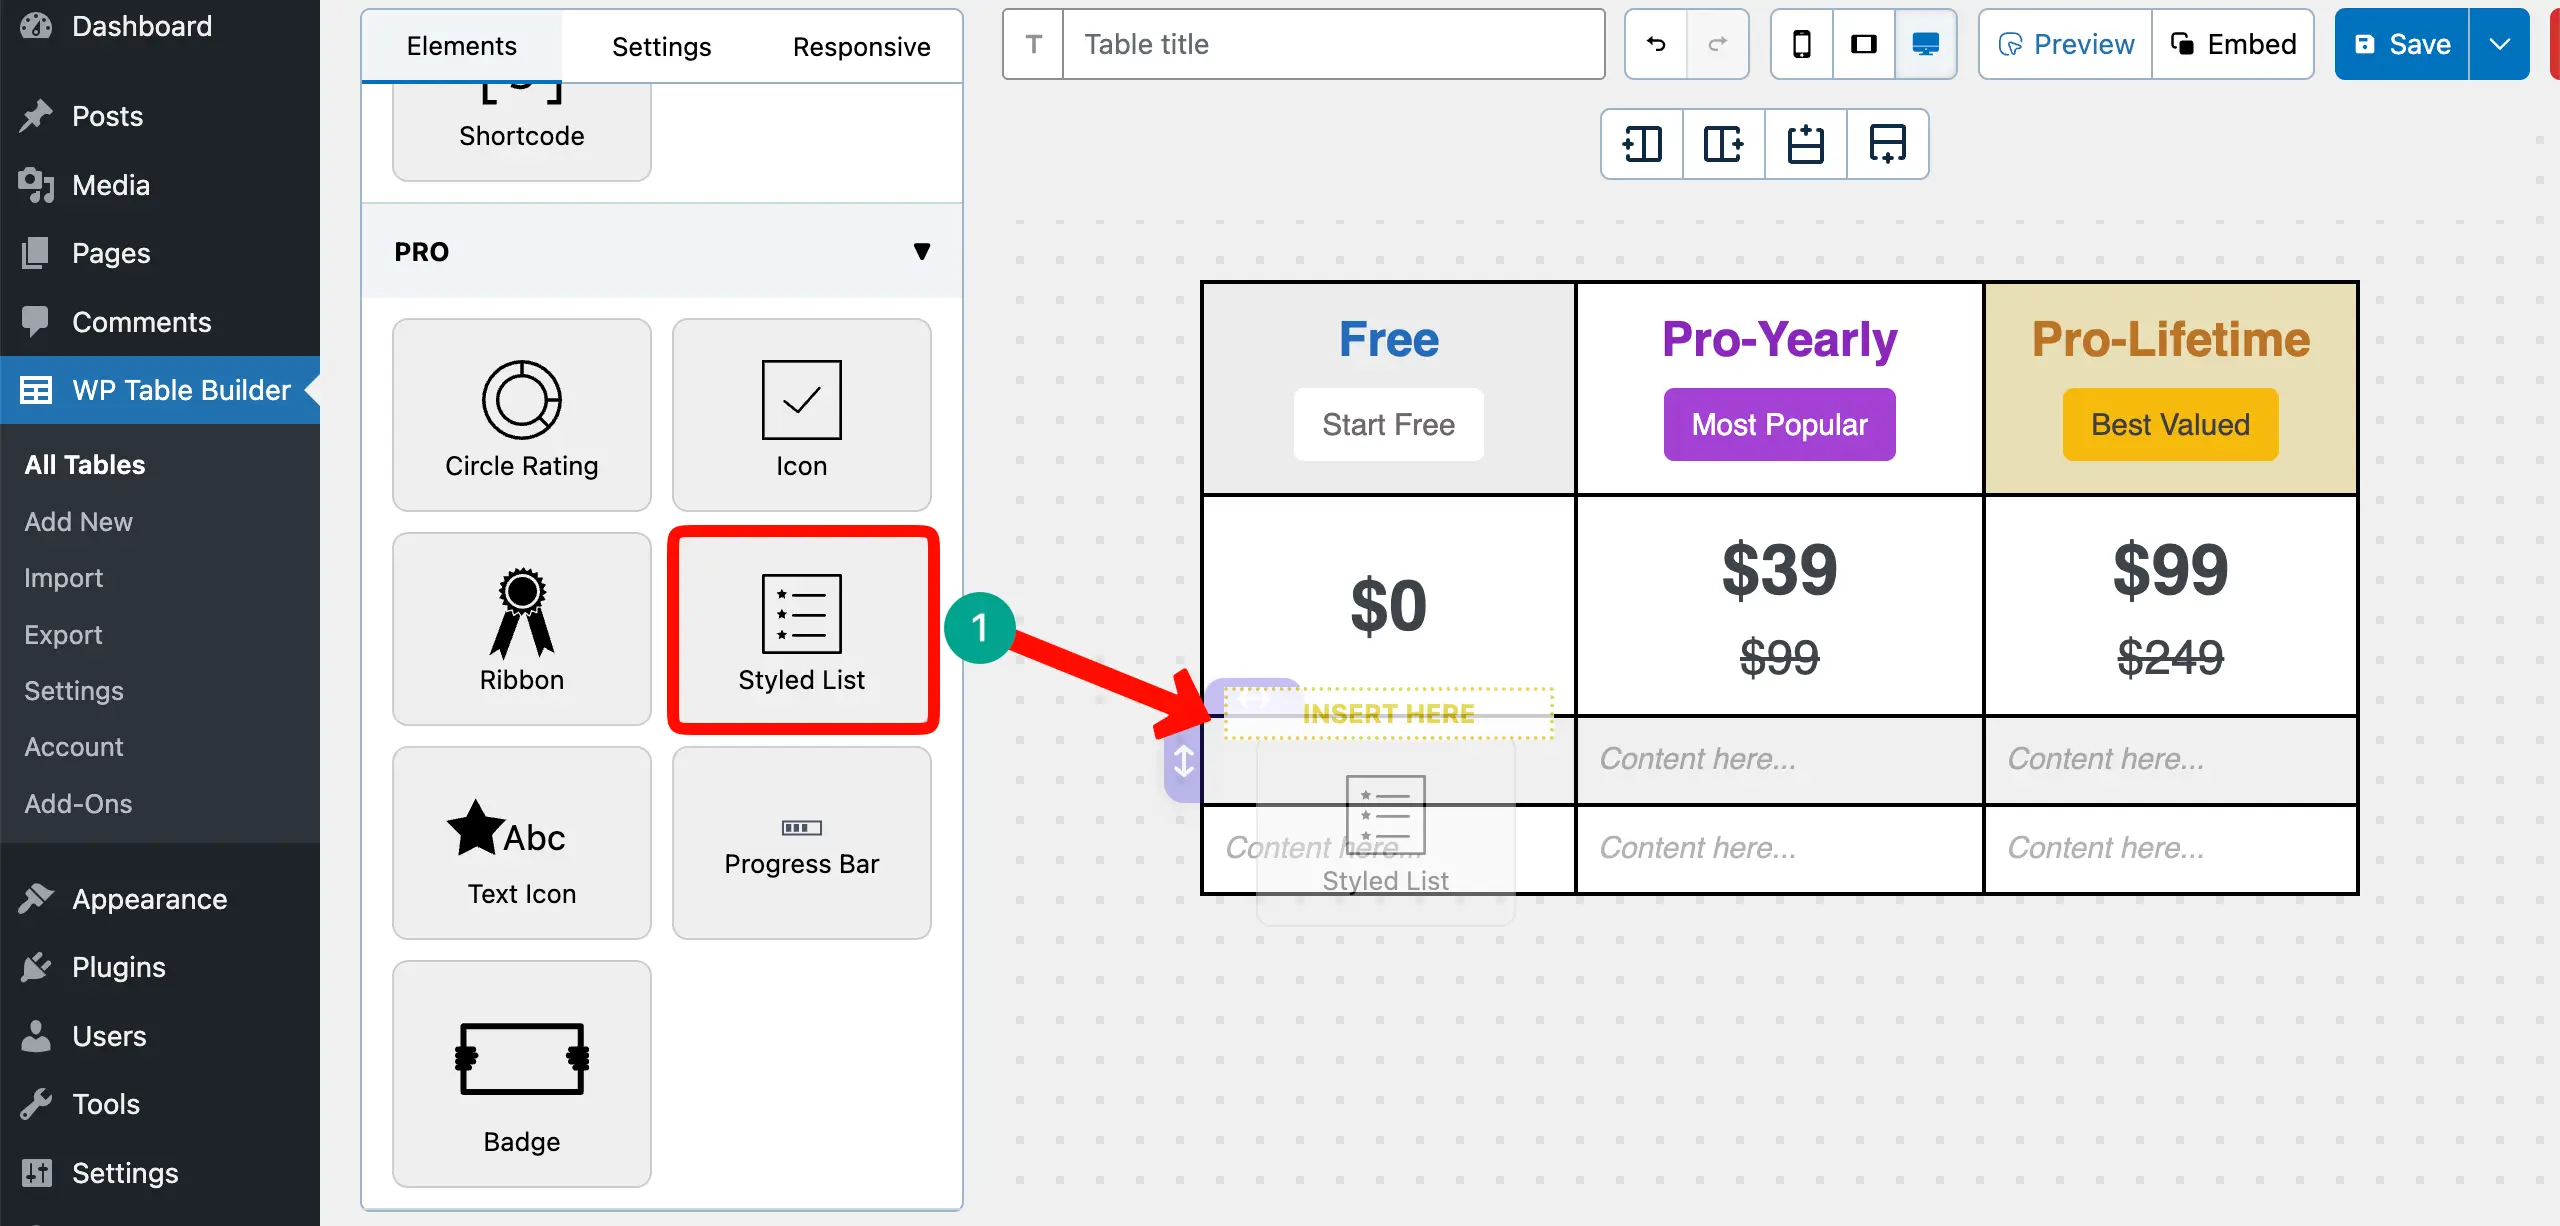
Step 6: Add the Feature List Using Styled List
It’s now the time to add features to the table. To do this, drag-and-drop the Styled List element to the table.
After the element is added, write all the features, one-by-one, that you want to display.
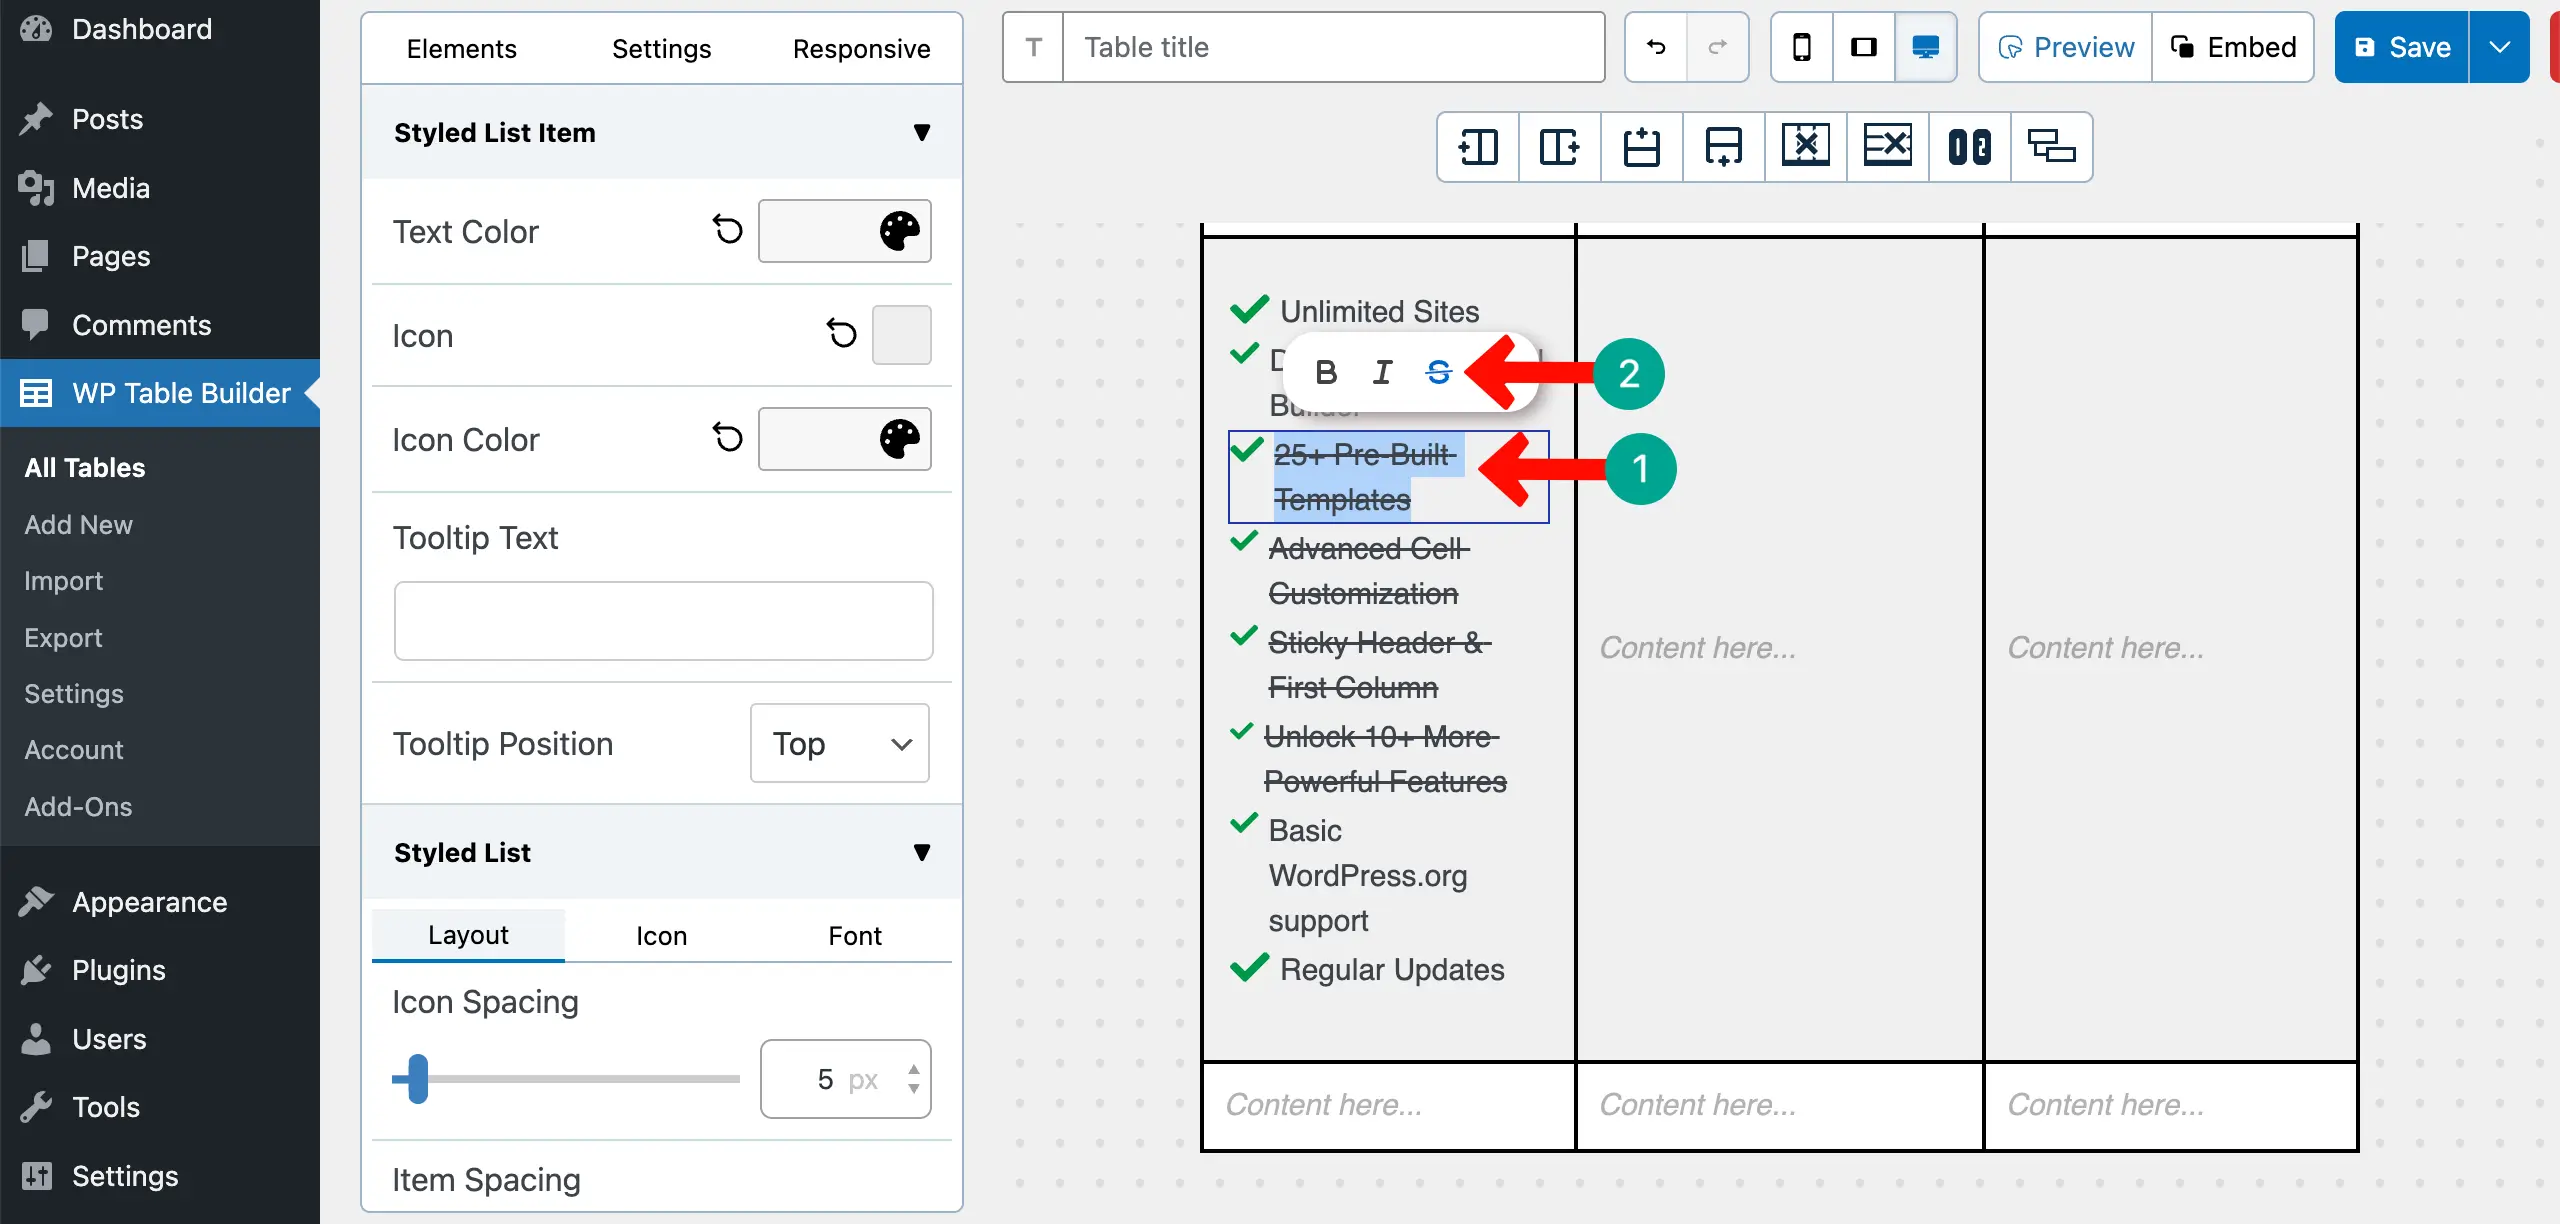
Not all features should be available in all plans. By using Strikethrough on the toolbar, you can add a crossline between those features that are not open in that respective plan.
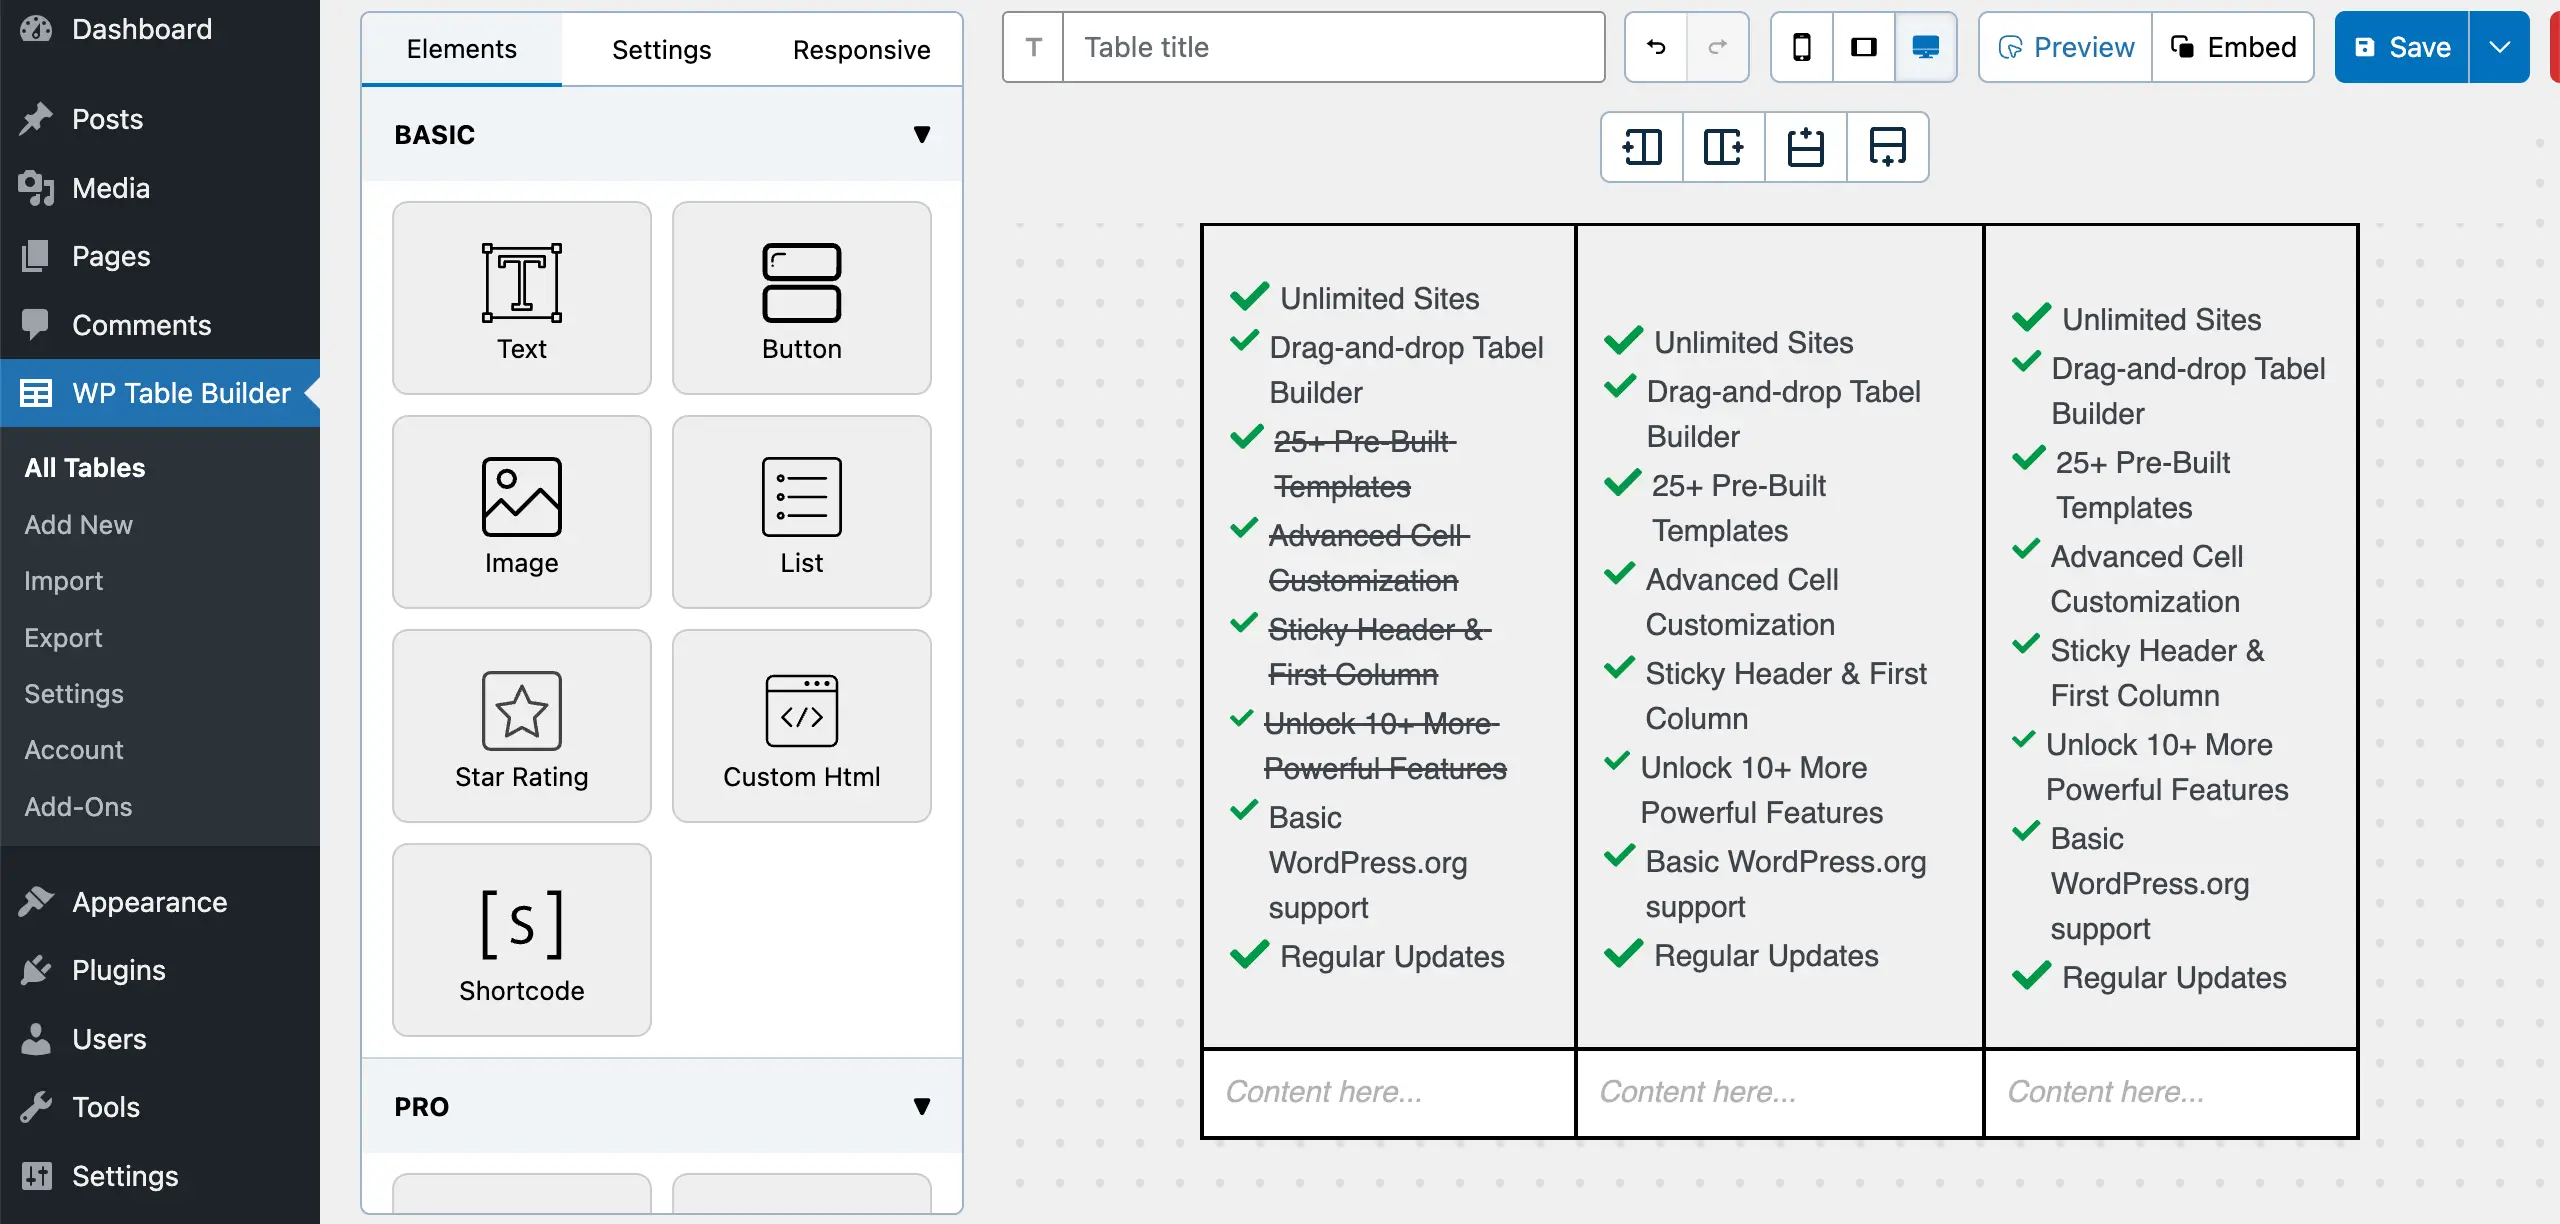
In the same way, list features in the other columns.
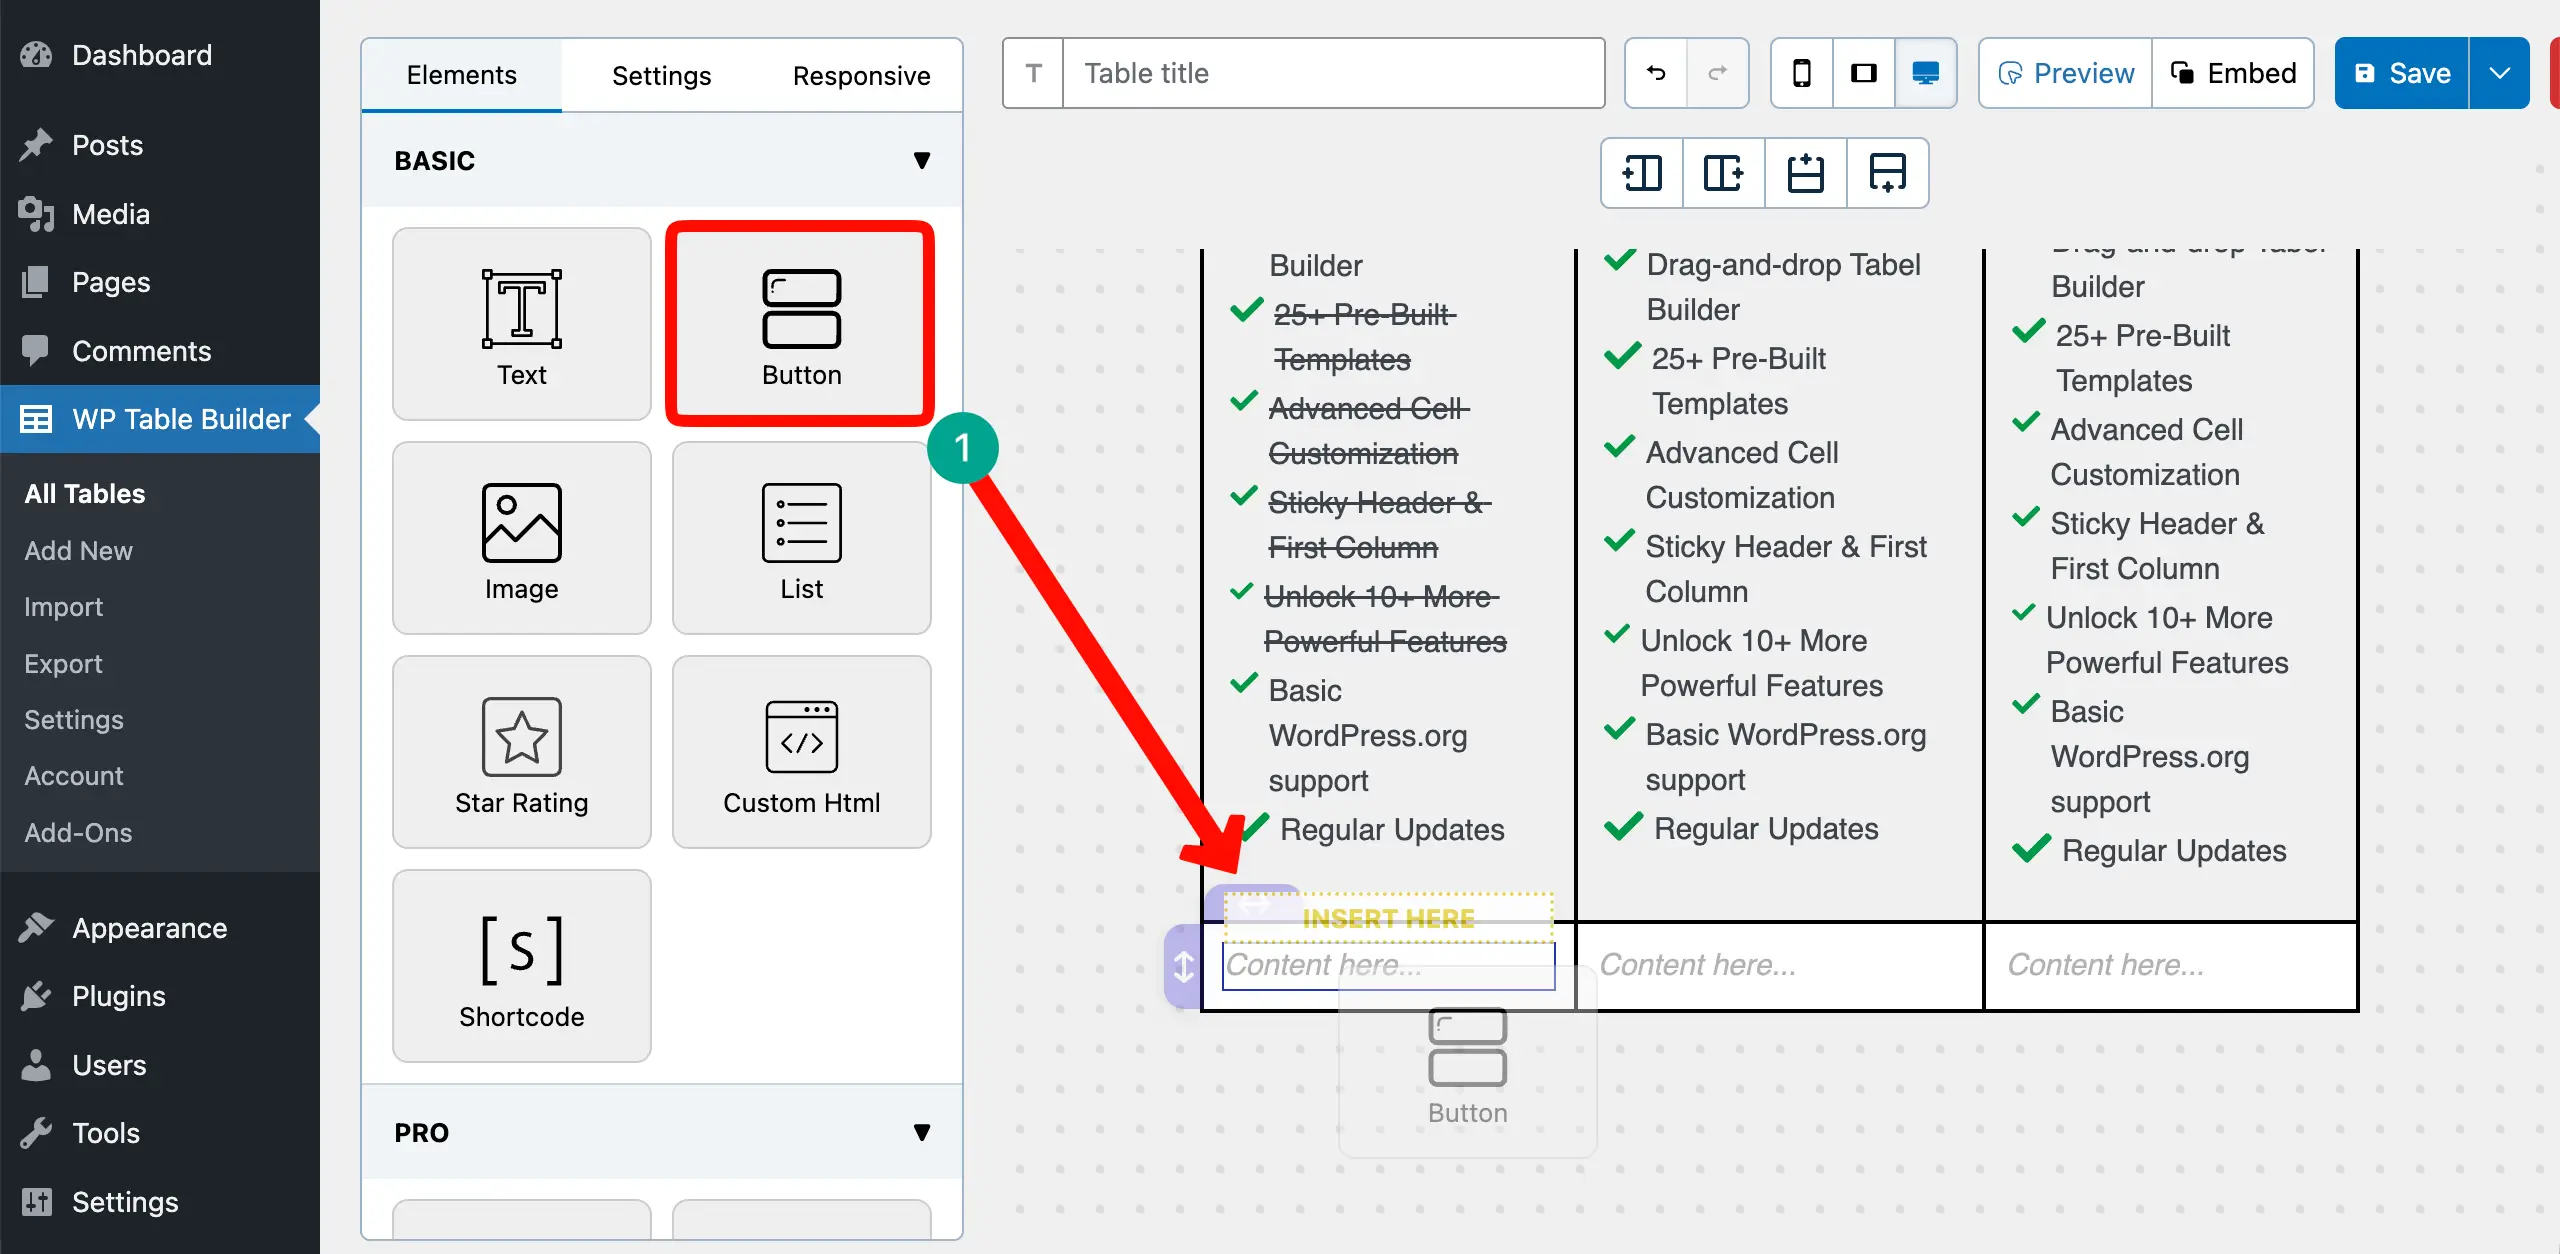
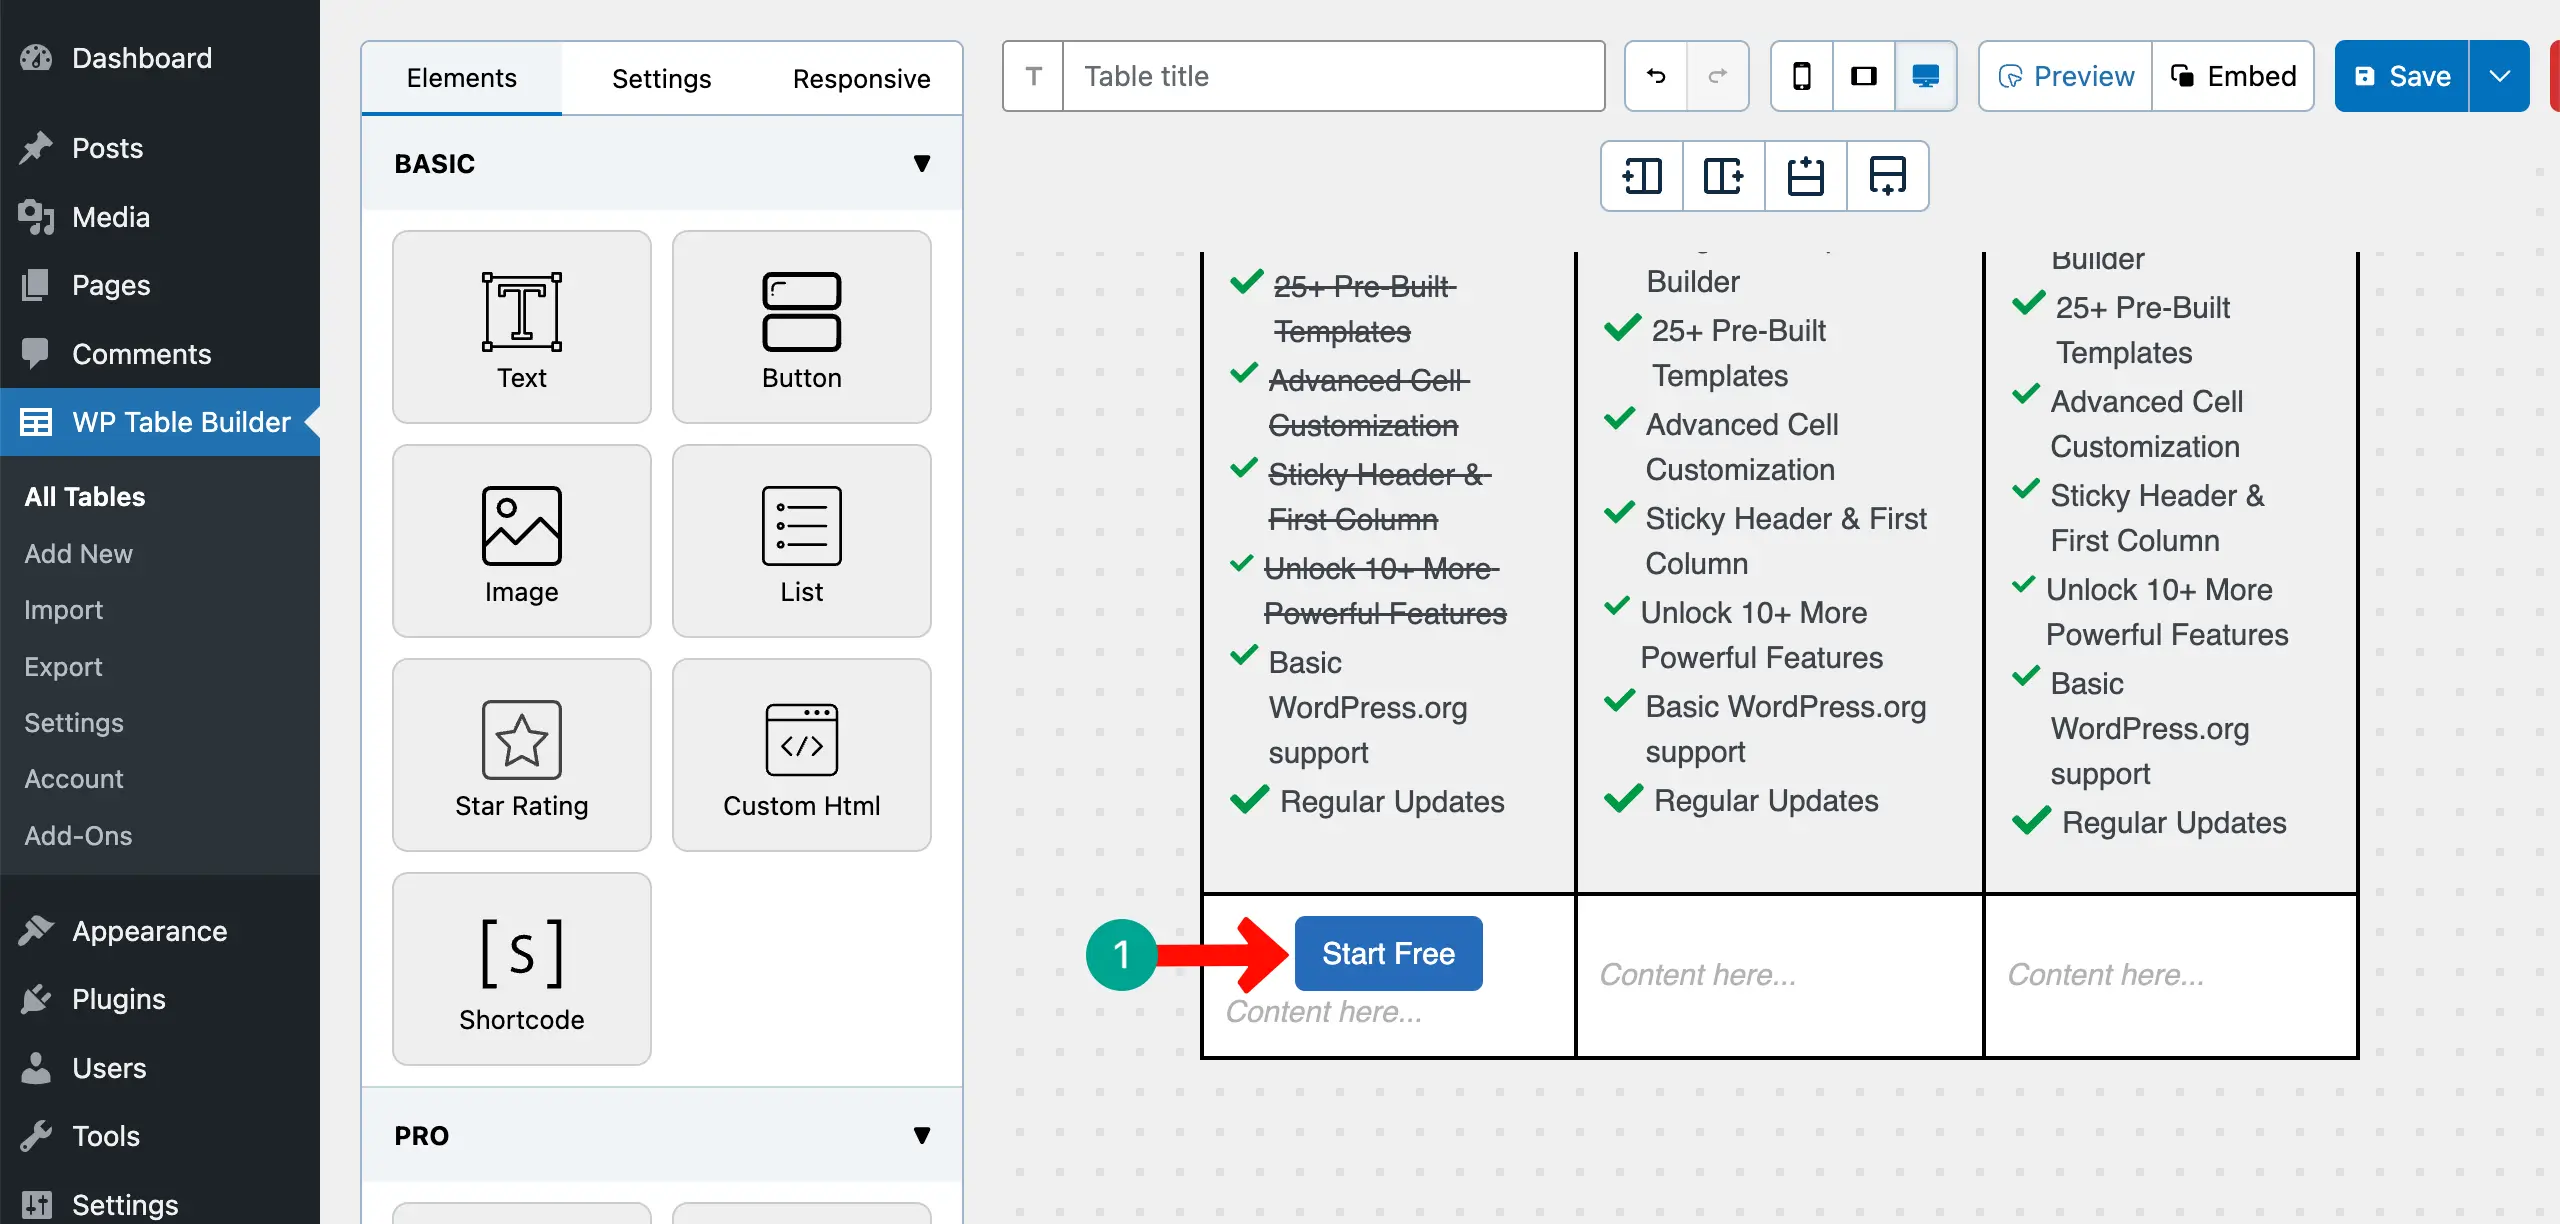
Step 7: Add Call-to-Action Buttons for Each Plan
Drag-and-drop the Button element to the table.
Add a copy and a background color to the button to make it look good.
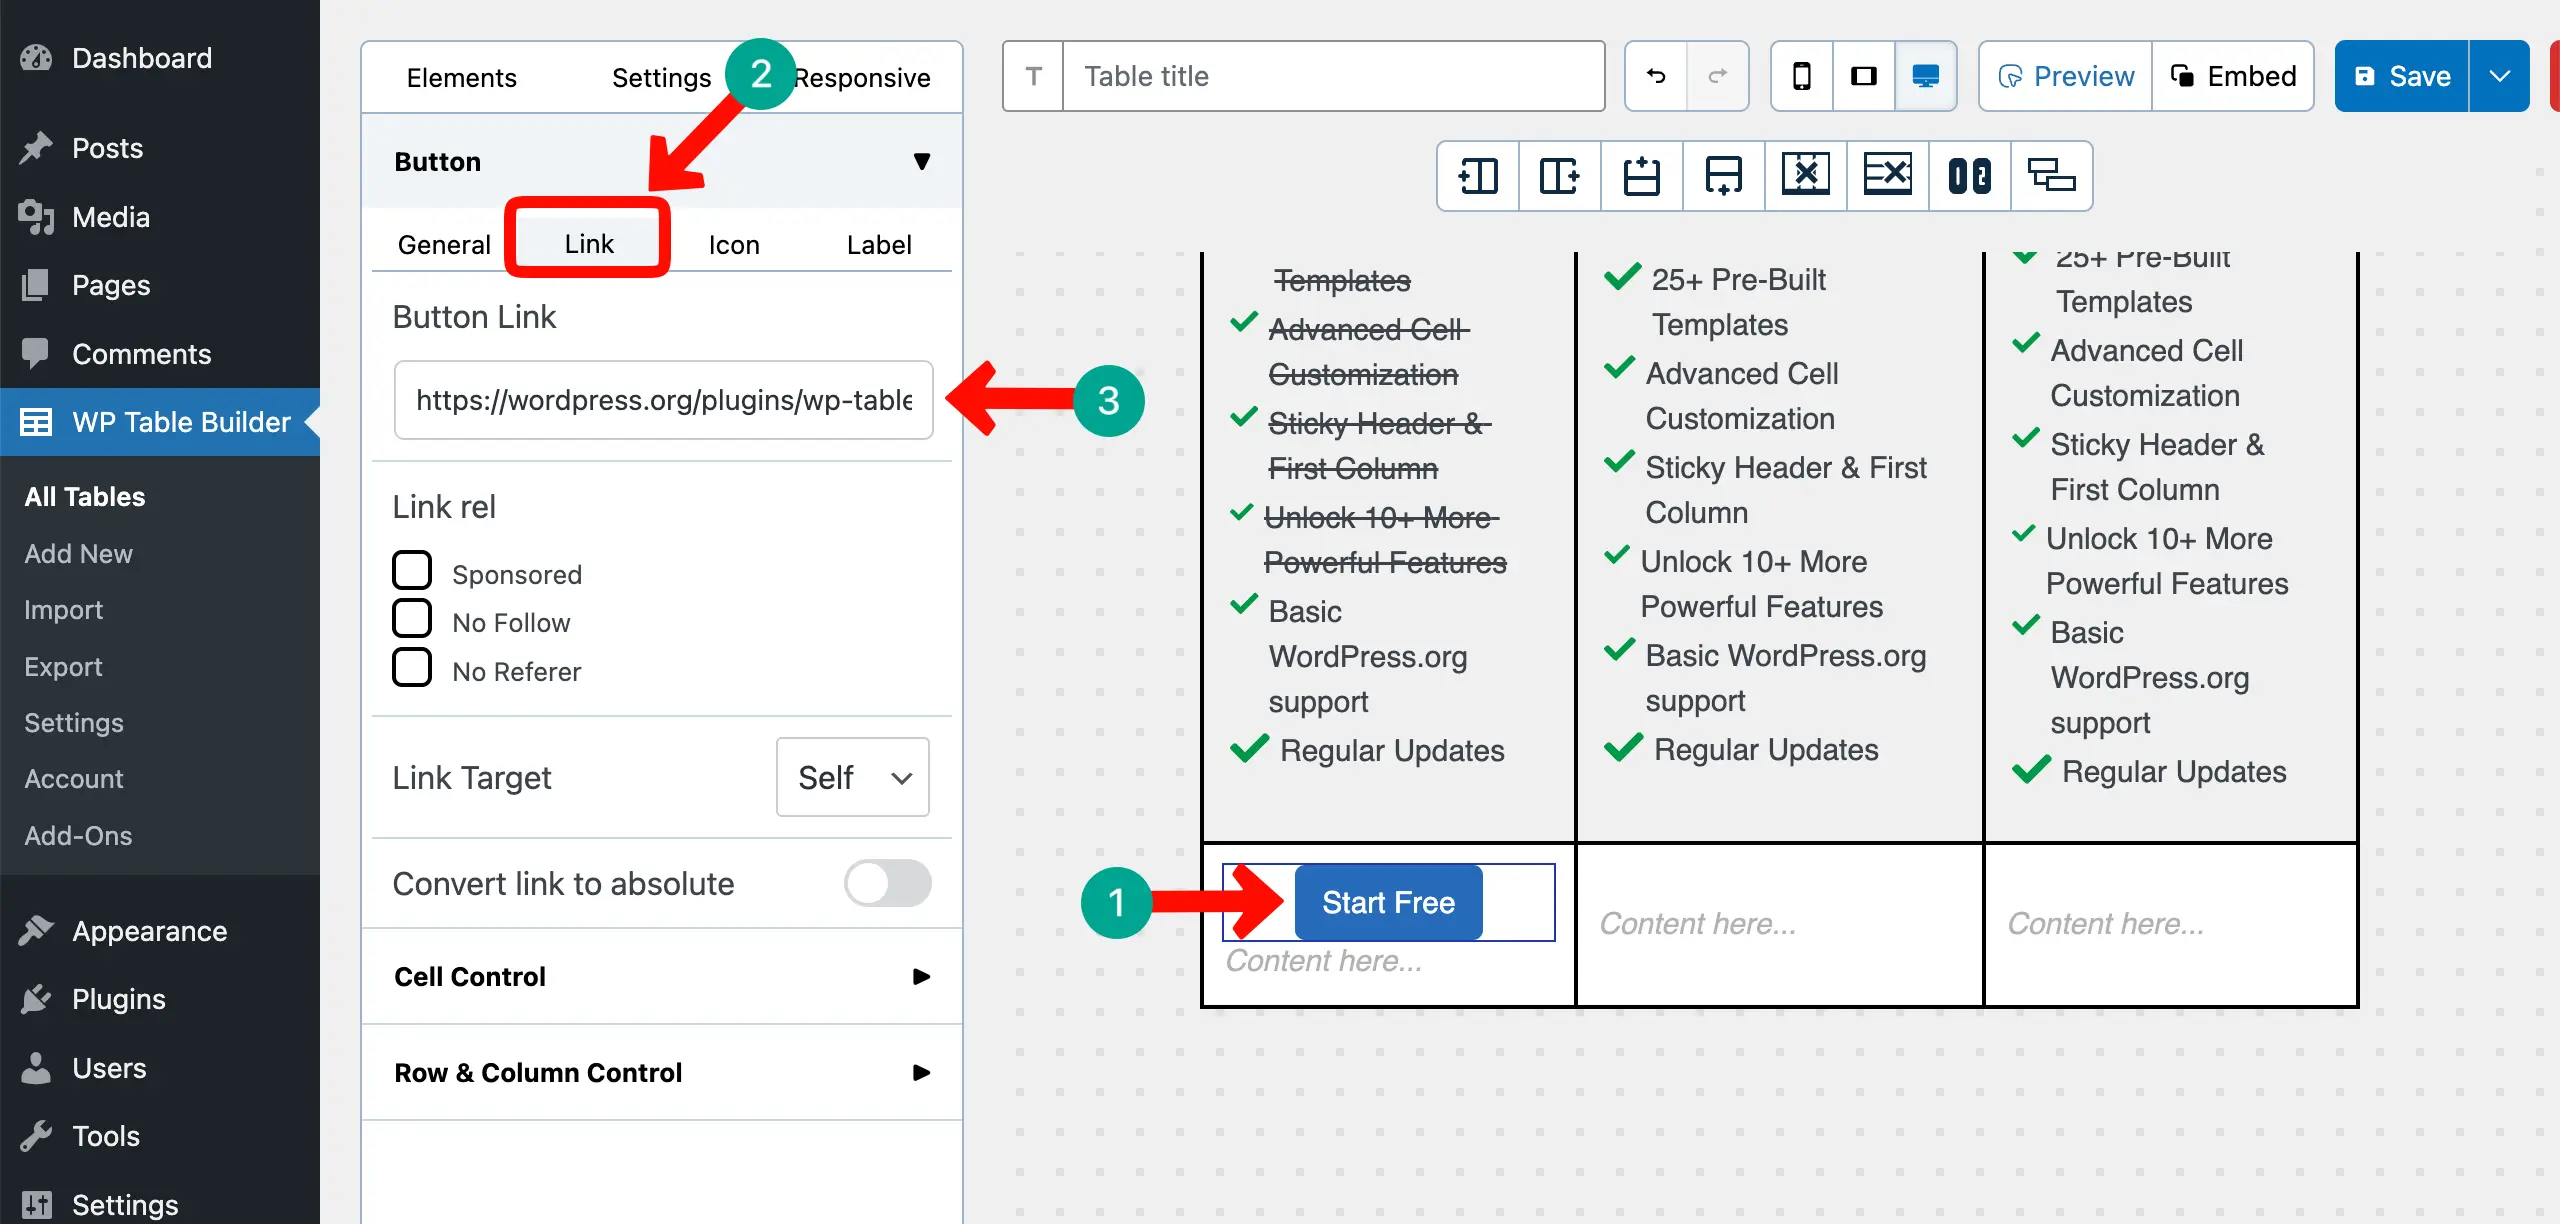
Connect your destination post or page link to the button from the respective option on the left sidebar.
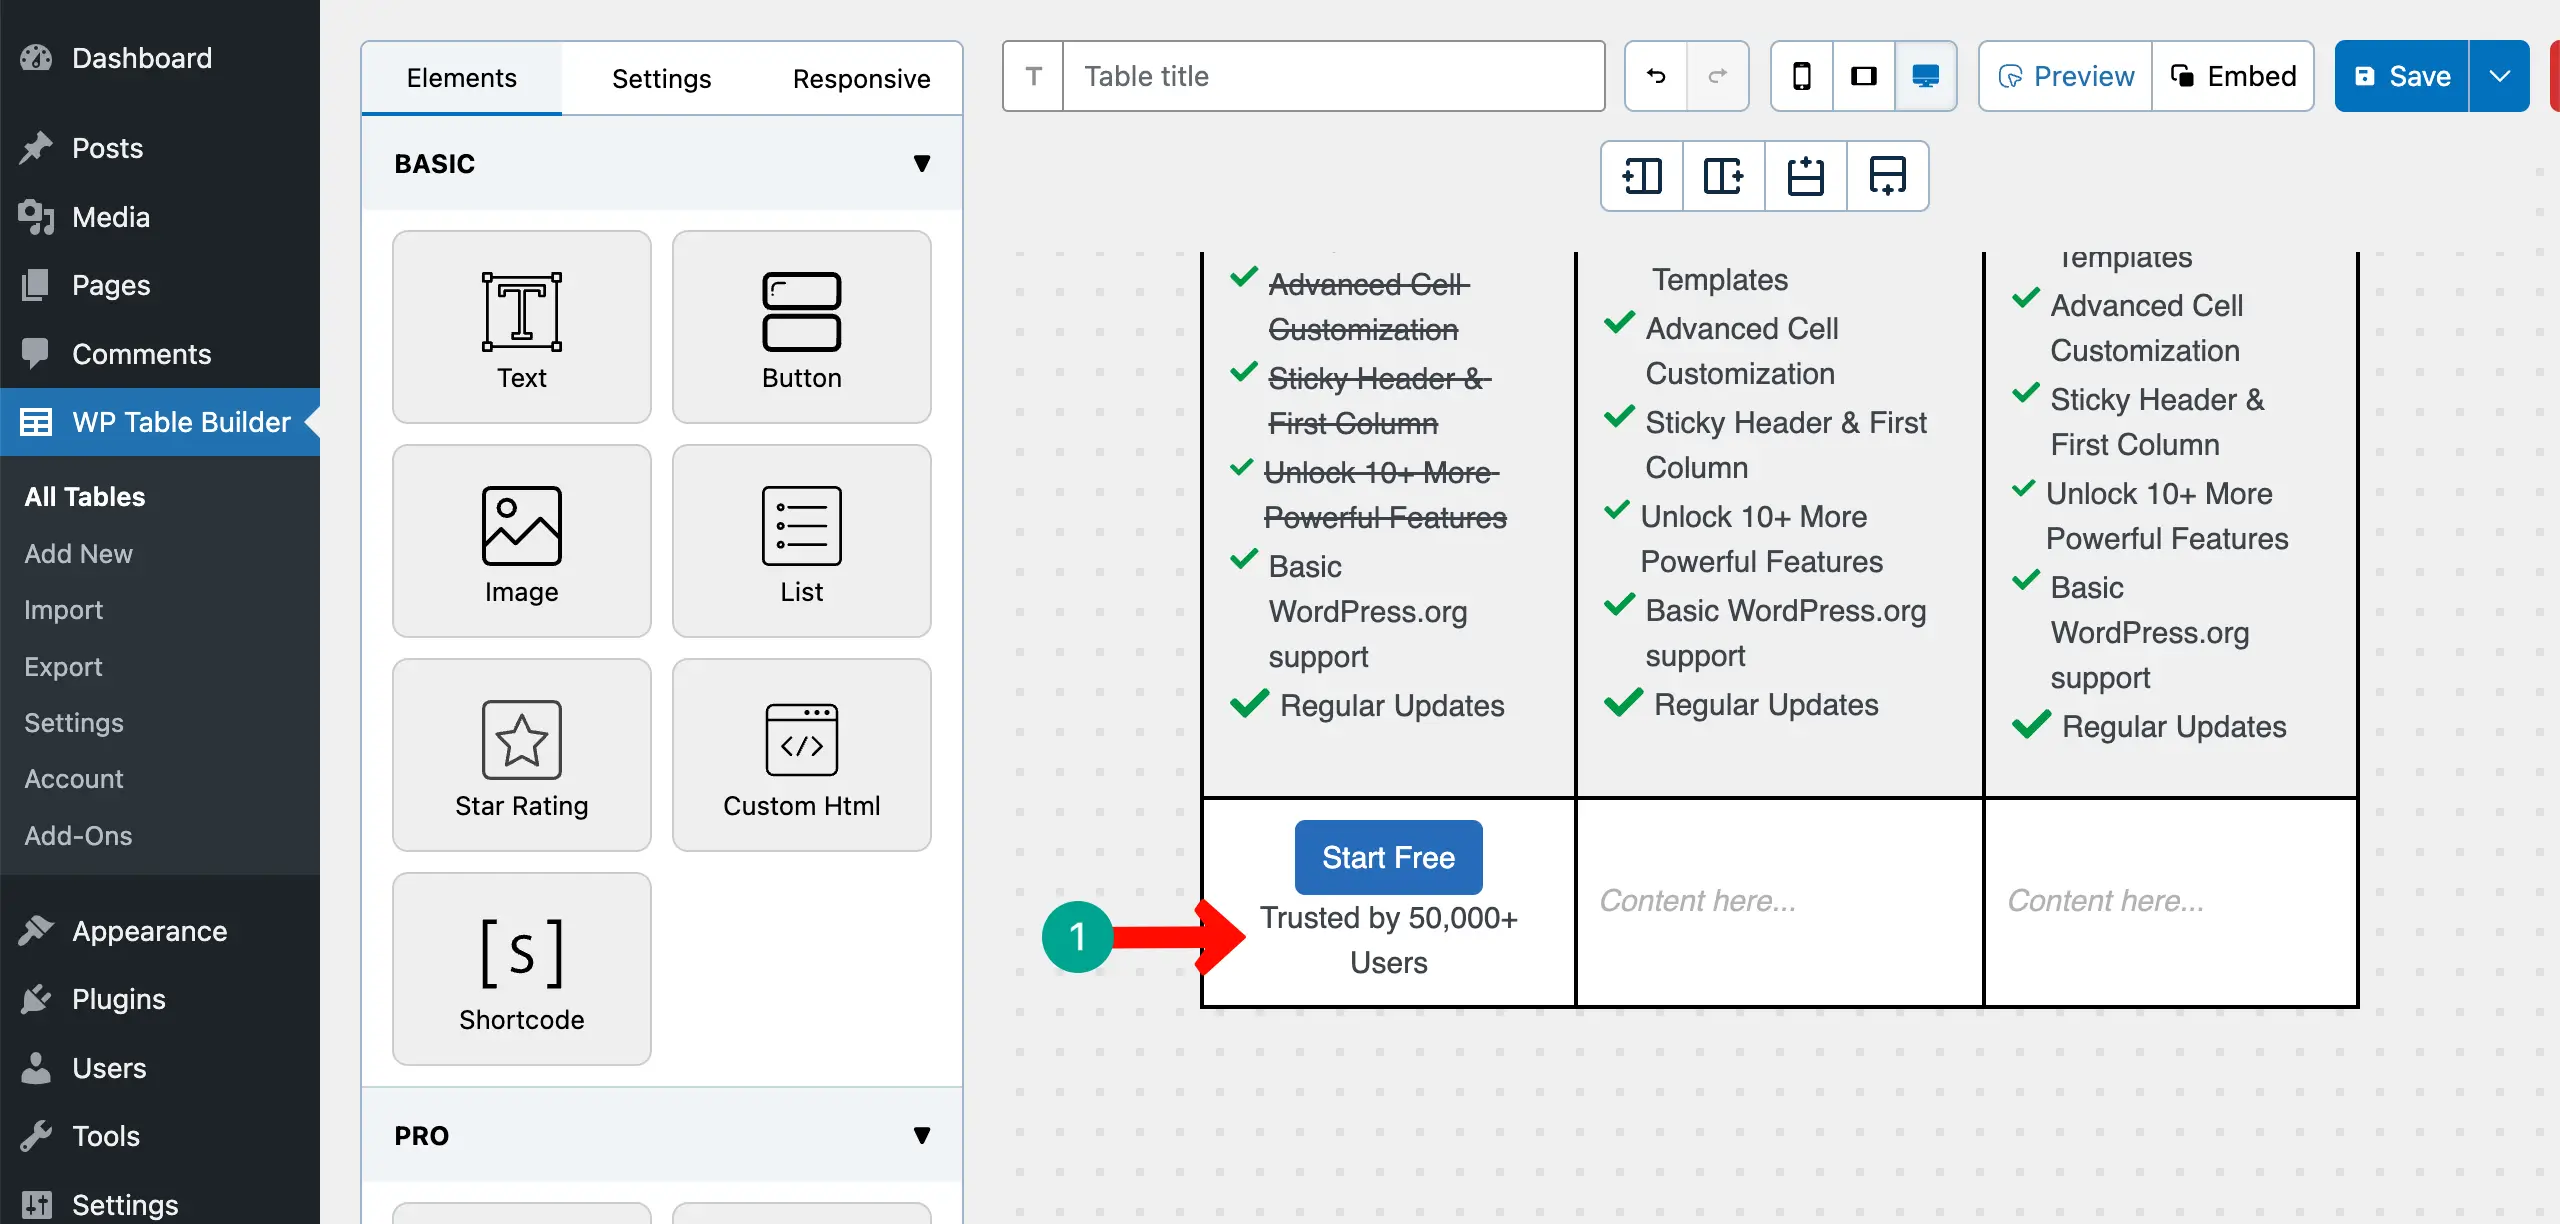
A trust signal near the button reduces last-second doubt more effectively than testimonials placed elsewhere.
You don’t have to use any element for this. Just write a simple text like us in the image attached below that may work as a trust signal.
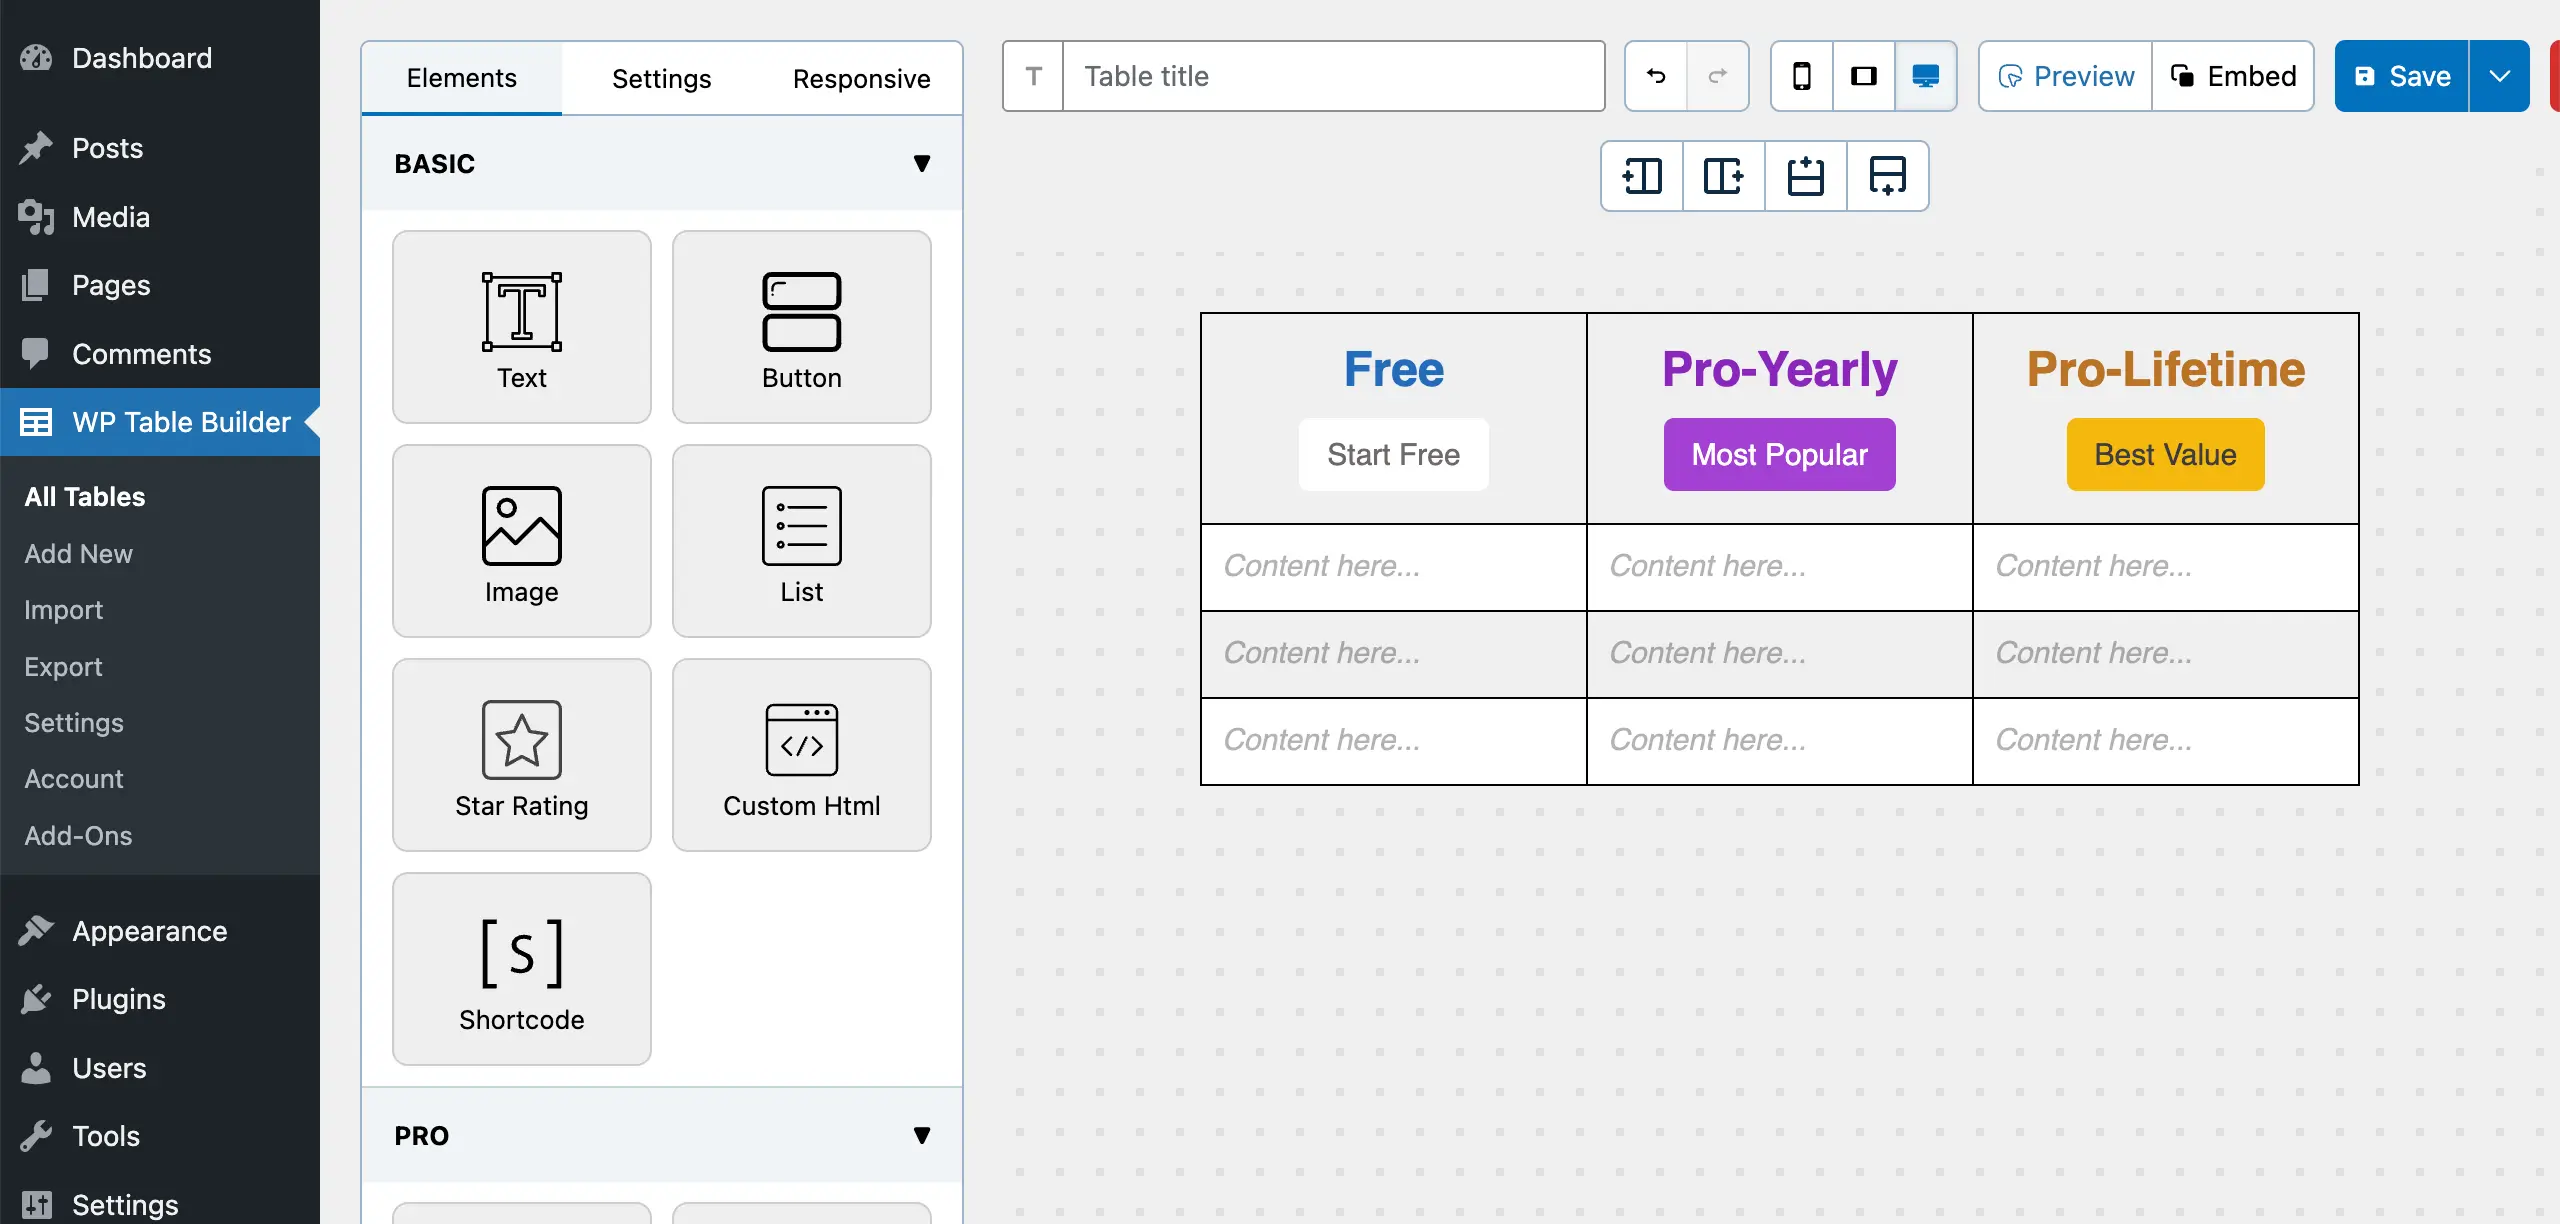
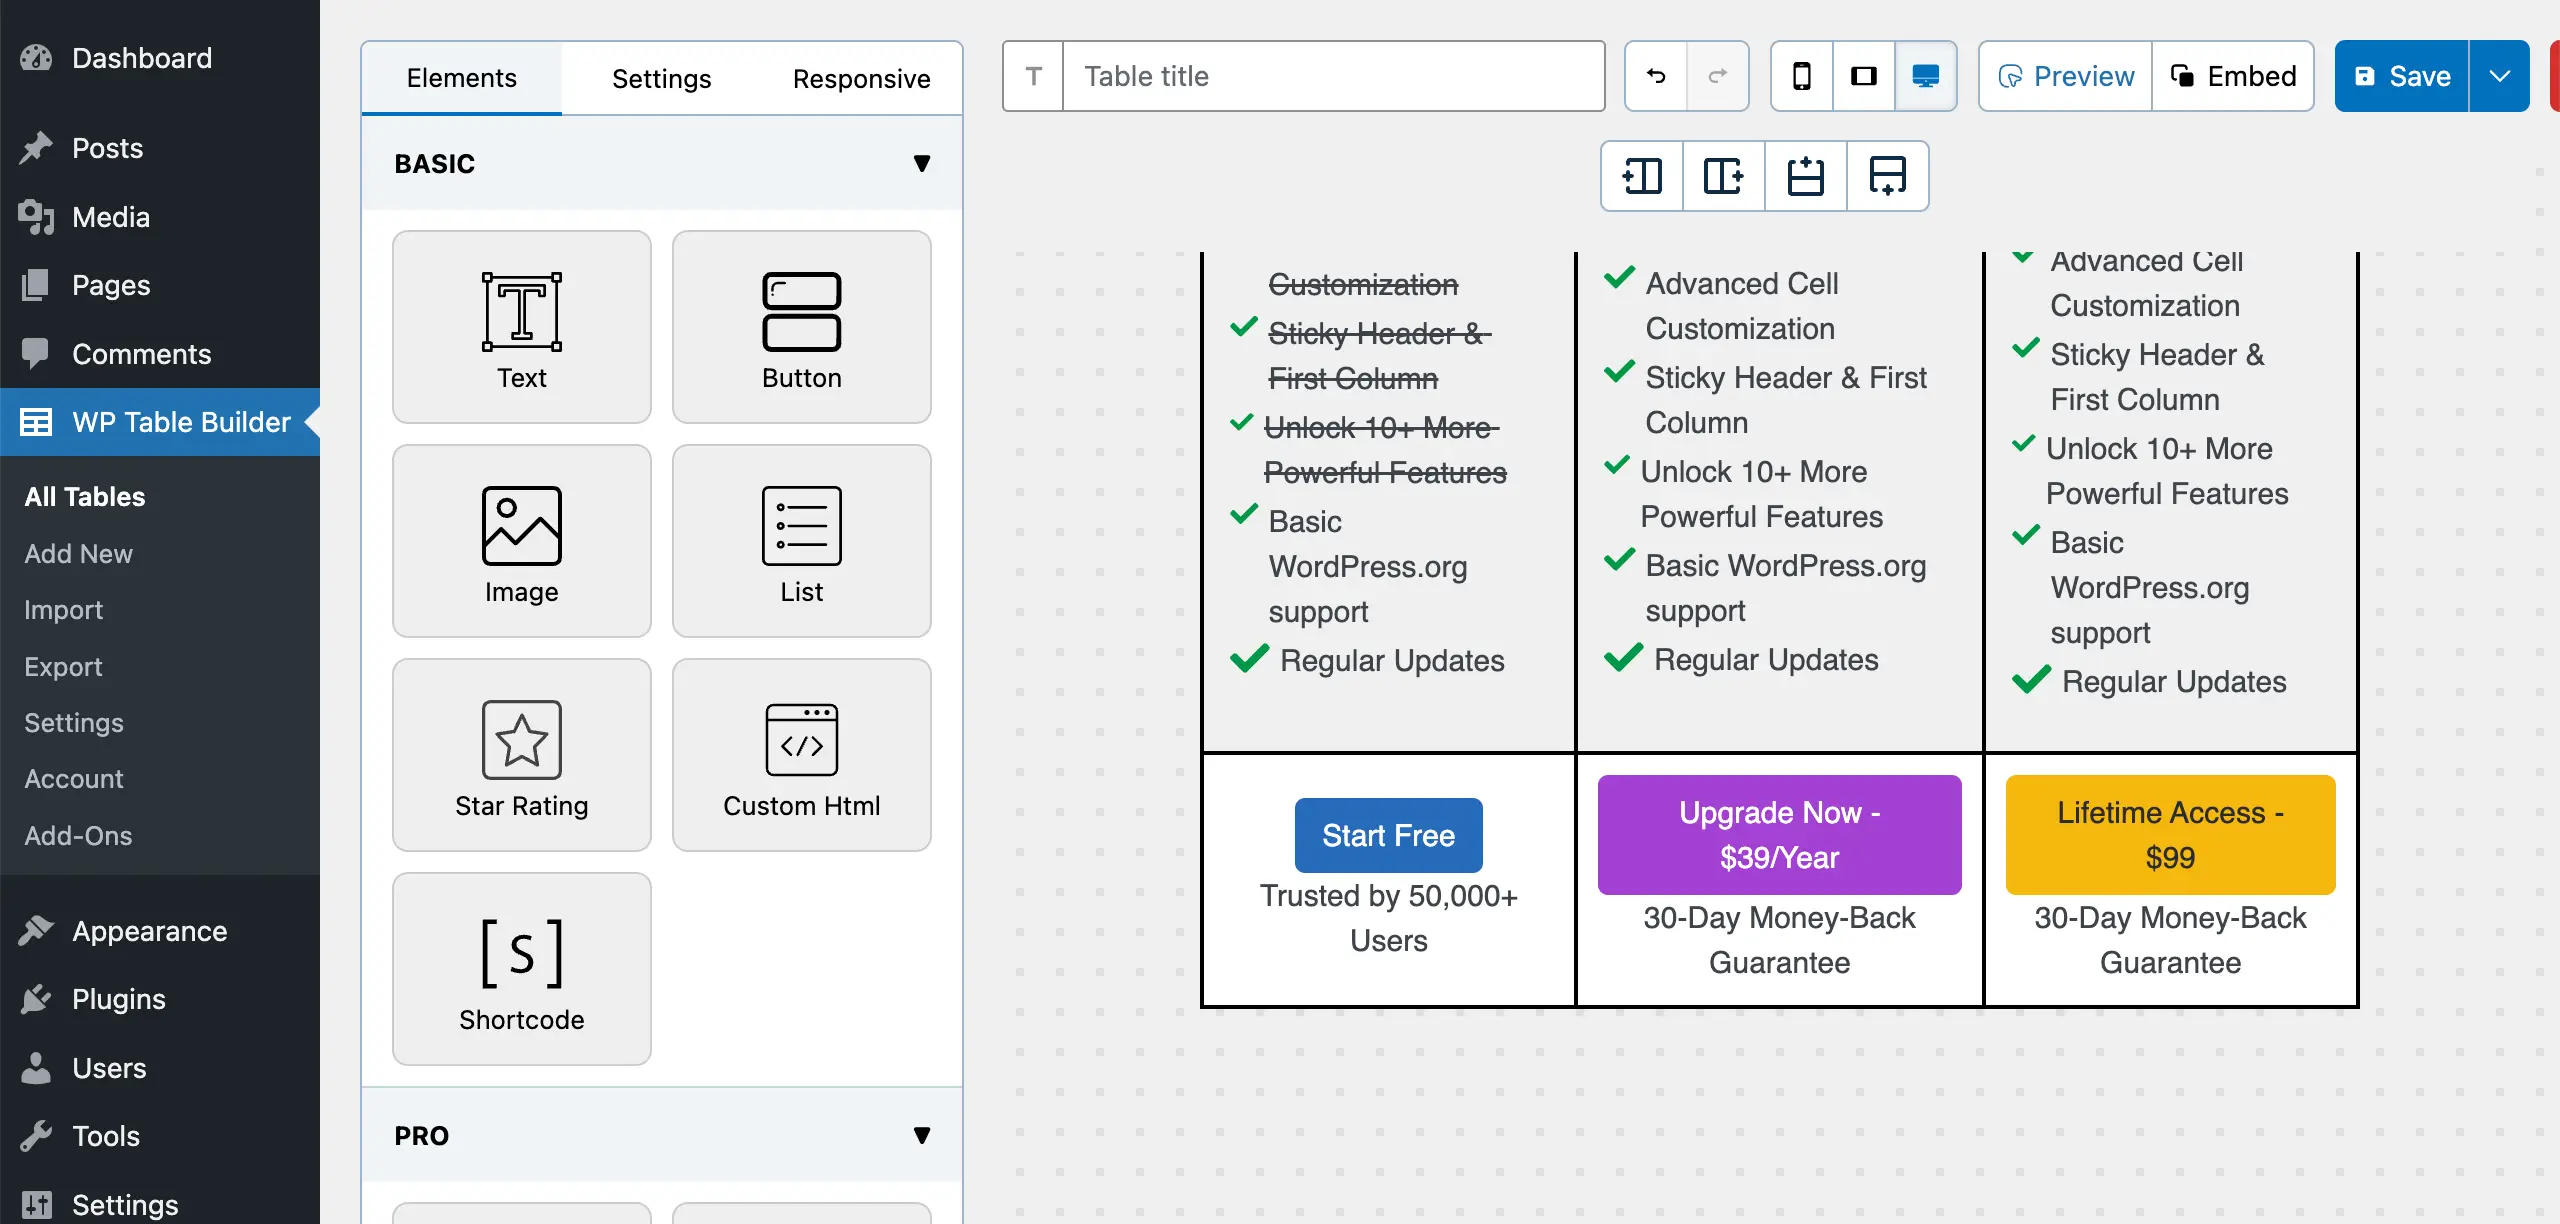
In the same way, add the button and trust signal to all the other columns of the pricing table.
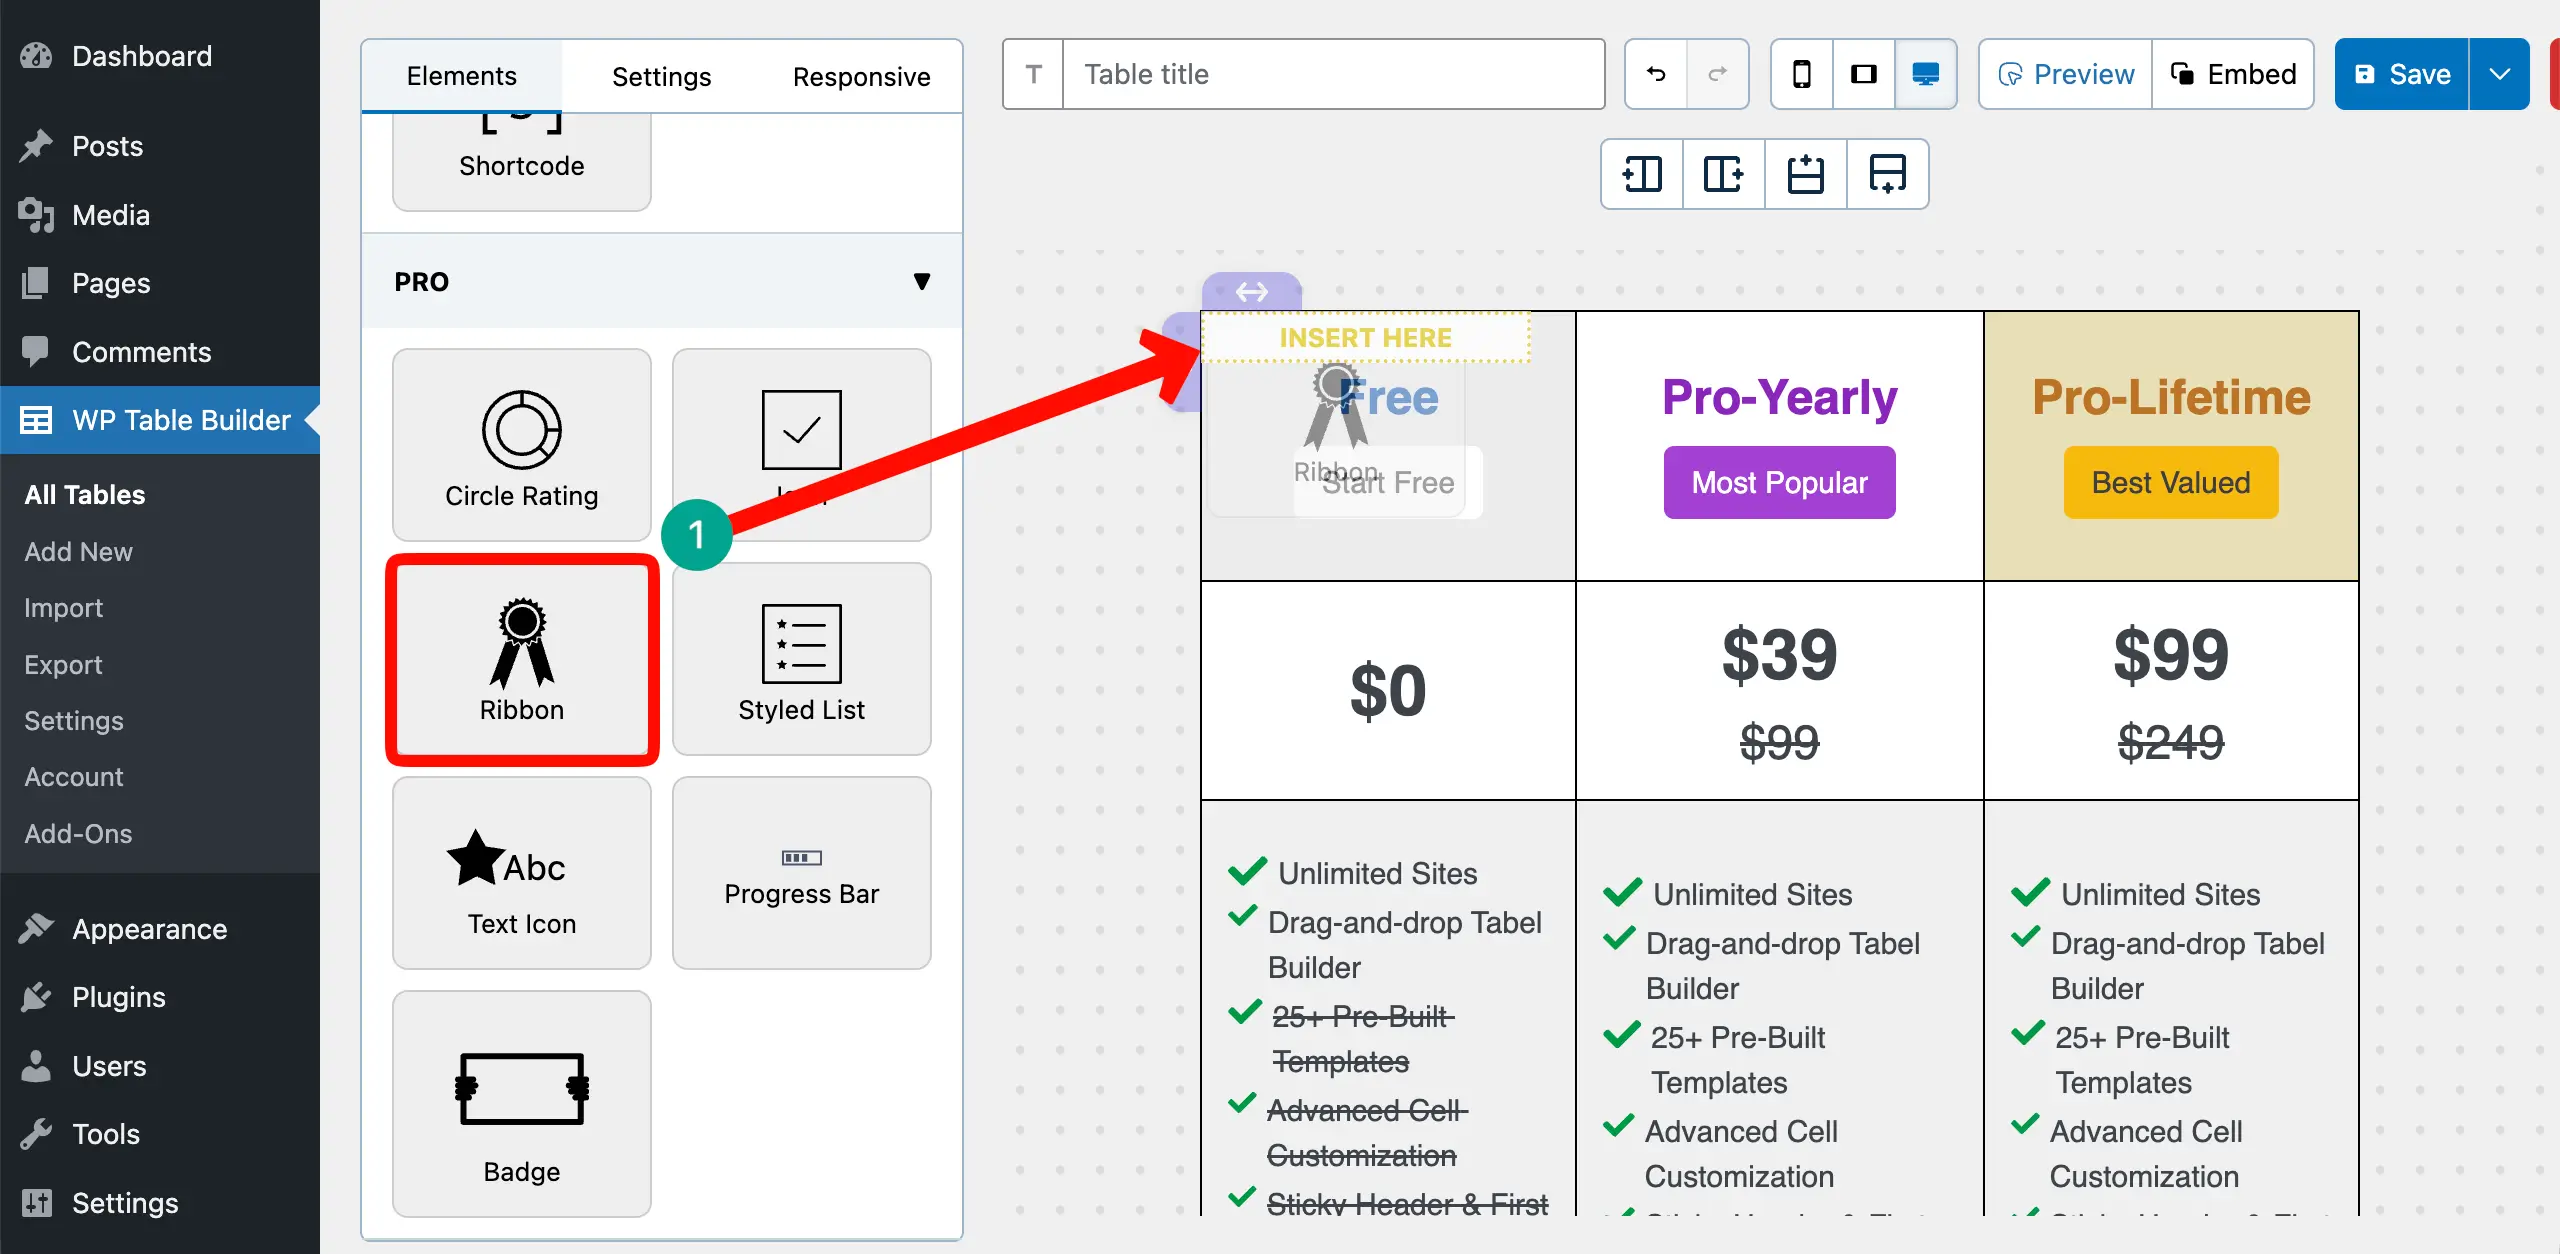
Step 8: Add Ribbons to the Table
Drag and drop the Ribbon element to the top cell of the first column of the table.
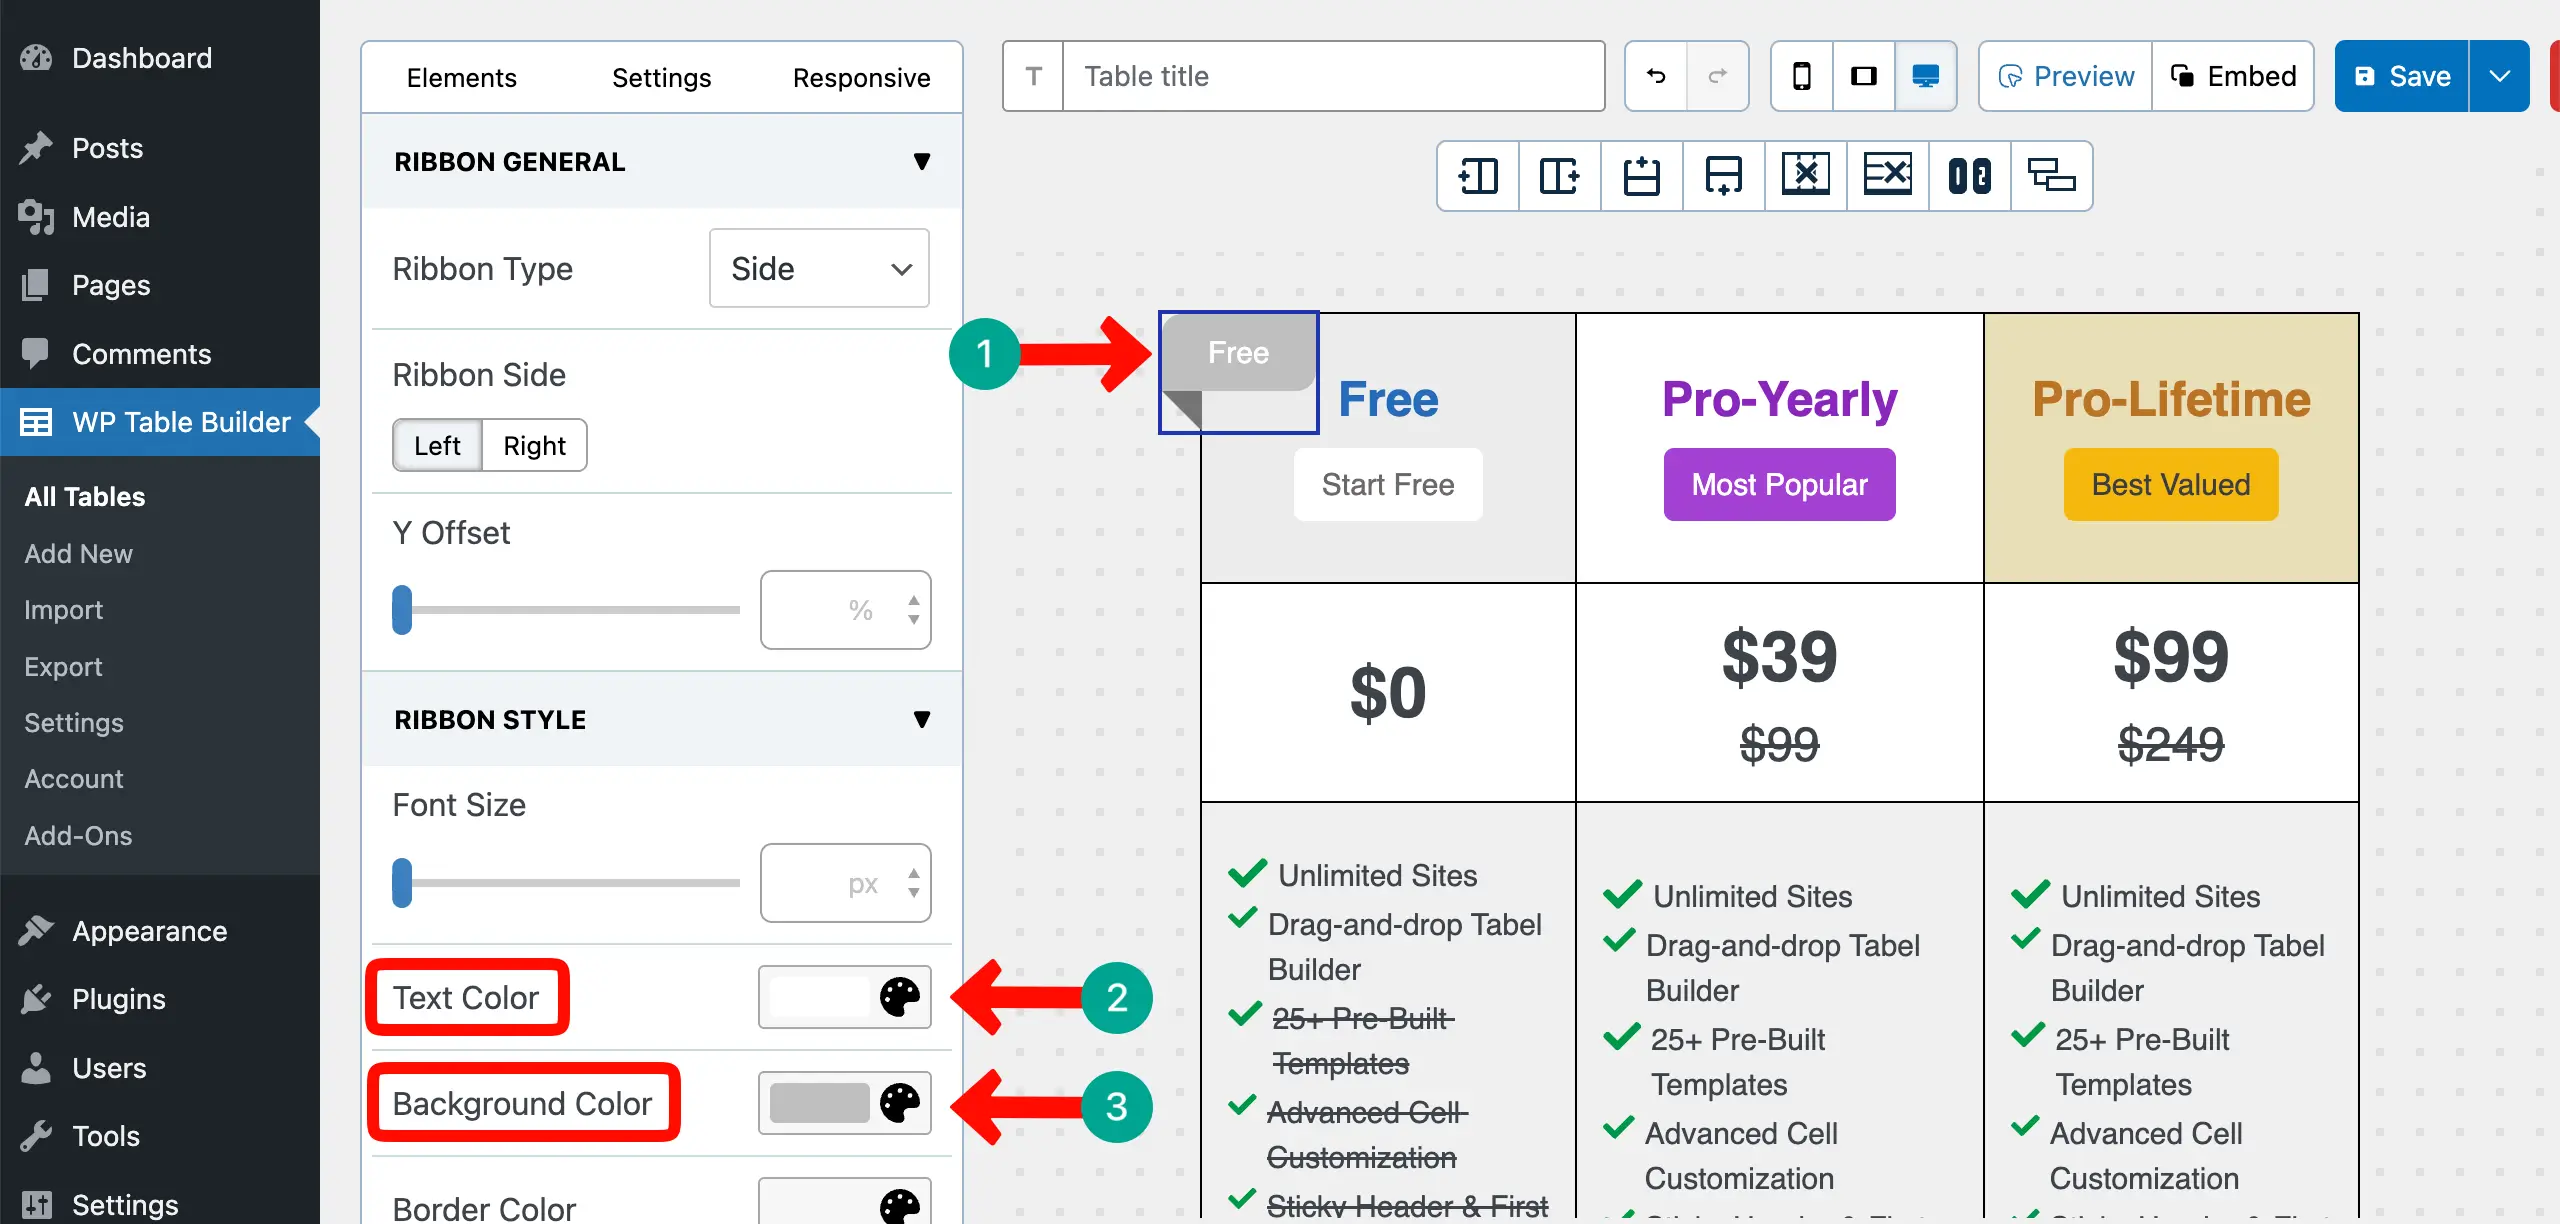
Write something to label the ribbon. Then, add text and background colors to the ribbon.
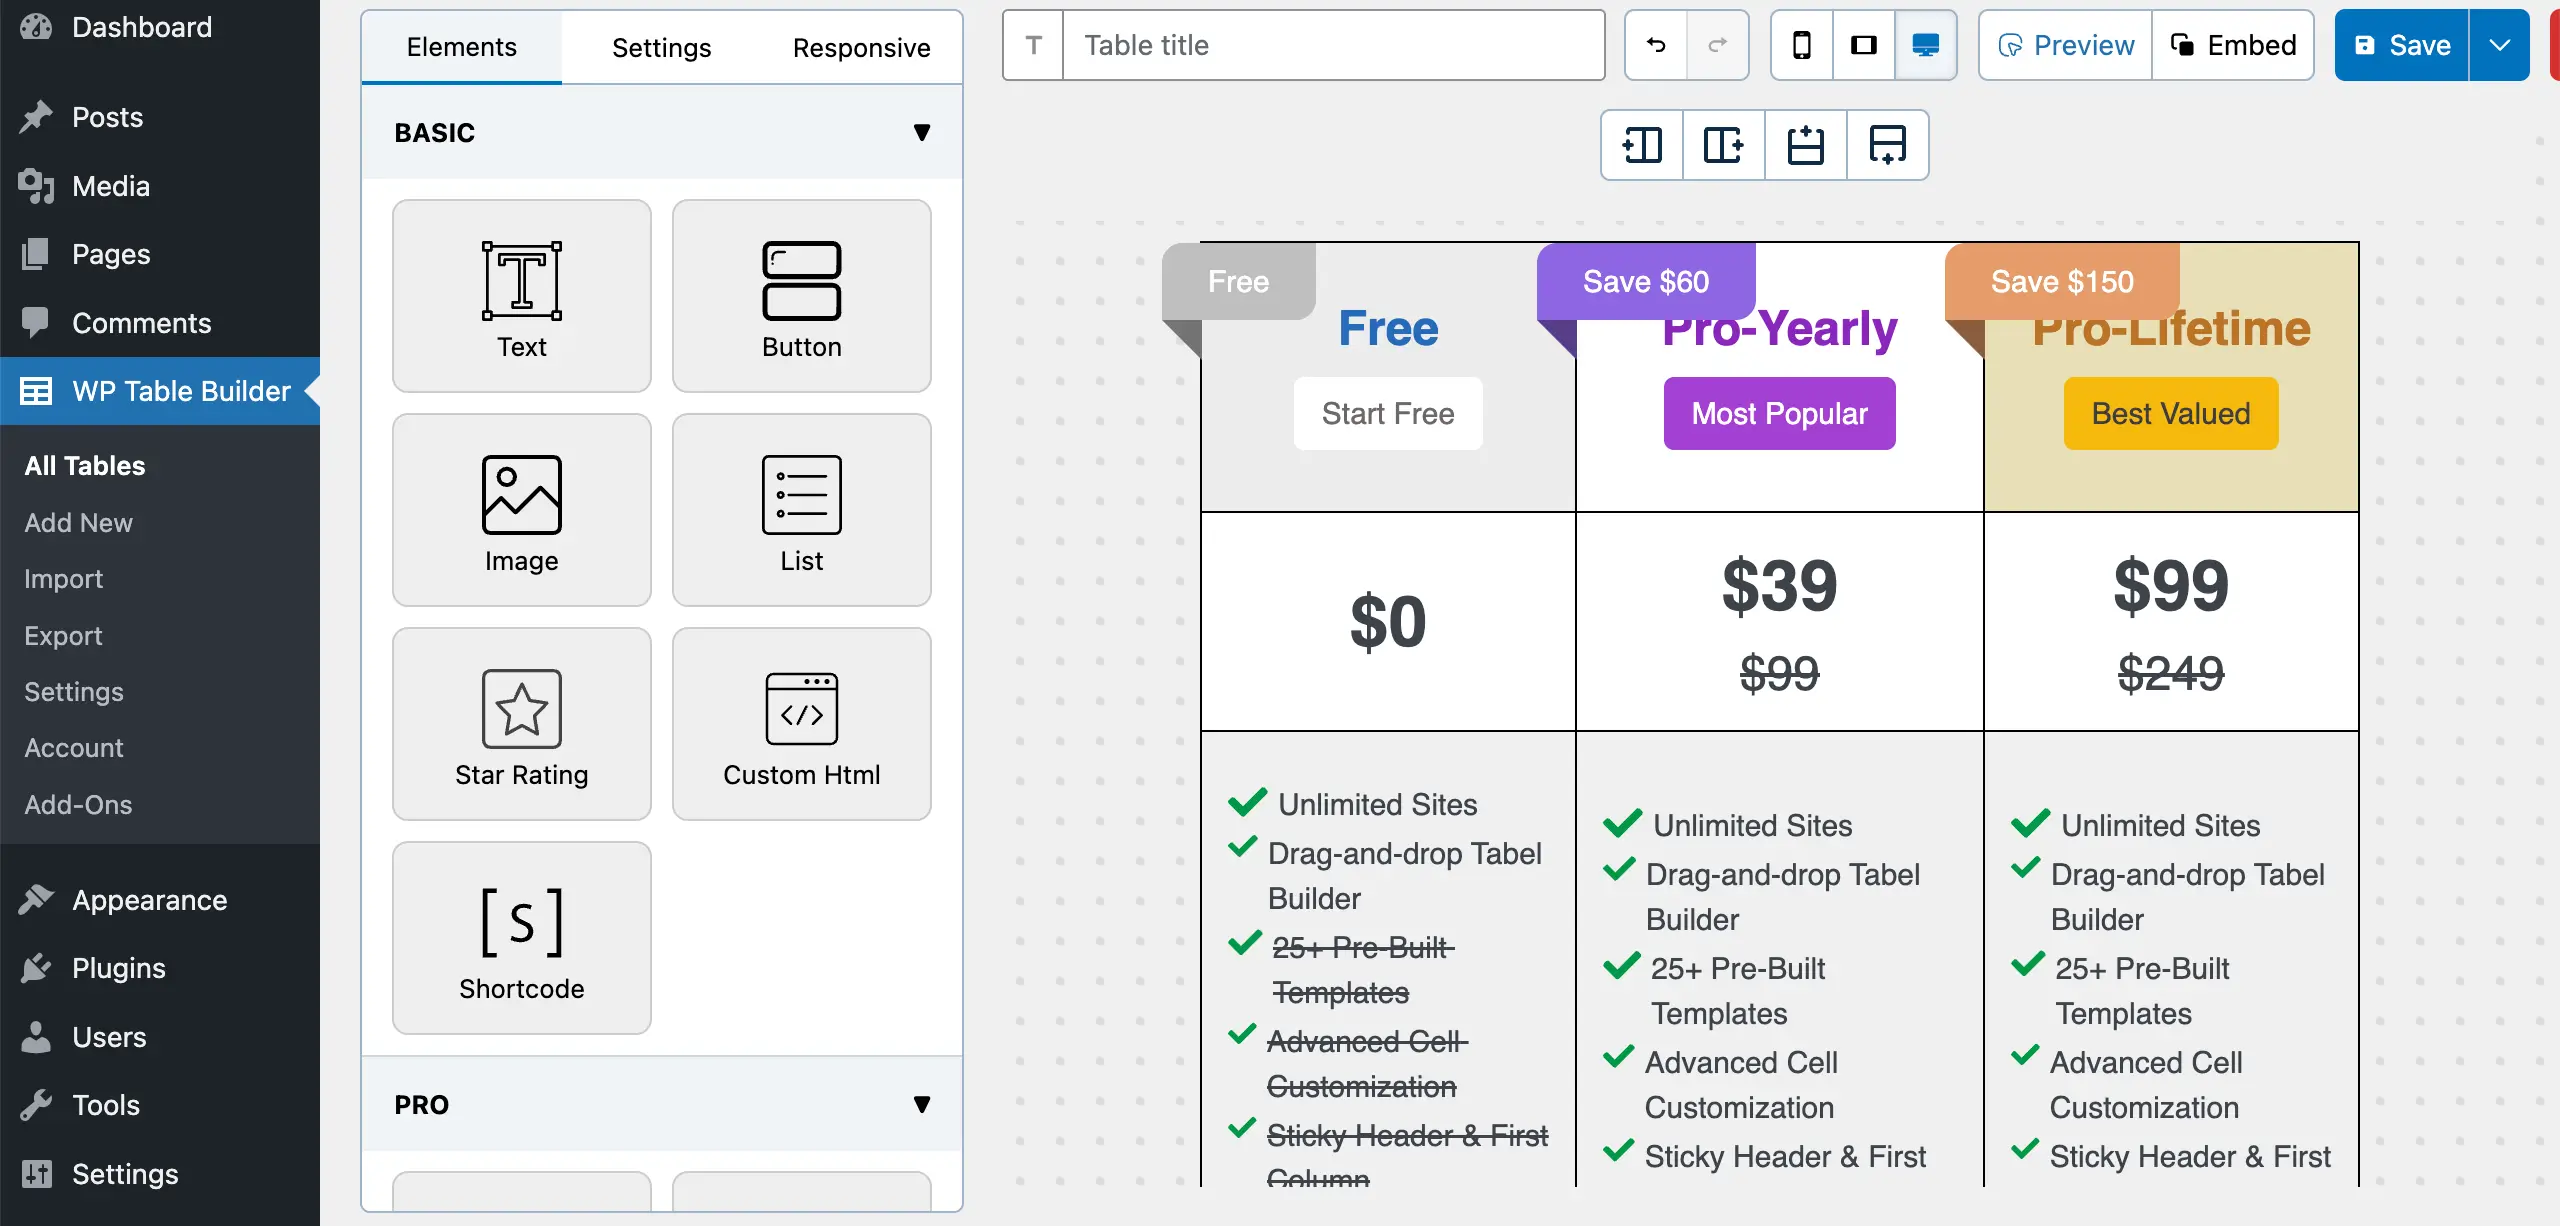
In the same way, add ribbons to all the other columns.
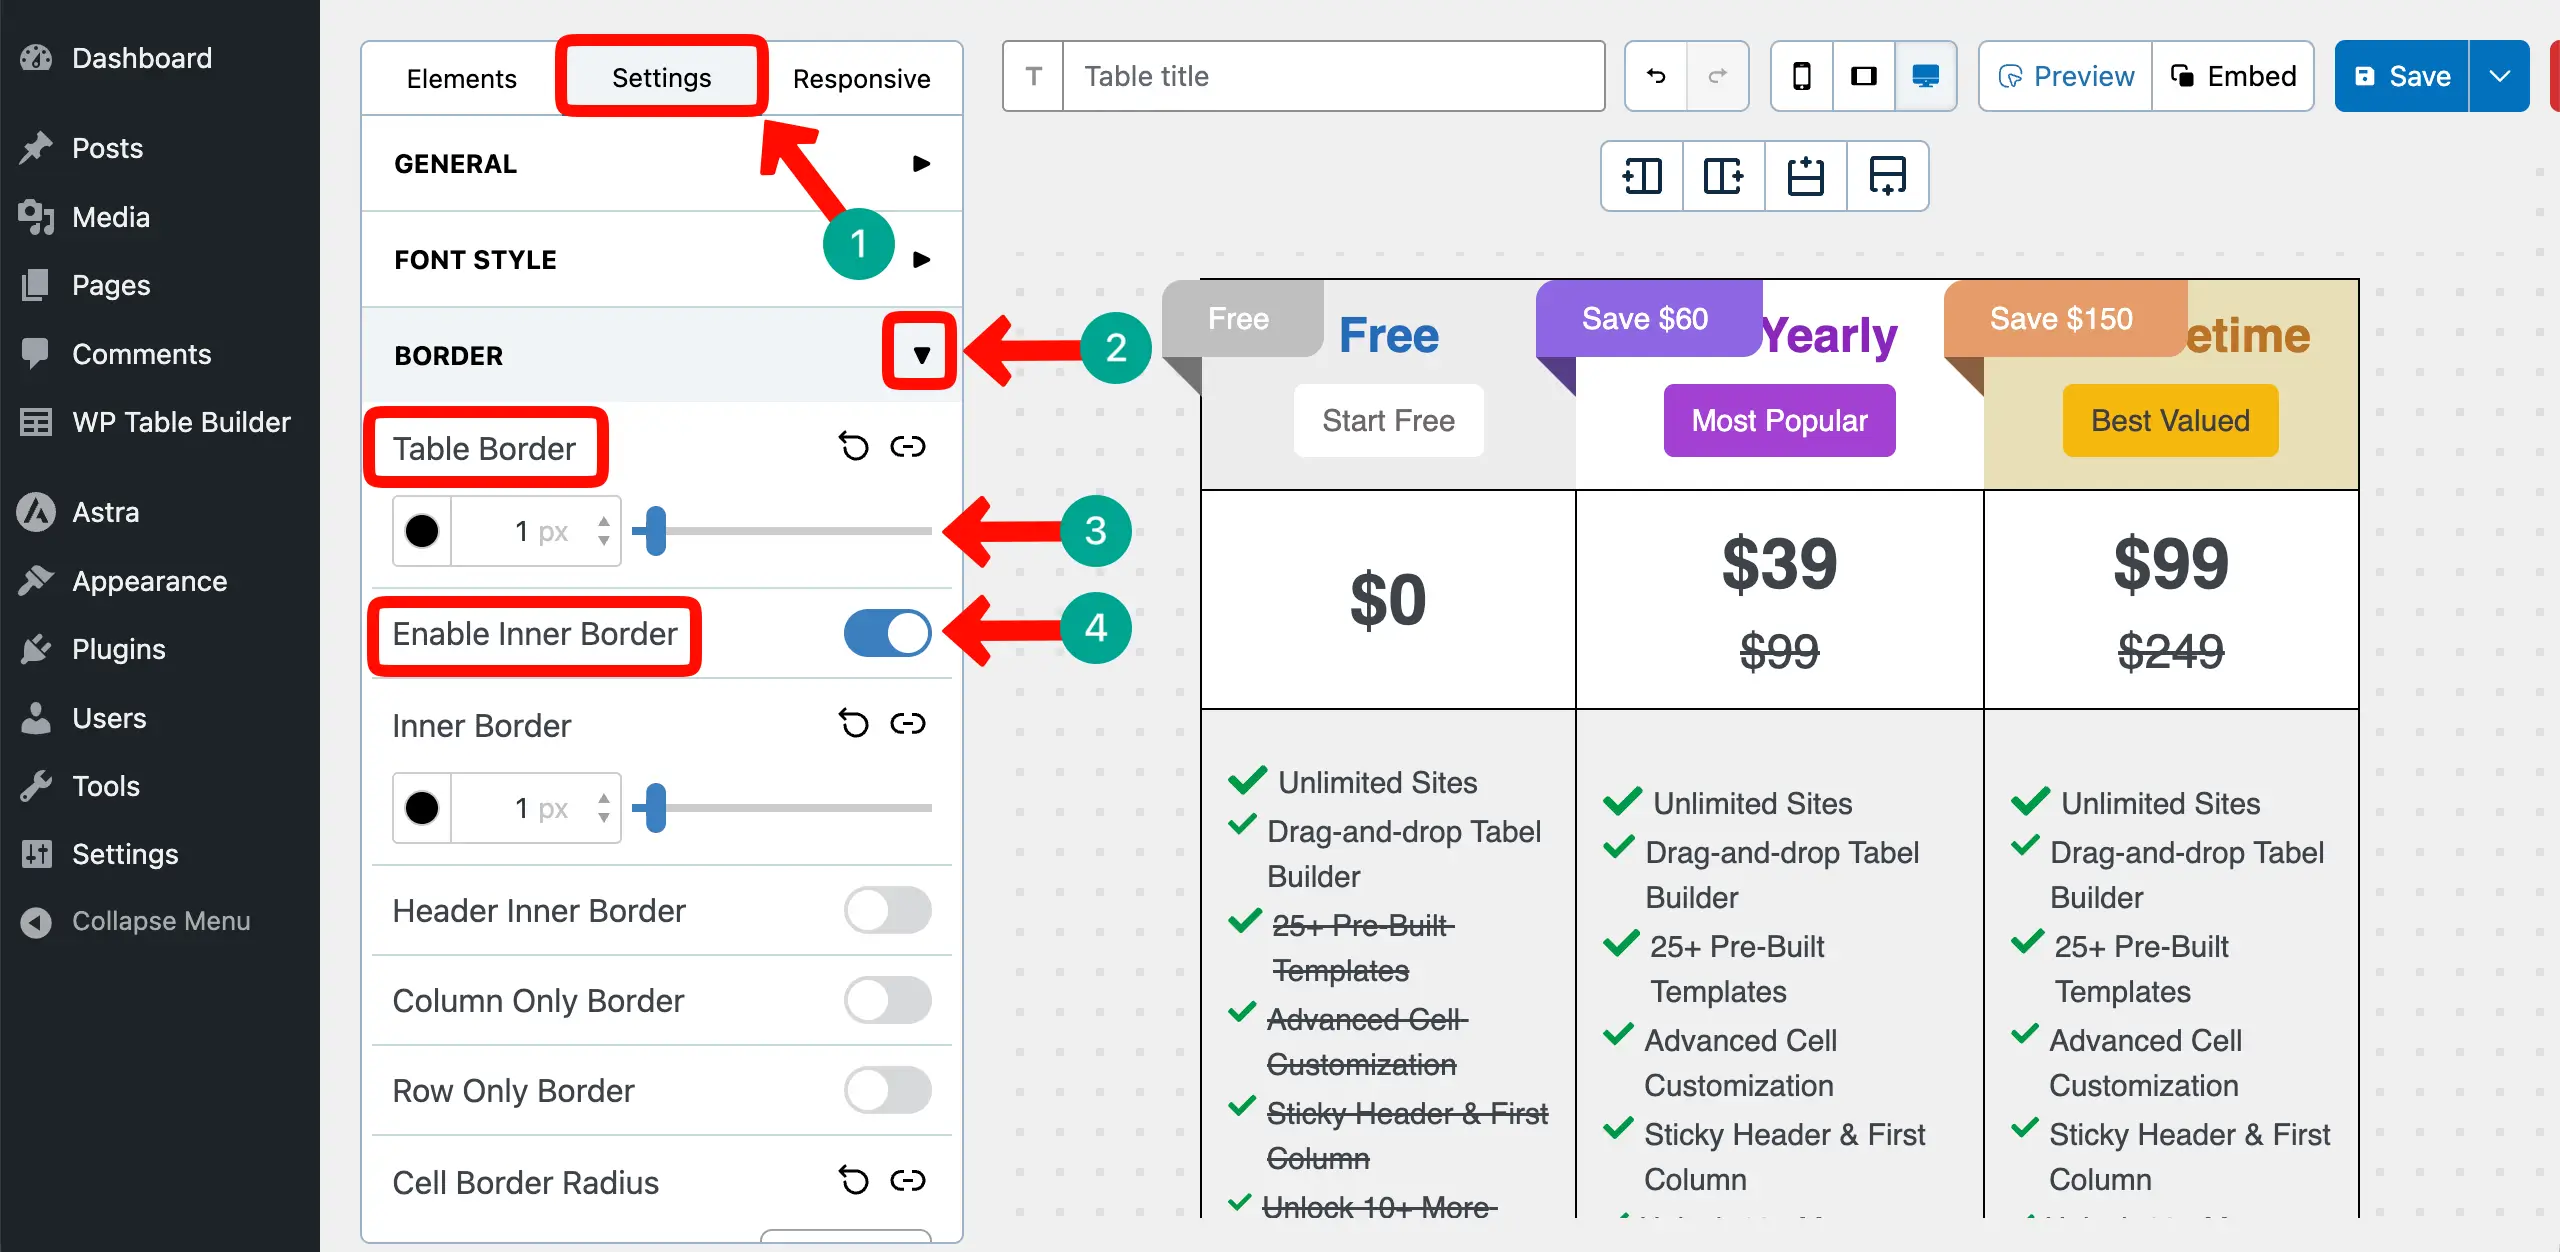
Step 9: Stylize the Border
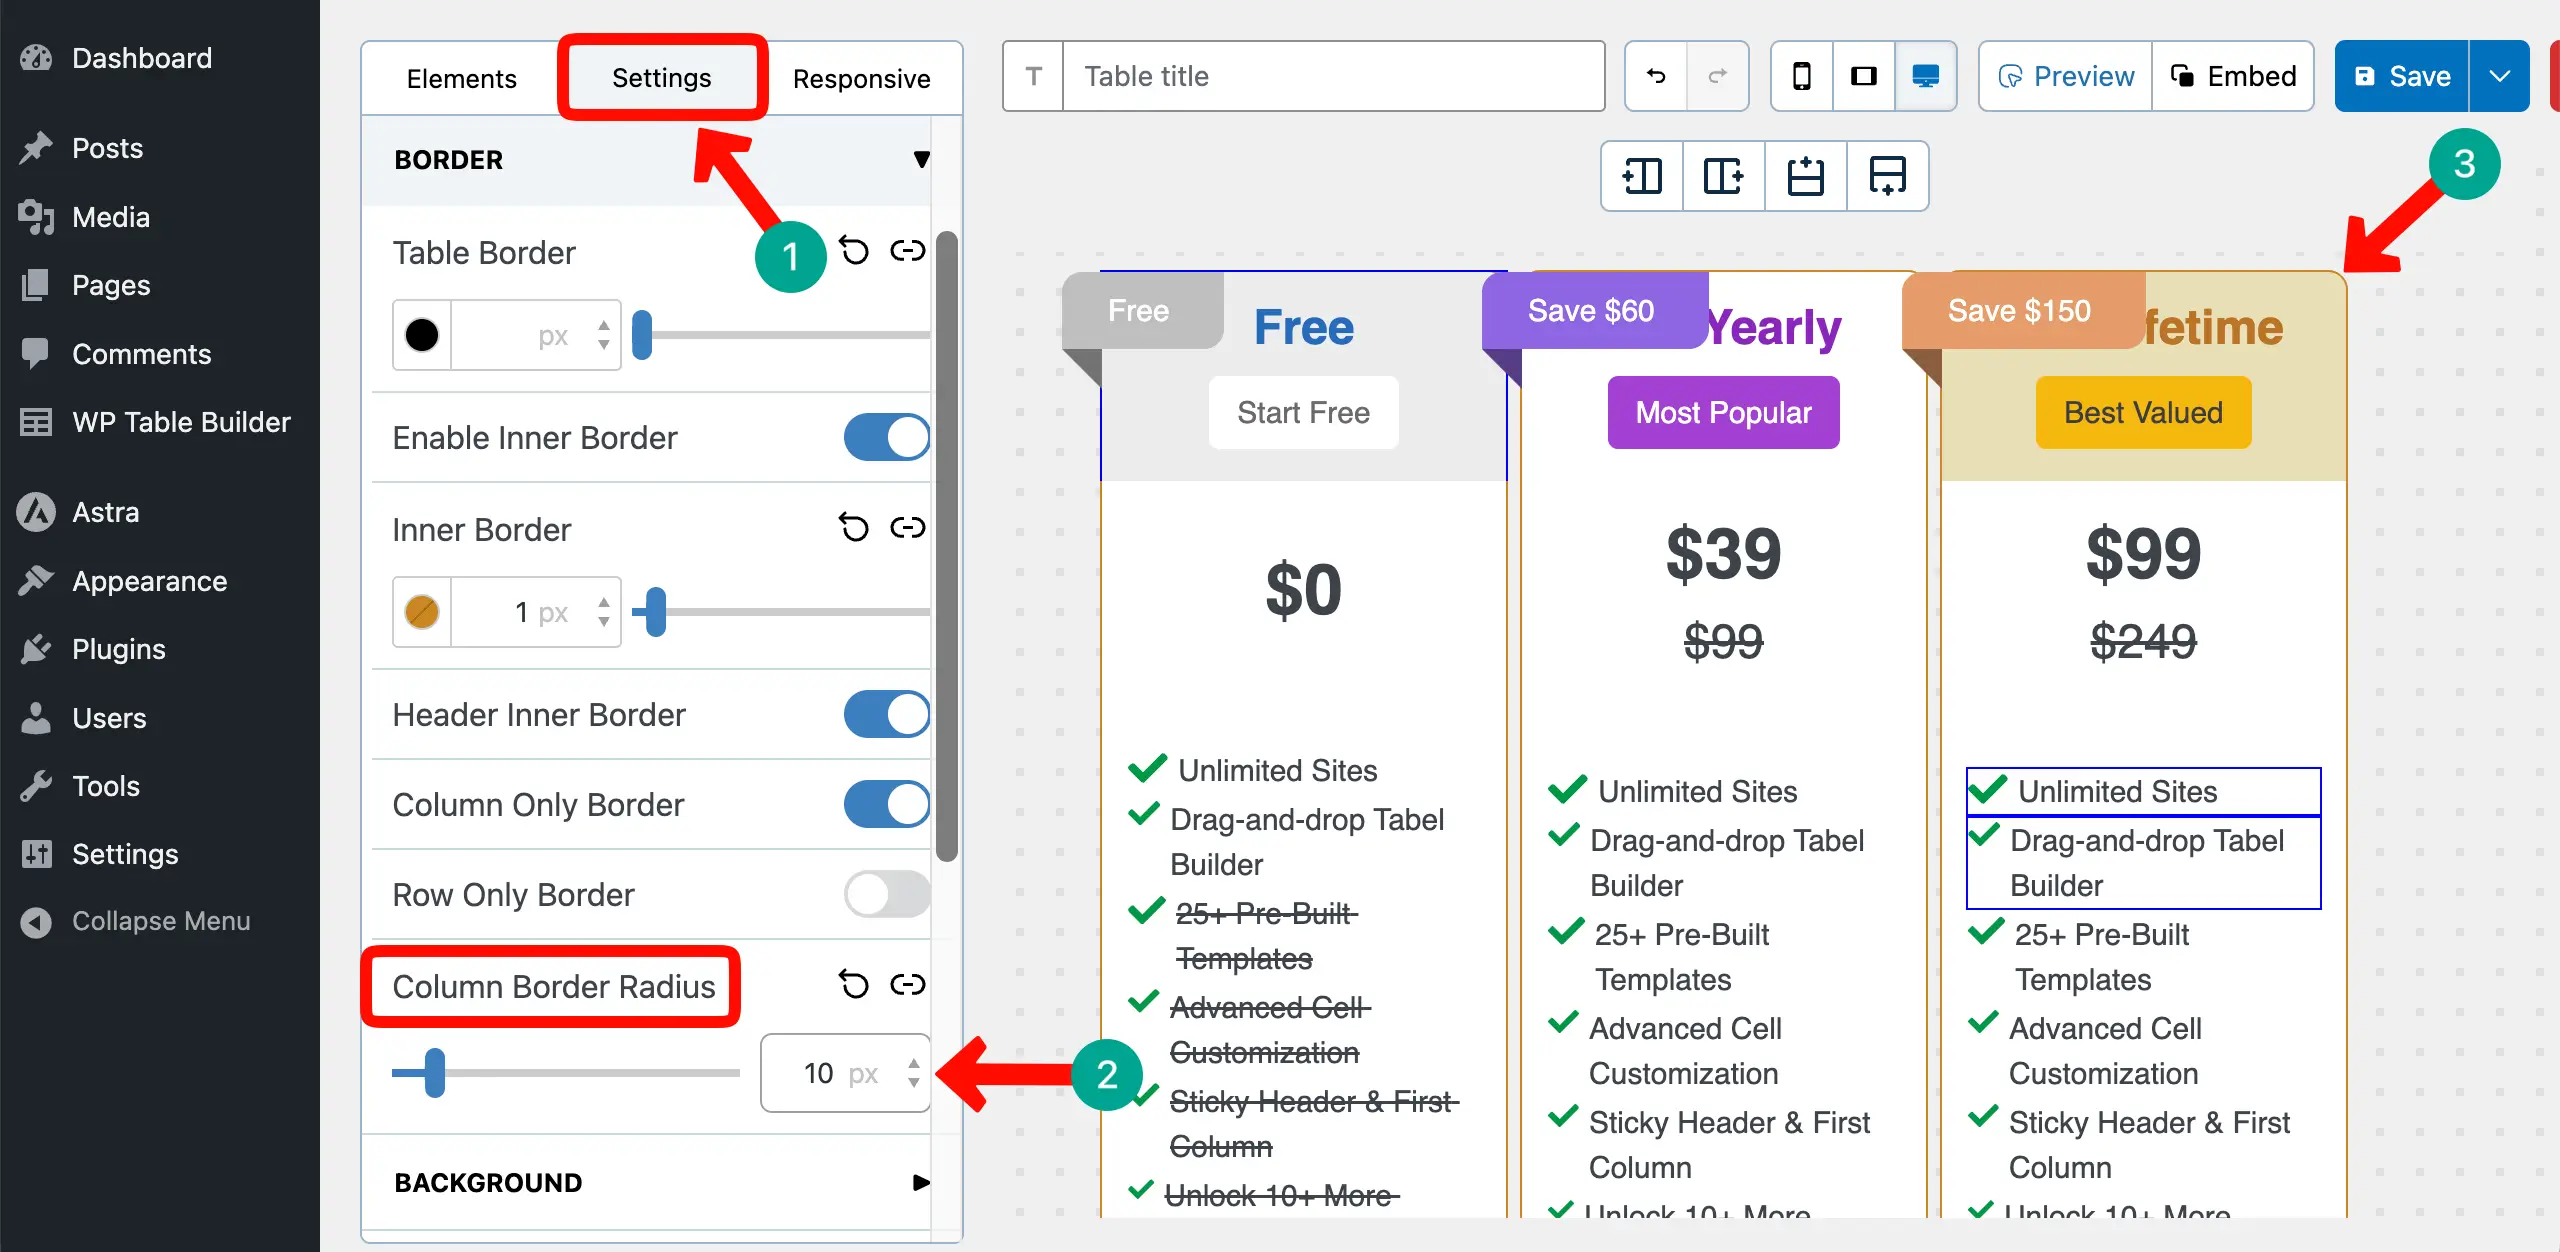
Navigate to the Settings tab > Border section. You can change the color and width of the table and inner borders. Do the changes as you want.
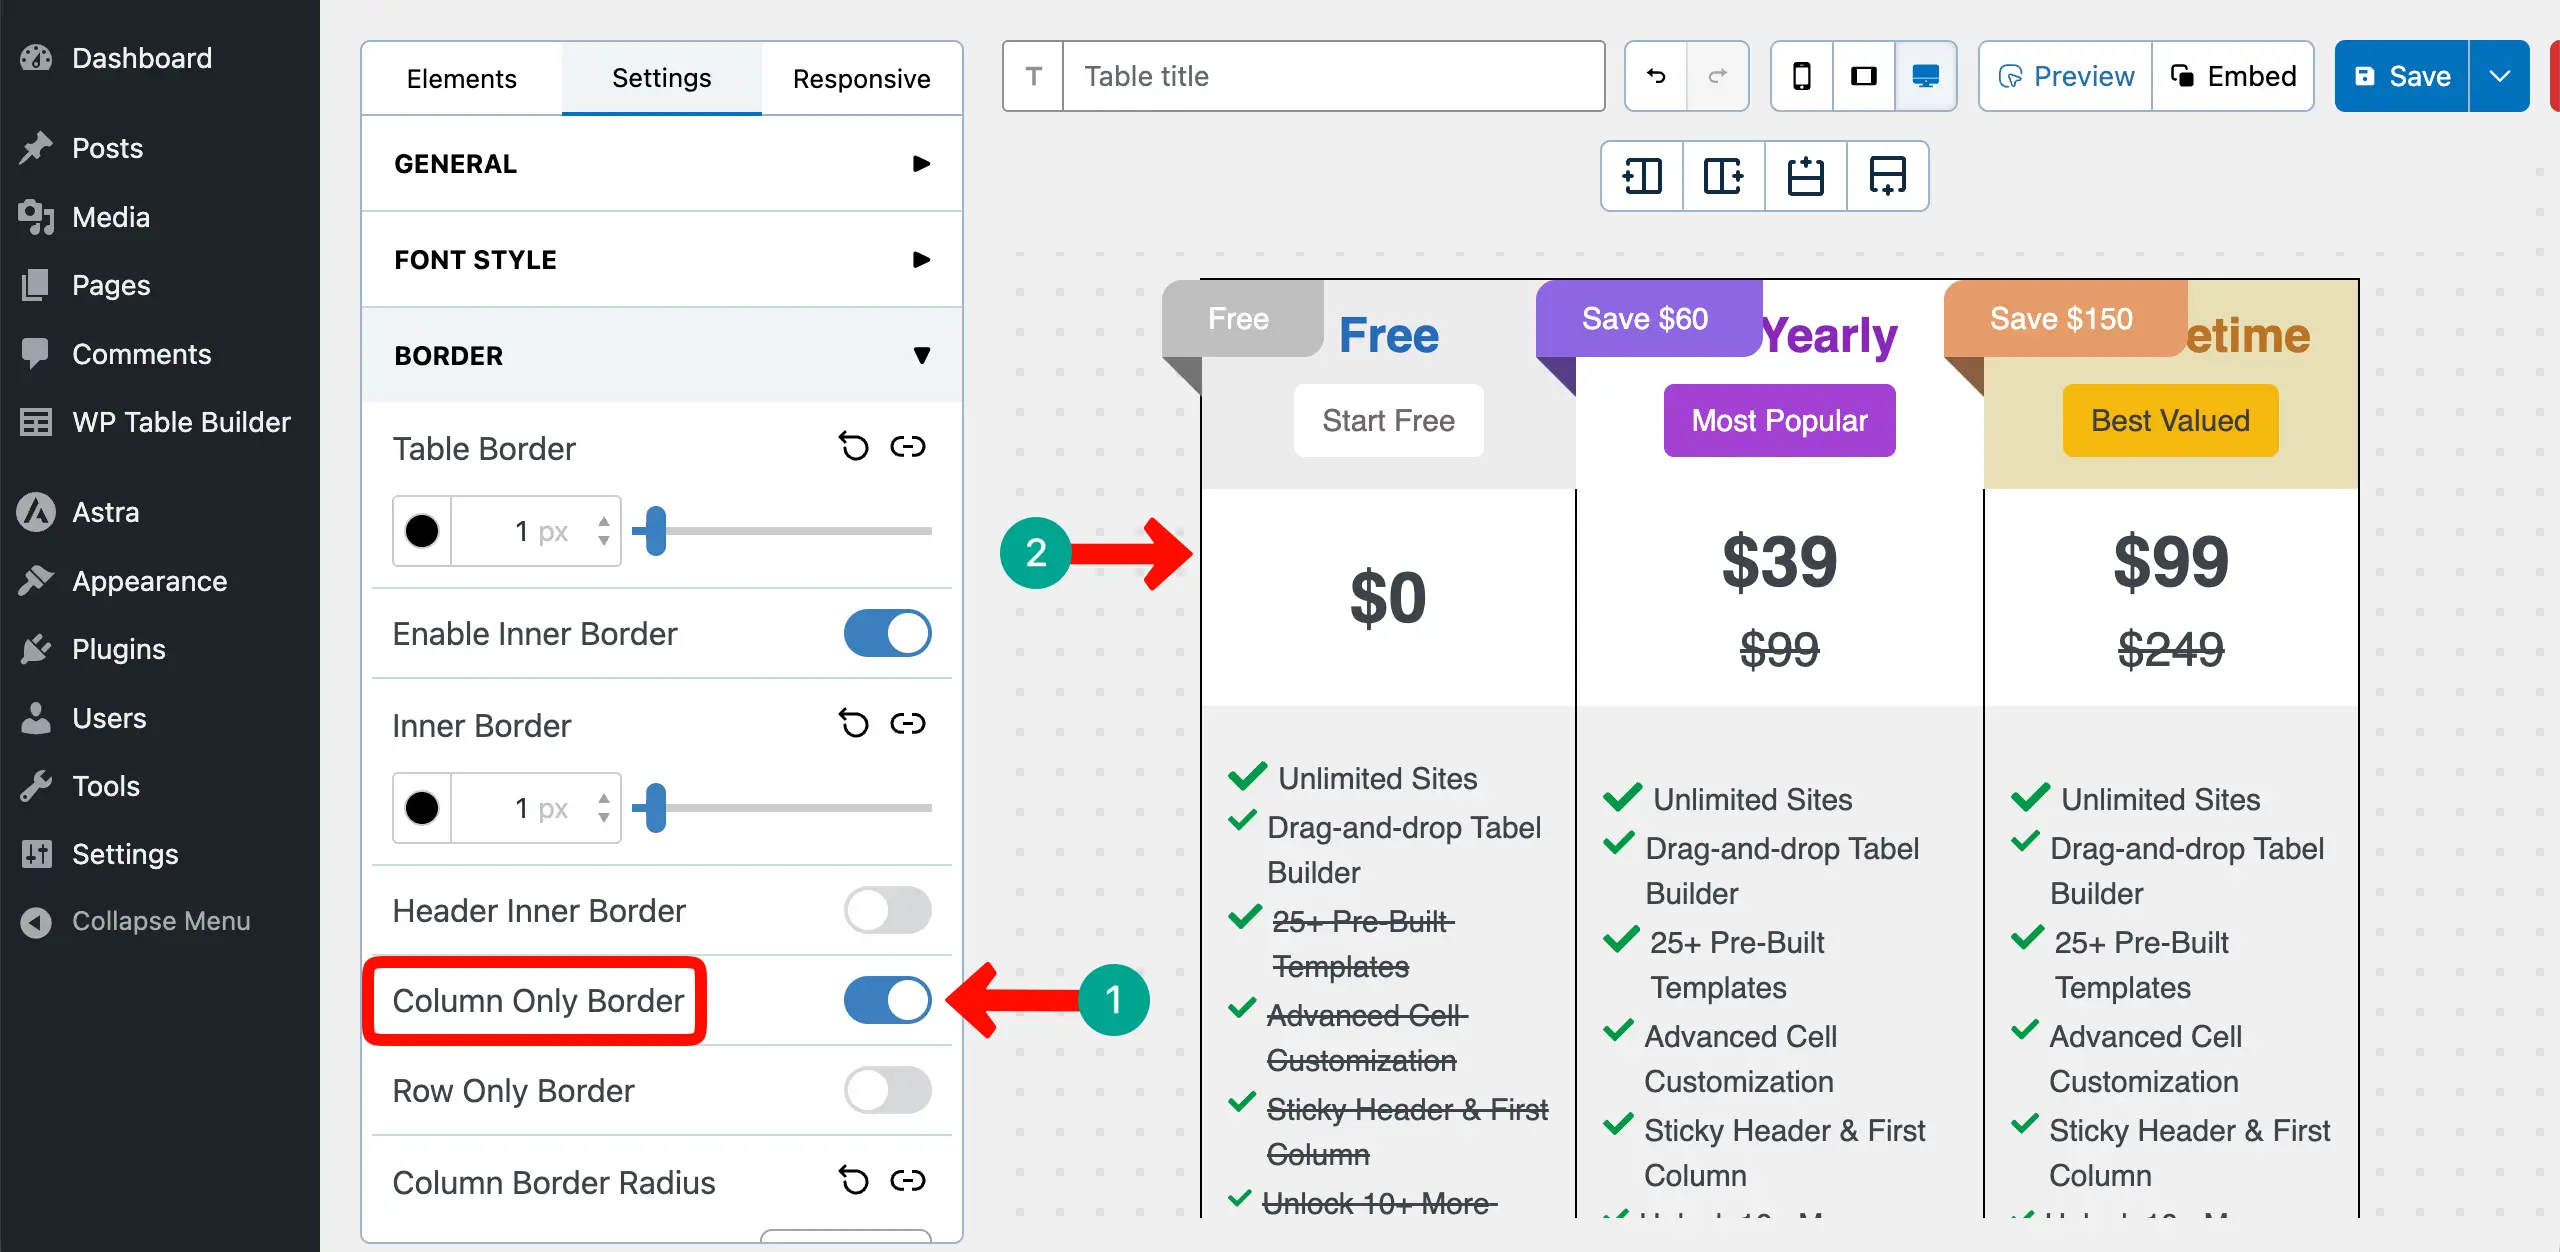
You may even want to display borders only for columns, not for the rows. If you want to do this, just toggle on the Column Only Border option.
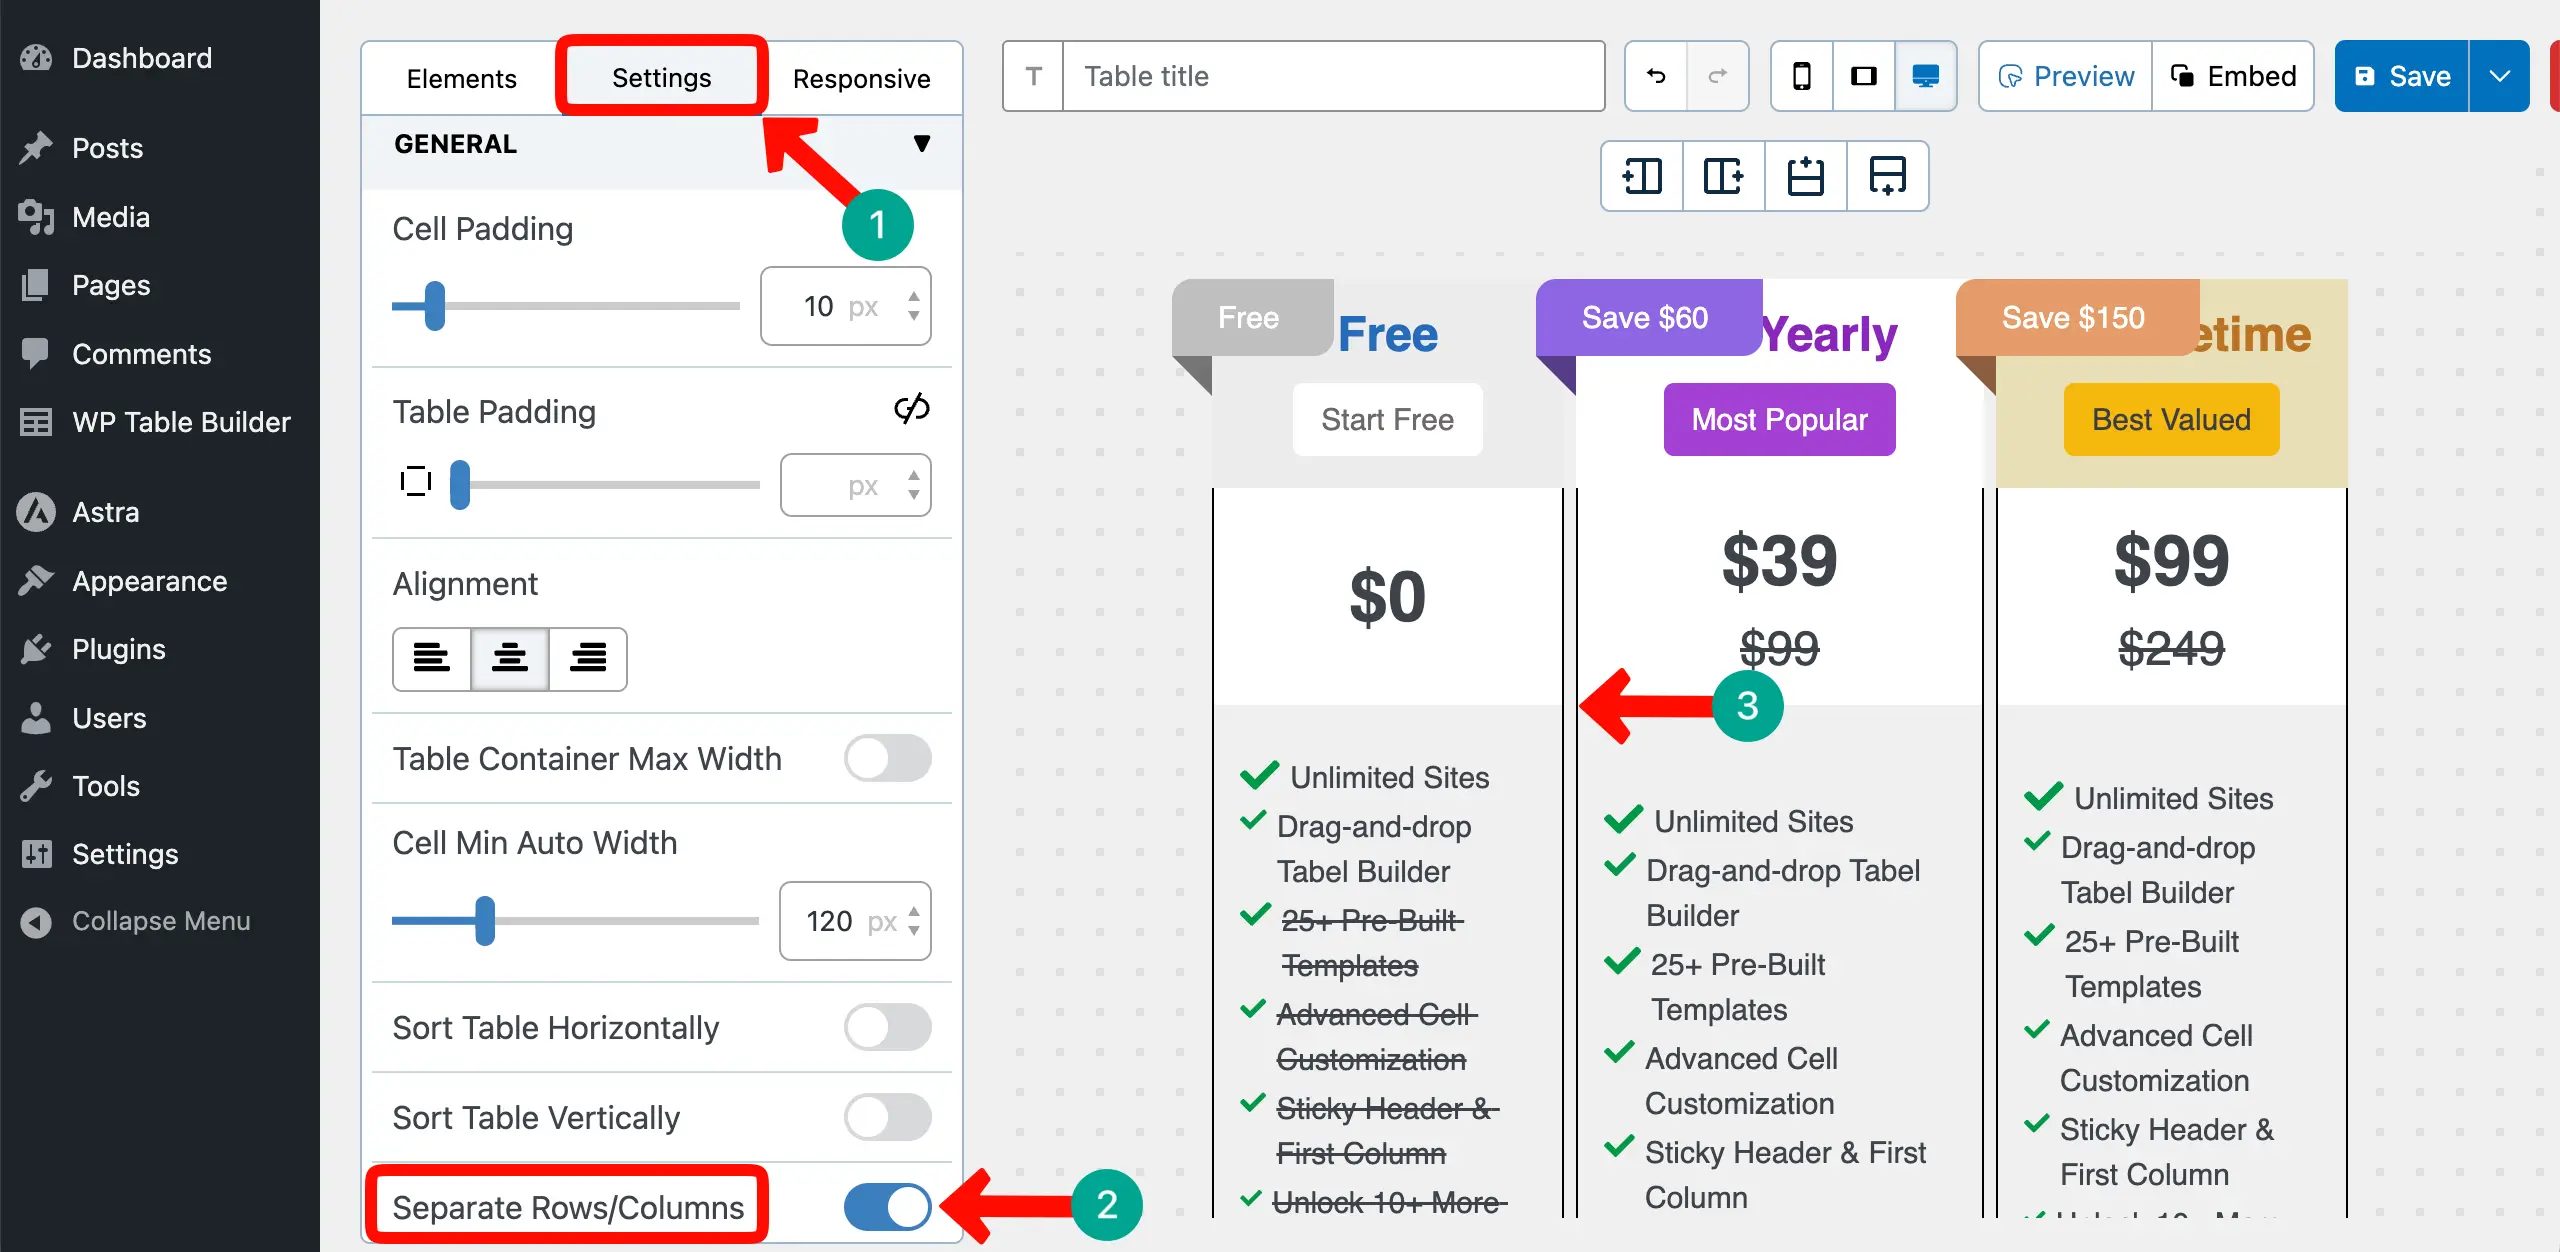
# Add Space Between Columns
To add spaces between the columns, go to the Settings tab. Toggle on the Separate Rows/Columns option.
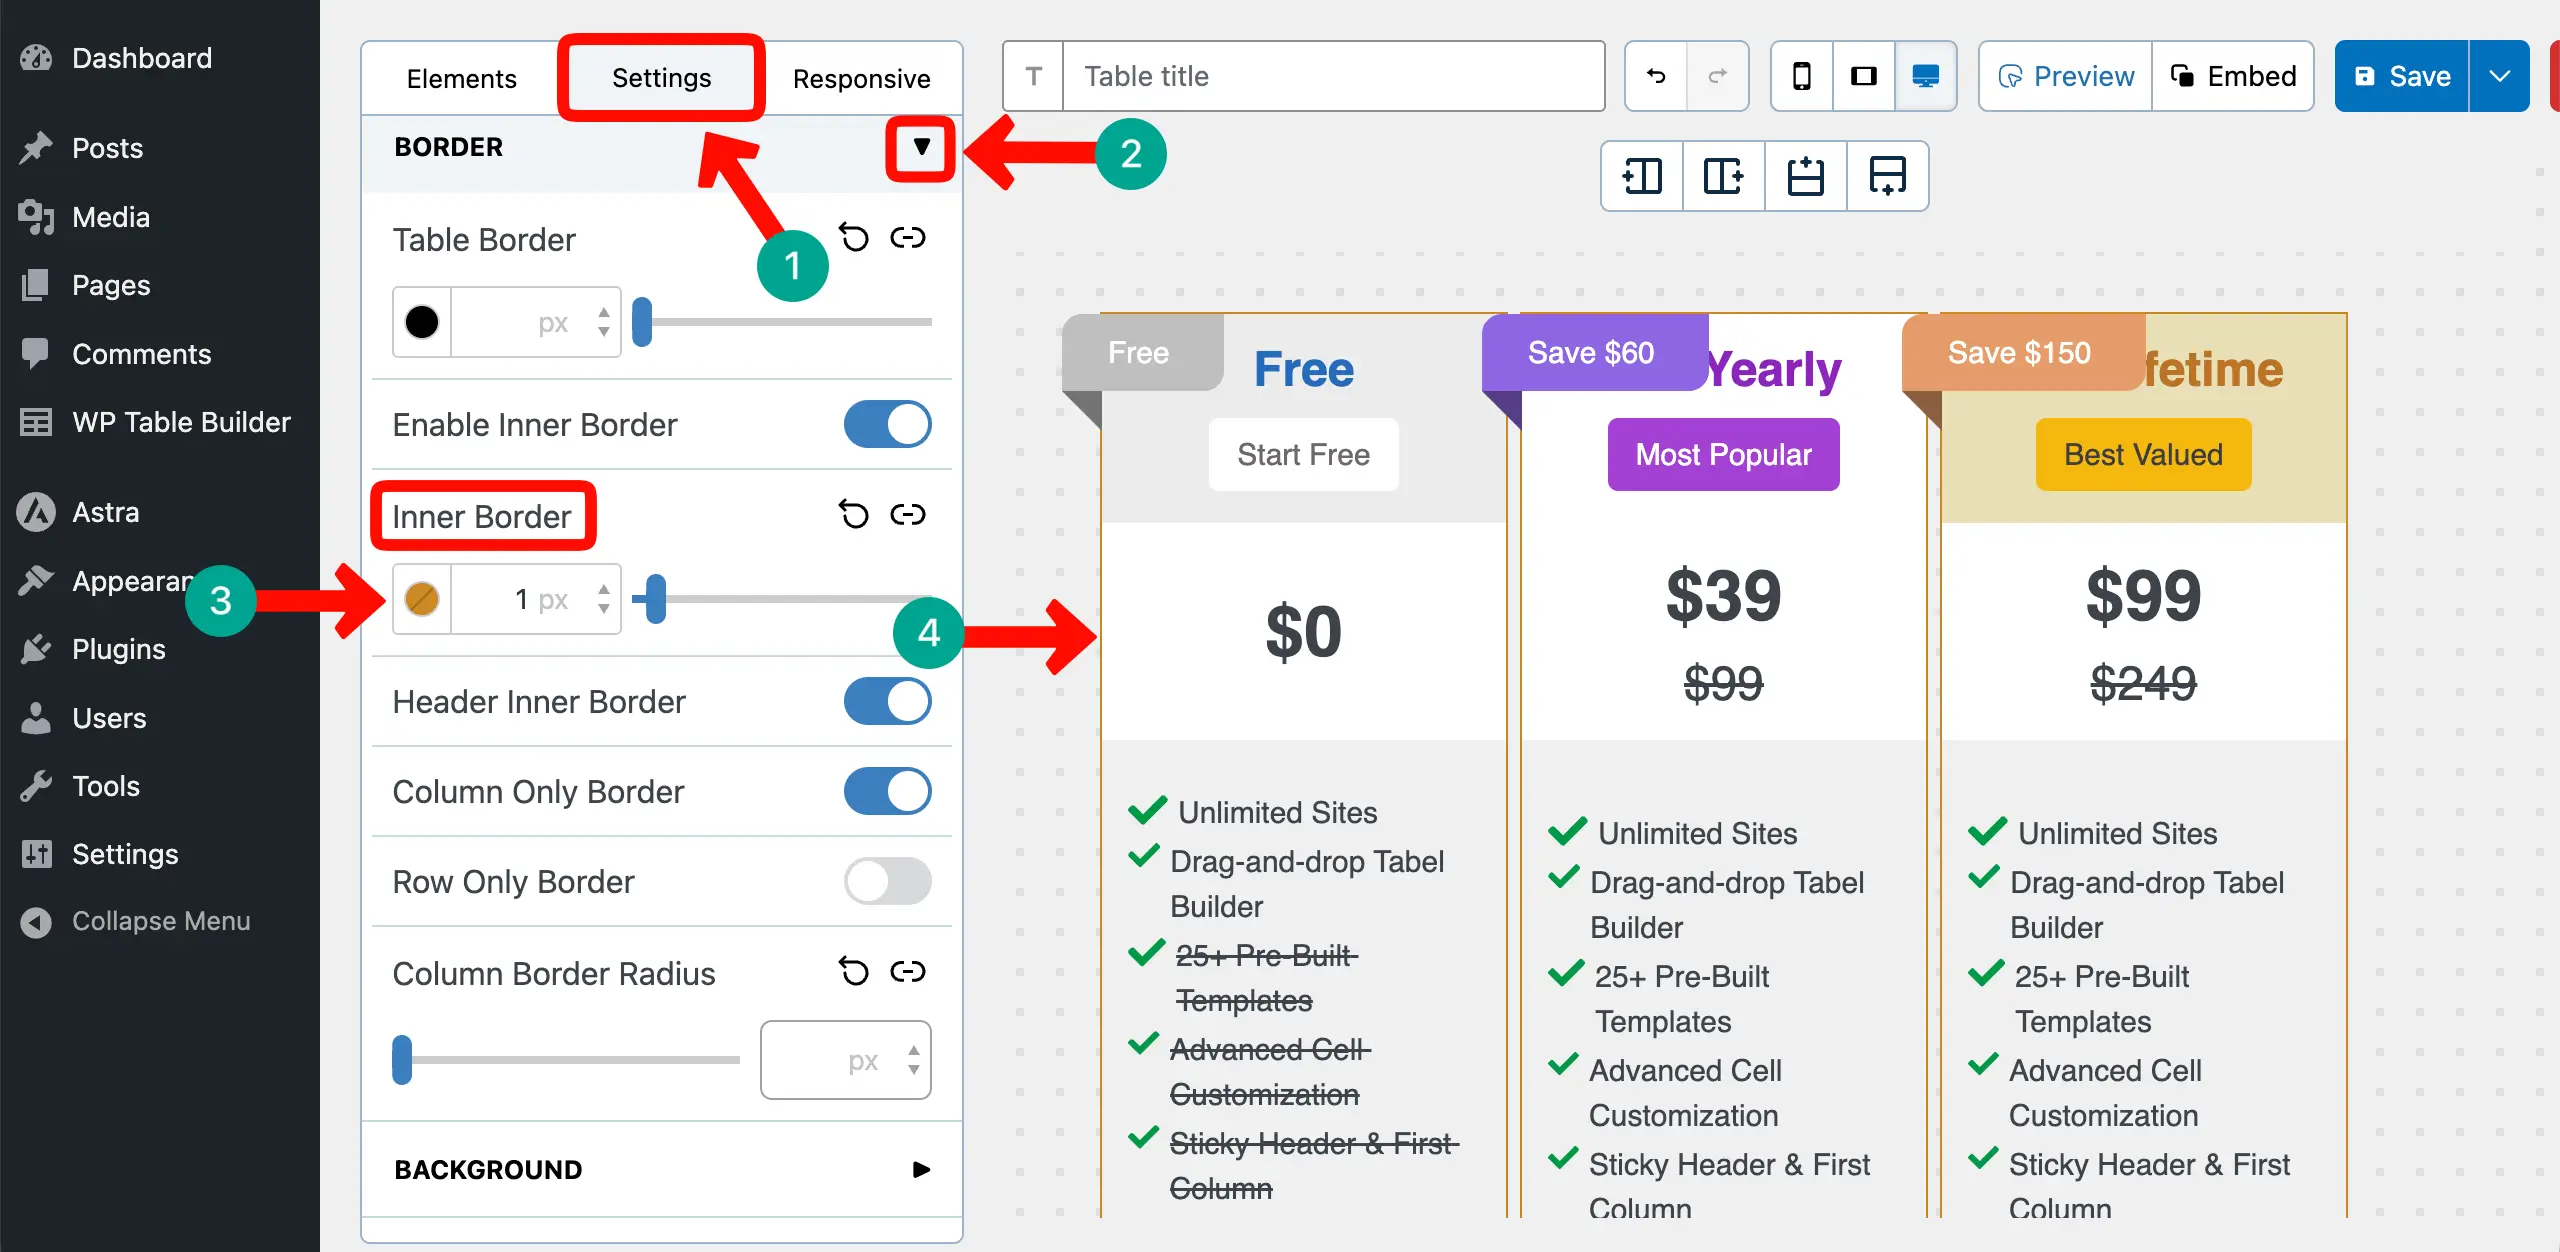
# Colorize the Table Border
To add a color to the border of the table, navigate to the Settings tab > Inner Border. Select your desired color and set the border width.
# Change Cell Background Colors
Hope you already know how to change the background color of a cell. Do this if you want more cells.
# Add Radius to the Table Corners
To add a radius, go to the Settings tab > Column Border Radius. Add your desired value to make the corners curvy as you want.
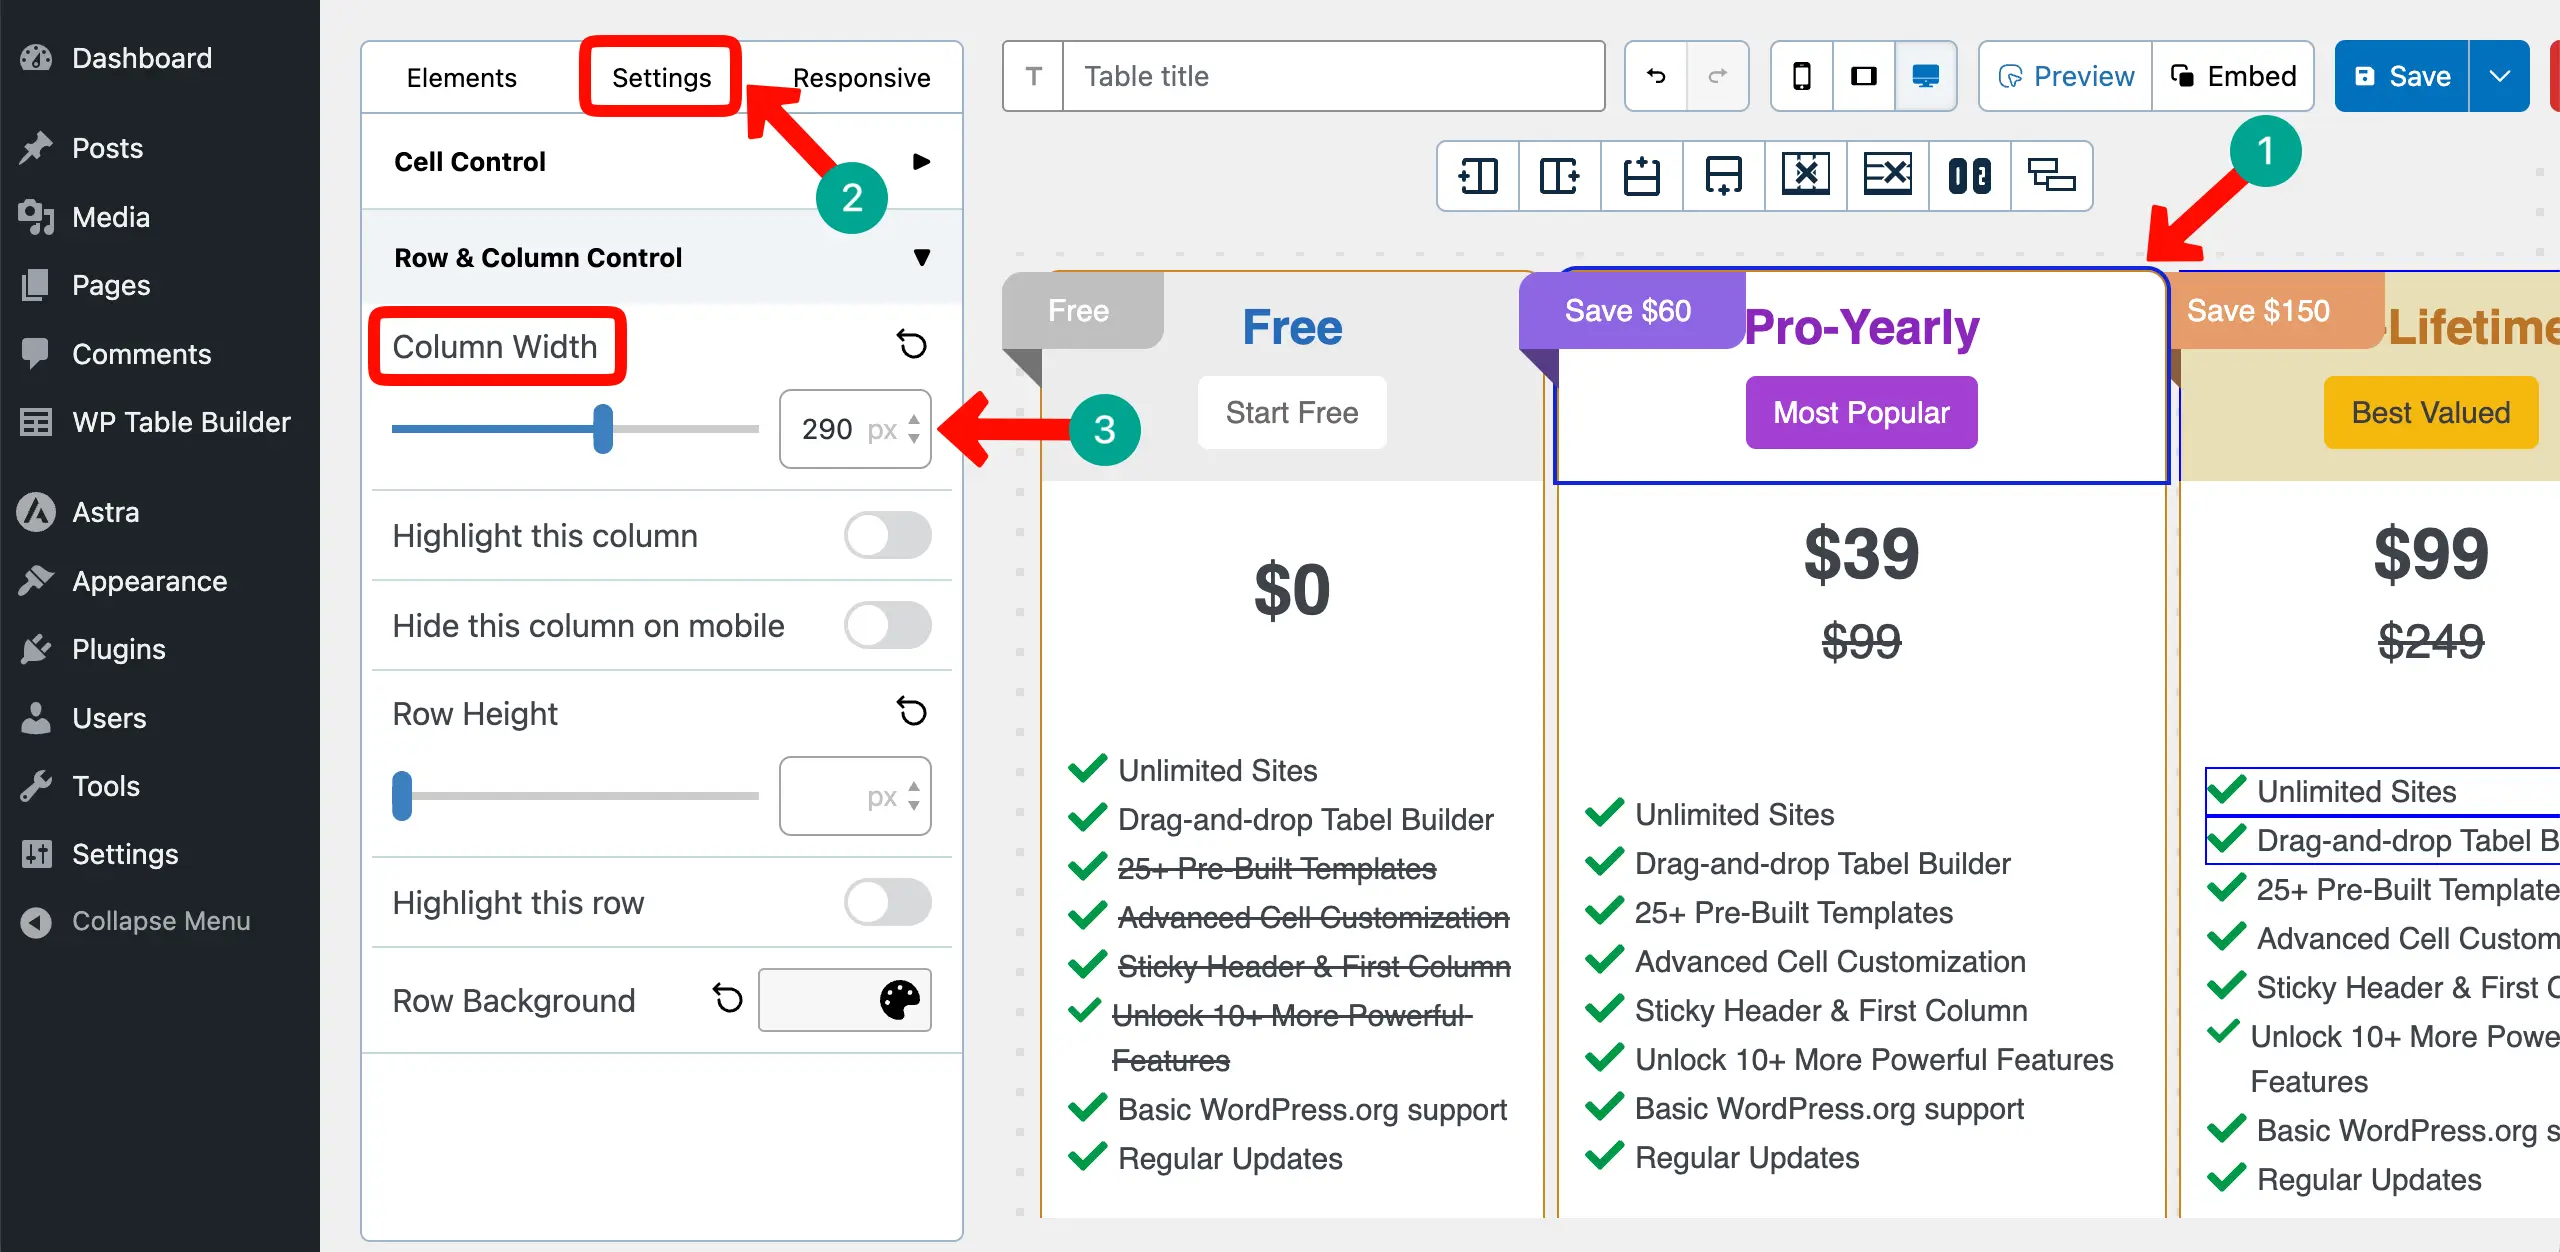
Step 10: Change the Width of the Columns
You may want to set different widths separately for each column. To do this, select a column. Then, go to the Settings tab > Column Width. Set a value for the width you want the respective column to be. Do the same for the other columns as well.
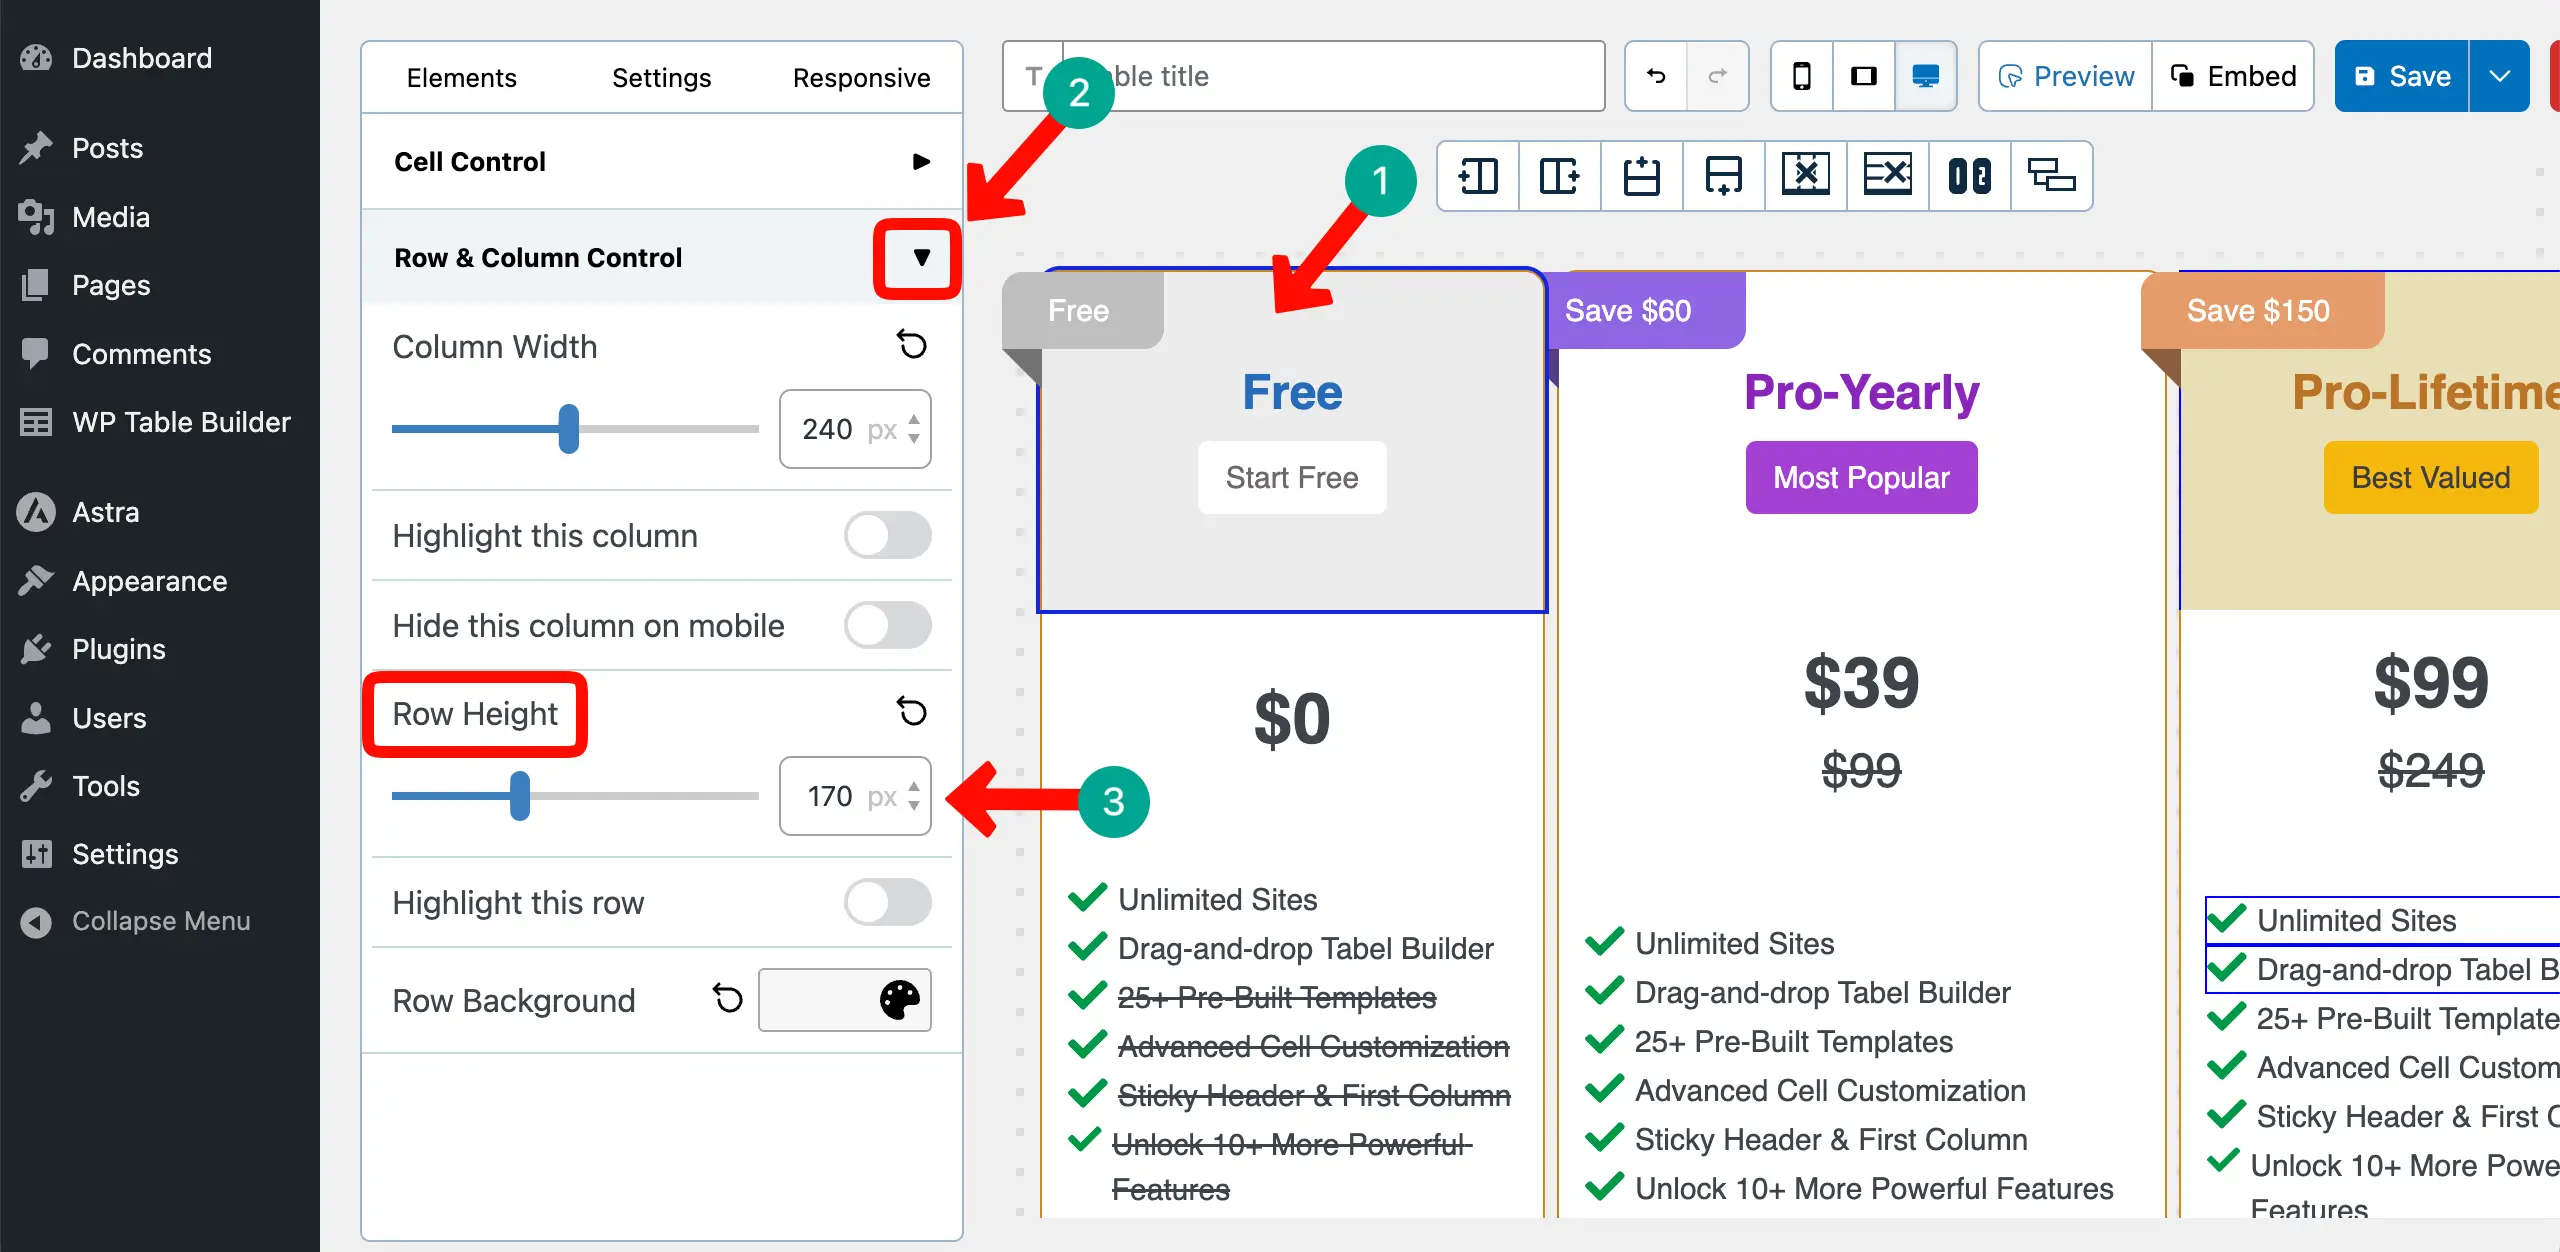
# Increase the Height of the Top Row
In the above images, you see that there isn’t enough space between the ribbon and column names. To add a space, you have to increase the column height.
To do this, select the row, go to Row & Column Control > Row Height. Define how much height you want to set for the row.
Step 11: Make the Table Mobile Responsive
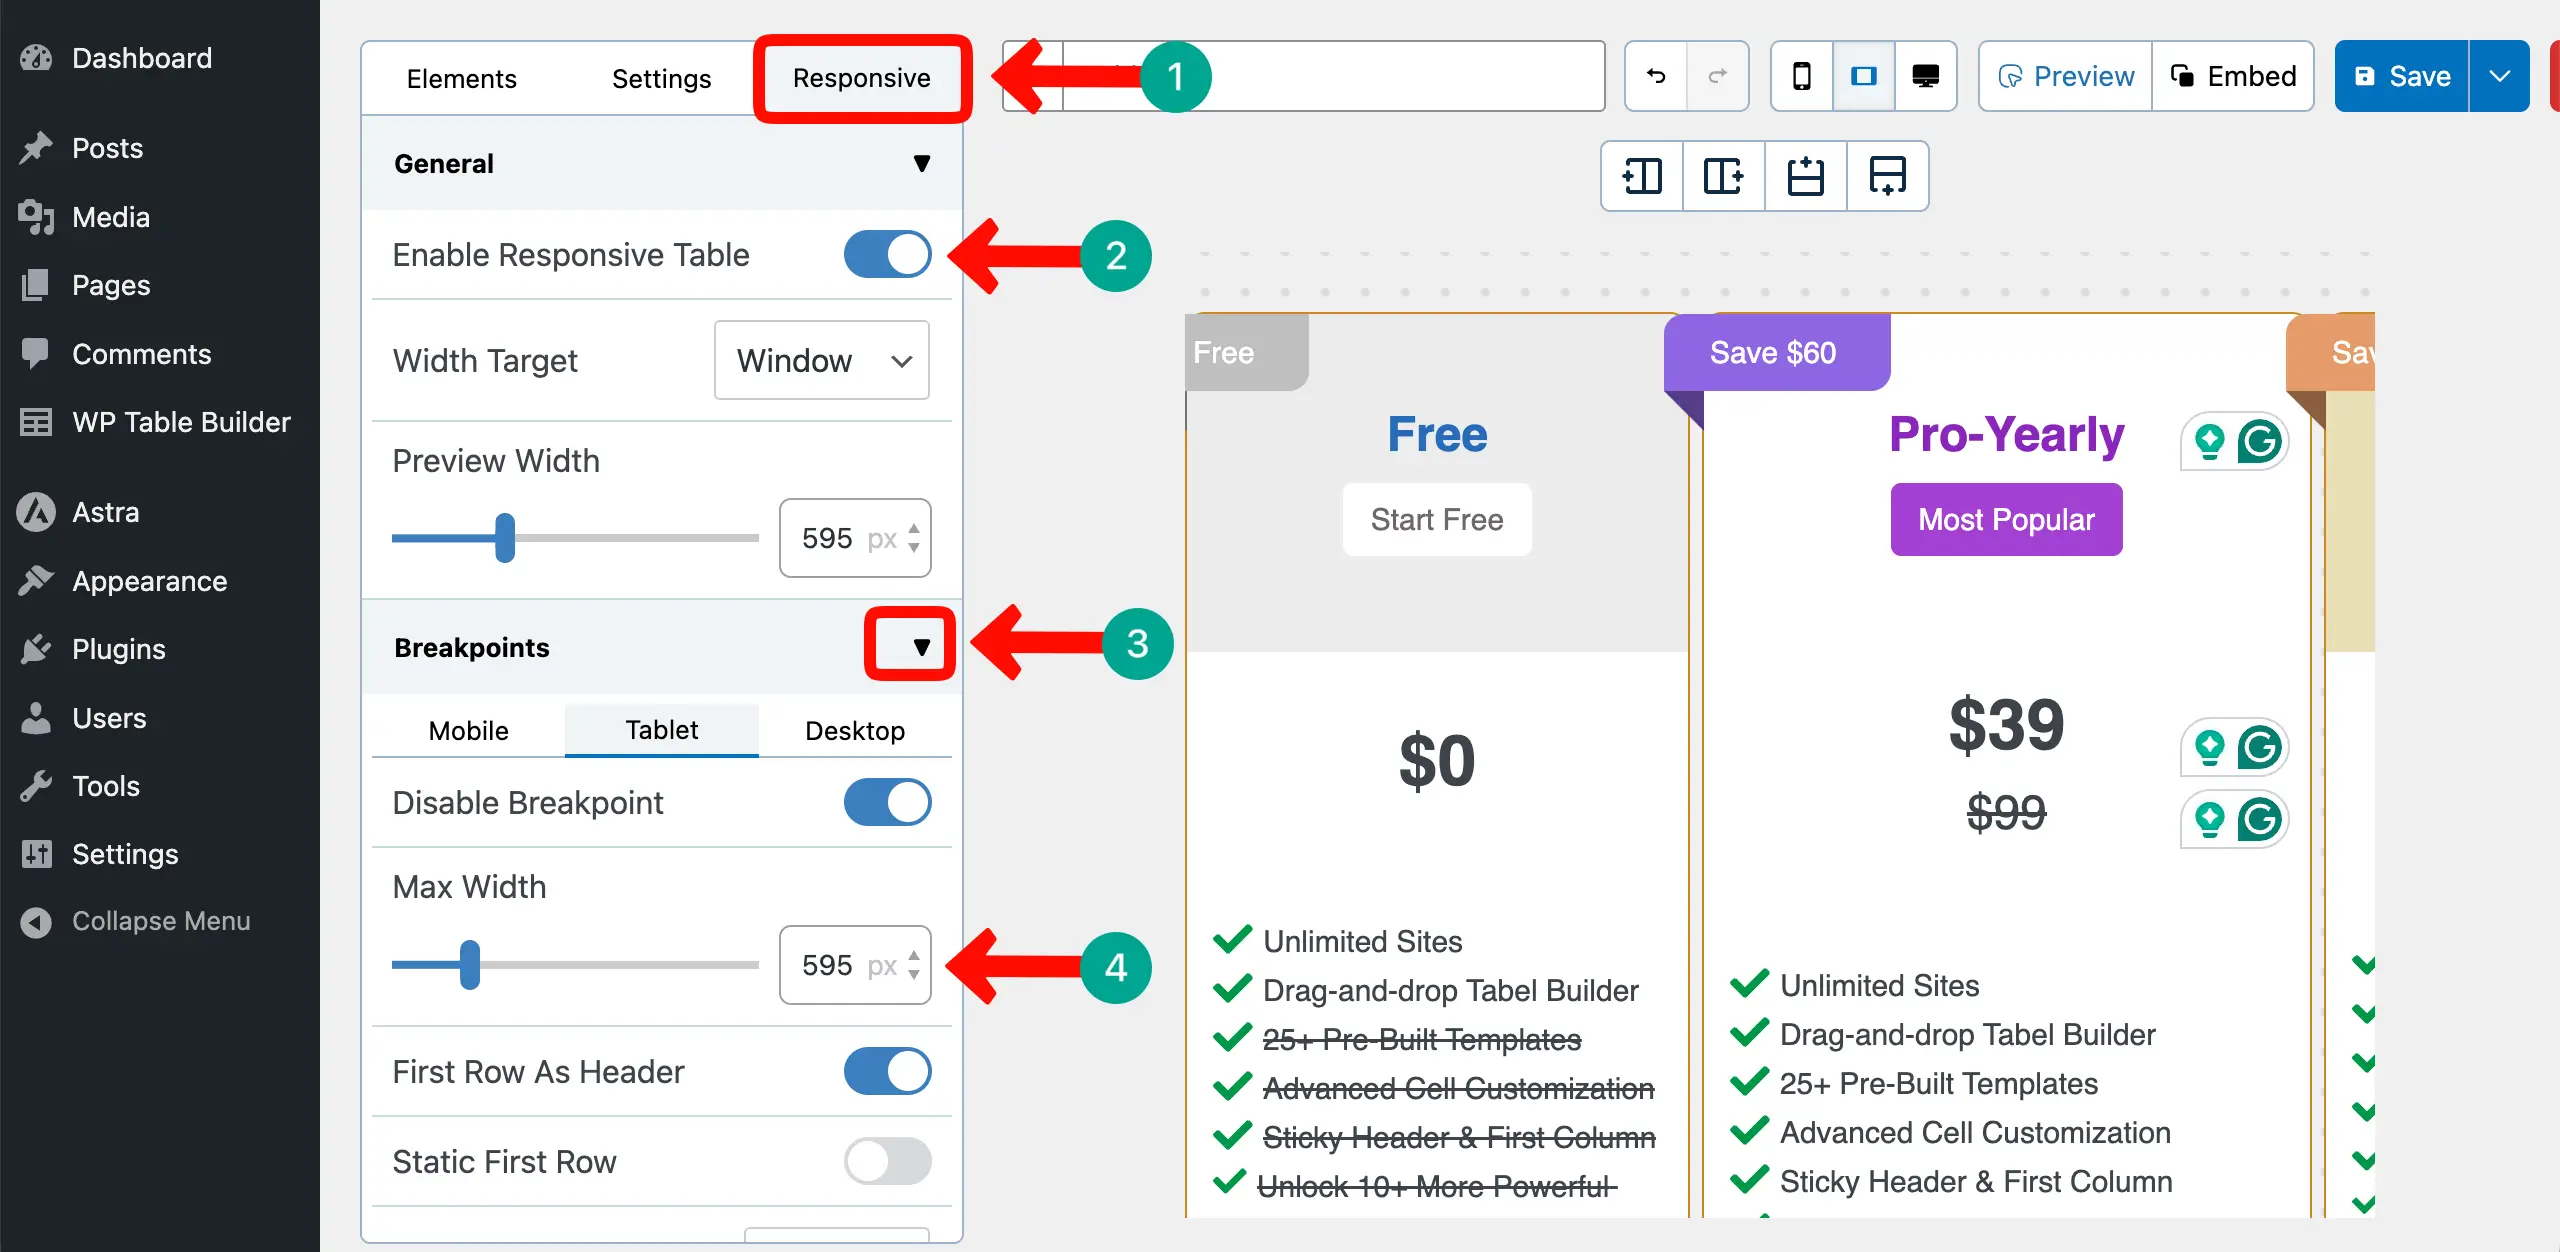
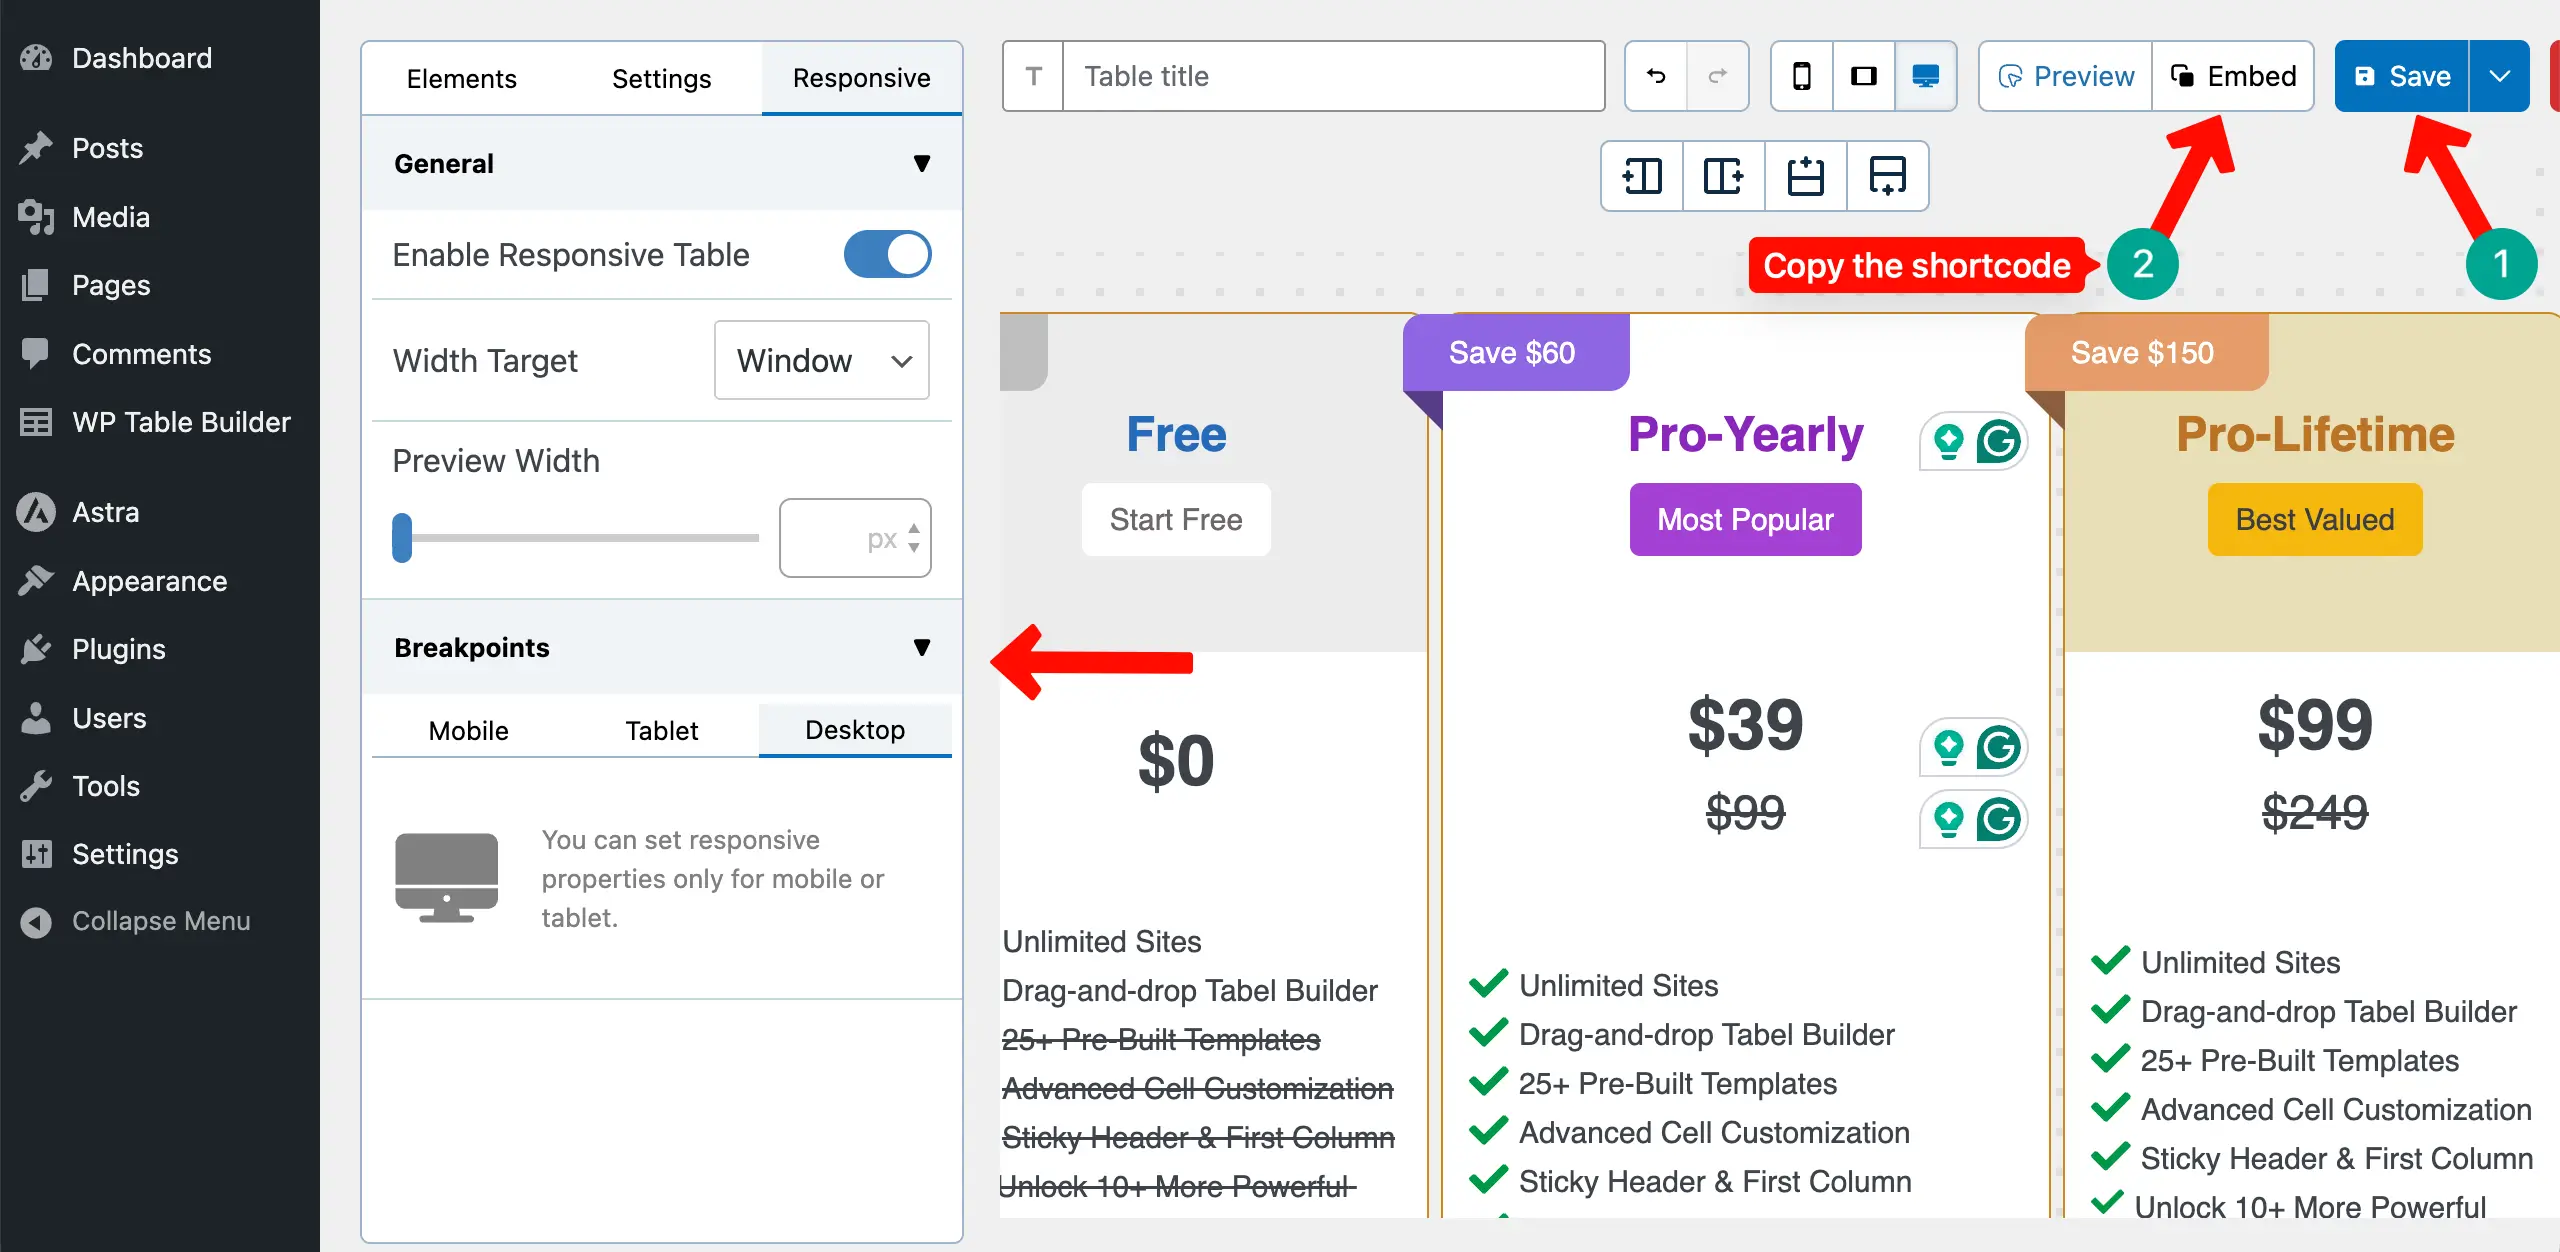
Making a table mobile responsive with the plugin is very easy. Just go to the Responsive tab. Expand the General section. Toggle on the Enable Responsive Table option.
The pricing table will be automatically mobile-responsive. Furthermore, if you want to set a maximum width for each device type separately, expand the Breakpoints section. Enable Breakpoints and set the width you want to add for each device type.
Step 12: Save and Publish the Table
When everything is done, save the table and copy its shortcode by clicking the Embed button.
Open your WordPress editor. Paste the shortcode and publish or save the page.
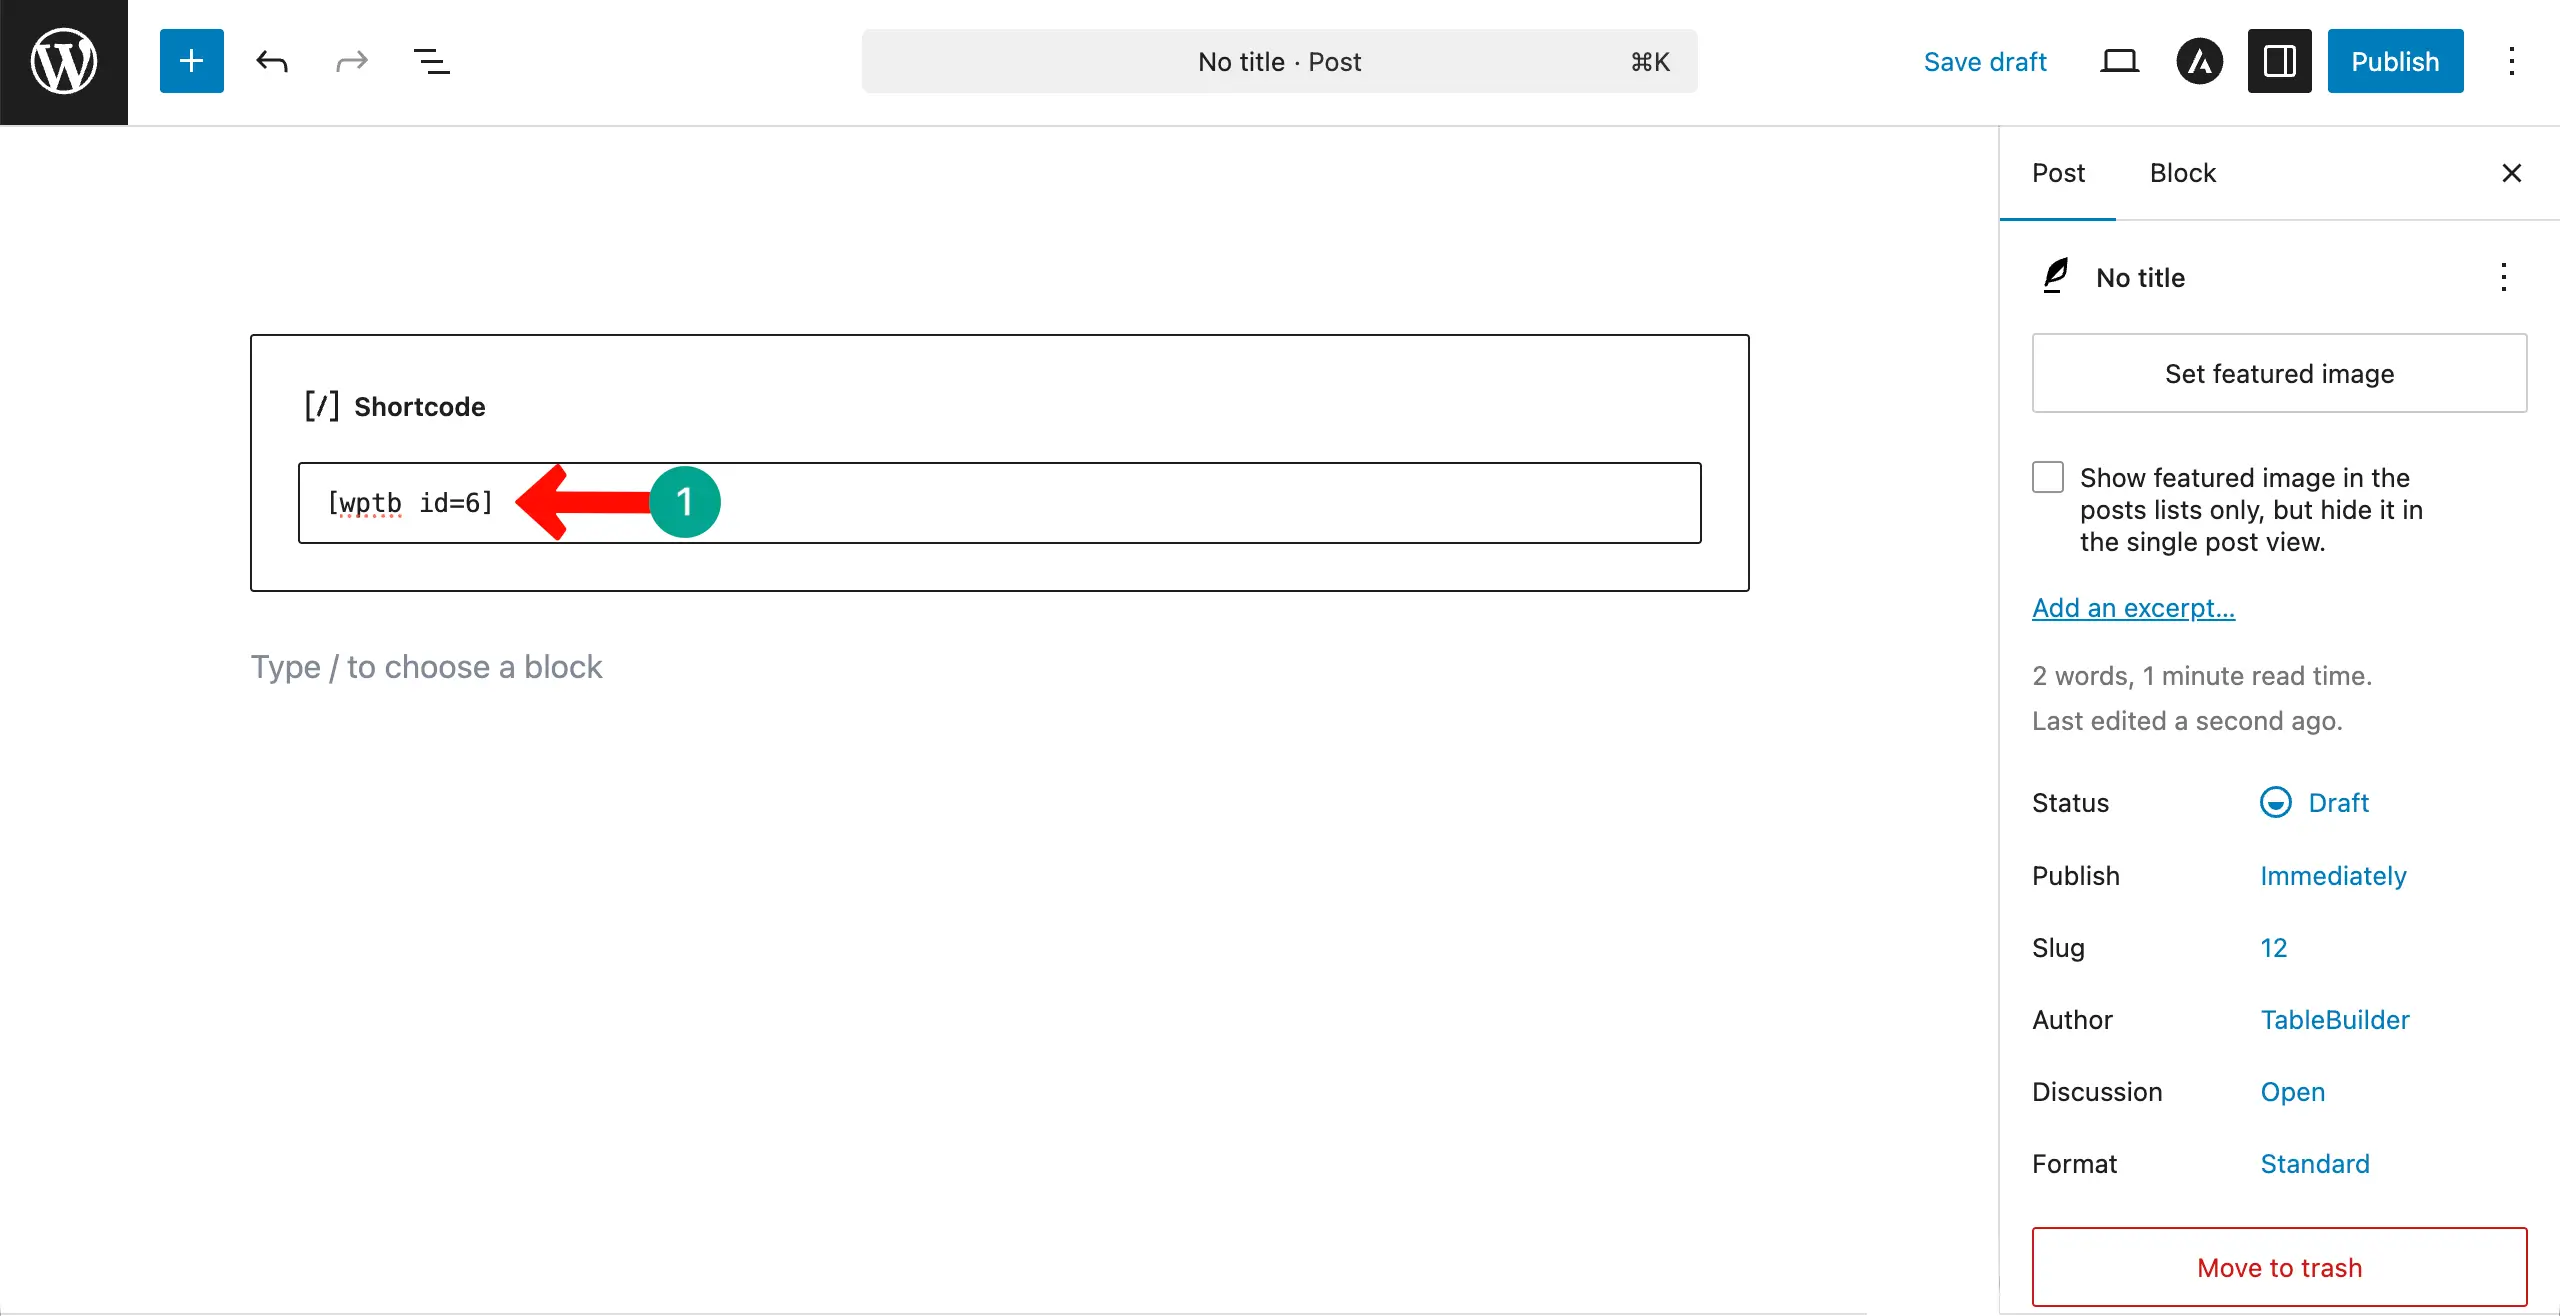
Go to the frontend of the page. You’ll see the pricing table has appeared.
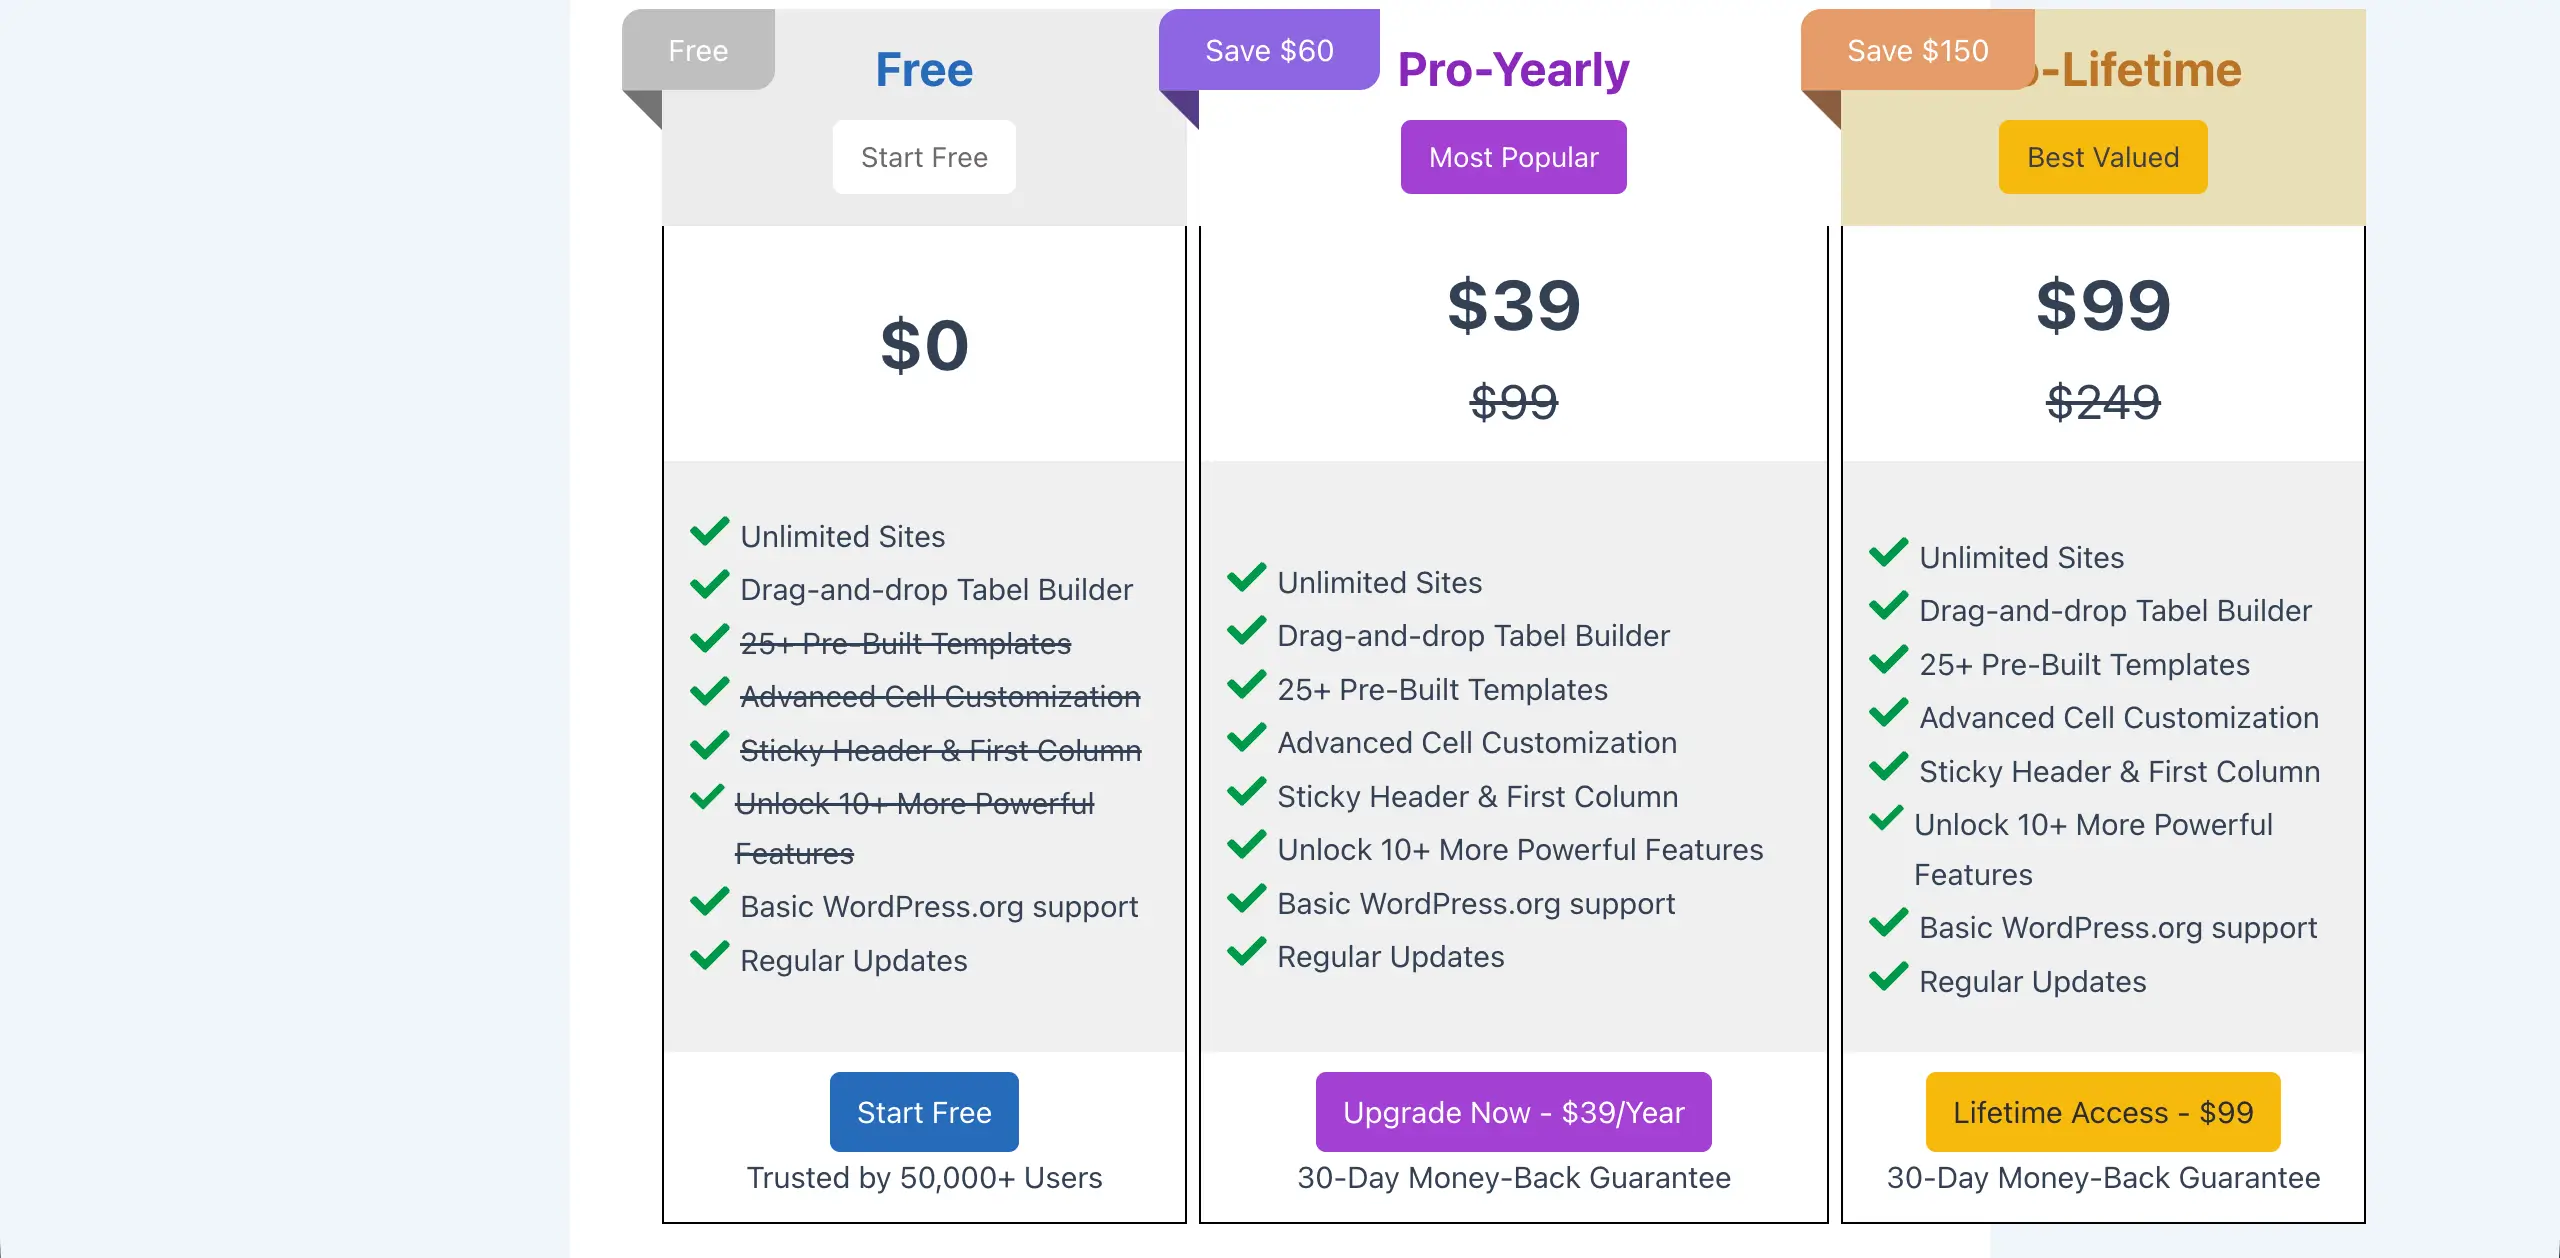
Conclusion
Thus, you can create feature-rich and advanced pricing tables on WordPress without coding or a steep learning curve using this drag-and-drop WP Table Builder plugin. Creating a high-converting pricing table is not only about design. It is about clarity, trust, and smart structure.
Keep your plans simple and easy to compare. Use short feature lists and avoid confusing words. Highlight your most valuable plan so users can quickly see the best choice. Show the real benefits, not only technical features. Add clear pricing, billing cycle details, and any extra costs in a transparent way.
When visitors understand your offer without effort, they feel more confident to buy. Now, if you have any further questions regarding today’s topic, mention them below in the comment box so we can answer them promptly.
Leave a Reply
You must be logged in to post a comment.