When you sell products online, clear size information is very important. Because customers cannot touch or test the product before buying. They rely only on the details you show on your website. If the size guide is missing or confusing, they may choose the wrong option.
This often leads to returns, refunds, and unhappy buyers. A table is one of the easiest and most effective ways to display a size guide in WordPress. Tables organize data in rows and columns. This makes it easy to compare dimensions, measurements, specifications, or variations.
In this tutorial, you will learn how to add a size guide in WordPress using a table. Hope you will enjoy it. Let’s get started!
How to Add Size Guide in WordPress
WordPress has a default table block with which you can create only basic-level tables. But when you want to add content beyond text and basic styling, the default table block isn’t enough. You’ll need an additional plugin. We’ll show you the tutorial using such a plugin.
Step 01: Install and Activate the WP Table Builder Plugin
WP Table Builder is one of the easiest and beginner-friendly table builder plugins. You can create tables with the plugin just by dragging and dropping elements. On top of all, you can display tables both on the Gutenberg editor and page builders using shortcodes.
Let’s first install and activate the WP Table Builder plugin.
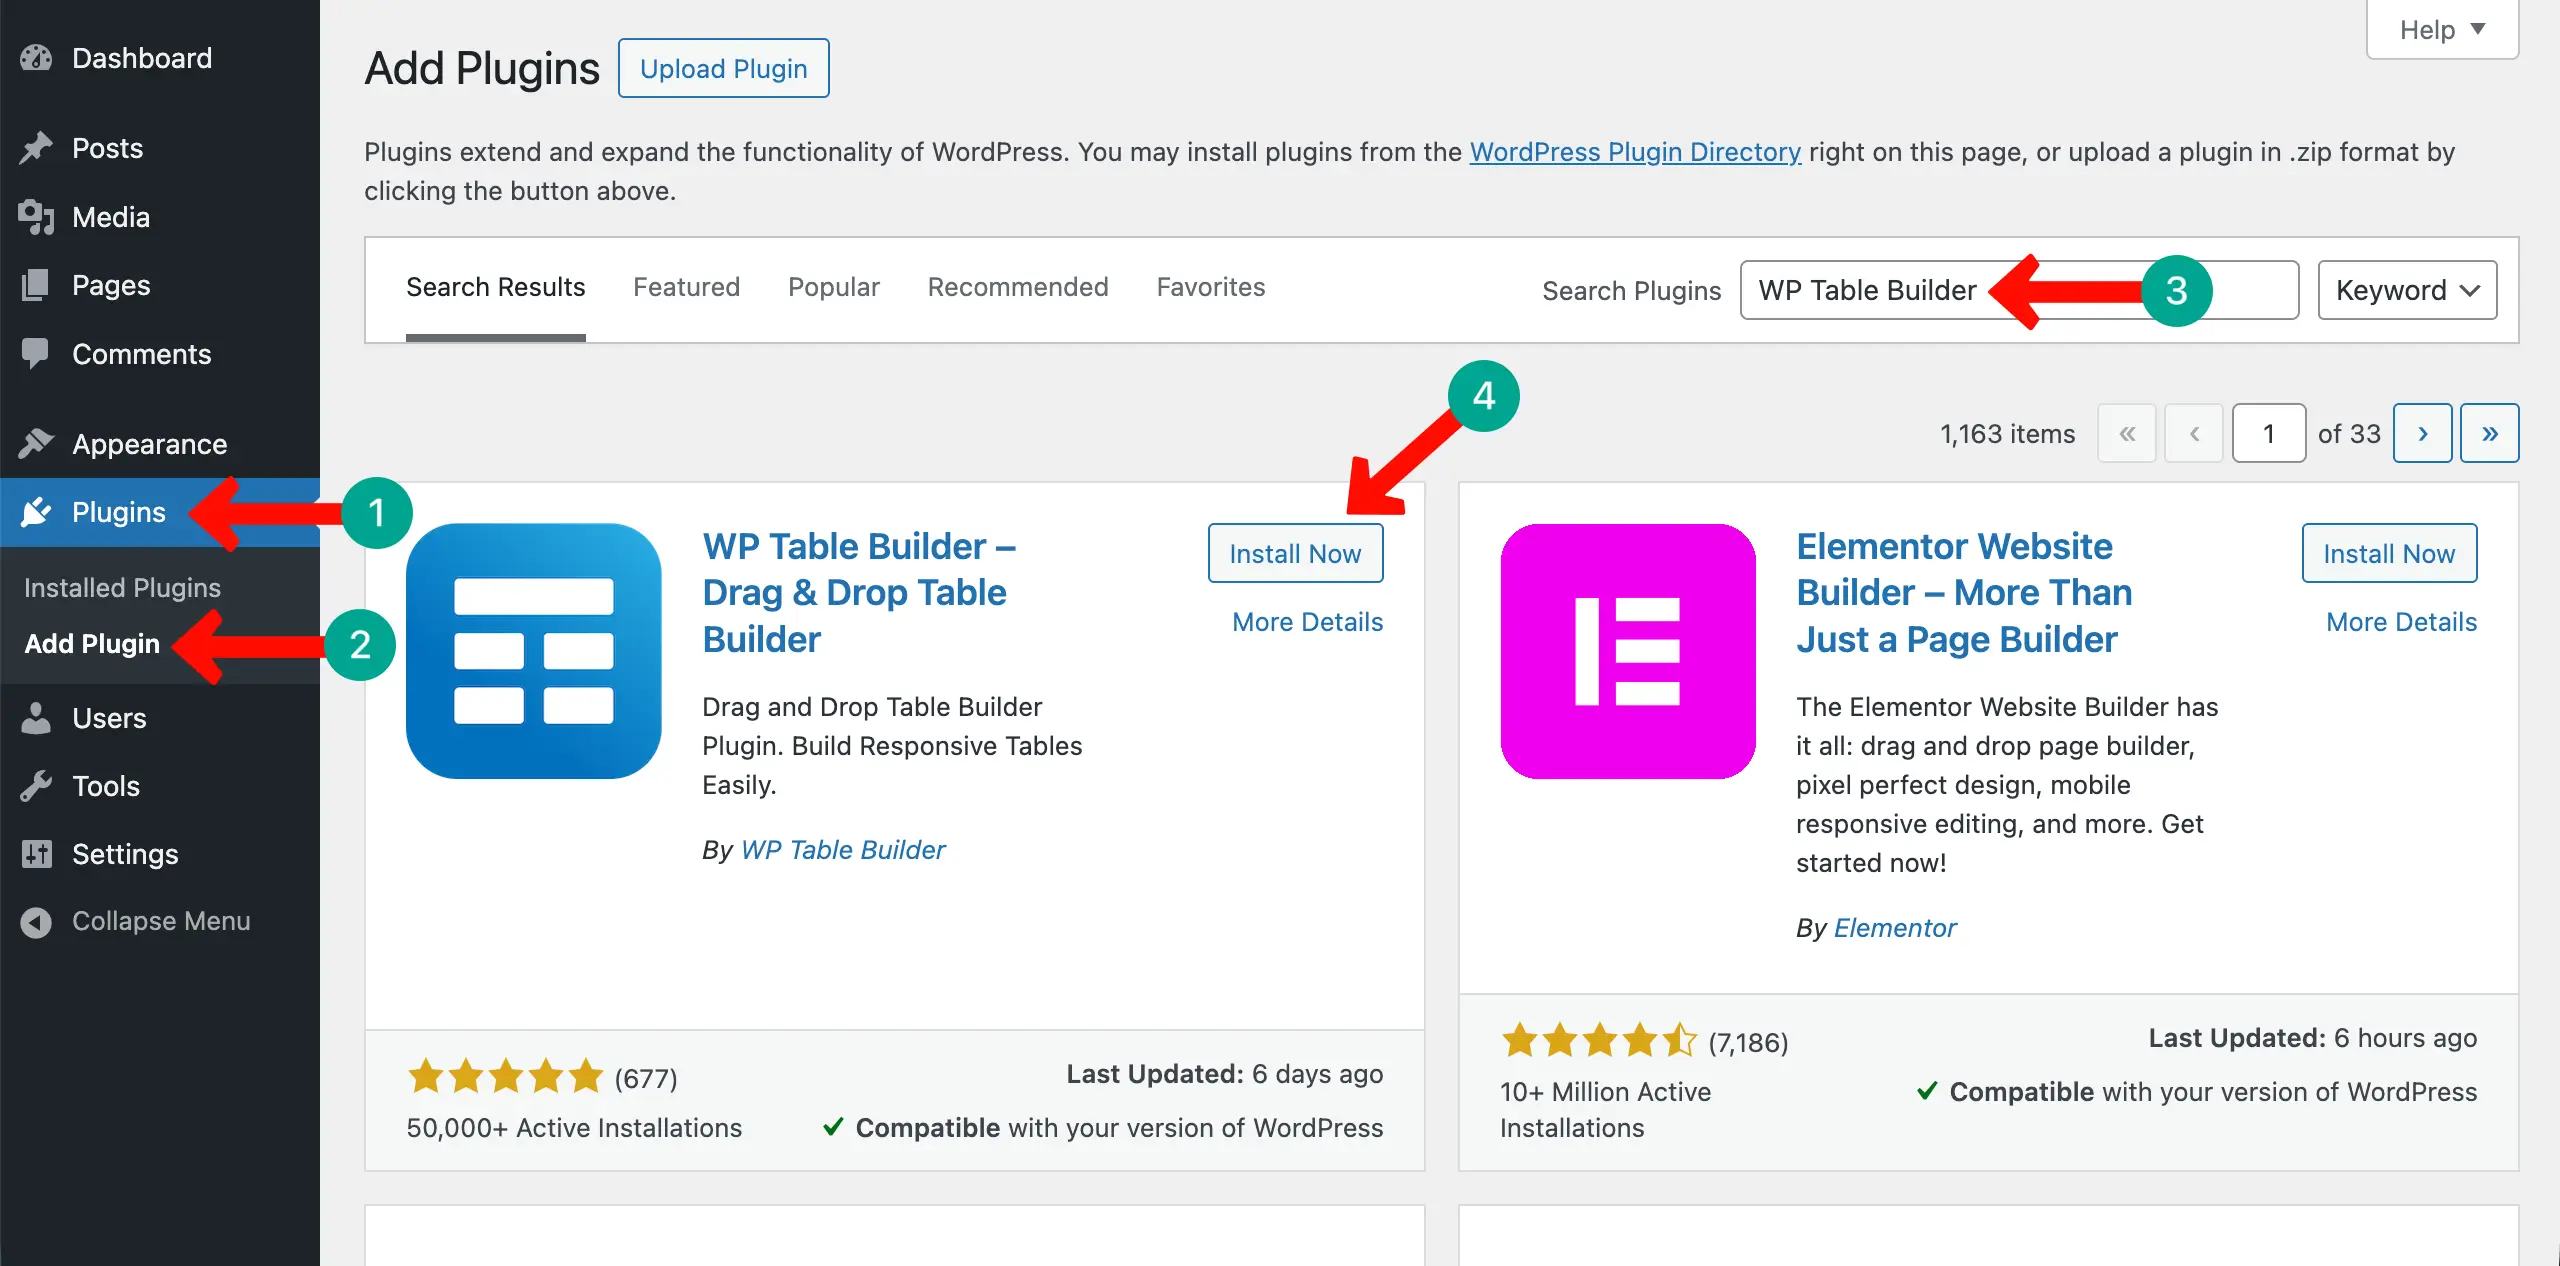
For simple size tables, the free version of the plugin is enough. But if you ever want to create advanced tables, you can use its premium version. You can check its pricing page by clicking the button attached below.
So, once the plugin is installed and activated (at least the free version), follow the steps explained below.
Step 02: Create a Table Layout
First of all, you need to set a layout. Navigate to WP Table Builder > Add New. Set the number of rows and columns you want. Click the Create New button after that.
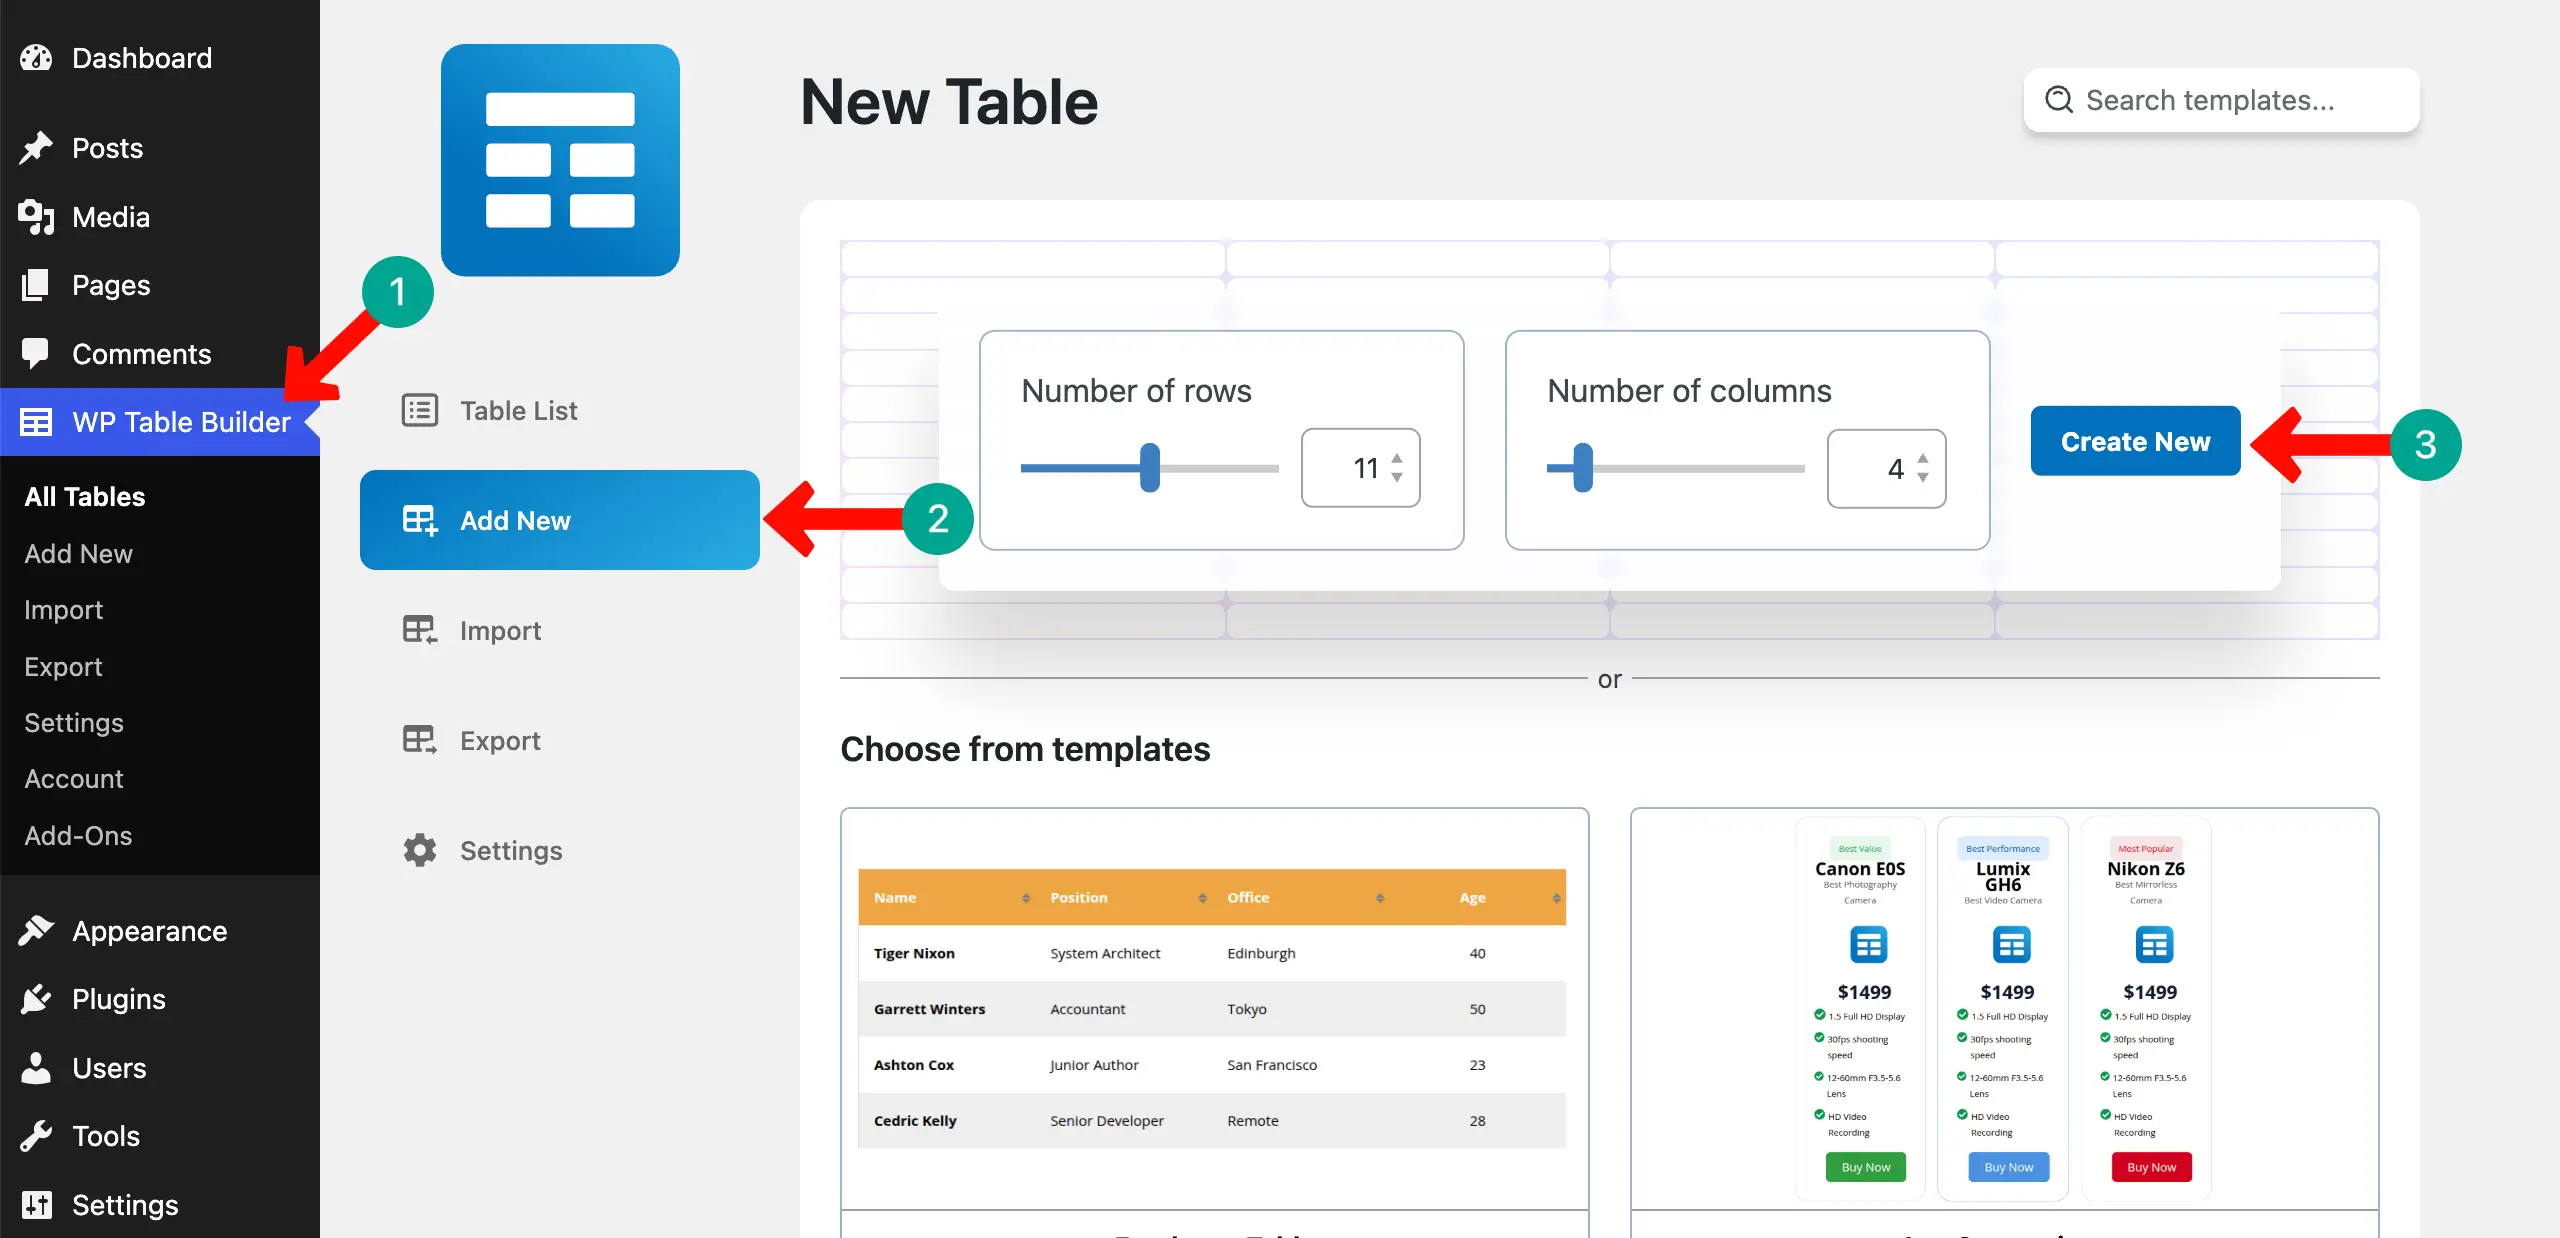
The layout for the table will be created right away.
Explore how to create a feature comparison table in WordPress.
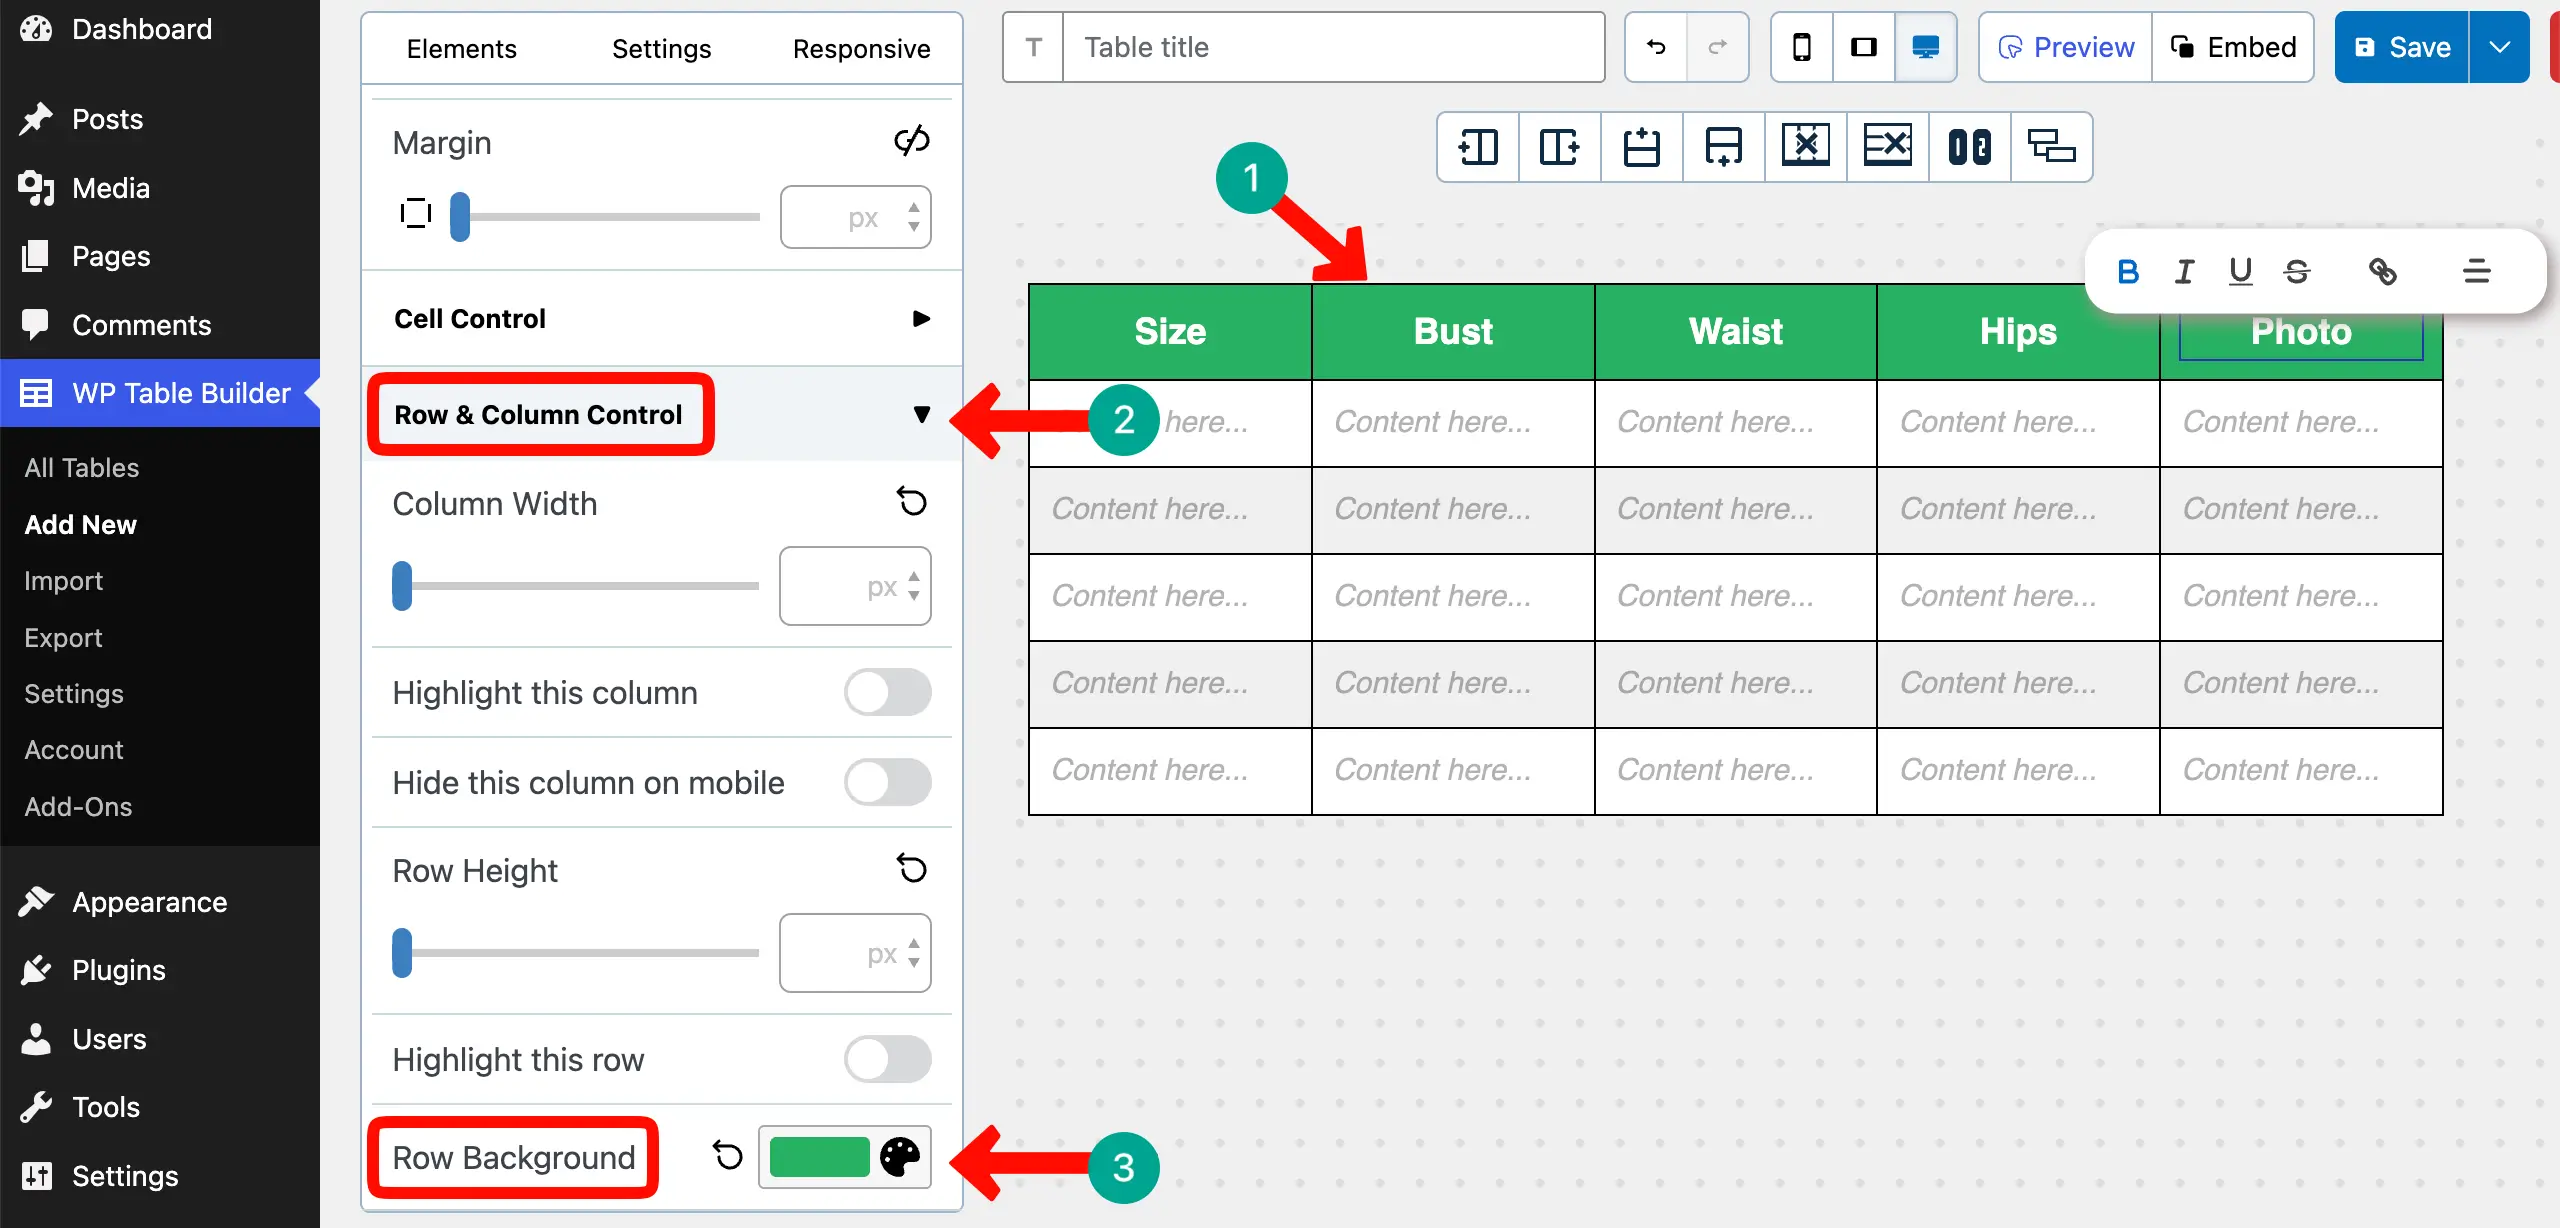
Step 03: Label the Table Columns
Place your cursor on the top cells of the table and label the columns one-by-one. Expand the Text Options section. You can increase the font size if needed.
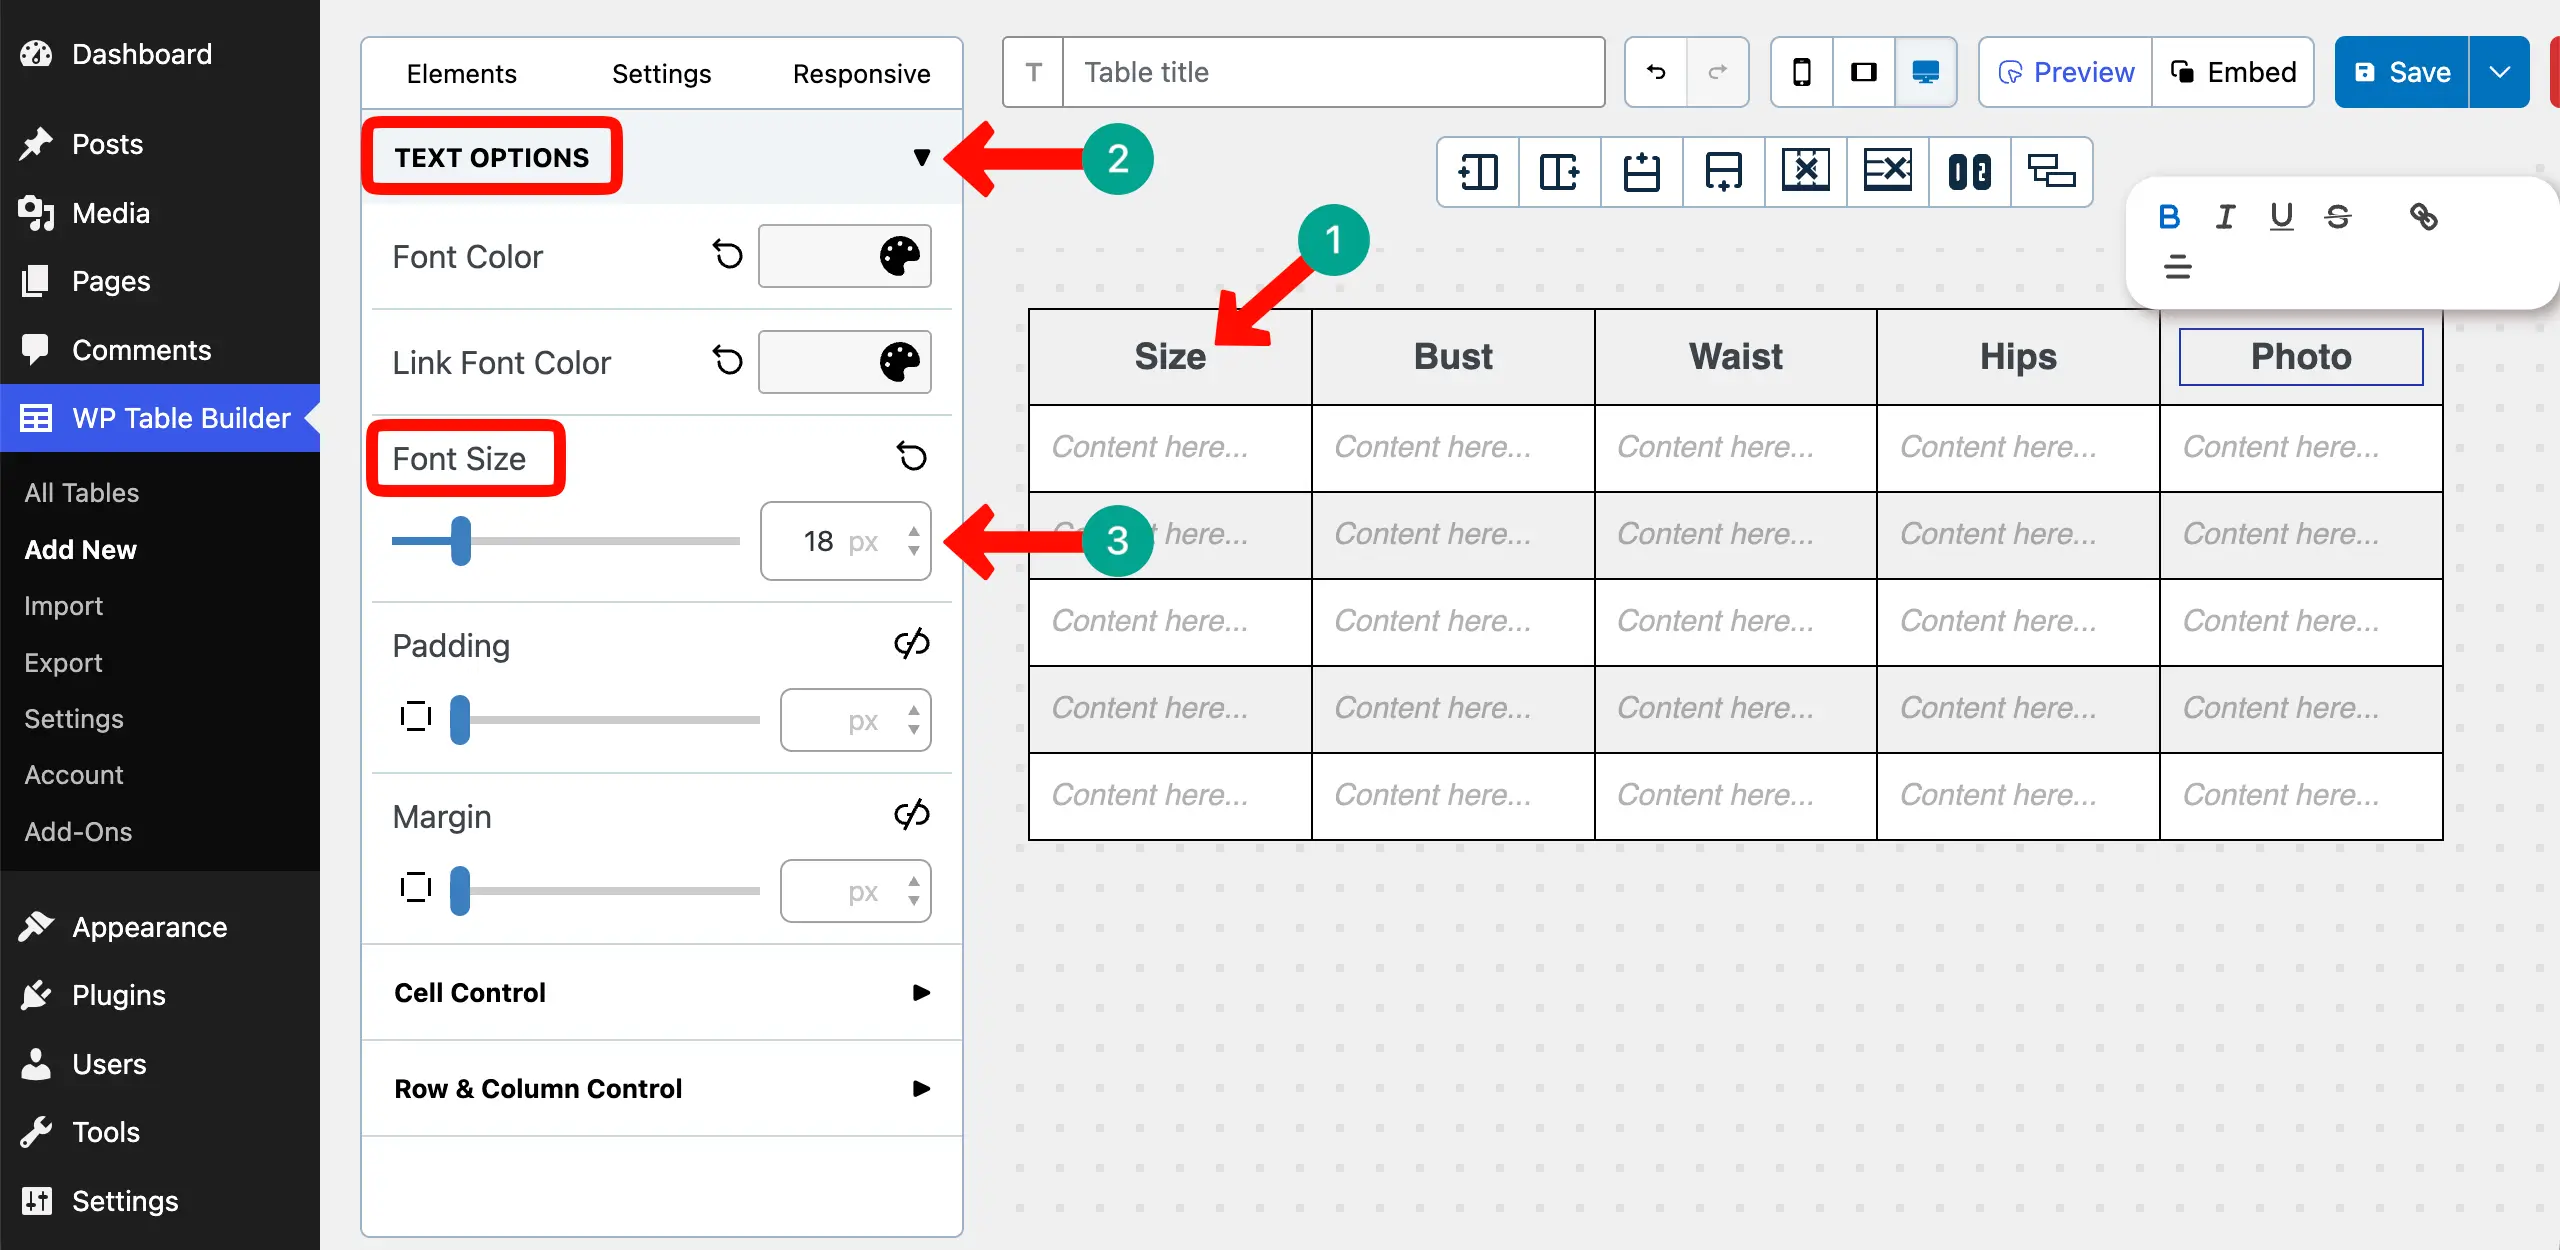
By expanding the Row & Column Control section, you can change the background color of the header row.
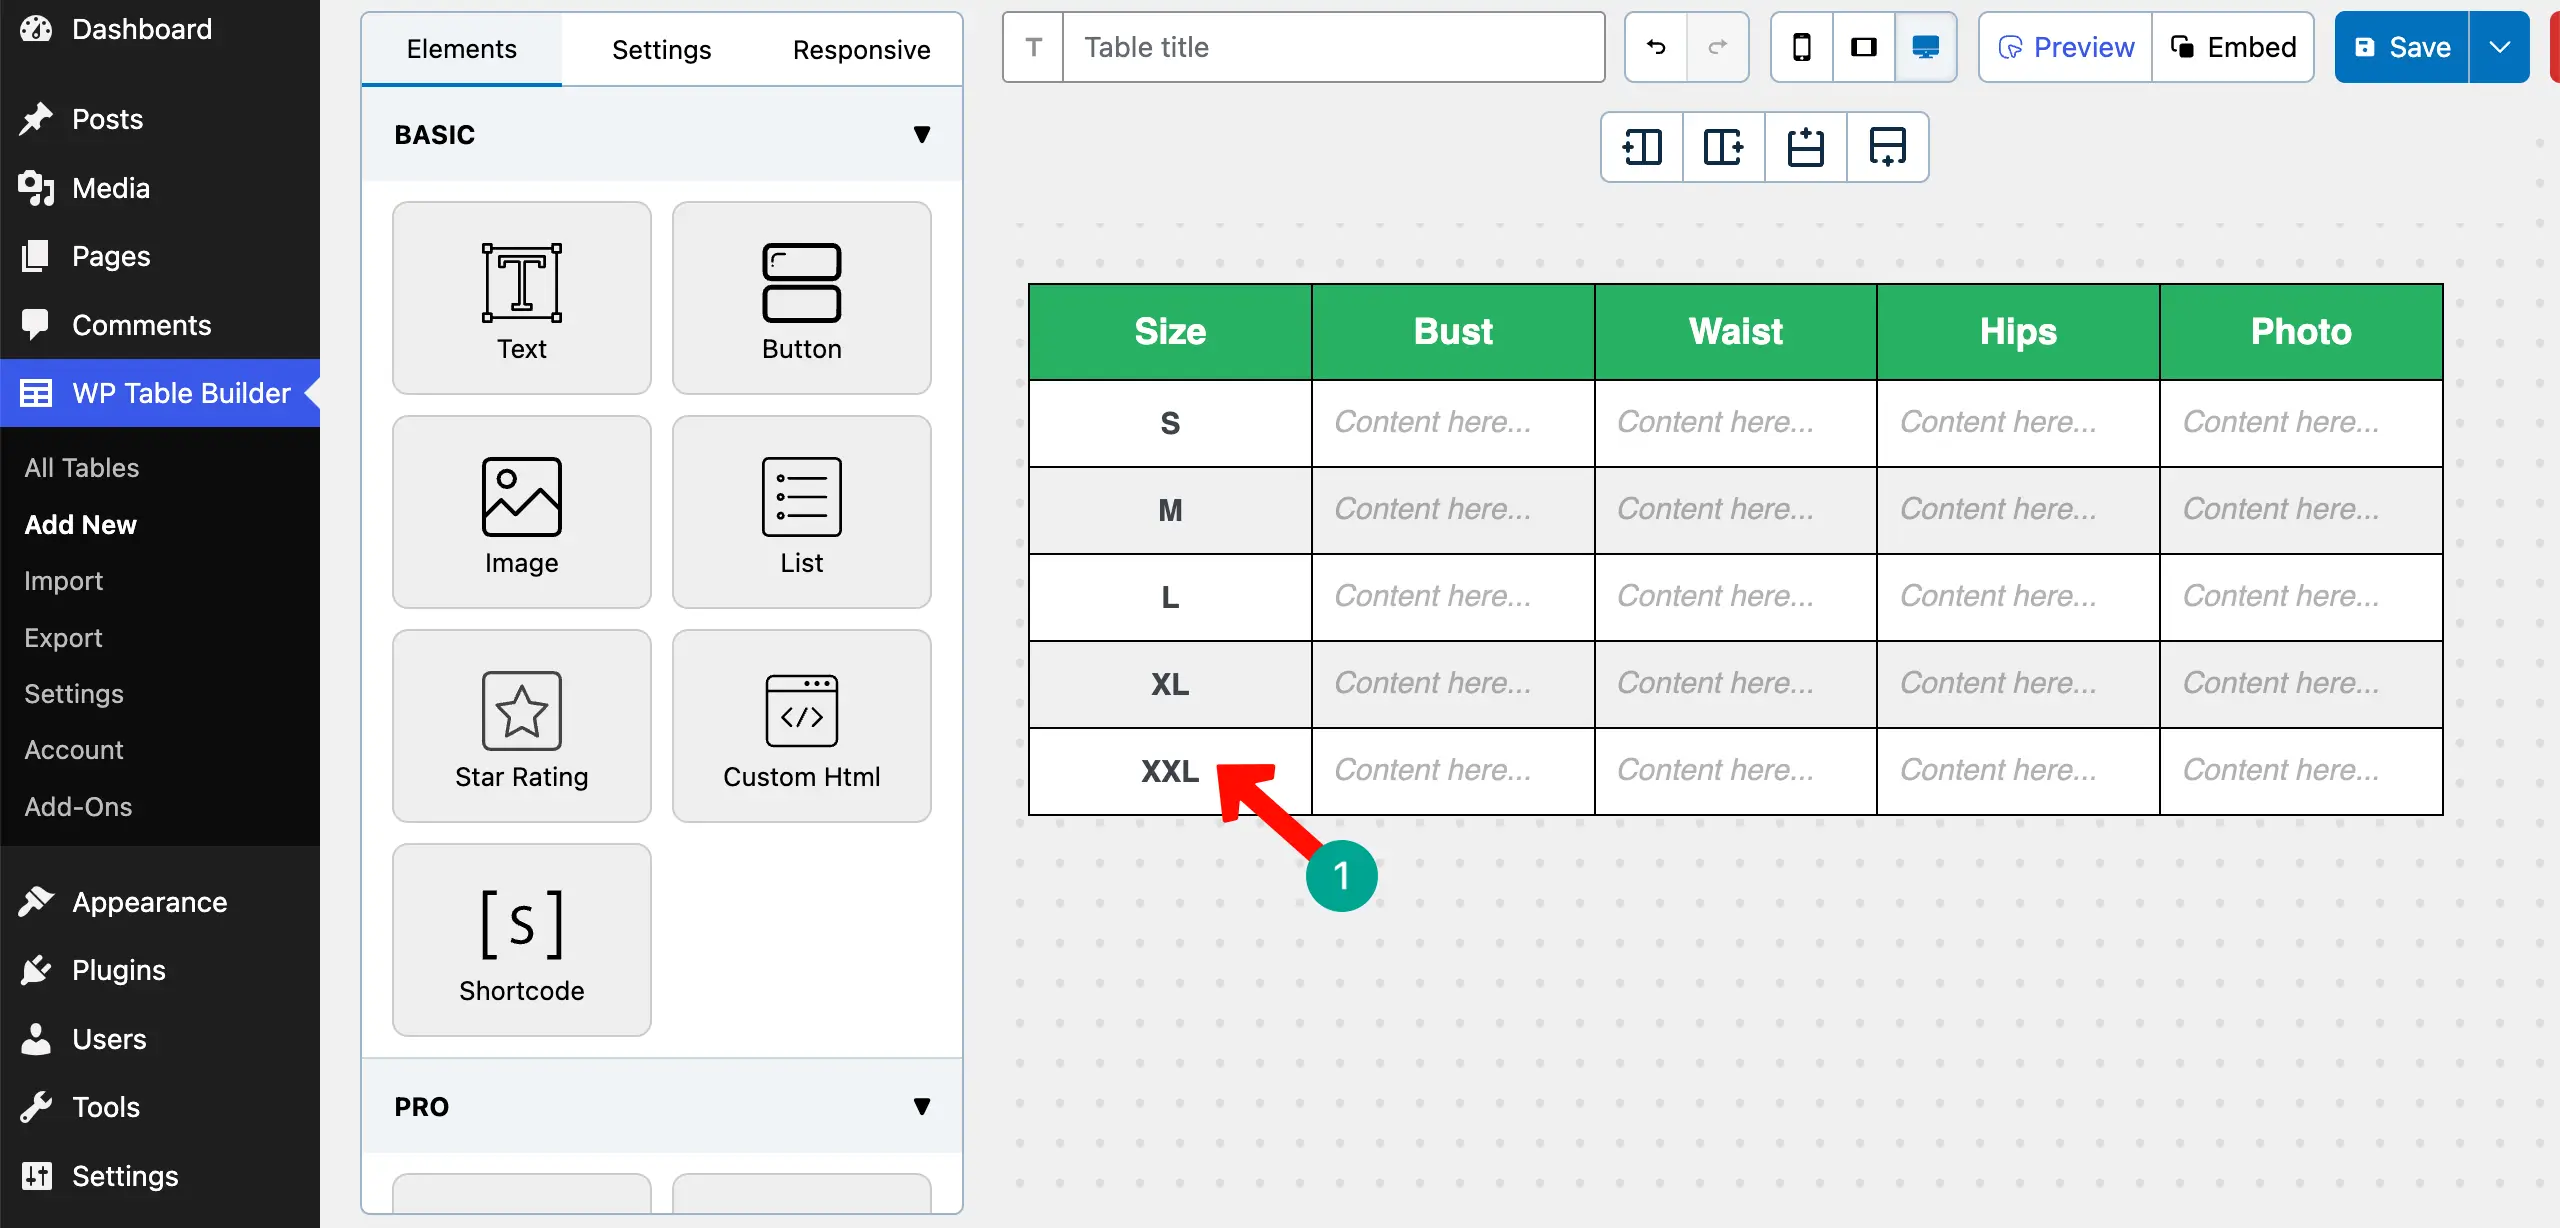
Step 04: Label the Table Rows
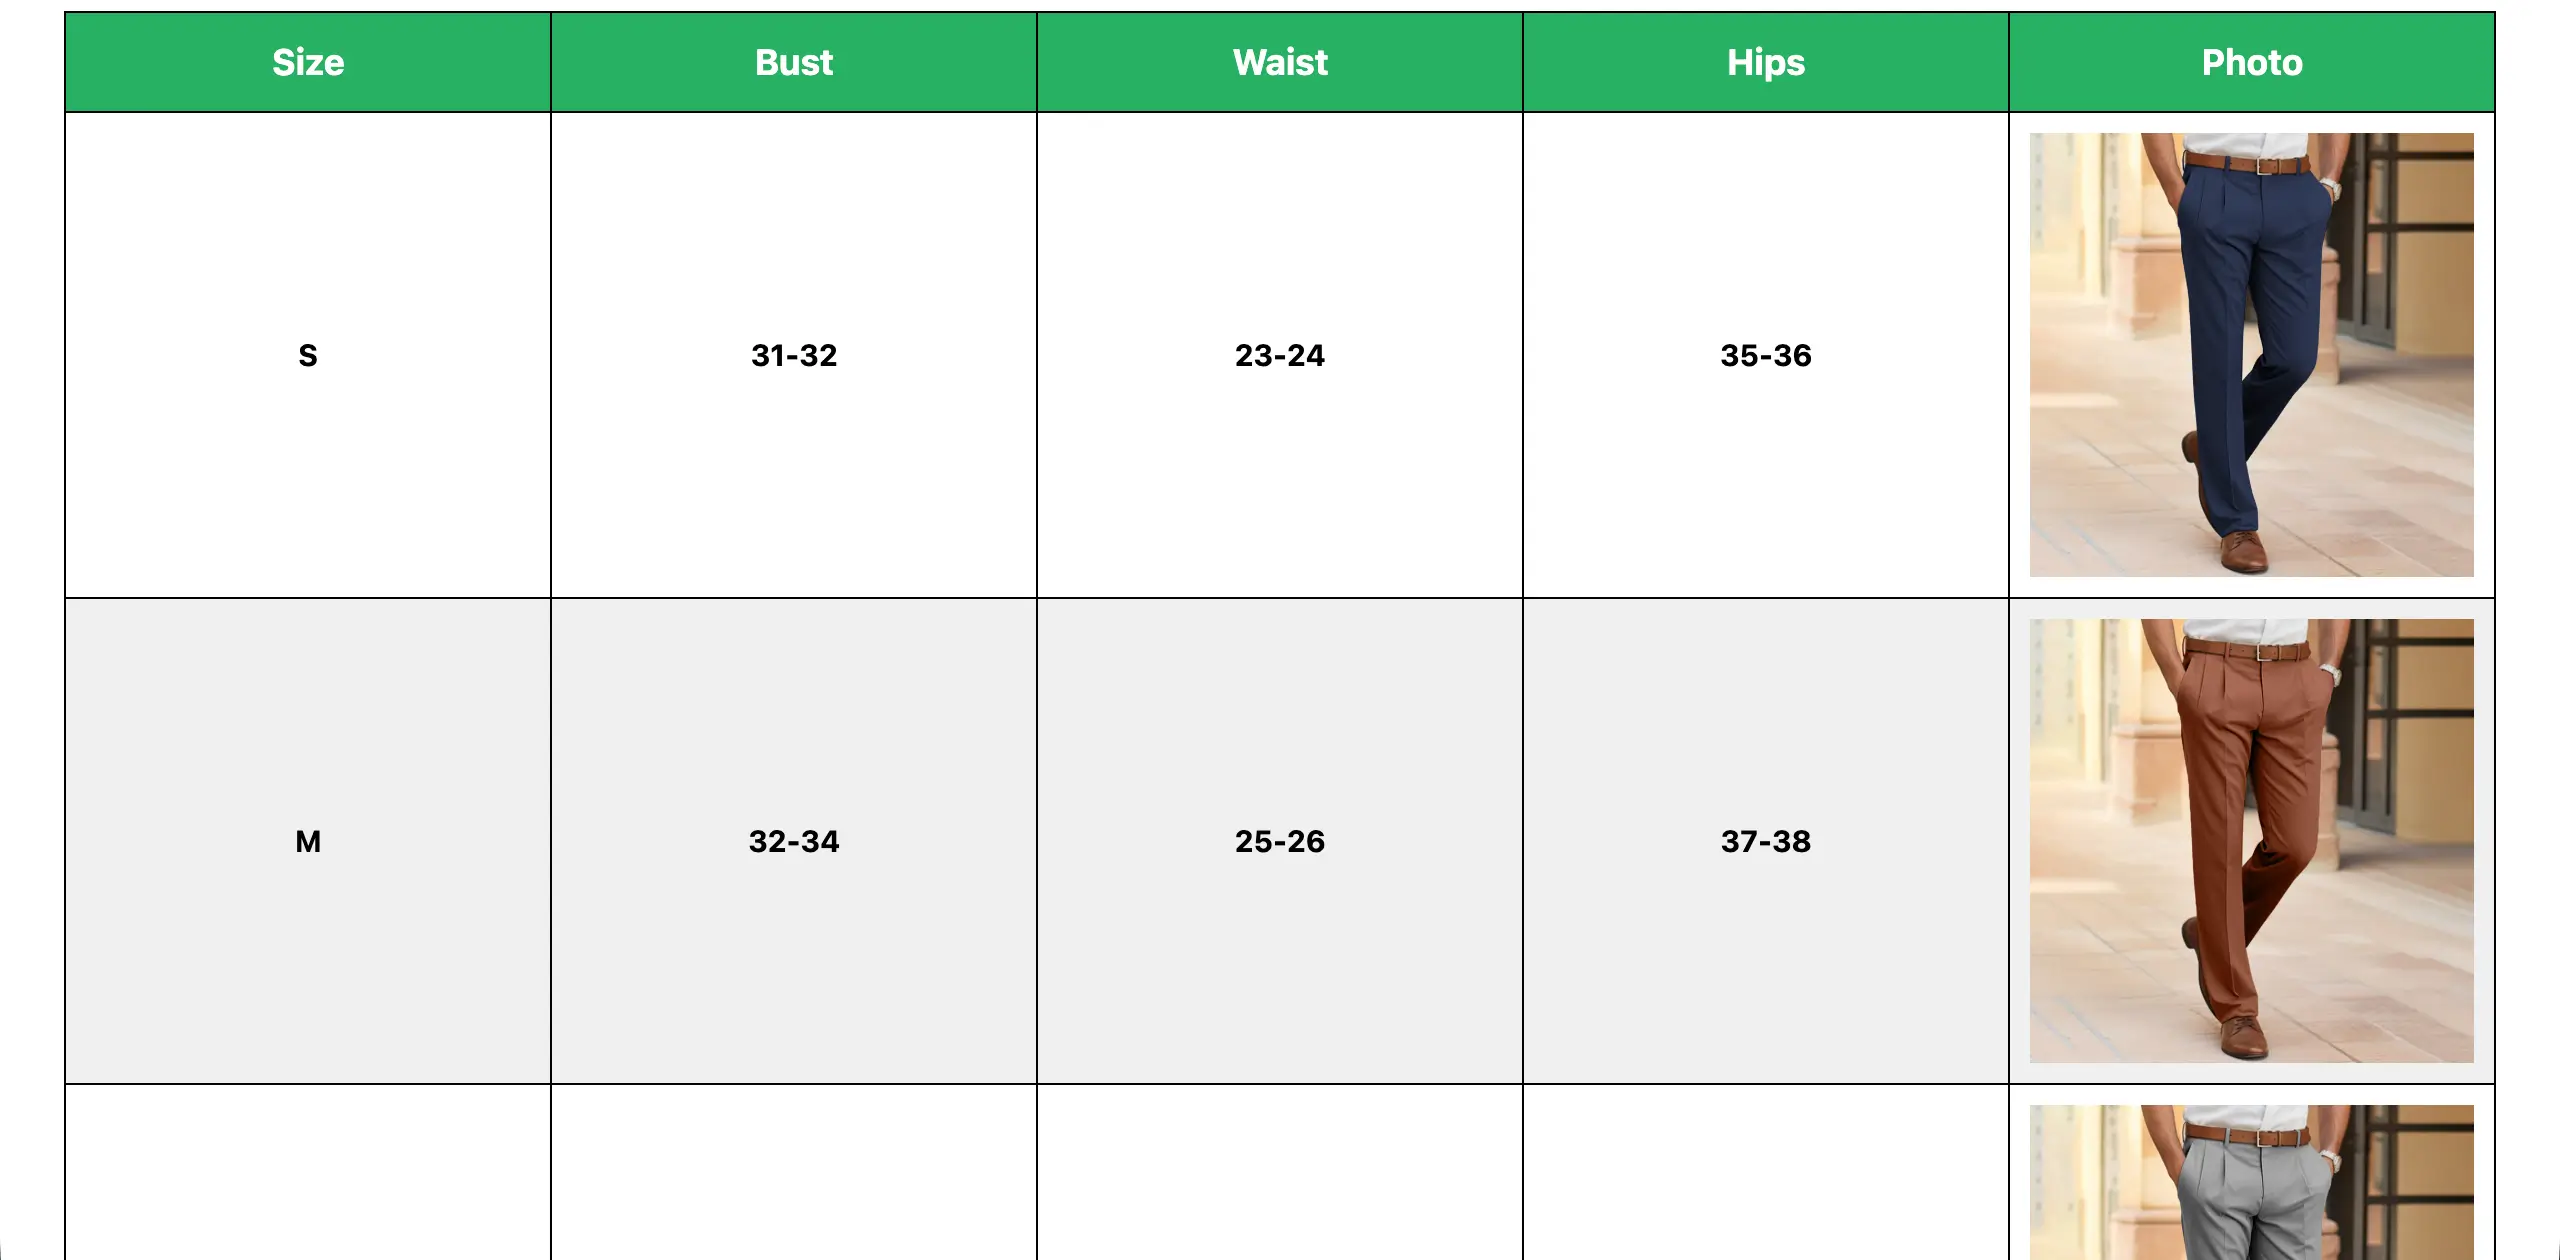
Like columns, you may often need to label rows. As we are preparing a size table, you’ll definitely need this. So, we have labeled the rows with the sizes with the sings of small, medium, large, extra large, and double extra large.
Check how to create a high-converting pricing table in WordPress.
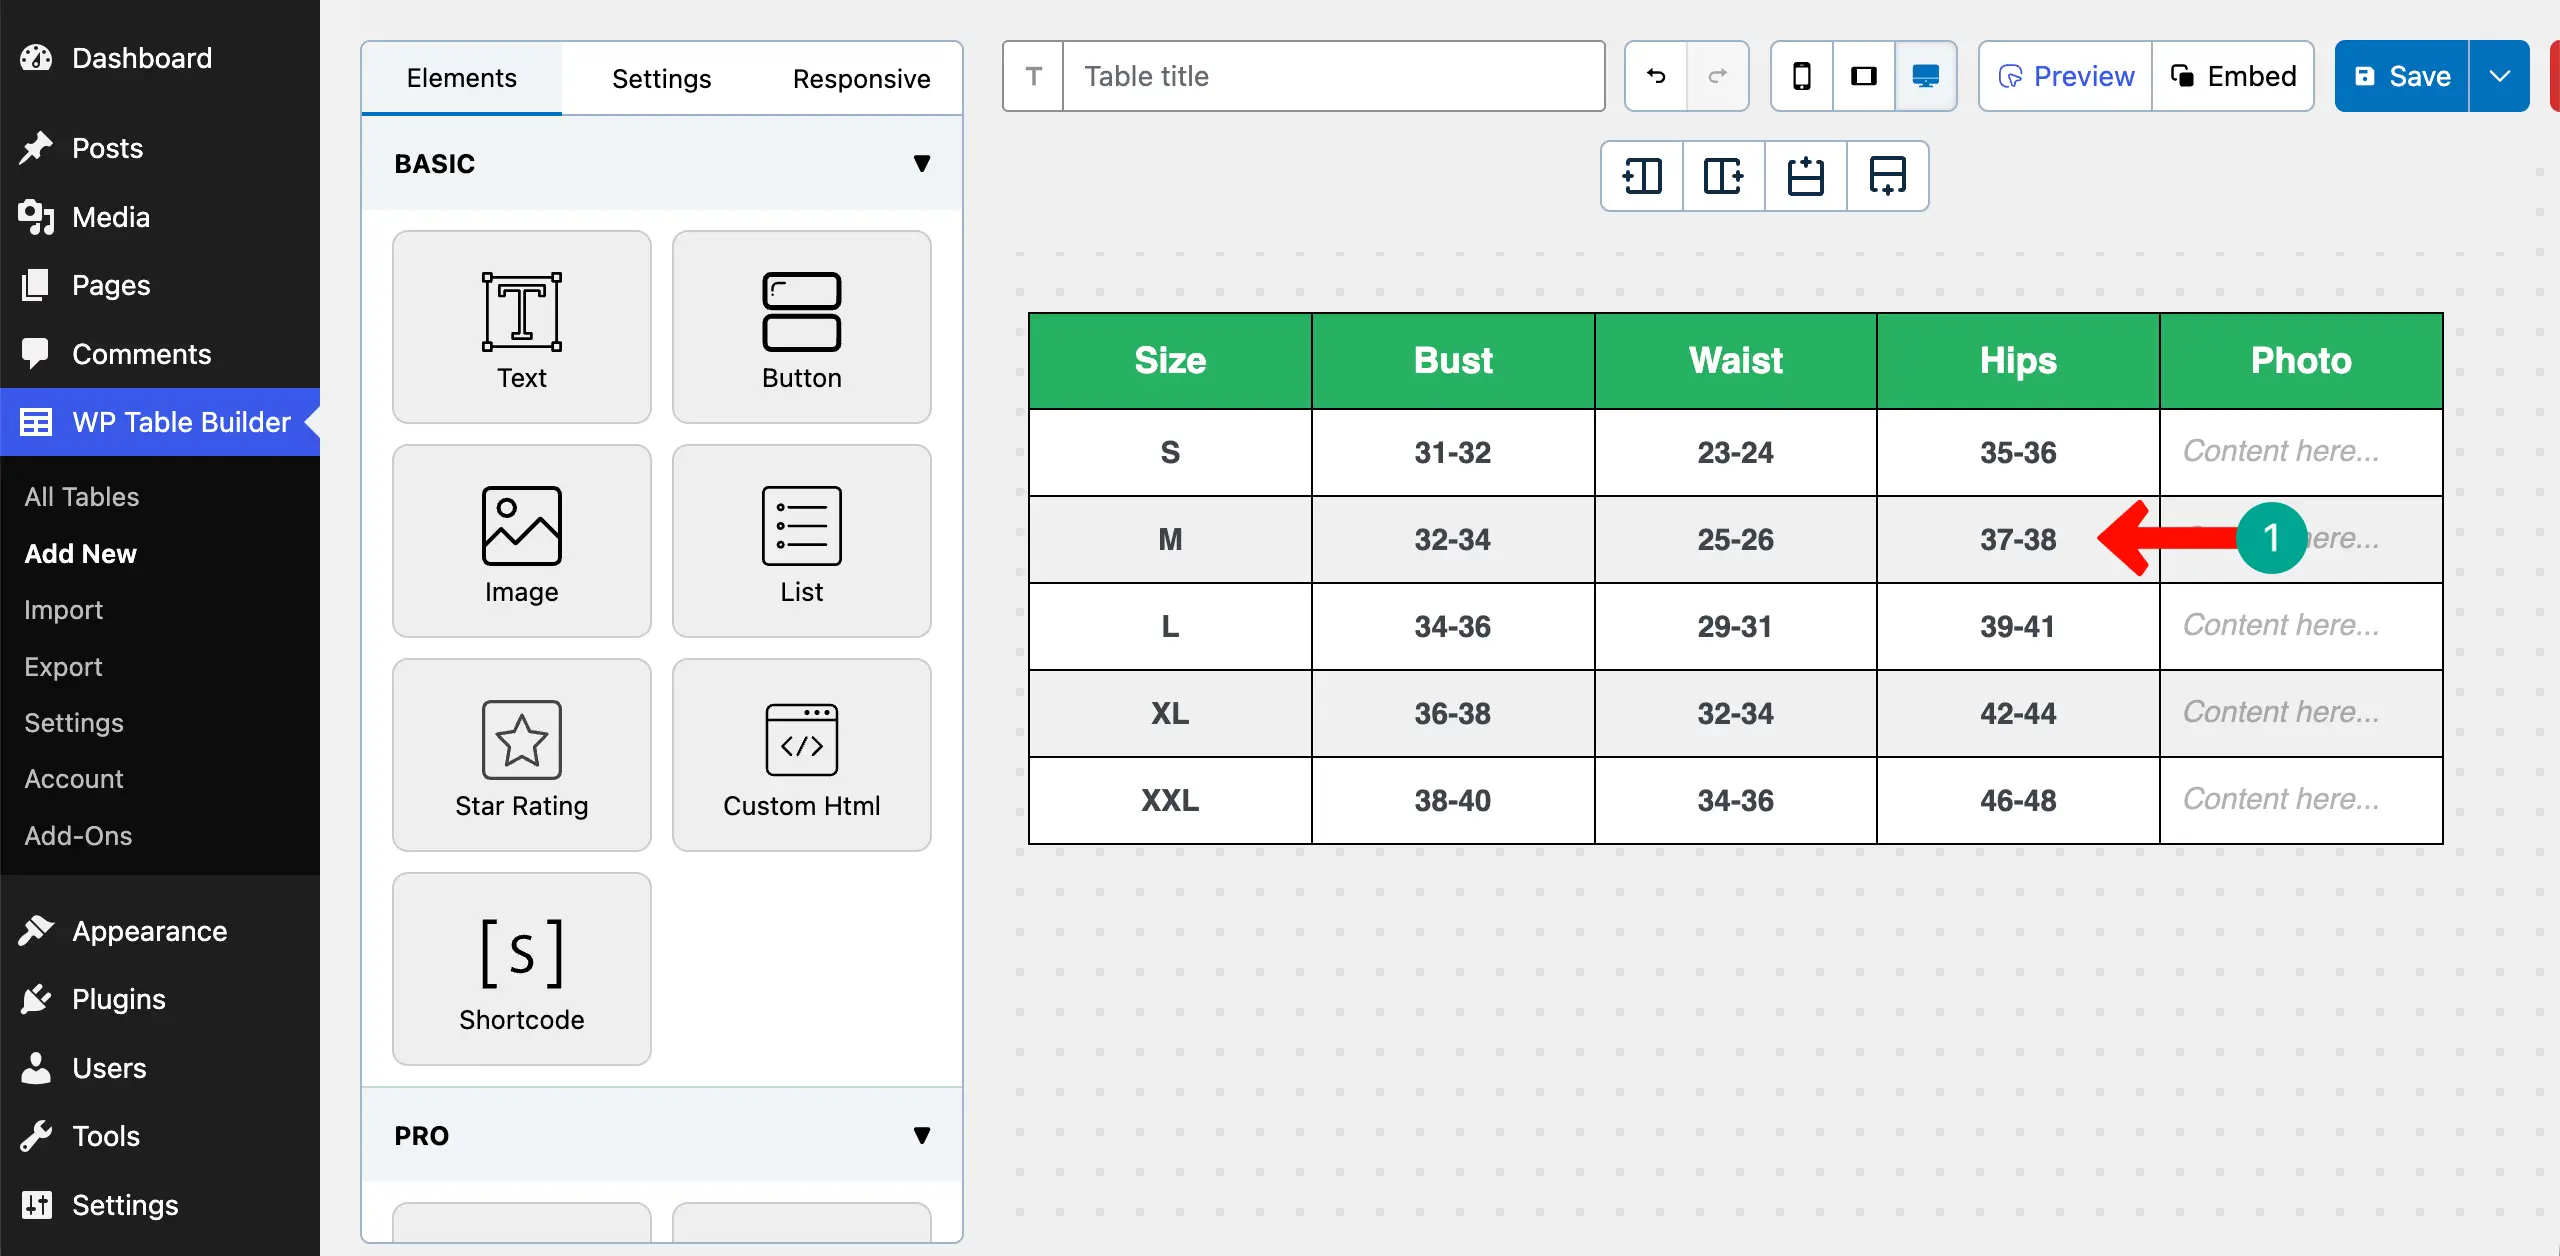
Step 05: Place Values in the Other Rows
Now, simply place the measurement values you want in the respective cells, as you can see what we have done in the screenshot attached below.
Step 06: Add Photos of Your Product (Optional)
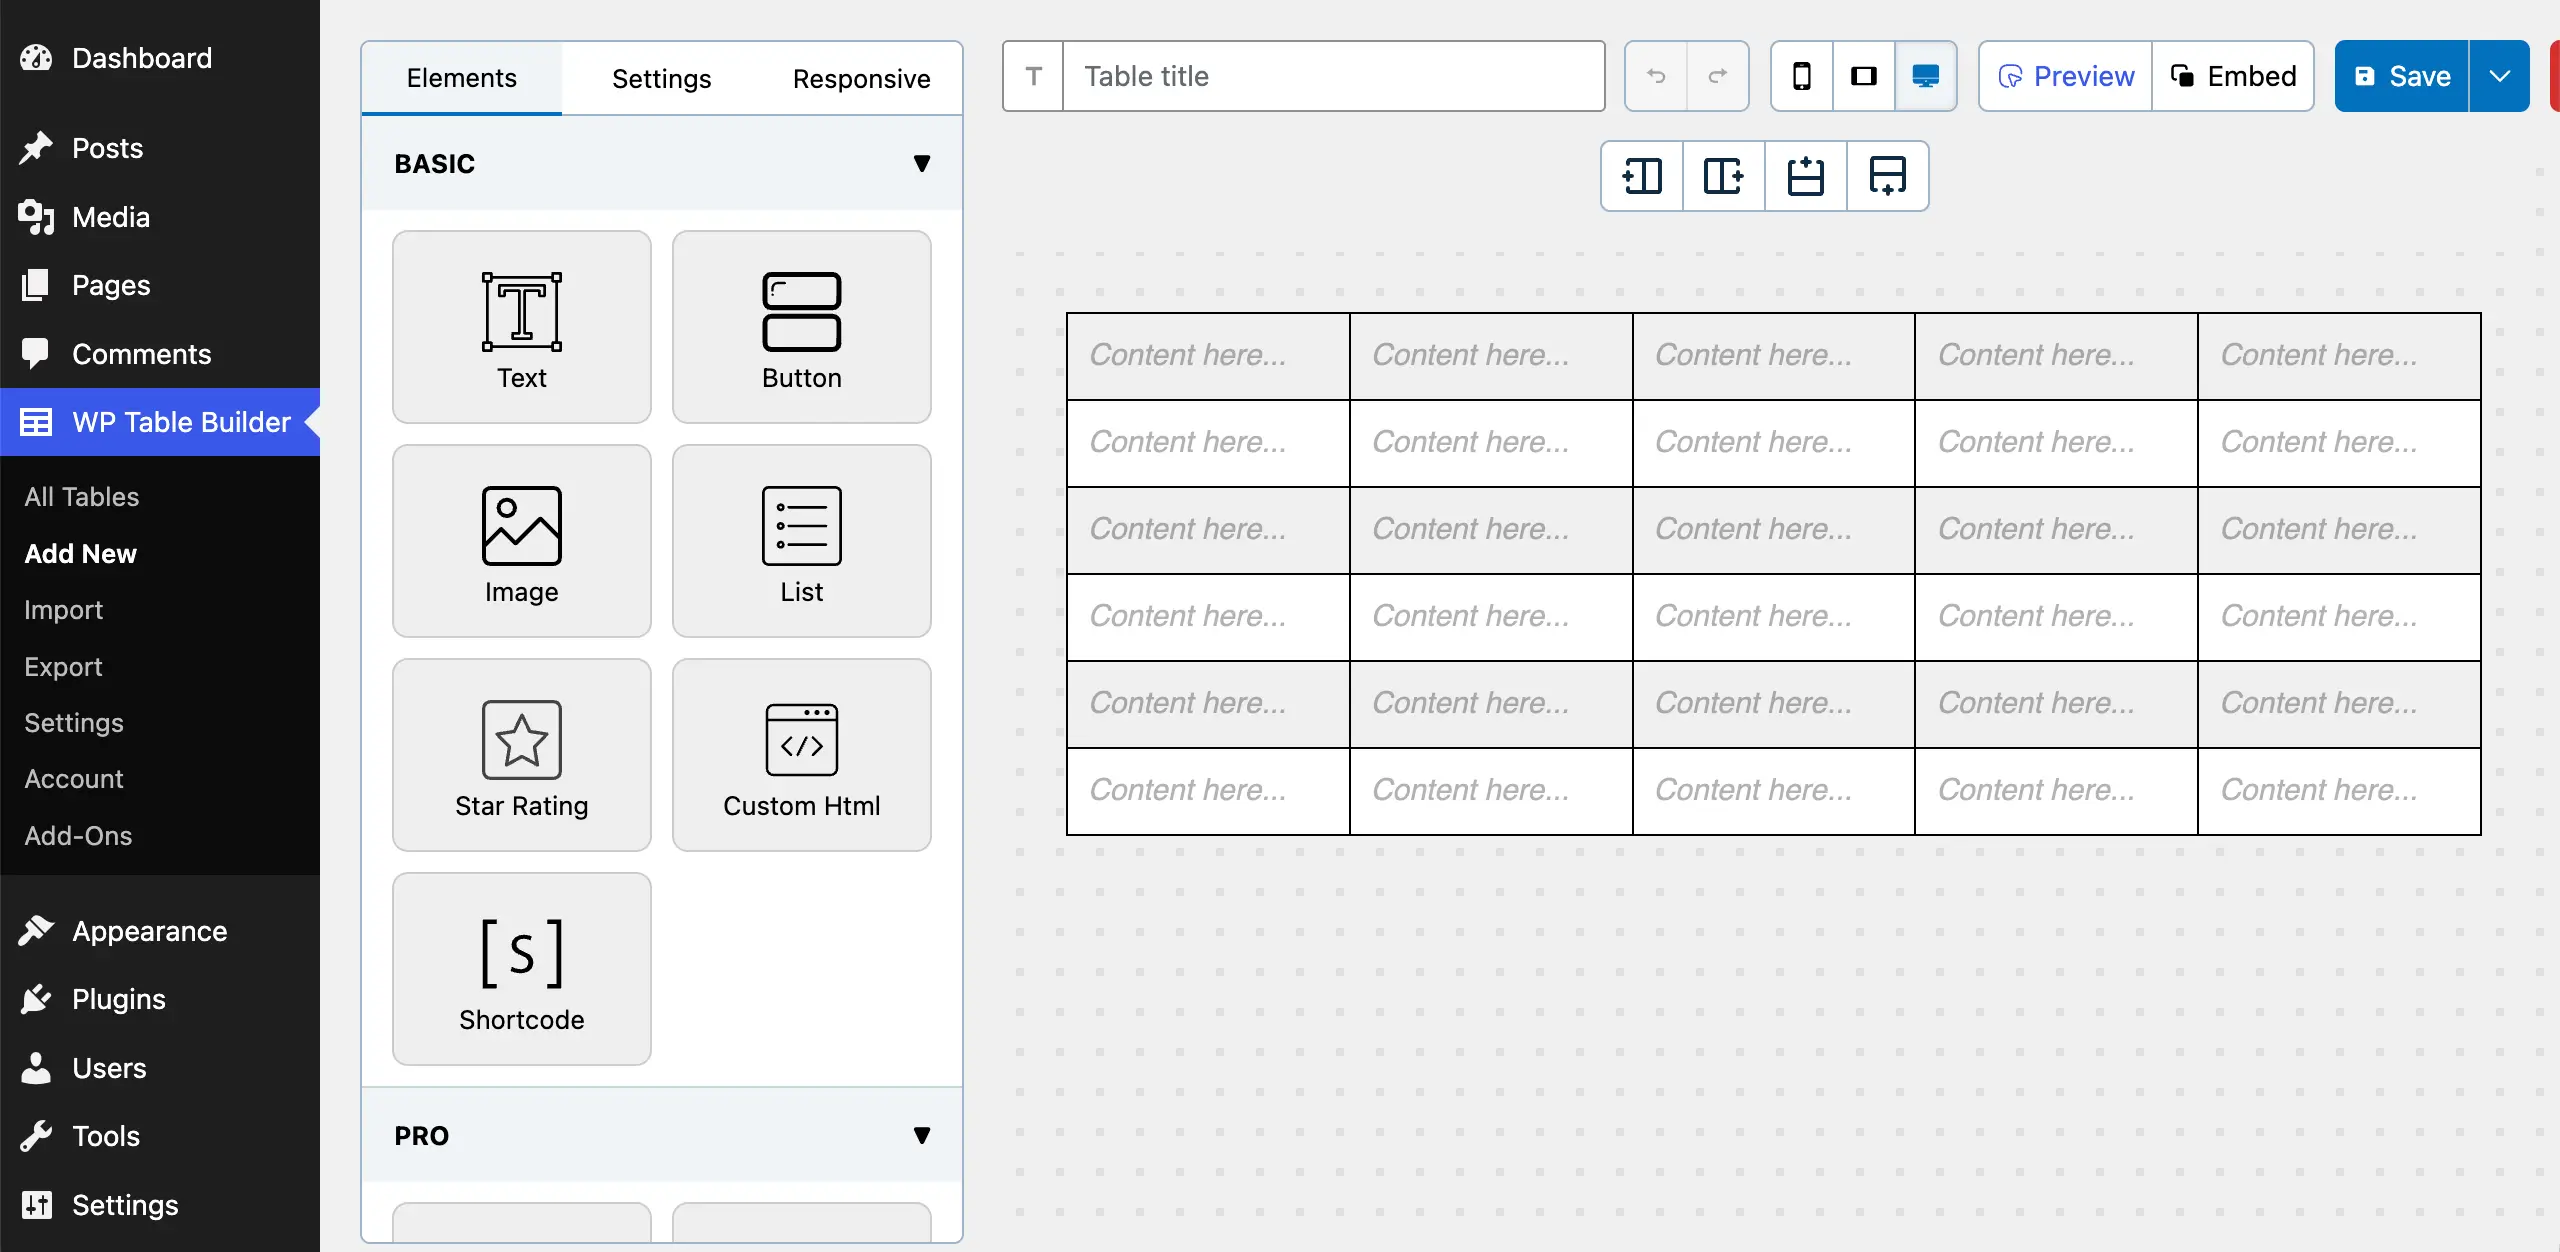
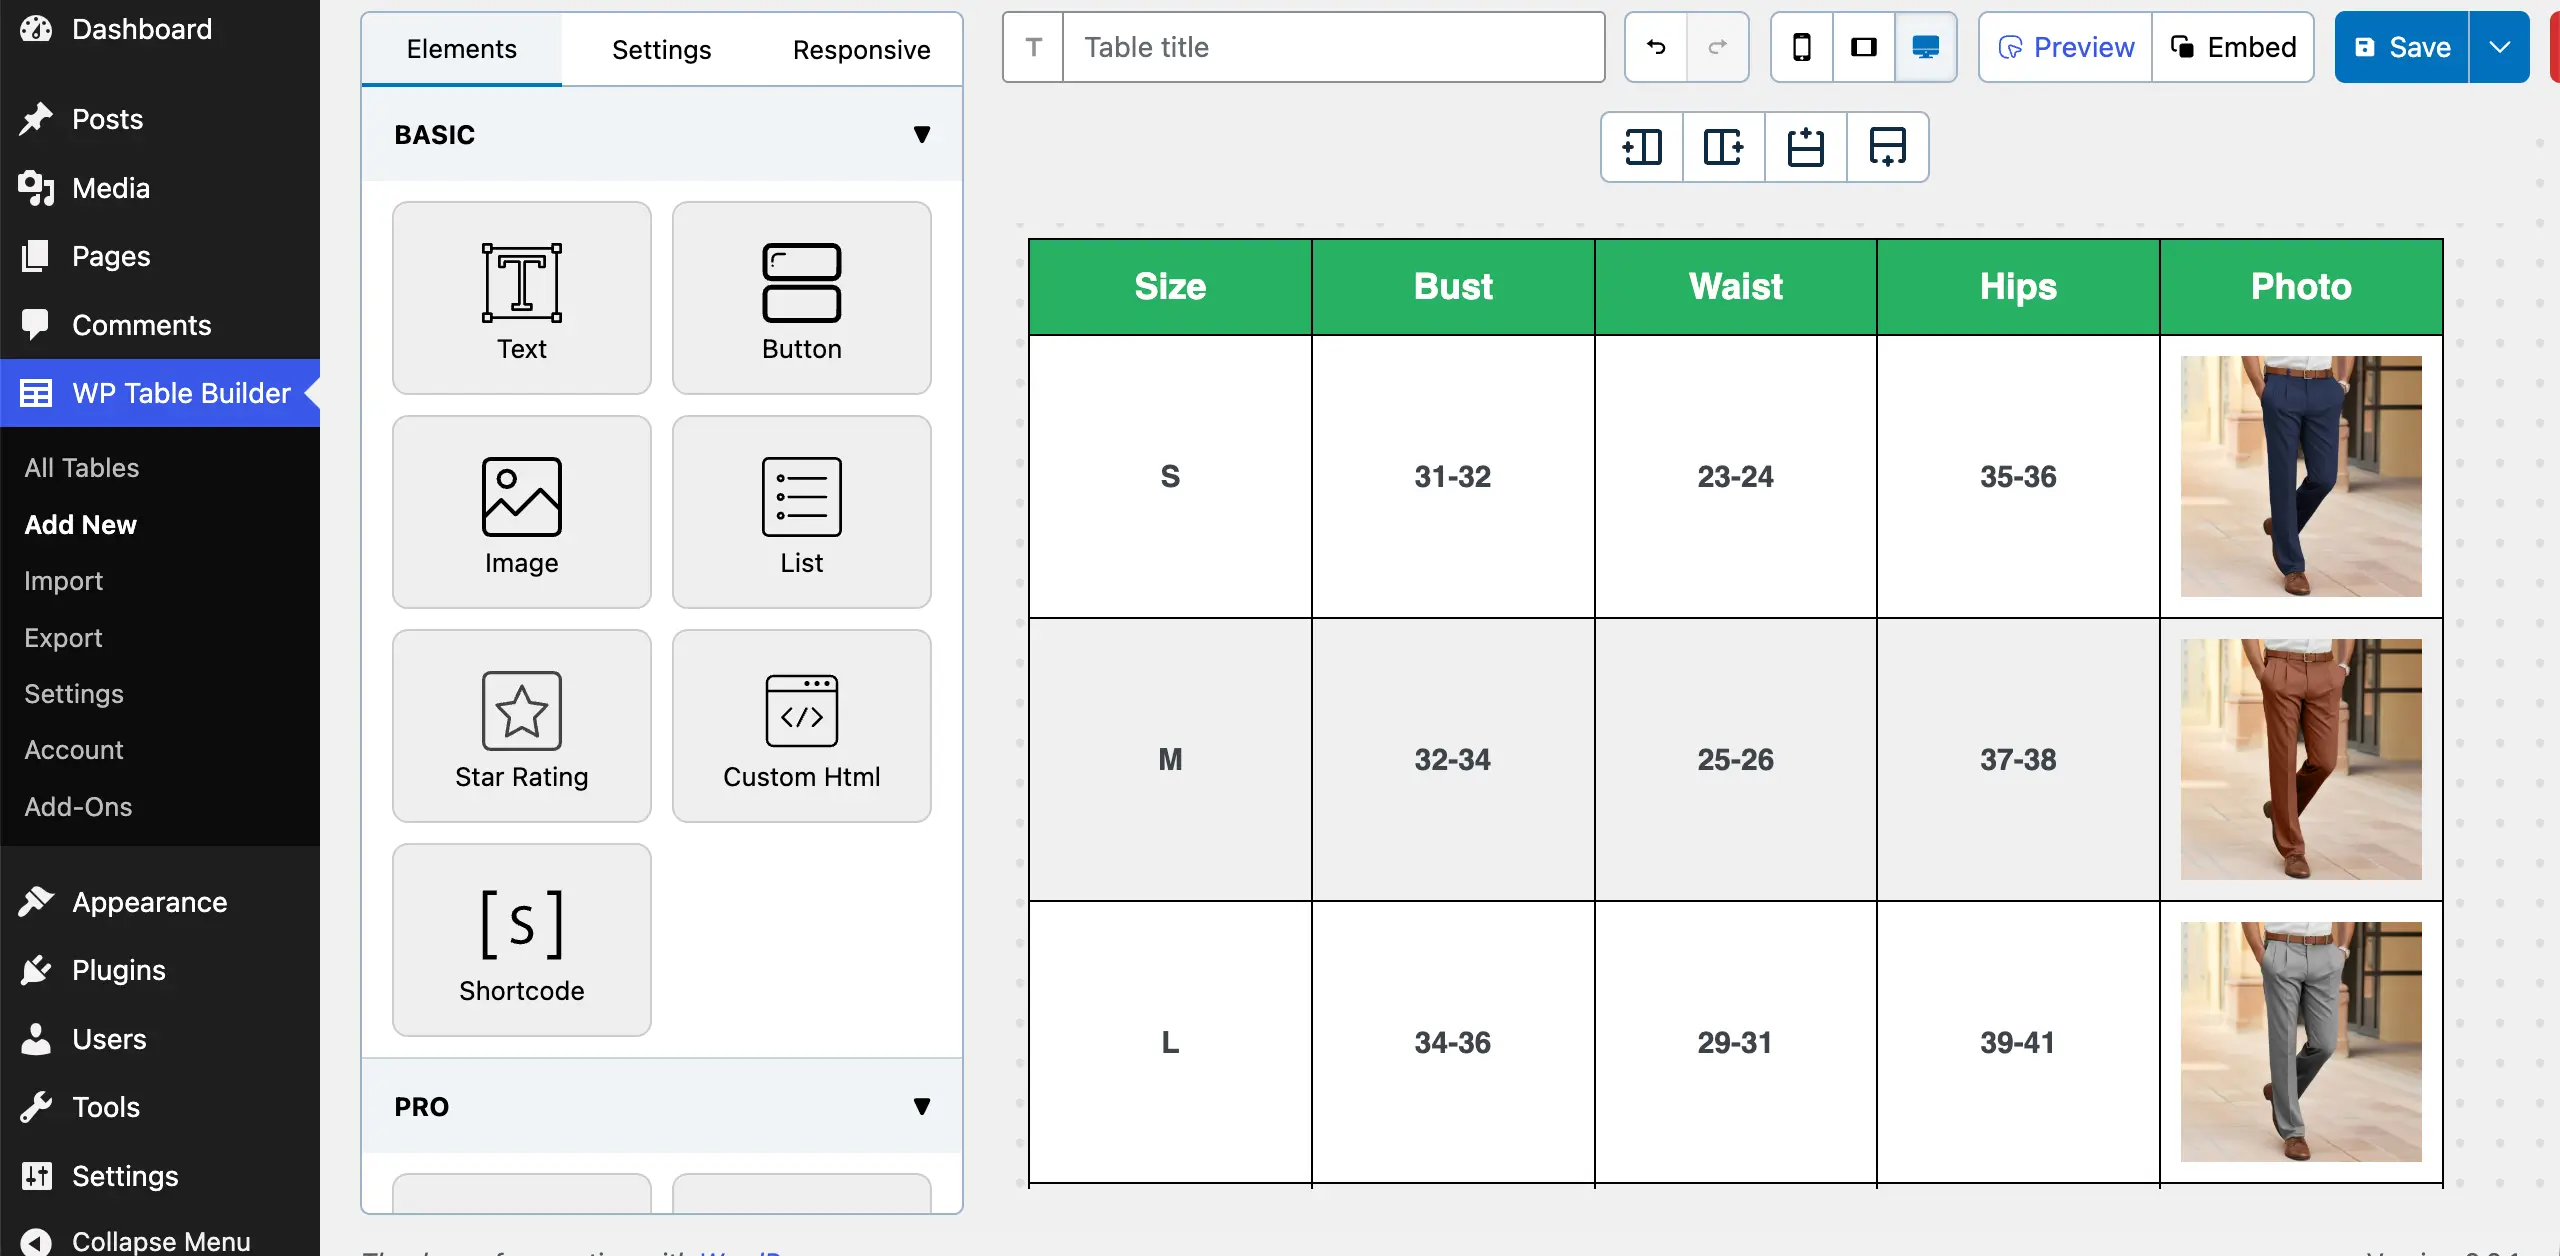
To make the table more engaging, you may consider adding images of your product to the table. Drag and drop the Image element to the table.
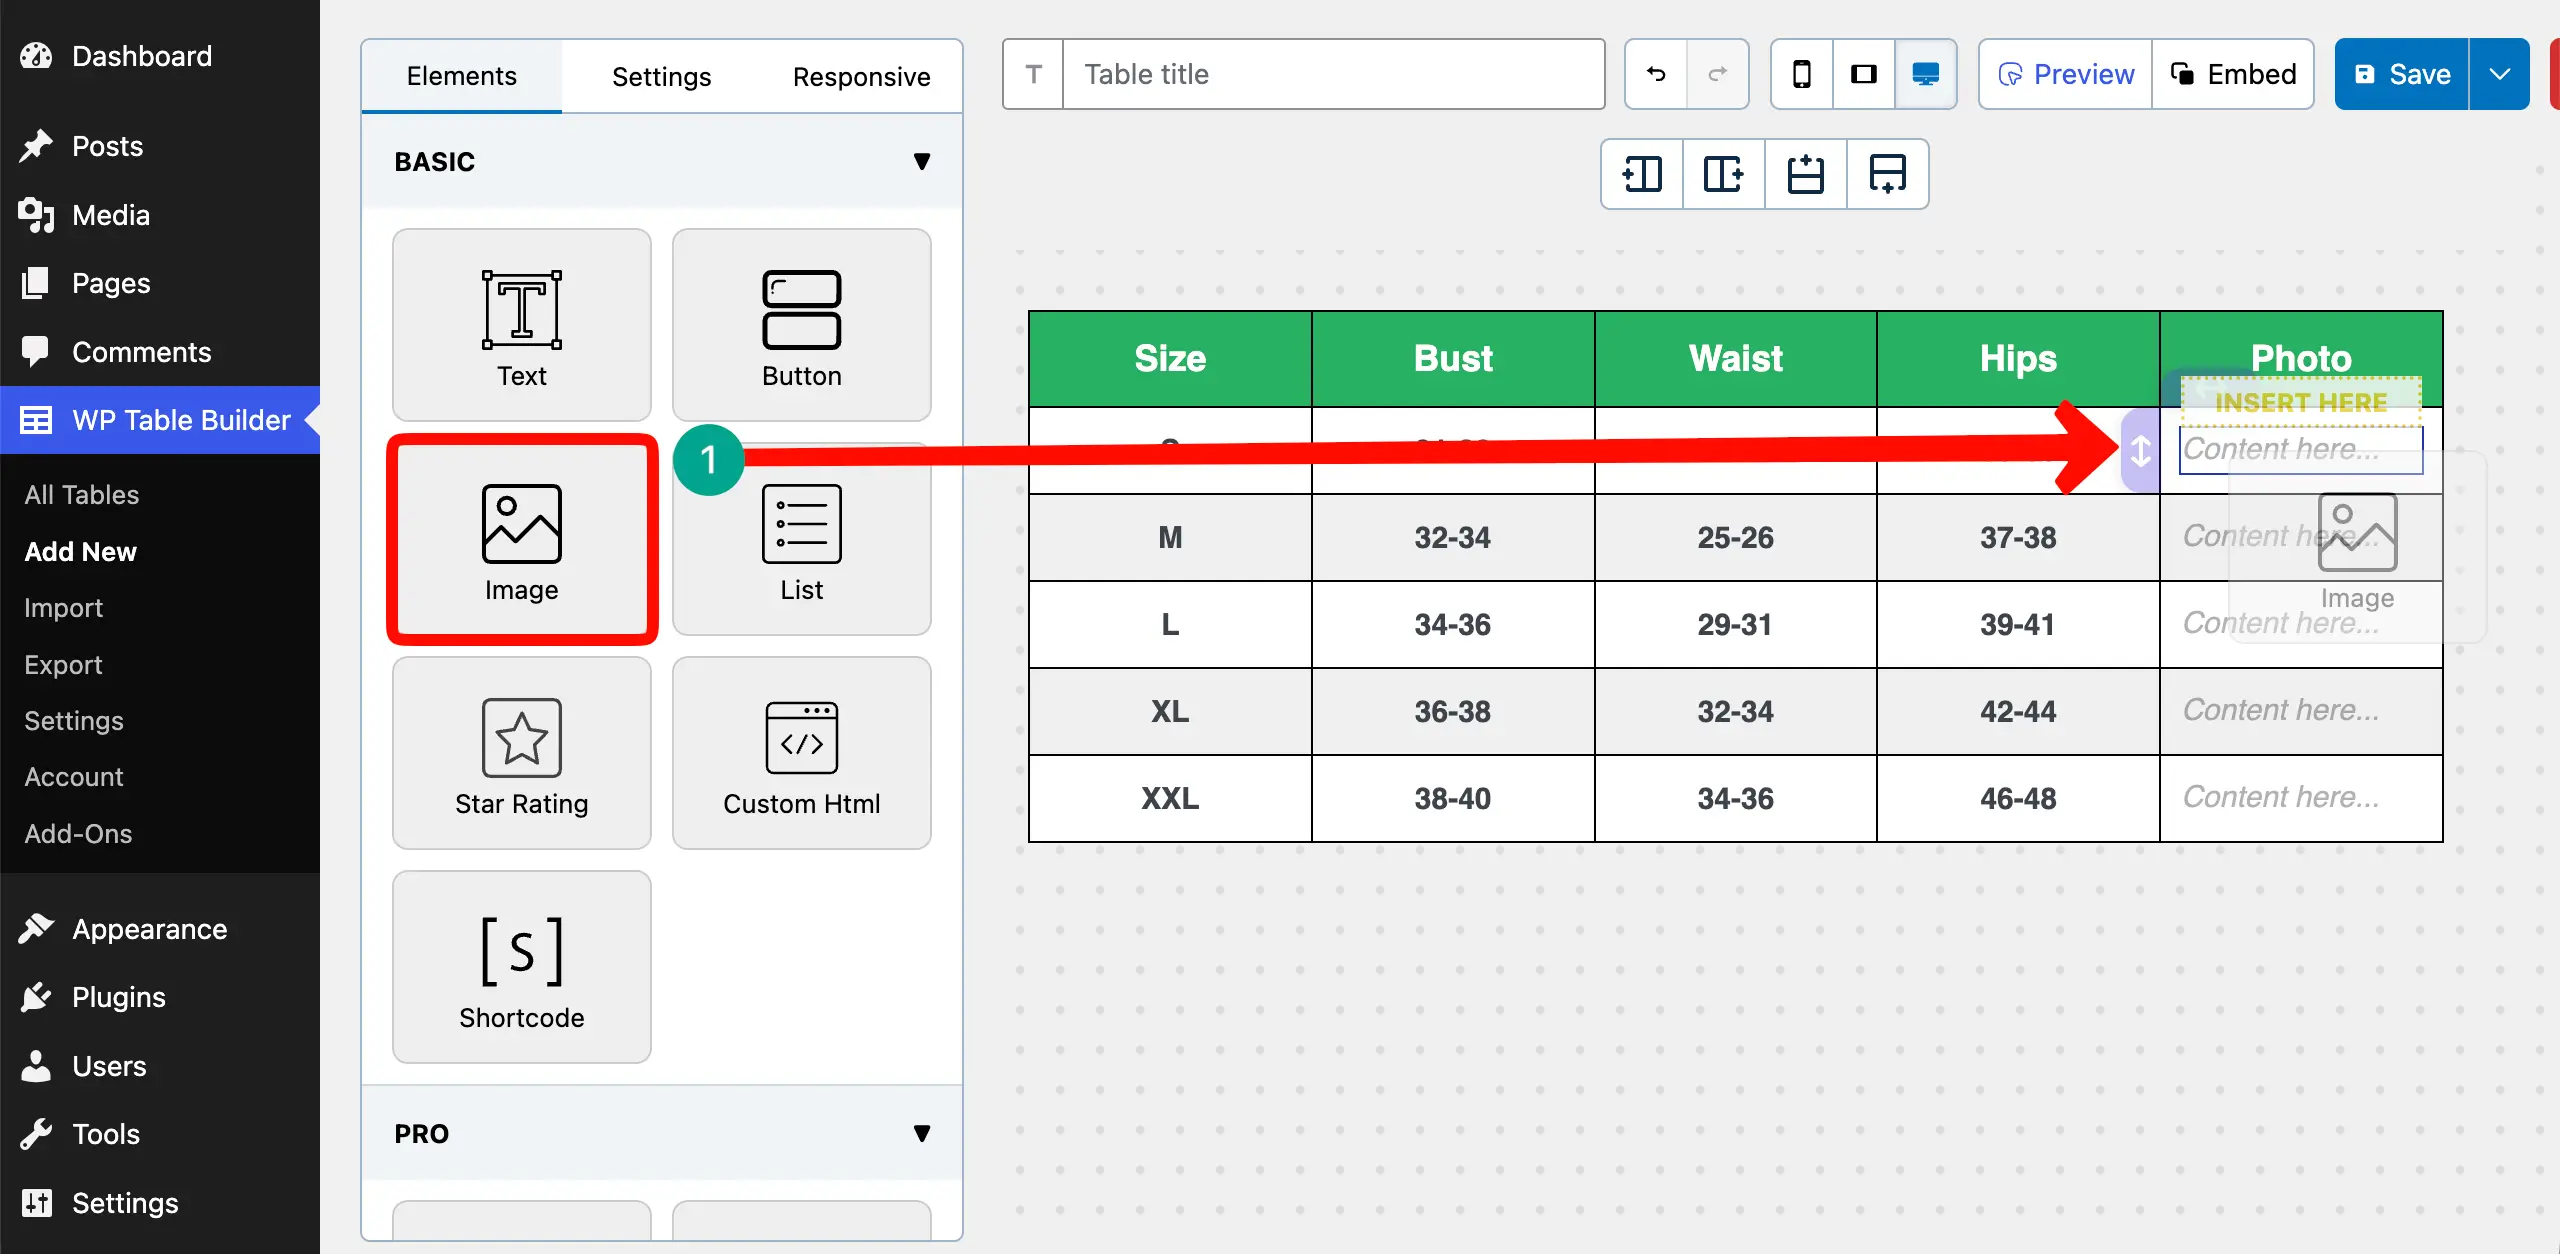
Click the Image element. You’ll get an option to select an image from the right sidebar. Do this.

You can see that we have added an image to the cell.
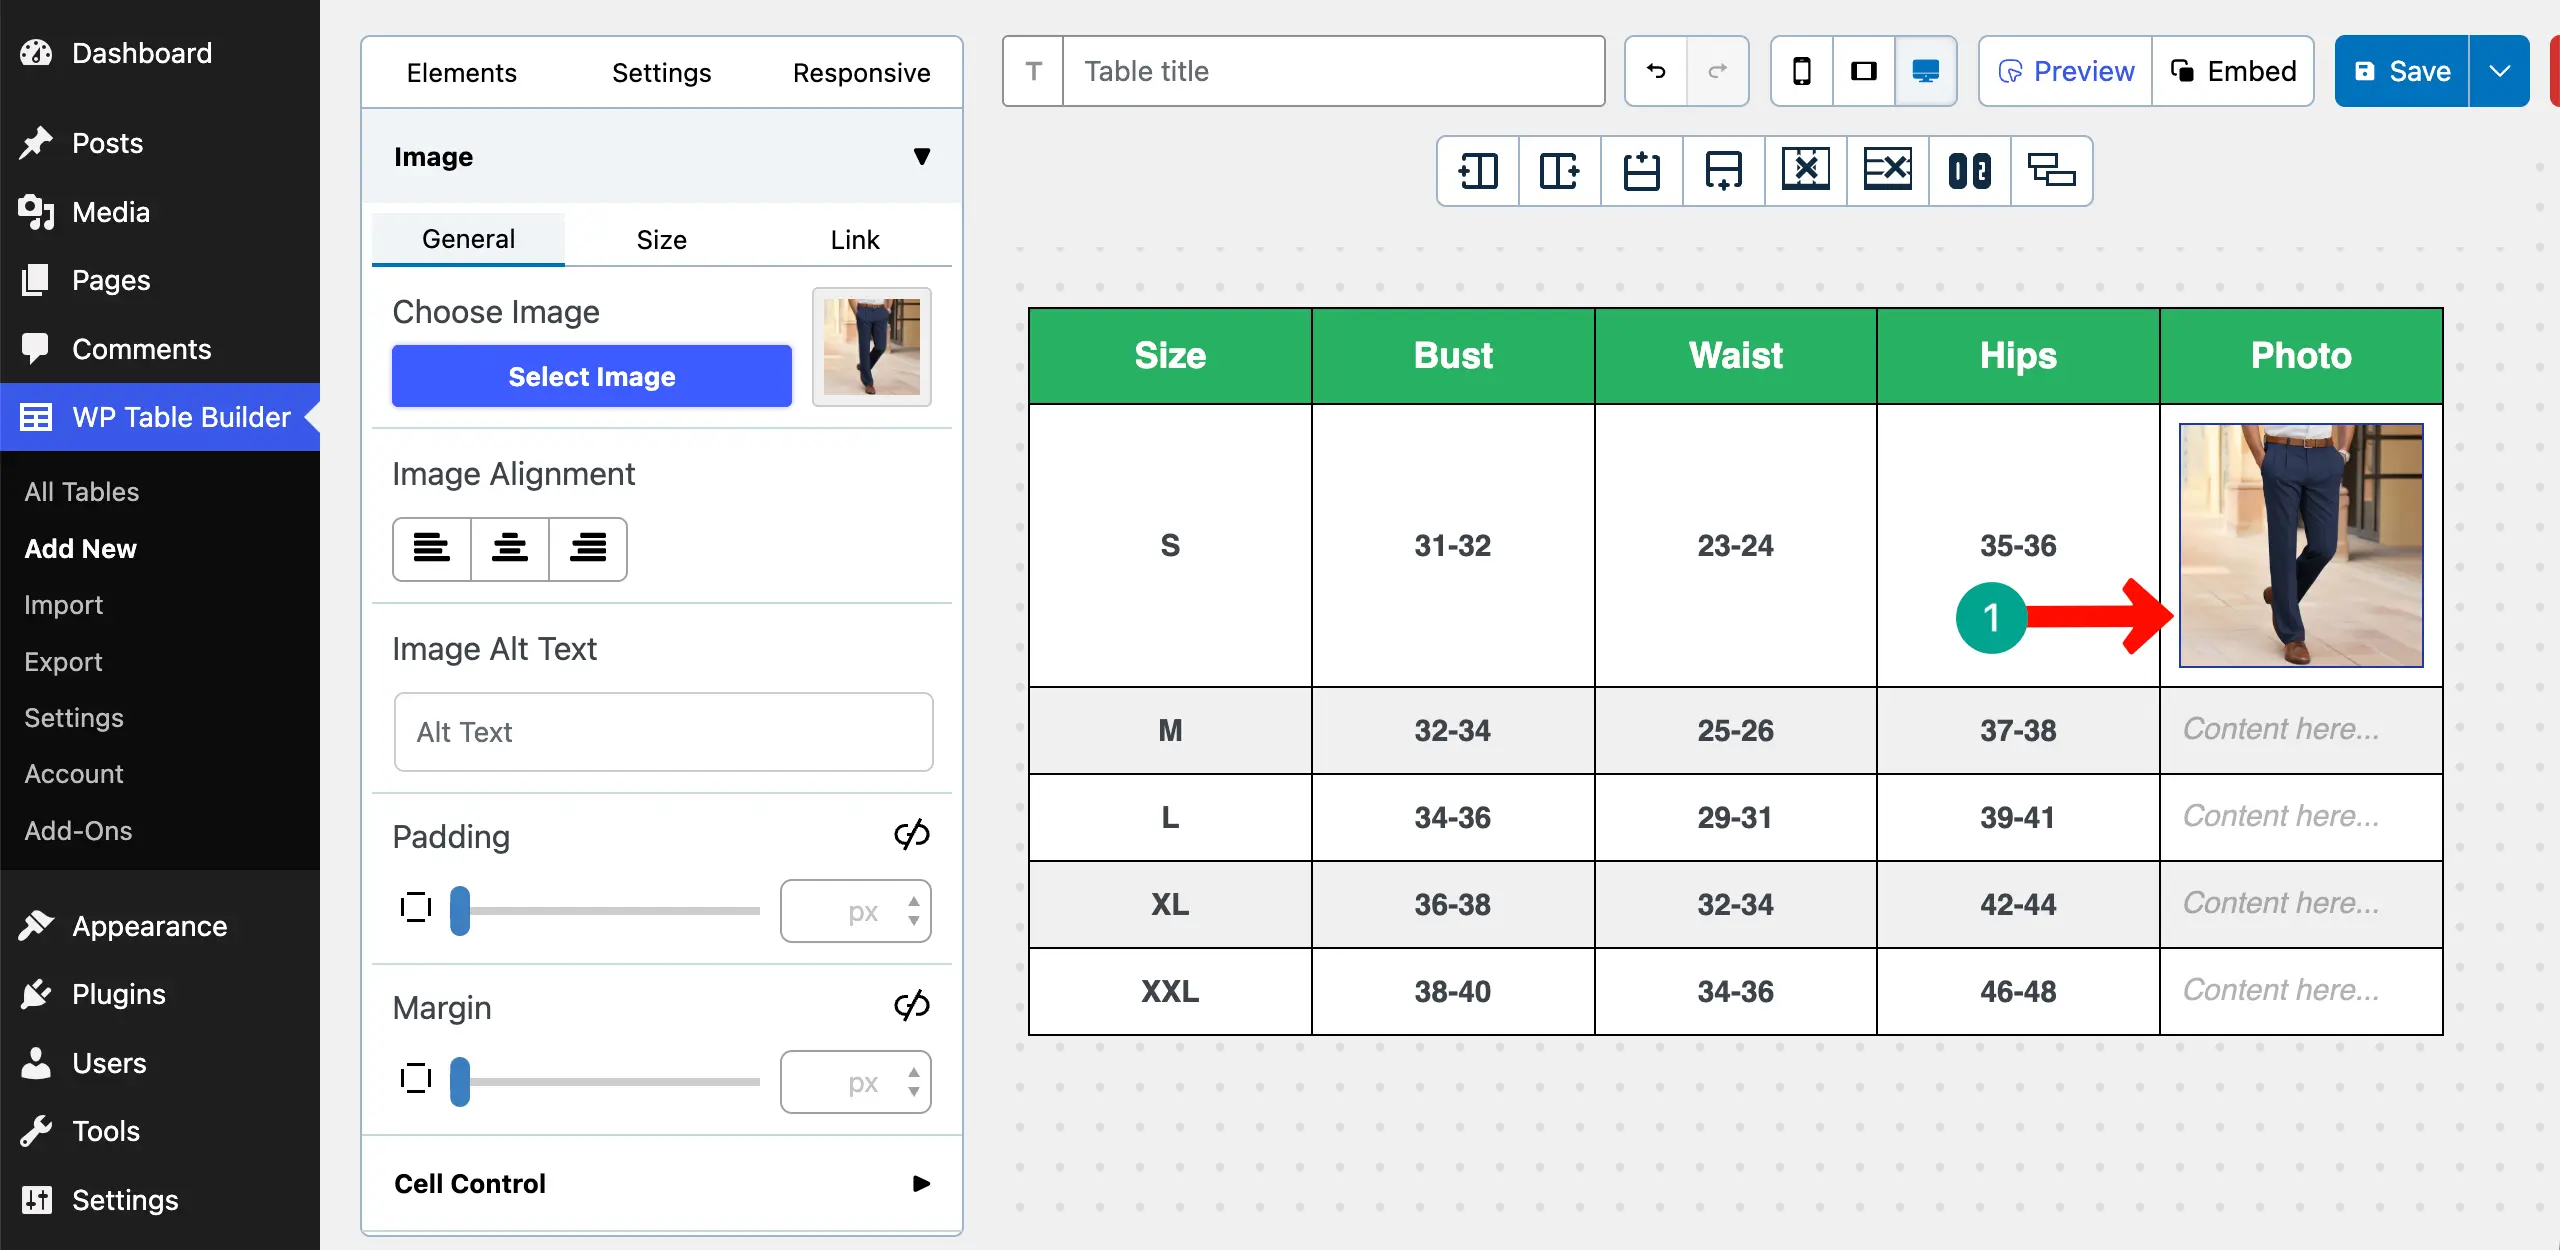
In the same way, add images to the other respective cells of each row.
Learn how to add an Amazon product box in WordPress.
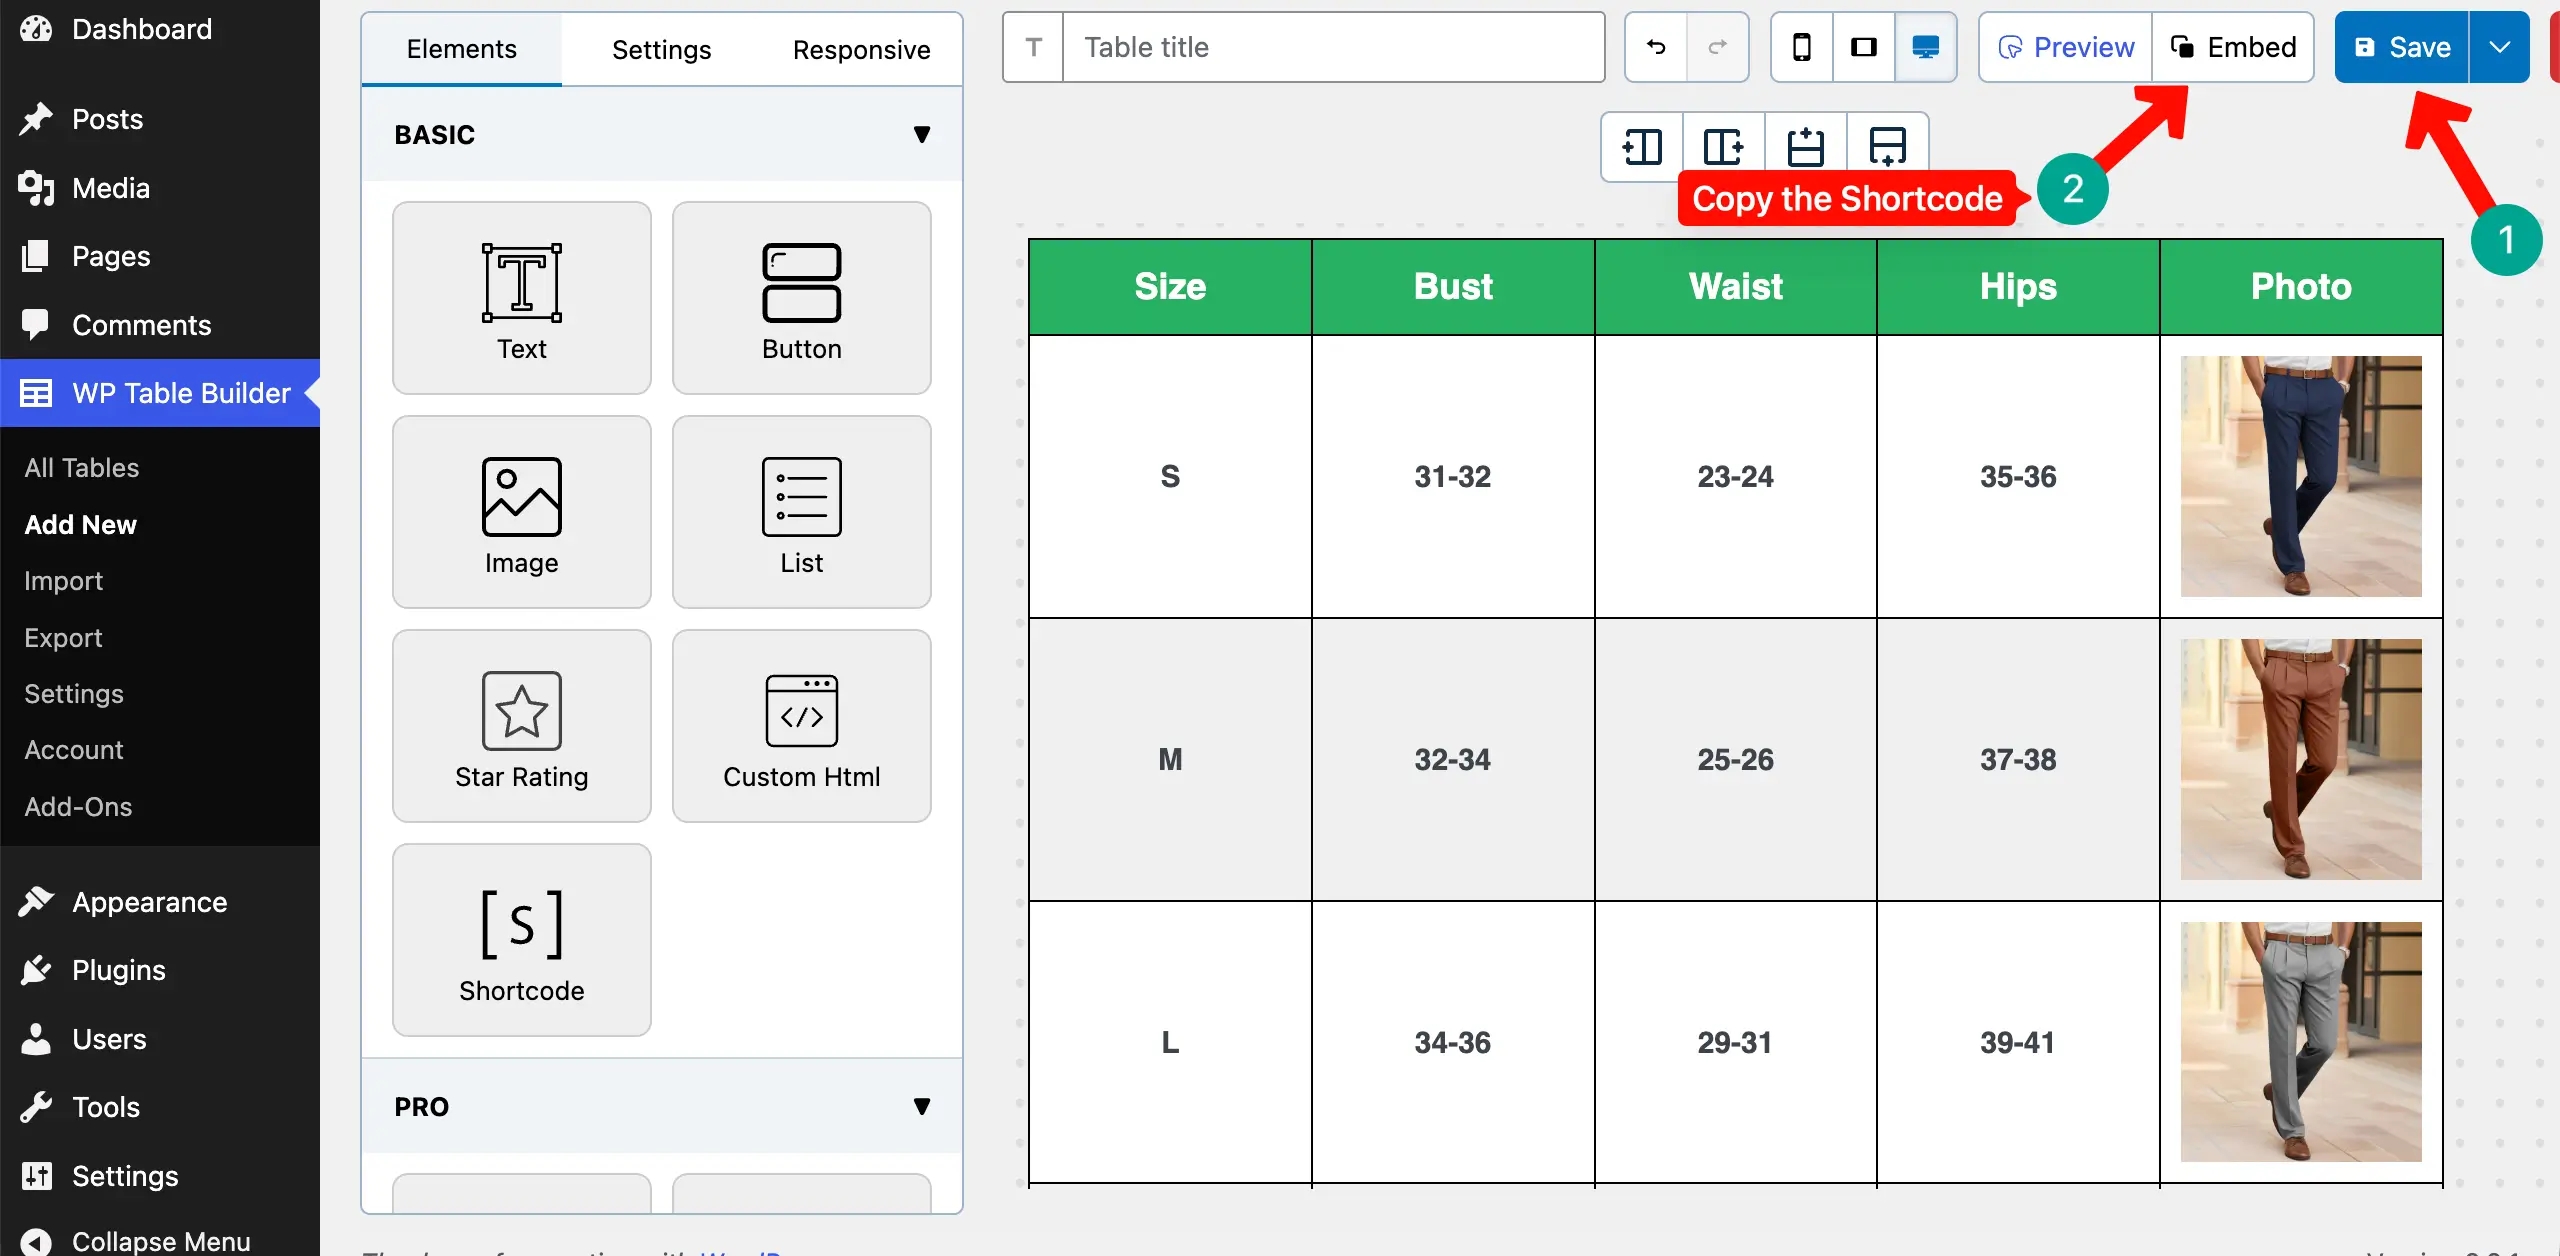
Step 07: Publish the Table
Save the table and then copy its shortcode by clicking the Embed button.
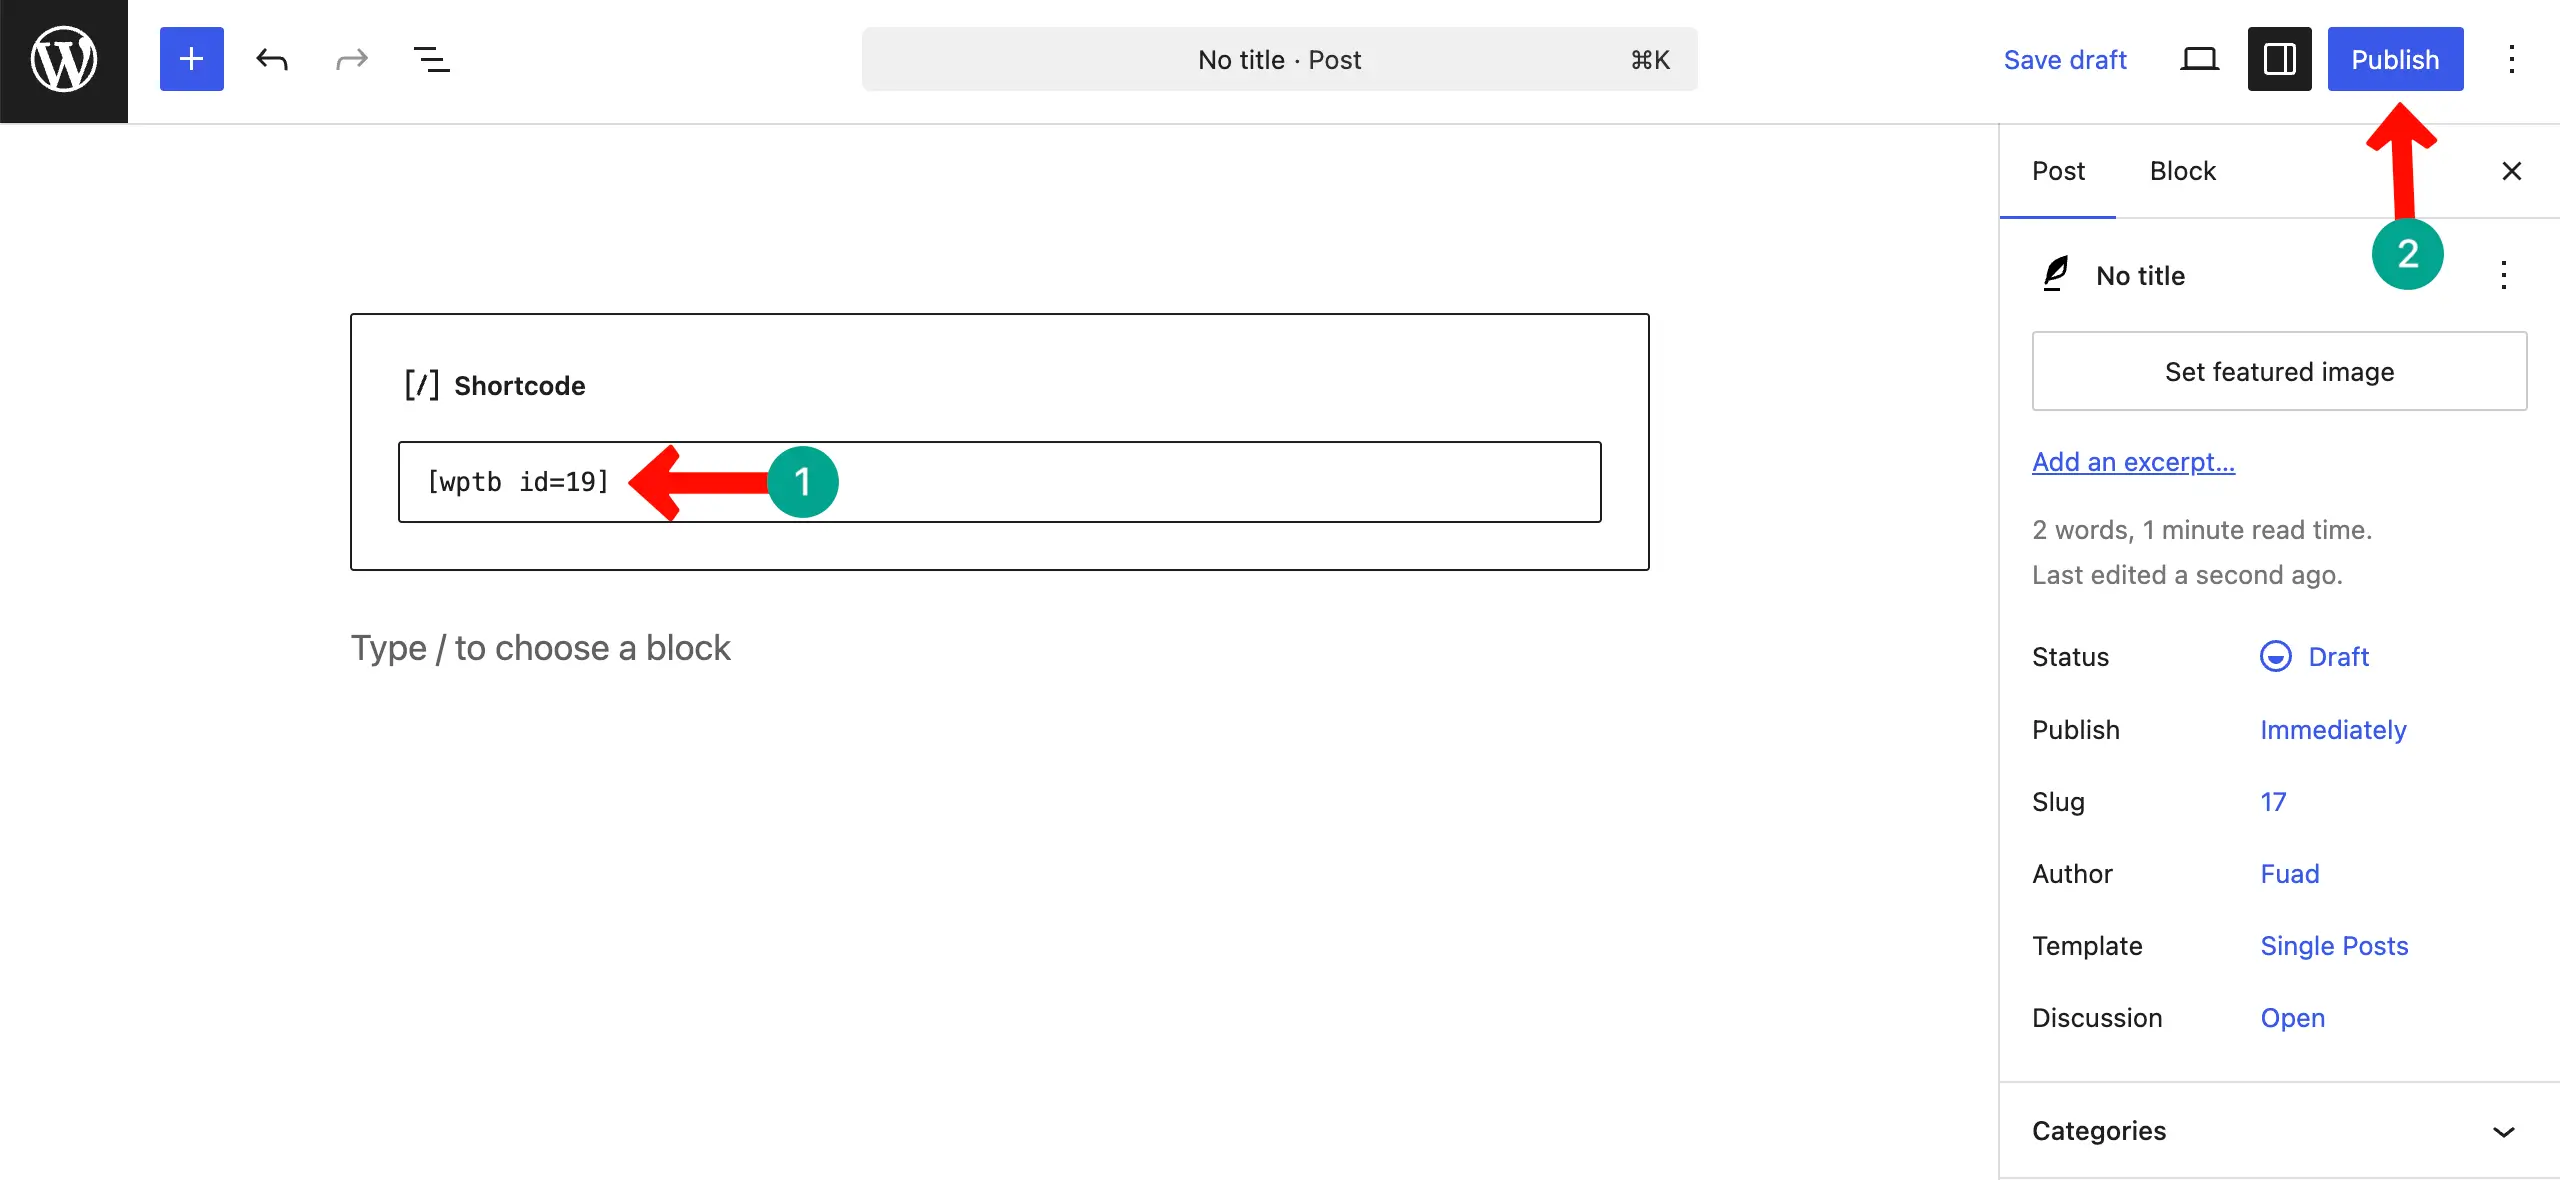
Open any post or page. Just paste the shortcode on it. Publish the post/page.
Come to the frontend of the respective post or page. You’ll see the table has appeared. If needed, you may customize the table again and save it.
The changes will be instantly displayed on the editor after you reload the page.
Thus, you can easily create a size guide in WordPress using a table.
Conclusion
Adding a size guide in WordPress is not just about inserting a table. It is about giving clear direction to your visitors. When people can see well-organized information in a simple layout, they feel more confident about their decision.
A clean size chart reduces confusion and helps users quickly find what they need. This small improvement can make your product pages look more professional and trustworthy. Now you know how to create, design, and publish a size guide using a table.
You can customize it based on your product type and business needs. Take a few extra minutes to format it neatly and keep the data accurate. So, let’s start applying this method today and make your WordPress site more helpful and user-friendly.
Leave a Reply
You must be logged in to post a comment.