Amazon product boxes are commonly used in affiliate content to present product information, images, and call-to-action links in a structured way.
While there are multiple ways to add Amazon product boxes in WordPress, one practical approach is using a table plugin to build a custom layout without writing any code.
In this guide, we’ll show you how to add Amazon product boxes in WordPress using the WP Table Builder plugin. You’ll learn how to create a clean, customizable product box layout step by step using a drag-and-drop interface.

What You Need to Get Started
Before you begin, make sure you have the following in place:
- A WordPress website with editing access
- The WP Table Builder plugin installed and activated
- An Amazon product link or product image that you plan to feature in your product box
Creating Amazon Product Boxes Using WP Table Builder
WP Table Builder is a drag-and-drop WordPress table plugin that allows you to build custom table layouts without writing any code.
Once you’ve installed and activated the plugin, follow the steps below.
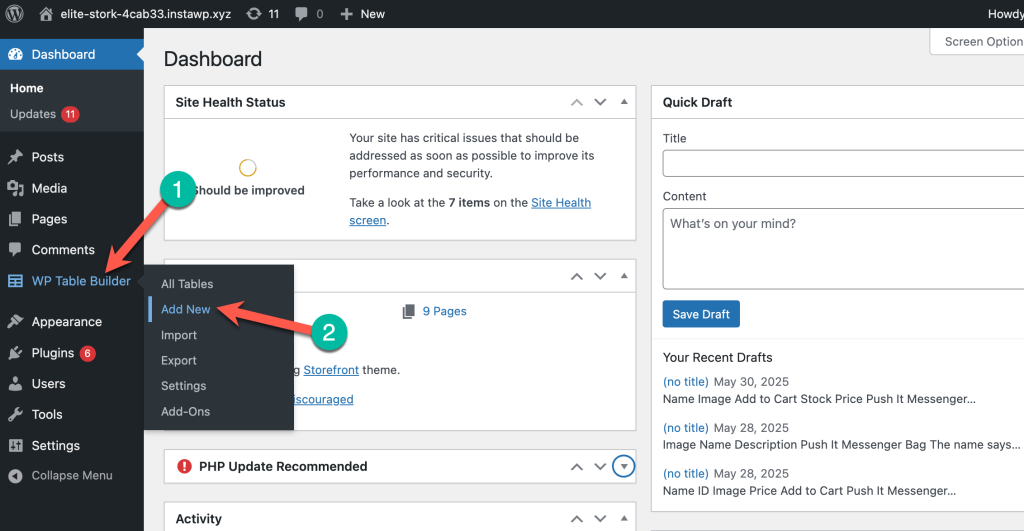
Step 1: Create a New Table
Go to your WordPress dashboard and click Add New under the WP Table Builder menu.
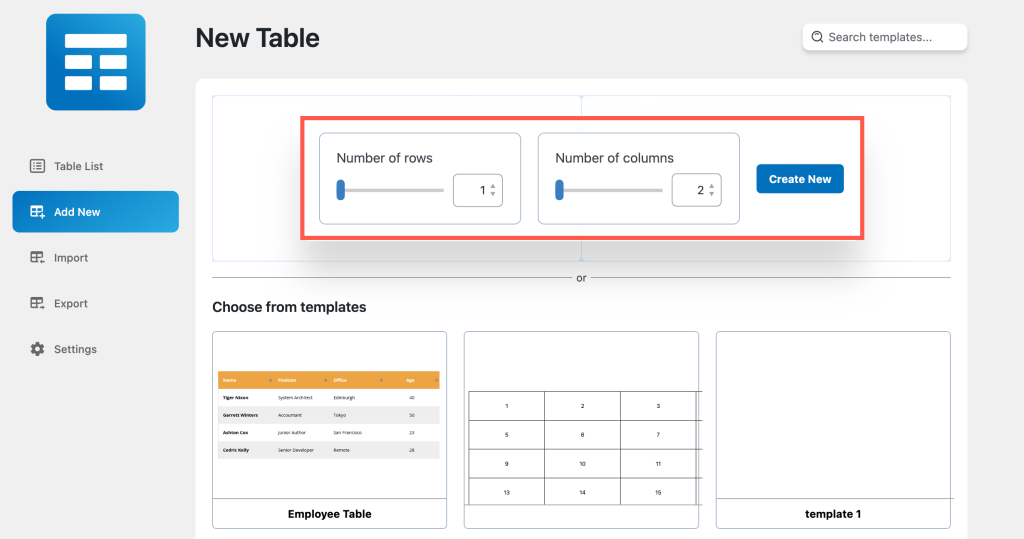
In the table builder interface, choose the number of rows and columns. For a simple product box layout, select 1 row and 2 columns—one for the product image and one for the product details.
Now we will be adding contents to the table.
Step 2: Add the Product Image
Add an Image element to the first column and insert your Amazon product image.
If you need detailed guidance, you can refer to the documentation on adding Amazon product images in WP Table Builder.
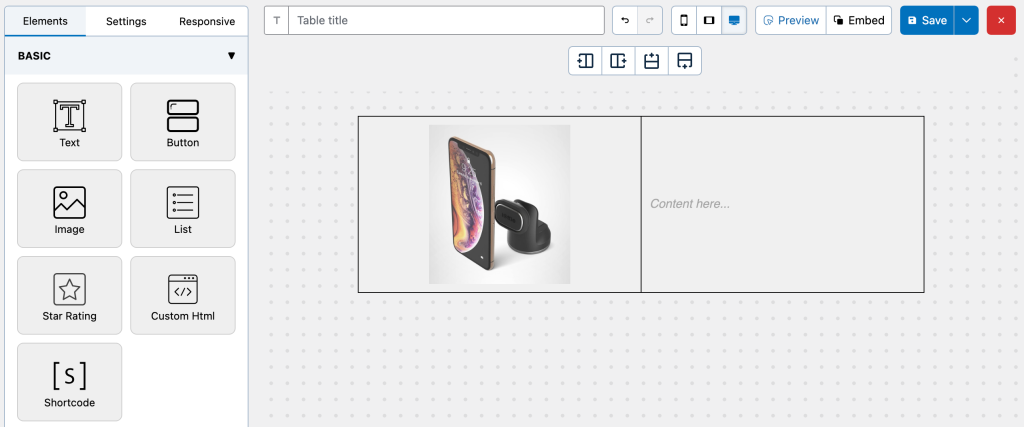
Step 3: Add Product Content and Button
In the second column, use the Text element to add the product title, features, or a short description.
Next, add a Button element and link it to your Amazon product page. You can label the button “Buy on Amazon” or similar.
Optionally, you can add a Ribbon element to highlight offers or draw attention to the product box.
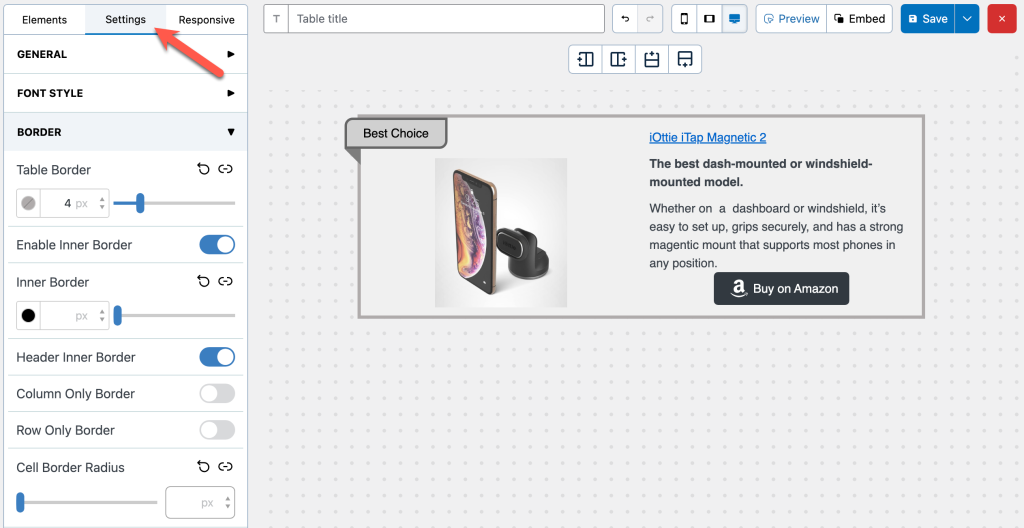
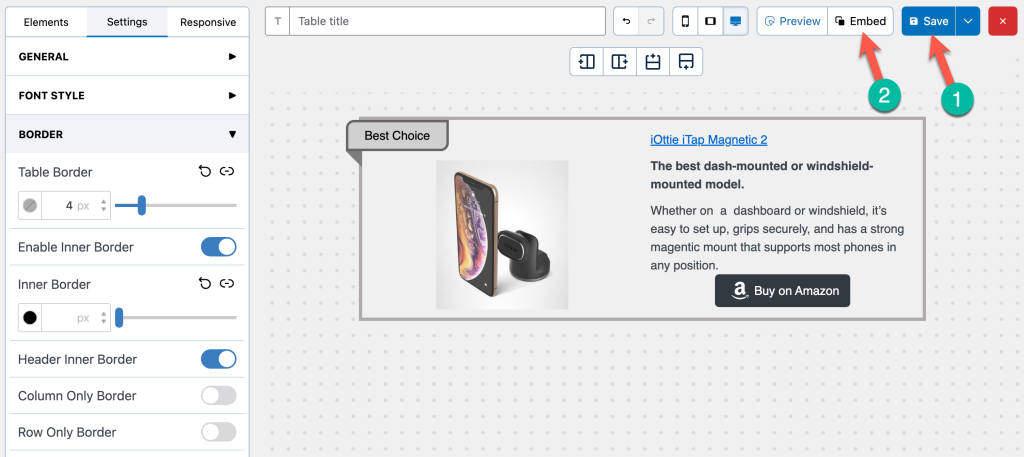
Step 4: Adjust Styling and Visual Settings
To improve the appearance of the product box:
- Add borders from the Settings tab
- Adjust spacing and alignment as needed
These settings help make the product box visually distinct within your content.
Step 5: Embed the Product Box in a Post or Page
Click Save Table, then select Embed and copy the generated shortcode.
Paste the shortcode into any post or page where you want the product box to appear.
If you’re using the WordPress Block Editor (Gutenberg), you can also insert the table using the WP Table Builder block.
You can also save this product box as a reusable template for future posts.
Conclusion
So this is how you can add Amazon Product Box to your post/page. It might seem a bit difficult when you create it for the first time. But you’ll find it easier once you’re familiar with all the elements and settings.
Please let us know if you have any questions regarding this. And feel free to share the post from your favorite social network.
Leave a Reply
You must be logged in to post a comment.