Product specification tables are one of the most effective ways to present technical details in a clean, scannable, and professional format.
Whether you’re reviewing gadgets, showcasing SaaS features, or listing WooCommerce product specs, a well-designed specification table helps users:
- Quickly compare features
- Understand product details at a glance
- Make confident buying decisions
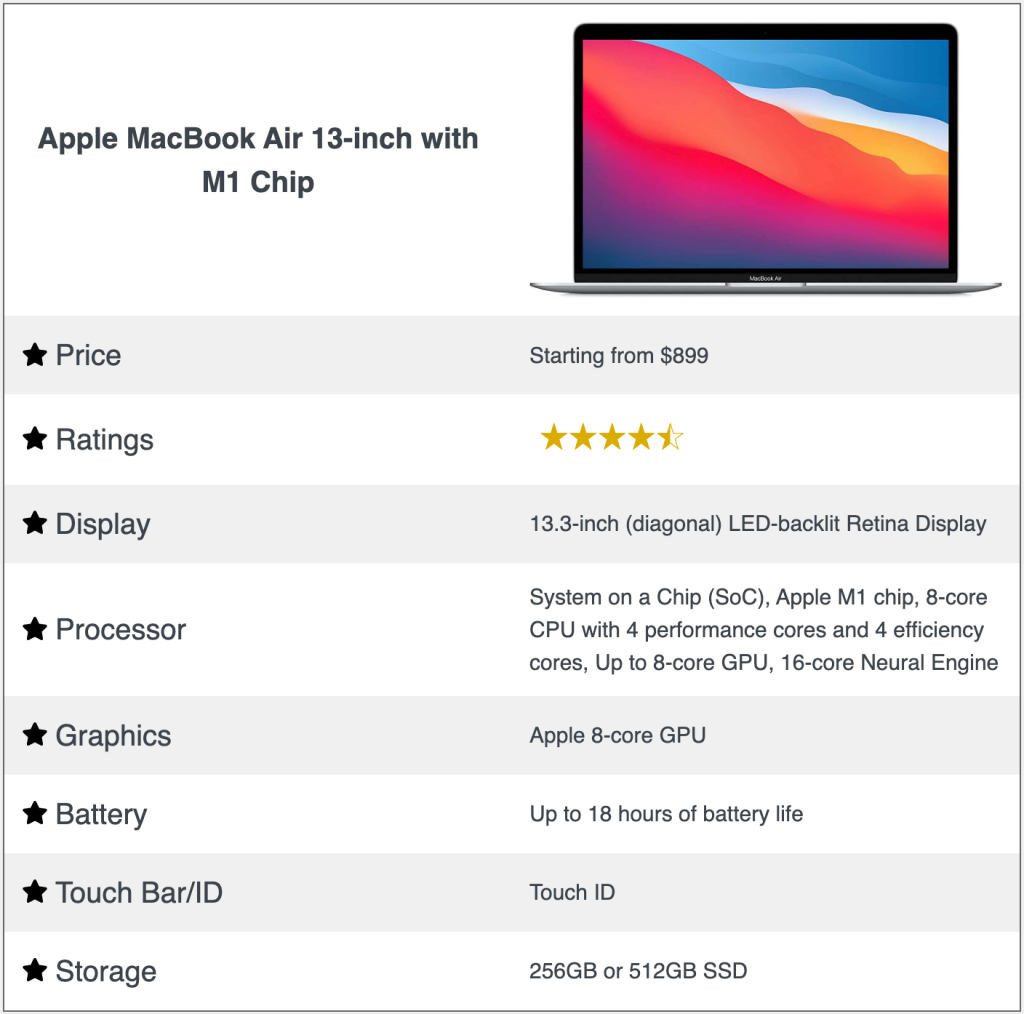
In this guide, you’ll learn how to create a beautiful product specification table in WordPress (like the one shown below), without writing any code, using the WP Table Builder plugin.
Why Use a Product Specification Table?
Before jumping into the tutorial, let’s quickly understand why specification tables matter.
1. Better Readability
Instead of long paragraphs, tables break information into structured rows and columns that are easy to scan.
2. Improved User Experience
Visitors don’t need to search through content — all key specs are visible in one place.
3. Higher Conversion Rates
For affiliate sites, review blogs, and product landing pages, clear spec tables often lead to better engagement and clicks.
4. SEO & LLM-Friendly
Search engines and AI models understand structured data better than plain text, especially when specs are clearly labeled.
What We’ll Build in This Tutorial
By the end of this tutorial, you’ll have a clean, elegant product specification table that includes:
- Product image
- Product name
- Price
- Ratings
- Display details
- Processor & graphics
- Battery life
- Storage information
All styled in a minimal, professional layout.
Step 1: Install and Activate WP Table Builder
First, you’ll need the WP Table Builder plugin. You can get started with the free version, or you can buy the premium version here.
To install the plugin:
- Go to WordPress Dashboard → Plugins → Add New
- Search for WP Table Builder
- Click Install Now, then Activate

Note: If you’ve bought the pro version, here’s how you can activate the license.
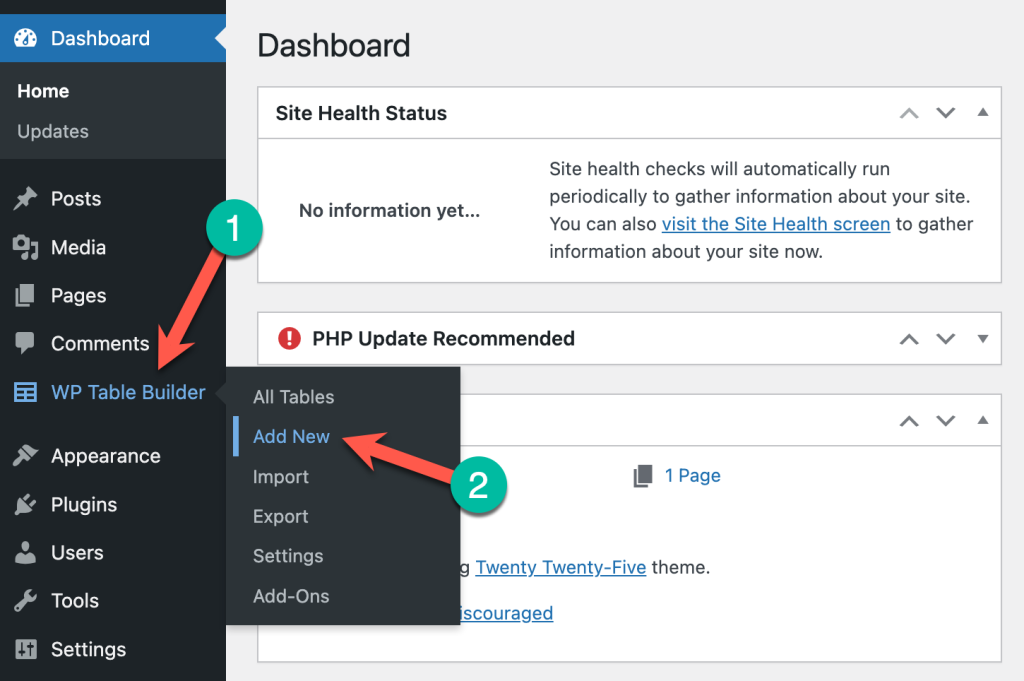
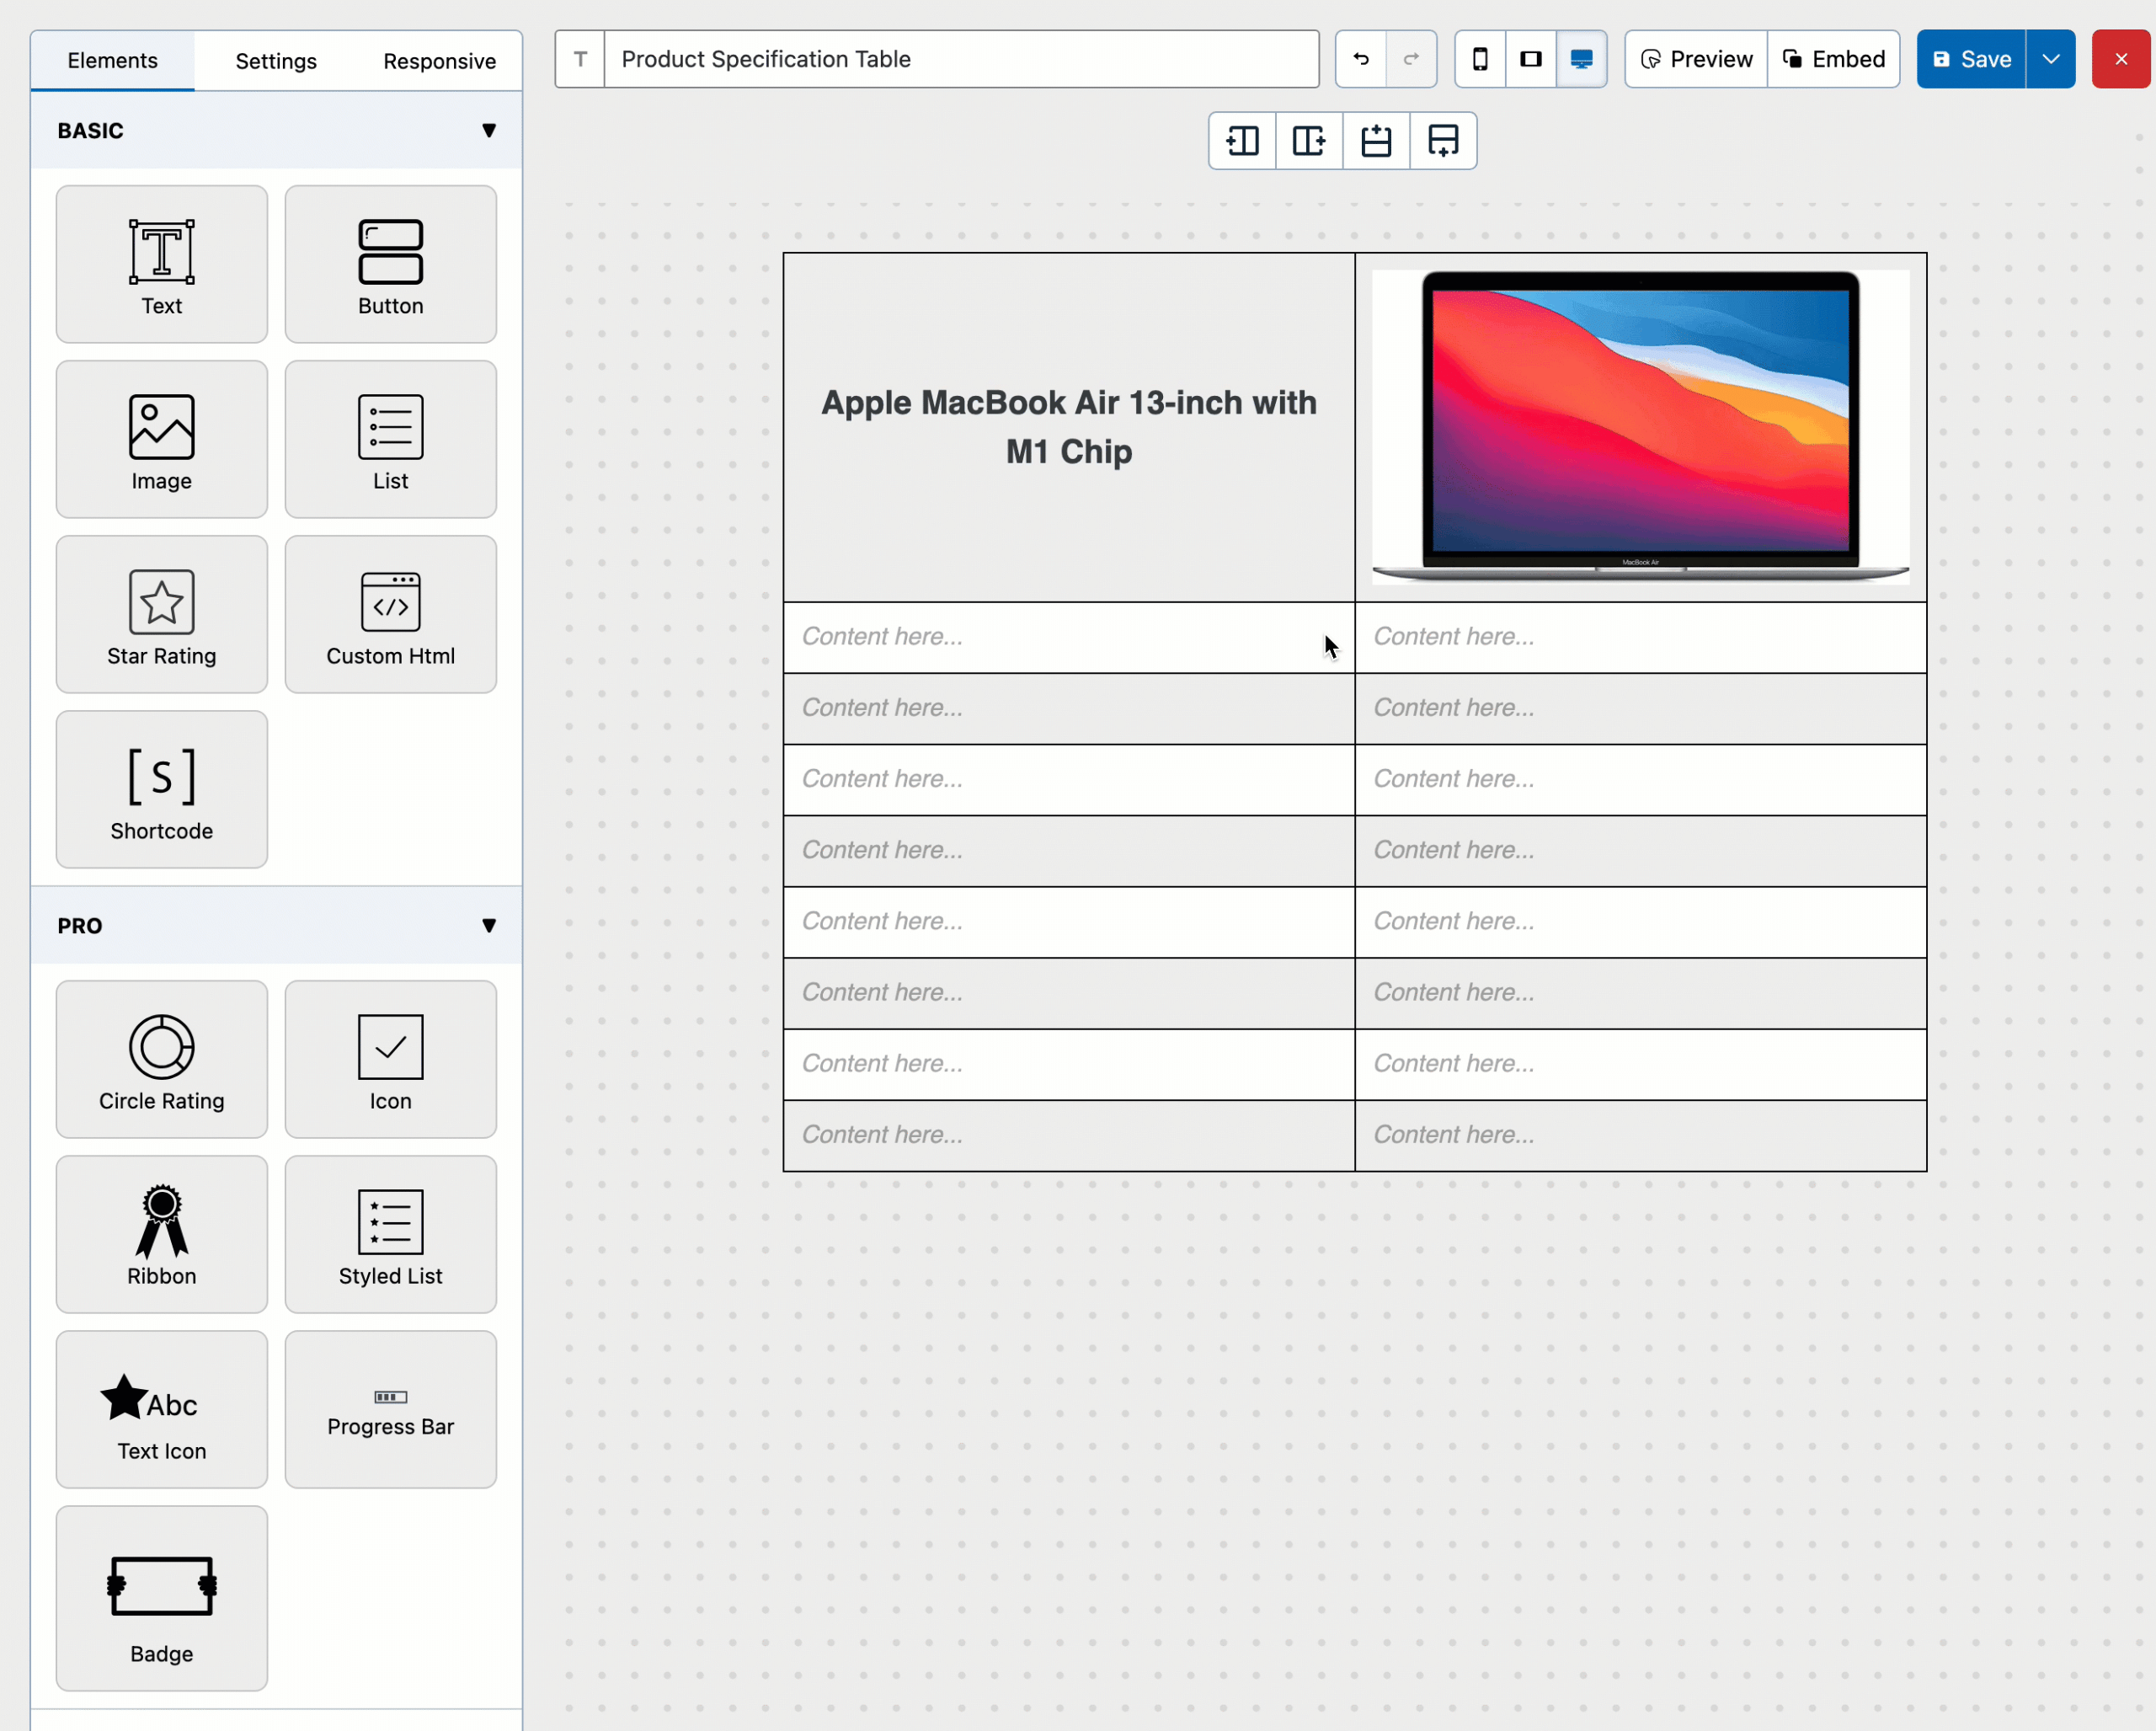
Step 2: Create a New Table
Once activated, you’ll see a new menu item called WP Table Builder in your dashboard. Navigate to WP Table Builder → Add New
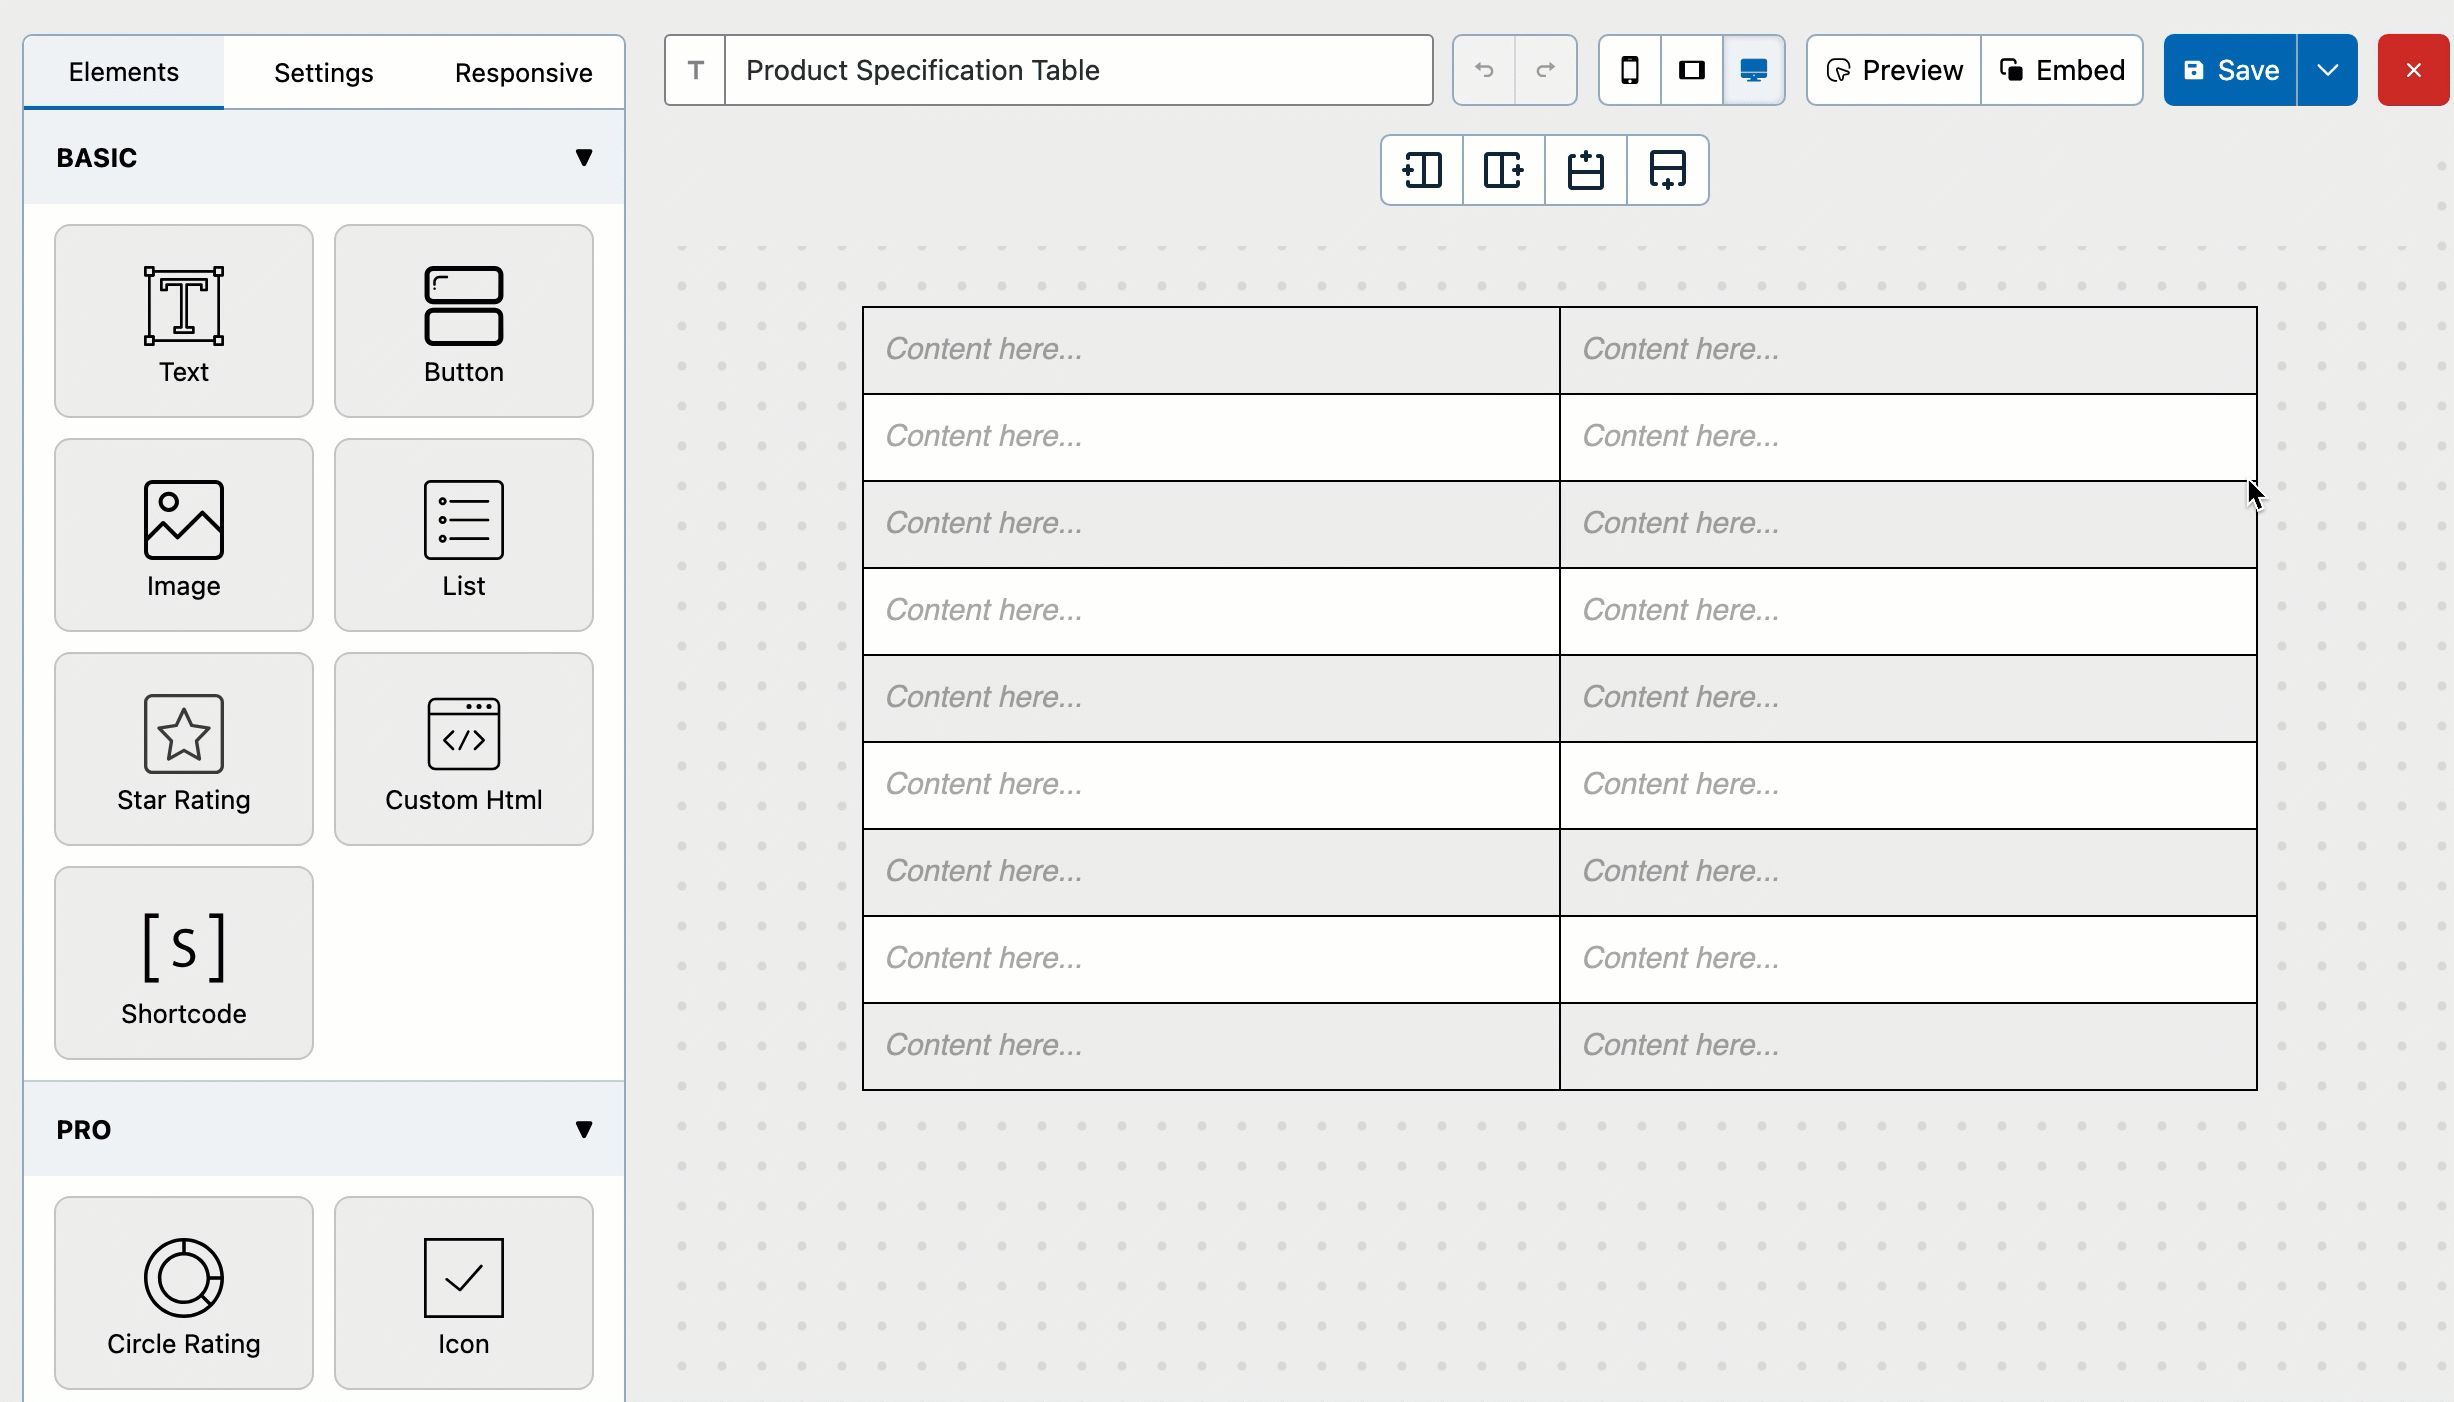
Then you need to choose the number of rows and columns. For product specs, a 2-column layout works best. And choose number of rows according to your table. Click Create Table to open the visual table builder.

Give your table a name (e.g., Product Specification Table)

Step 3: Add Product Image and Title
To make the table more visually appealing, start with a strong header section.
Add the product image:
- Insert an Image element into the top-right cell
- Upload your product image or select one from the Media Library
- Adjust alignment and padding for balance
Add the product title:
- Insert a Text element next to the image
- Use a slightly larger font size
- Keep the title clear and descriptive
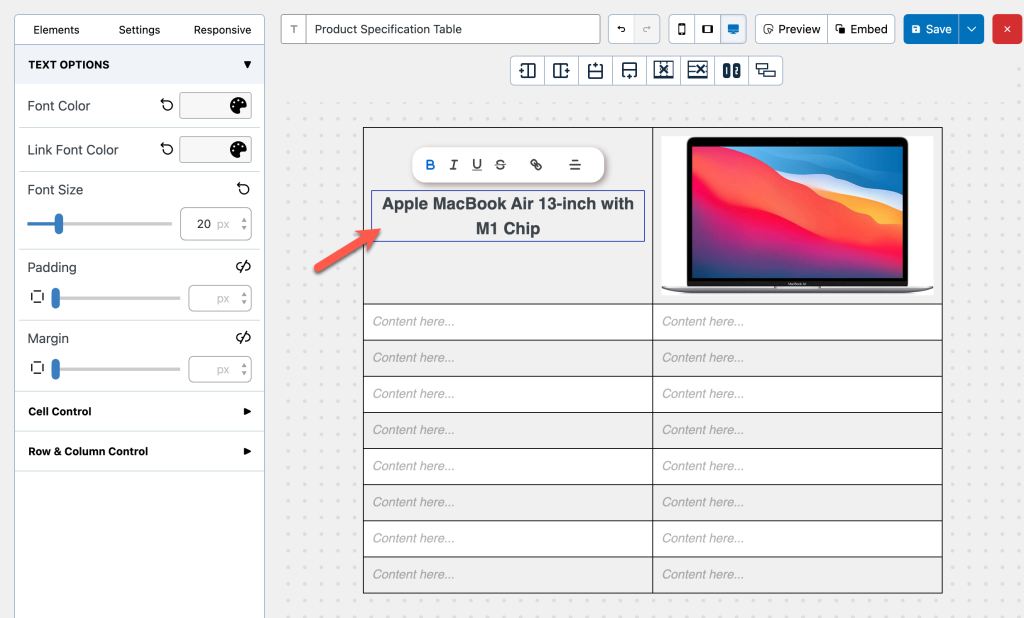
This creates a strong first impression and makes the table feel premium.
Step 4: Add Specification Rows
Now comes the core part — adding product specifications.
For each row:
- Left column → Specification name
- Right column → Specification value
Common rows you can add:
- Price
- Ratings
- Display
- Processor
- Graphics
- Battery
- Storage
WP Table Builder lets you insert text, icons, lists, and even star ratings inside cells — so you’re not limited to plain text.
Here’s how to do it:
Step 5: Style the Table for a Clean, Elegant Look
This is where WP Table Builder really shines.
You can:
- Adjust row height and padding
- Apply light background colors for alternating rows
- Customize borders and separators
- Align text and images perfectly
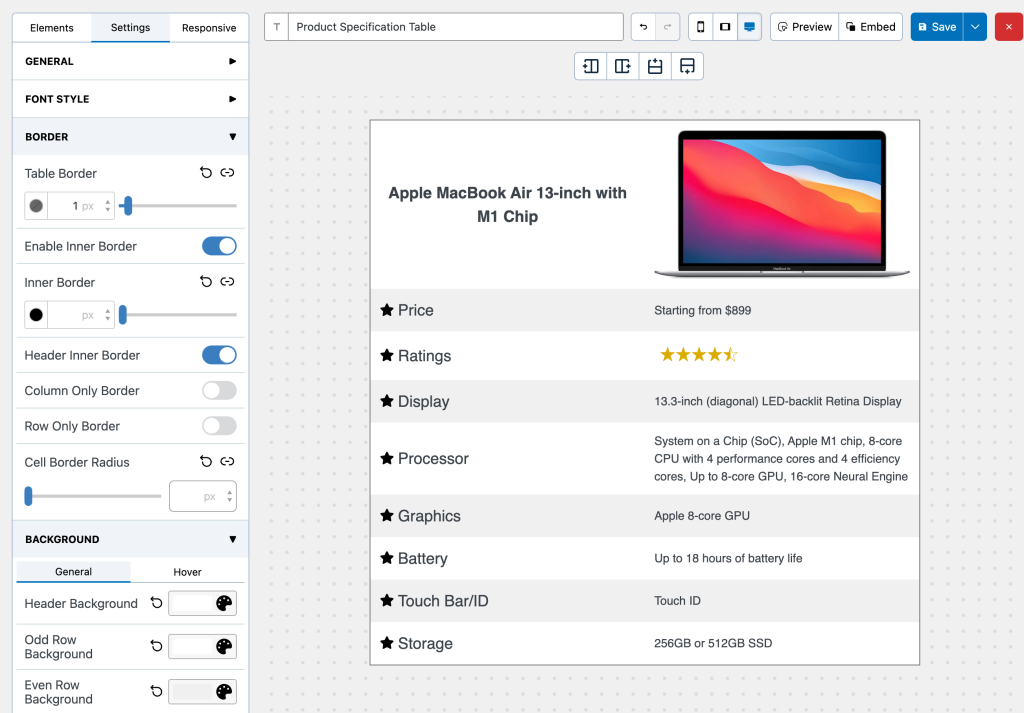
For product specification tables, keep the design minimal and neutral. Let the content speak — not heavy colors or animations.
Step 6: Insert the Table into Your Post or Page
Once your table is ready:
Click Save and copy the table shortcode.
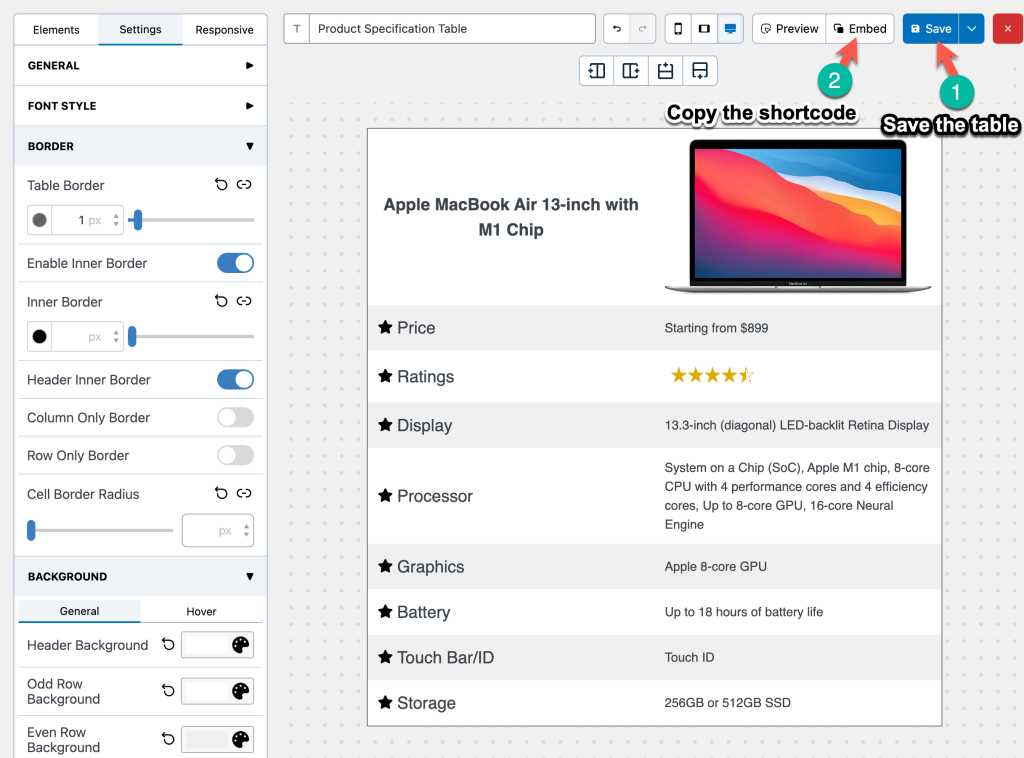
Paste it into:
- A blog post
- A product review
- A landing page
- A WooCommerce product description
That’s it — your product specification table is now live.
Best Practices for Product Specification Tables
To get the best results, keep these tips in mind:
- Use consistent labels (e.g., “Battery Life” instead of “Battery”)
- Avoid overloading the table with unnecessary specs
- Highlight the most important features
- Make sure the table looks good on mobile devices
A clean table builds trust – a cluttered one does the opposite.
Final Thoughts
A well-designed product specification table can dramatically improve how users interact with your content.
With WP Table Builder, you can:
- Build professional tables visually
- Customize every detail without code
- Create layouts that look great on all devices
If you regularly publish product reviews, comparisons, or affiliate content, this is a must-have tool in your WordPress setup.
Leave a Reply
You must be logged in to post a comment.