

Building a table in WordPress used to mean typing HTML or fighting with a block that only handles plain text. A drag and drop table builder changes that. You pick a layout, drop images, buttons and star ratings into cells, and style everything with a few clicks.
This beginner’s guide walks you through the drag and drop builder in WP Table Builder. You will learn what each part of the builder does, then build, style and publish your first table step by step.
What Is a Drag and Drop Table Builder?
A drag and drop table builder is a visual editor for tables. Instead of writing code, you build the table on a canvas: you choose content blocks (called elements) from a panel, drag them into cells, and change their settings in a sidebar. What you see in the builder is what visitors see on your site.
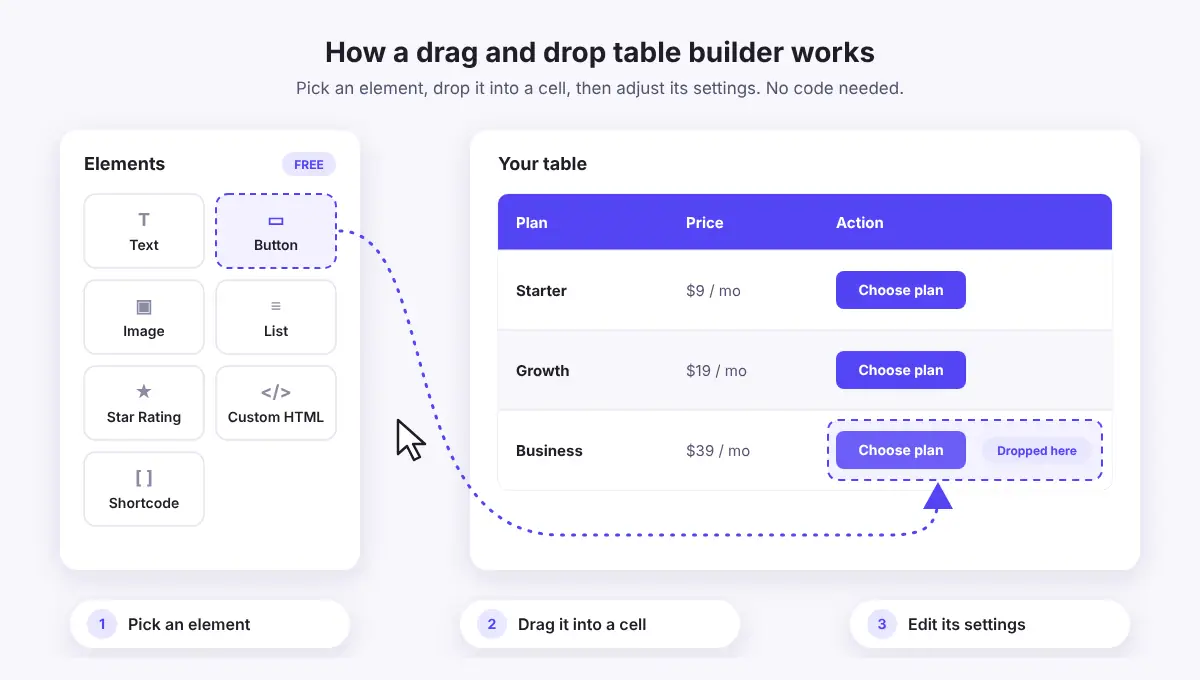
This matters because the tables people actually need are rarely plain text. Pricing tables need buttons, product comparisons need images and ratings, and schedules need clean rows that still read well on a phone. The default WordPress Table block is fine for simple data, as we explain in our guide to creating tables in the block editor, but it cannot hold these elements or change its layout on mobile.
The WP Table Builder Interface at a Glance
When you open a table, the builder fills the screen. At the top you will find the table name, undo and redo, a desktop, tablet and mobile preview switch, and the Preview, Embed and Save buttons. The sidebar has three tabs: Elements, Settings and Responsive. The table itself sits in the middle, with a toolbar above it for working with rows and columns.
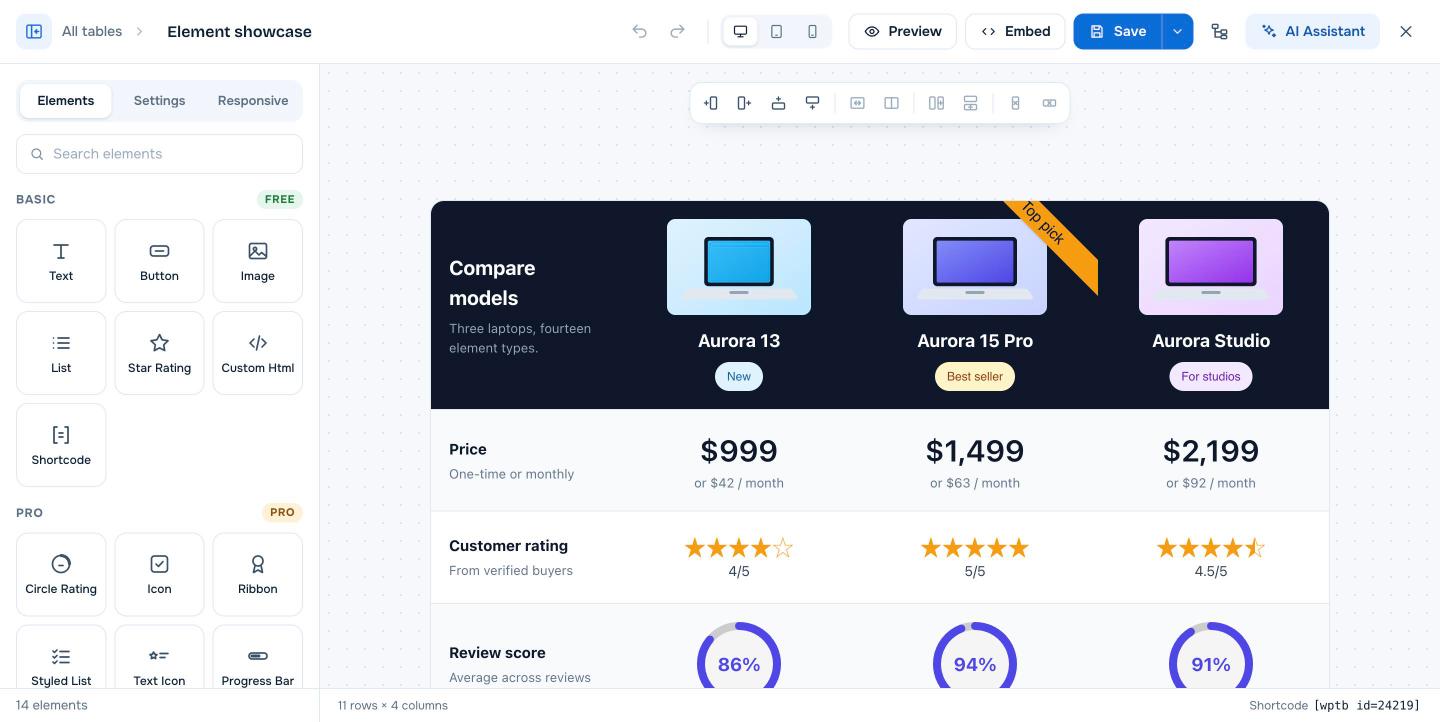
Here is a quick map of where everything lives:
Builder area | What you do there | Plan |
1Add New screen | Pick a template or start blank with columns and rows. | Free |
2Elements tab | Drag Text, Image, Button, List and more into cells. | Free |
3Cell toolbar | Add, merge, split and delete rows and columns. | Free |
4Settings tab | Style the header, rows, borders and spacing. | Free |
5Responsive tab | Choose how the table looks on tablets and phones. | Free |
6Embed button | Copy the shortcode or find the Gutenberg block. | Free |
7Pro extras | Sticky rows, search, pagination and extra elements. | PRO |
This table was built with WP Table Builder.
How to Build Your First Table With the Drag and Drop Builder
Let’s build a small table from start to finish. The same steps work for pricing tables, comparison tables, product lists and data tables.
Step 1: Install WP Table Builder
- In your WordPress dashboard, go to Plugins > Add New.
- Search for WP Table Builder, then click Install Now and Activate.
- A new Table Builder menu appears in your dashboard. This is where all your tables live.
Step 2: Pick a Template or Start Blank
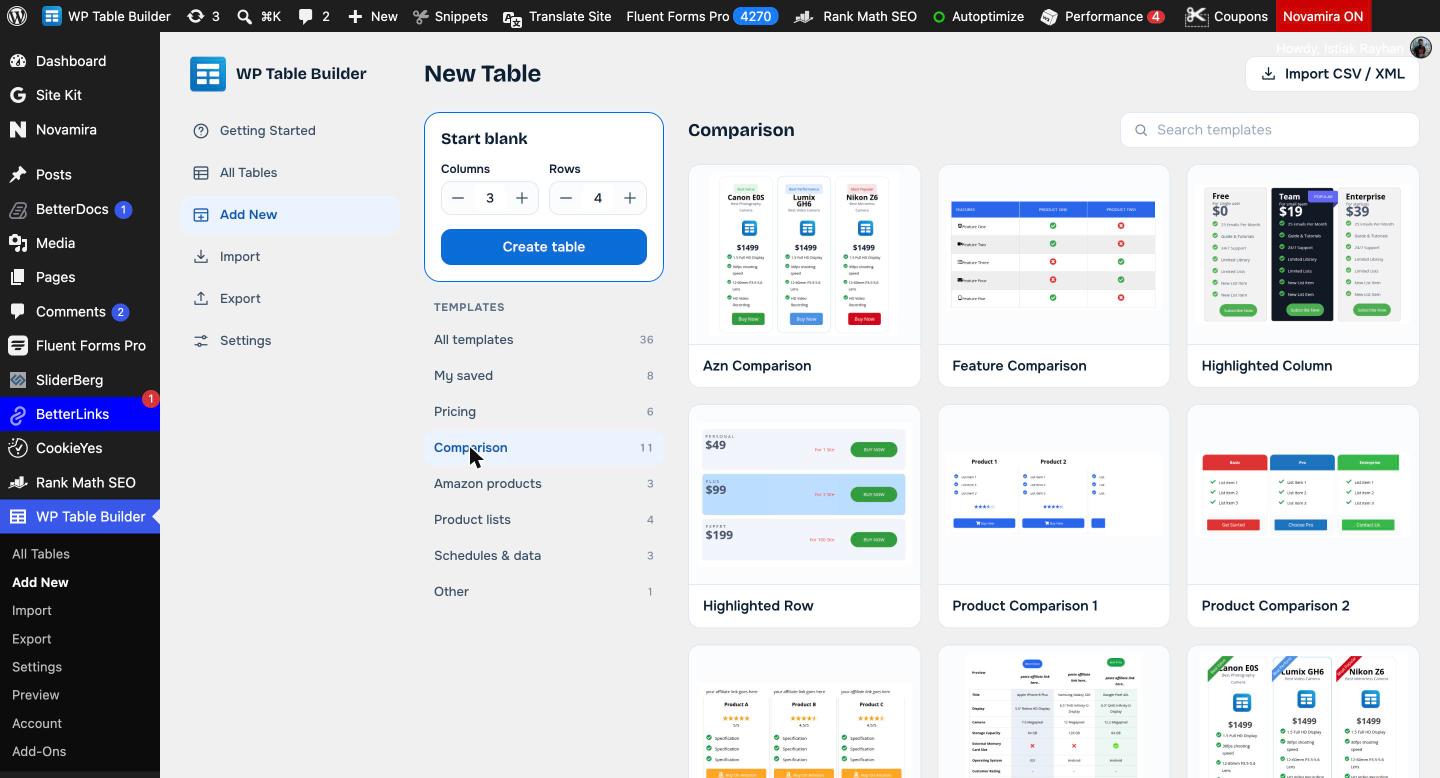
Go to Table Builder > Add New. You have two ways to begin:
- Use a template. Browse ready-made designs grouped into categories such as Pricing, Comparison, Amazon products, Product lists and Schedules & data. Hover over one and click Use template. Templates marked PRO need WP Table Builder Pro.
- Start blank. Set the number of Columns and Rows, then click Create table. Do not worry about getting the size right, you can add or remove rows and columns at any time.
Give the table a clear name in the top bar, for example “Hosting plans” or “Camera comparison”. Visitors do not see this name, but it helps you find the table later in All Tables.
Step 3: Drag Elements Into Cells
Open the Elements tab in the sidebar. The free plugin includes seven basic elements:
- Text for headings, labels, prices and descriptions.
- Image for product photos, logos and icons.
- Button for calls to action such as “Buy now” or “Choose plan”.
- List for features or pros and cons.
- Star Rating for reviews and scores.
- Custom HTML for small snippets of your own code.
- Shortcode to show content from other plugins inside a cell.
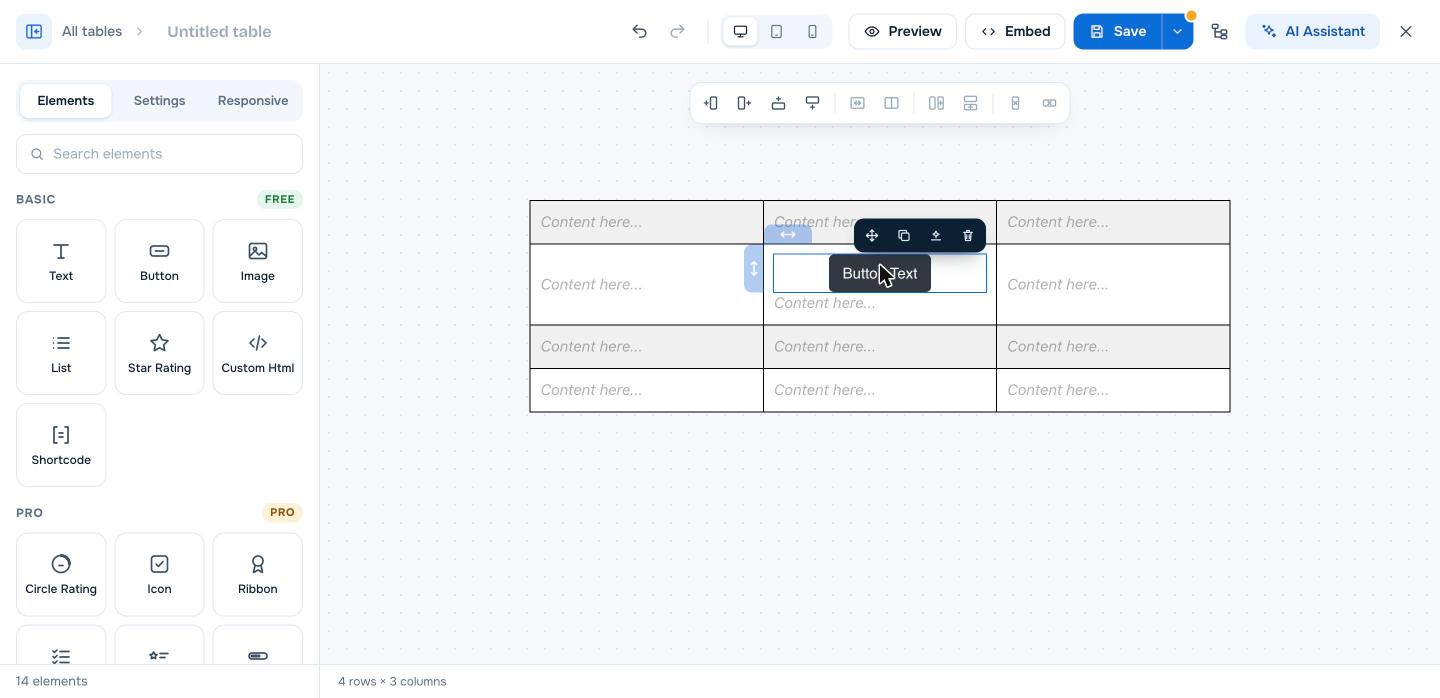
Click and hold an element, drag it over a cell and let go. You can drop more than one element into the same cell, for example an image with a text label under it. Use the Search elements box if you cannot spot the one you need.
Step 4: Edit Each Element
Click any element in the table to select it. Its options open in the sidebar. Text can be typed straight into the cell, while other elements have their own settings. A Button, for example, lets you set its link (with options such as opening in a new tab), colors and size.
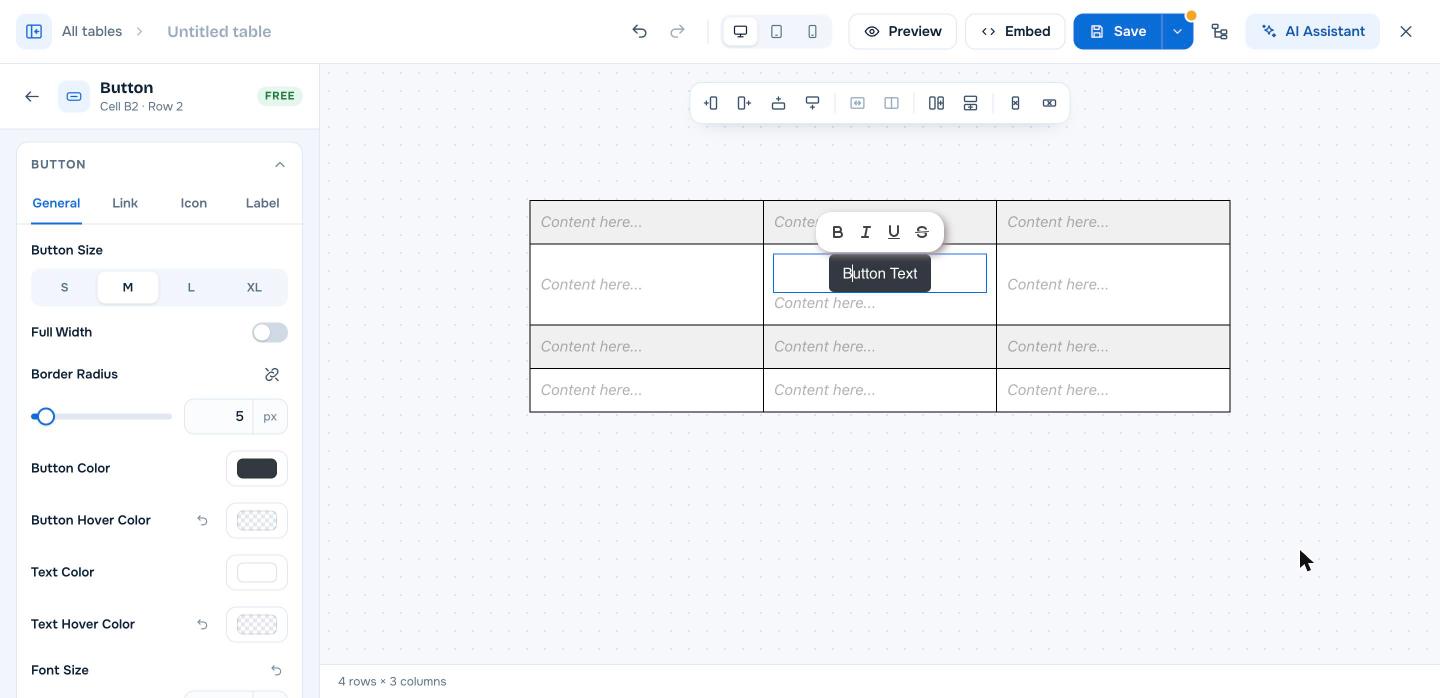
Tip: style one cell the way you like it first. Then use it as a model for the rest of the row or column, so your table looks consistent.
Step 5: Add, Merge and Remove Rows and Columns
Select a cell and use the toolbar above the table to change the structure:
- Add column to the left / right and Add row above / below insert new space next to the selected cell.
- Merge cells joins several cells into one. Hold Shift and click two or more cells to select them first. This is handy for a wide header or a “Most popular” label across a column.
- Split cell breaks a merged cell back into separate cells.
- Delete column and Delete row remove what you no longer need.
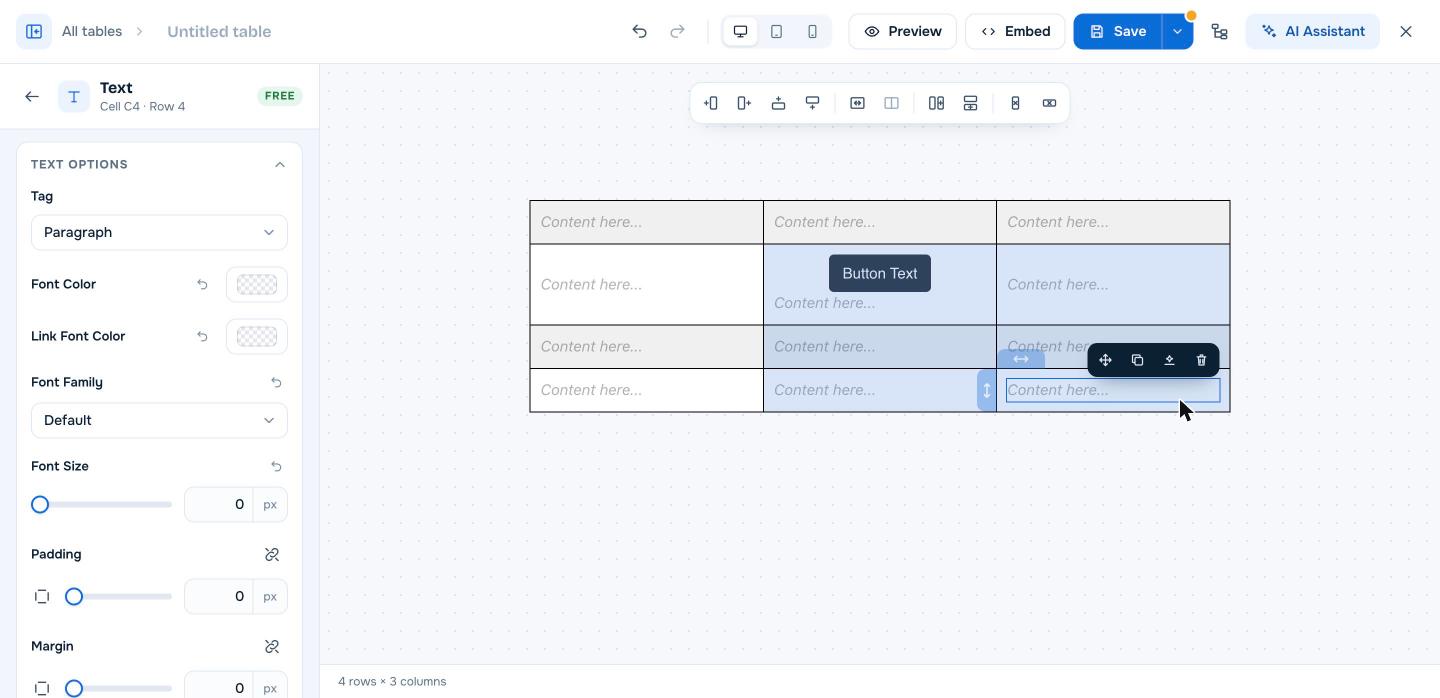
Duplicating a whole row or column in one click is a Pro feature. In the free version, add a new row and drag in the same elements.
Step 6: Style the Table in the Settings Tab
Open the Settings tab in the sidebar. This is where you control the look of the whole table. Useful options include:
- Header Background, Odd Row Background and Even Row Background for a clean striped look.
- Cell Padding and Table Padding to give content room to breathe.
- Table Border, Table Border Radius and Inner Border to control lines and rounded corners.
- Sort Table Horizontally or Vertically so visitors can sort the data.
- Use th for first row to mark the first row as a proper header, which helps screen readers and search engines understand the table.
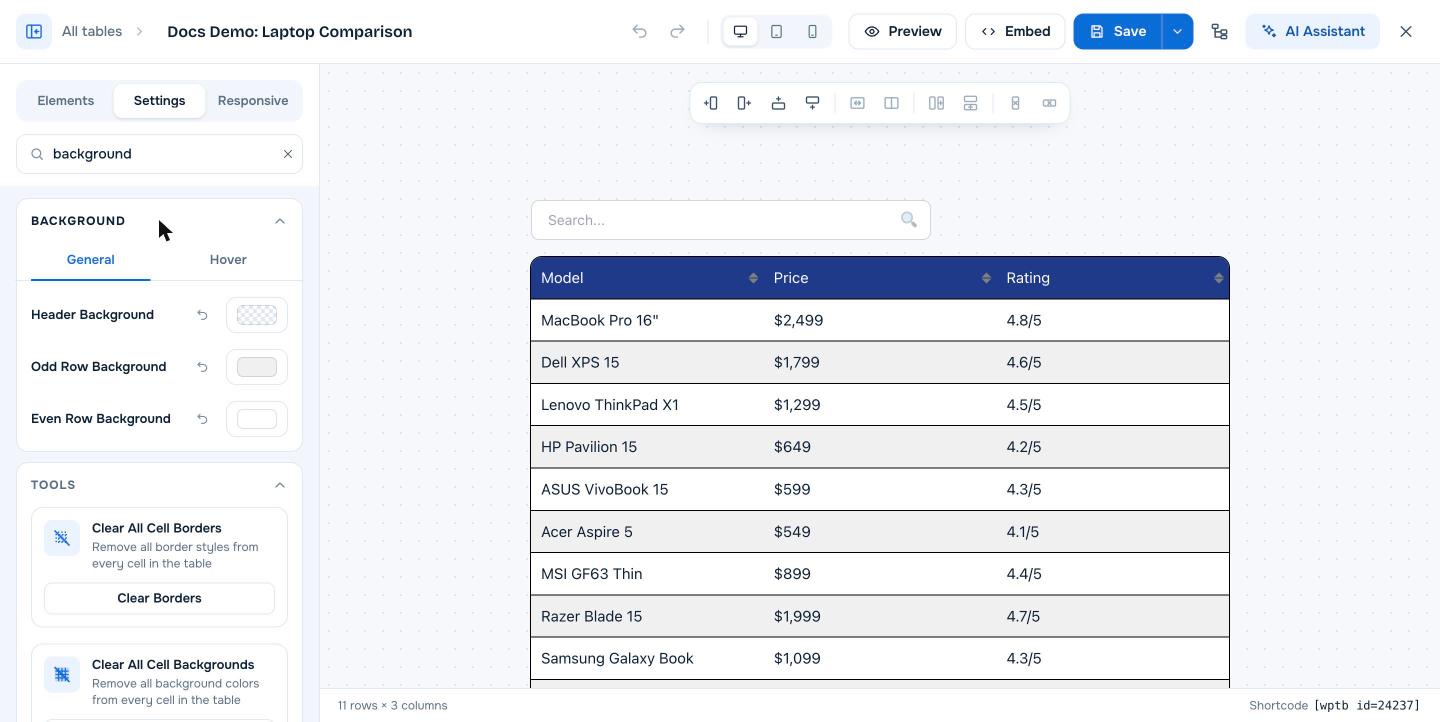
The Search settings box at the top of the tab is a quick way to jump to an option. Some advanced styling, such as per cell backgrounds and borders, sticky rows and columns, pagination and table search, is part of WP Table Builder Pro and is marked with a PRO label in the builder.
Step 7: Make the Table Mobile Friendly
Open the Responsive tab and switch on Enable Responsive Table. Then click the Tablet or Mobile breakpoint to set how the table should look on smaller screens. You can stack cells by row or by column, keep the first row as a header, and choose how many items appear per header.
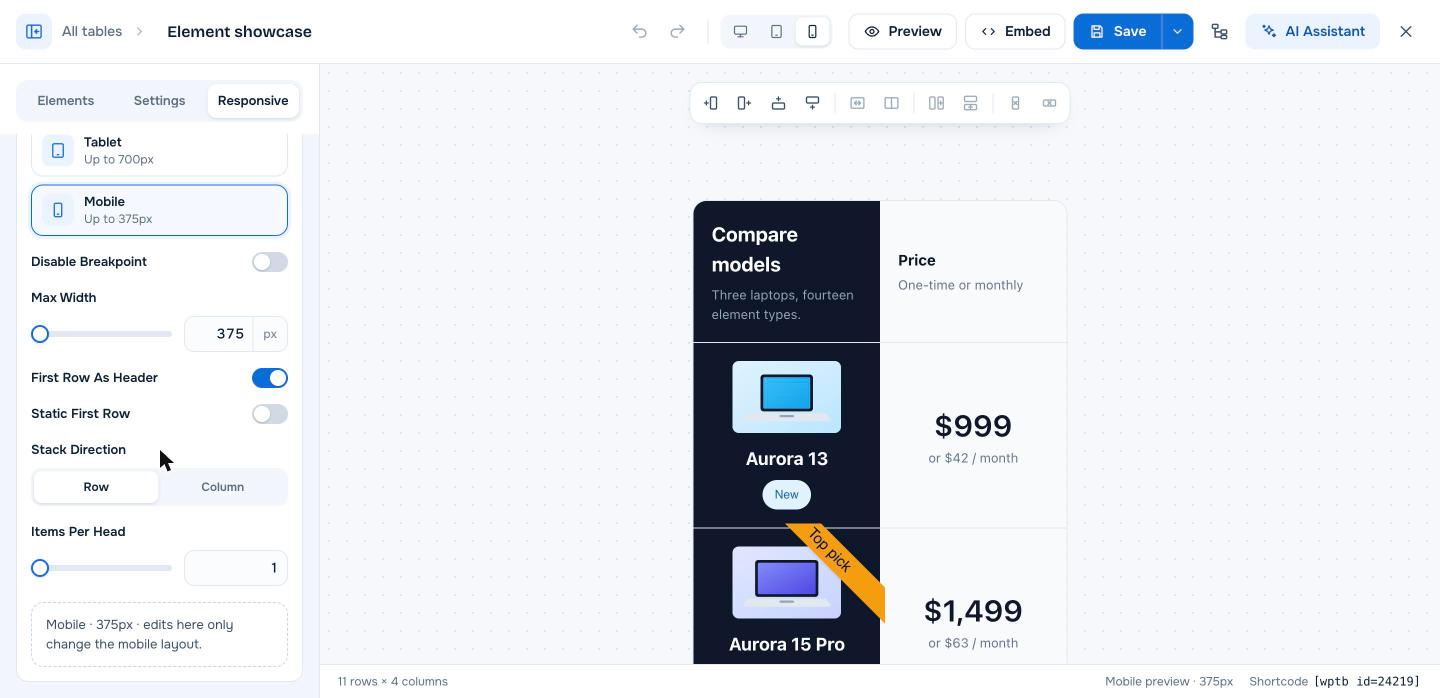
For wide data tables, you can also turn on Enable horizontal scrolling in the Settings tab, or select a cell and tick Hide this column on mobile for columns that only matter on a big screen. Our full guide on how to create responsive tables in WordPress covers each option in detail.
Step 8: Save, Preview and Embed
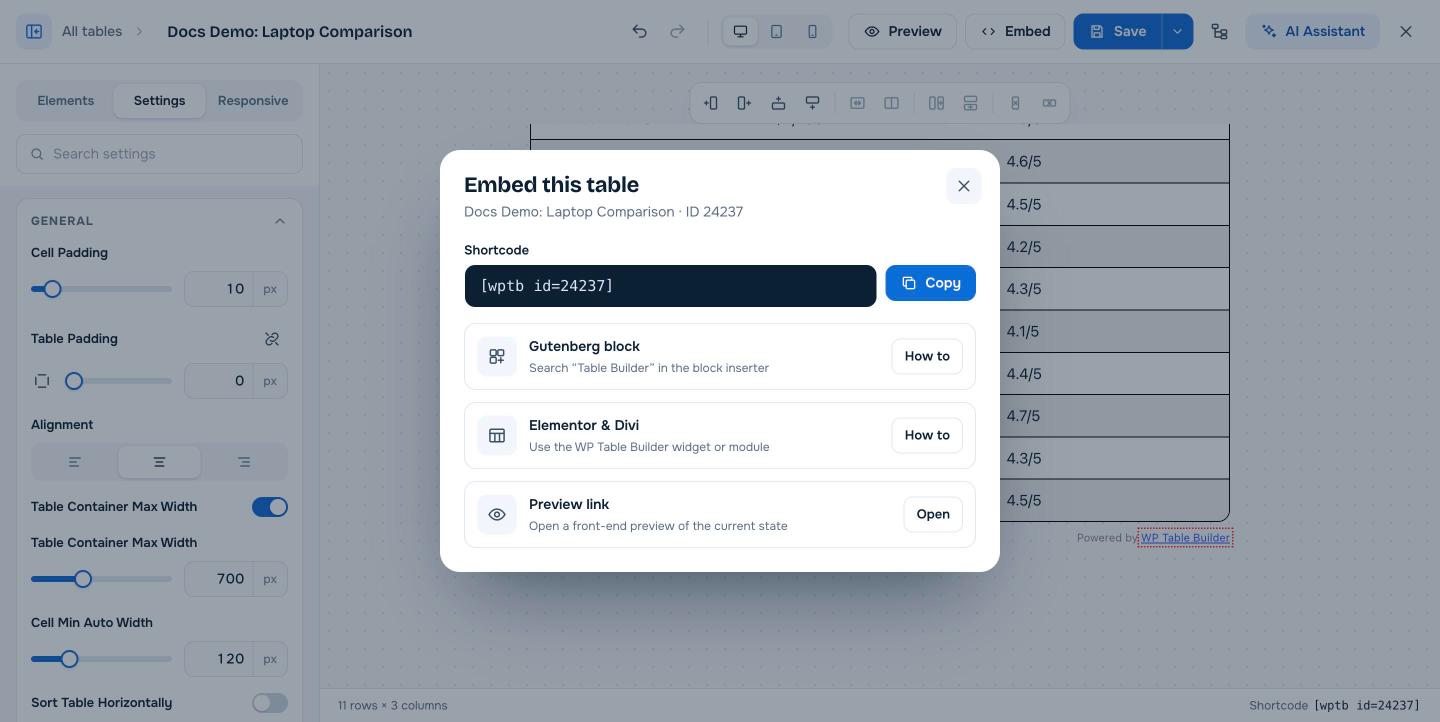
Click Save, then Preview to open the table on the front end of your site. When you are happy with it, click Embed. The dialog gives you three ways to add the table to a page:
- Shortcode: copy the shortcode, such as
[wptb id="123" not found ], and paste it into any post, page or widget area. - Gutenberg block: in the block editor, search for “Table Builder” in the block inserter and pick your table from the list.
- Elementor and Divi: use the WP Table Builder widget or module.
Because the embed points to the table itself, any change you save in the builder later shows up everywhere that table is used. You never have to paste it again.
Tips to Work Faster in the Builder
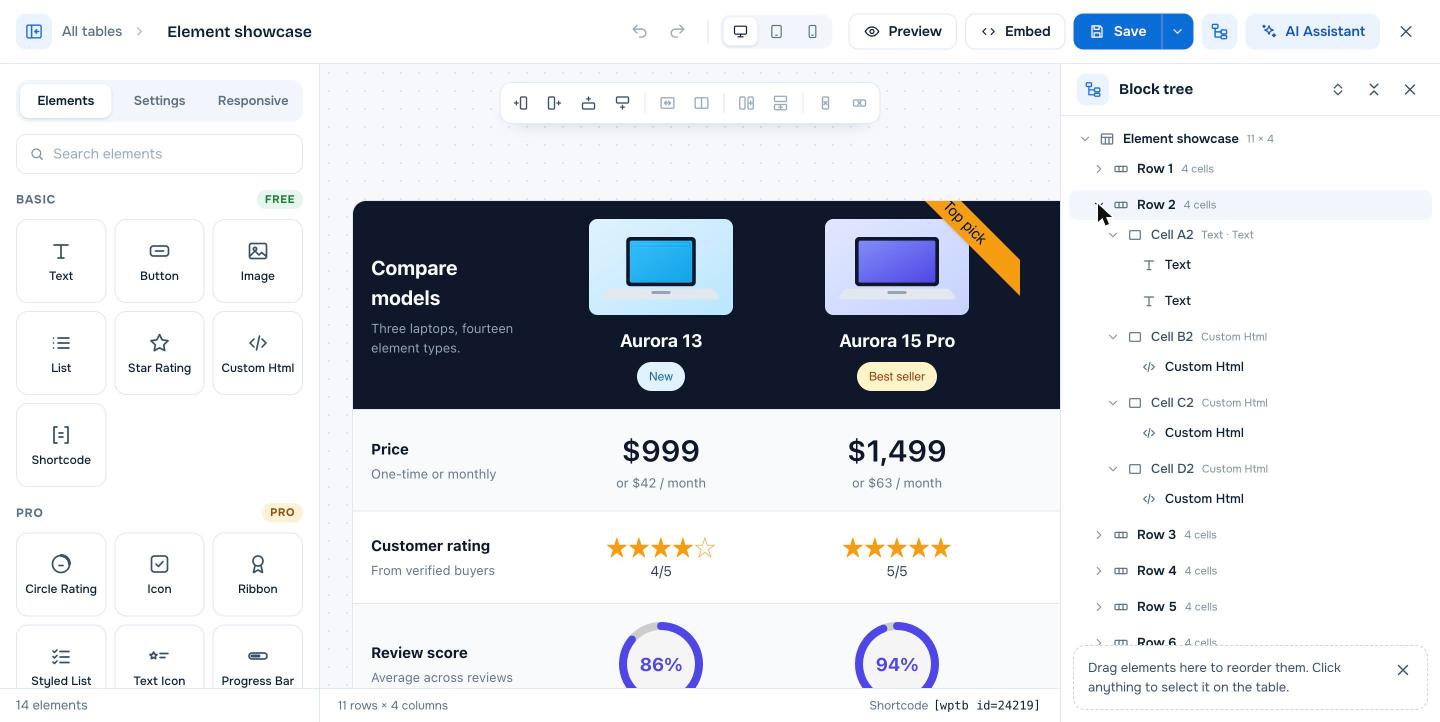
- Use the block tree. The block tree button in the top bar opens an outline of every row, cell and element. It is the easiest way to select something small, like a single list item in a crowded cell.
- Undo freely. The undo and redo arrows in the top bar let you experiment without worrying about breaking the table.
- Preview each device. Switch between the desktop, tablet and mobile icons while you work instead of waiting until the end.
- Import instead of typing. If your data is already in a spreadsheet, use Table Builder > Import to bring in a CSV or XML file (or tables from TablePress), then finish the design in the builder. See how to import a CSV file and display it as a table.
- Duplicate good tables. In All Tables, hover over a table and click Duplicate to reuse a design you already like.
What WP Table Builder Pro Adds
The free plugin is enough to build complete, responsive tables. If you want more, WP Table Builder Pro adds:
- Extra elements: Circle Rating, Icon, Ribbon, Styled List, Text Icon, Progress Bar and Badge.
- Long table tools: sticky rows and columns, pagination and a search box.
- More design control: per cell backgrounds and borders, row and column highlights, and more templates.
- Time savers: duplicate rows and columns and save your own designs as templates.
Not sure if you need a table plugin at all? Read why use a table plugin in WordPress, or compare your options in our list of the best WordPress table plugins.
Frequently Asked Questions
Is the WP Table Builder drag and drop builder free?
Yes. The core WP Table Builder plugin is free on WordPress.org and includes the drag and drop builder, seven elements, templates, responsive settings, import and export. WP Table Builder Pro adds extra elements, sticky rows and columns, pagination, search and more templates.
Do I need to know HTML or CSS to use it?
No. Everything is done visually: you drag elements into cells and change options in the sidebar. The Custom HTML element is there if you want it, but you never need it to build a table.
Can I edit a table after I add it to a page?
Yes. Open the table from Table Builder > All Tables, make your changes and click Save. The update appears on every page that uses that table, because the shortcode or block points to the table instead of a copy of it.
Can I start from a spreadsheet instead of a blank table?
Yes. Go to Table Builder > Import and upload a CSV or XML file, or import tables from TablePress. The imported table opens in the same drag and drop builder, so you can add buttons, images and styling afterwards.
Does it work with Elementor and Divi?
Yes. Besides the shortcode and the Gutenberg block, WP Table Builder offers a widget for Elementor and a module for Divi, so you can place your tables in pages built with those page builders.
Conclusion
A drag and drop table builder takes the guesswork out of tables in WordPress. With WP Table Builder, you start from a template or a blank grid, drag in the elements you need, style the table from one place, set up tablet and mobile layouts, and embed it anywhere with a shortcode or block.
Once you are comfortable with the builder, try a real project next. Our step by step guide on how to create a table in WordPress is a good place to keep going. Ready to start? Get WP Table Builder and build your first table today.
Leave a Reply
You must be logged in to post a comment.