How to Create a Table in WordPress (With/out A Plugin)

Creating a table using plugins is super easy, but if you are looking for an answer to how to create a table in WordPress without any plugins, we have the answer below.

The amazing thing about WordPress is that you can accomplish almost anything with it by using plugins. But there’s a downside, as some plugins can make your site slow or can also be responsible for breaking your website. So, you should always try to use fewer plugins.

With the introduction of the Block Editor, WordPress has added many functionalities to the editor. One such thing is Table Block, which offers the answer to creating a table in WordPress without a plugin.

Previously, you needed to use a plugin to create simple tables. You don’t need any plugin to add or create simple tables in WordPress. We will show you how to add tables using the Block Editor and Google Docs.

Now, let’s see how to create a table in WordPress without a plugin, as shown in the details below.

How to Create A Table in WordPress Without a Table Plugin (Using WordPress Block Editor)

Creating a table is a piece of cake using the block editor. You don’t need to have any coding knowledge. 

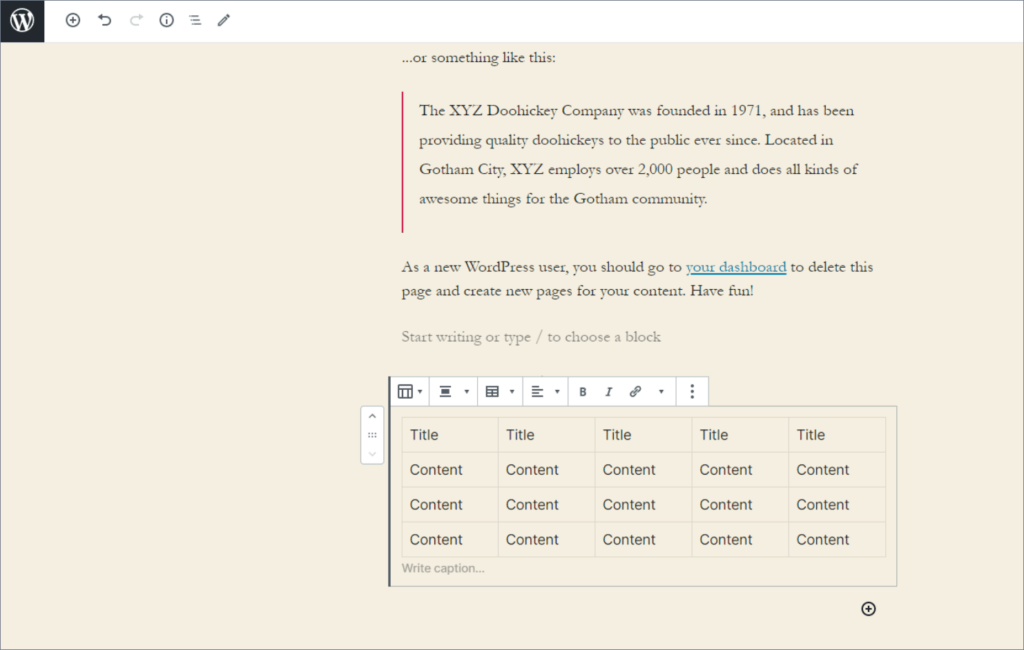
Go to the post editor, type ‘/table’, and insert the table block.

Select the number of columns and rows and click ‘Create Table’.

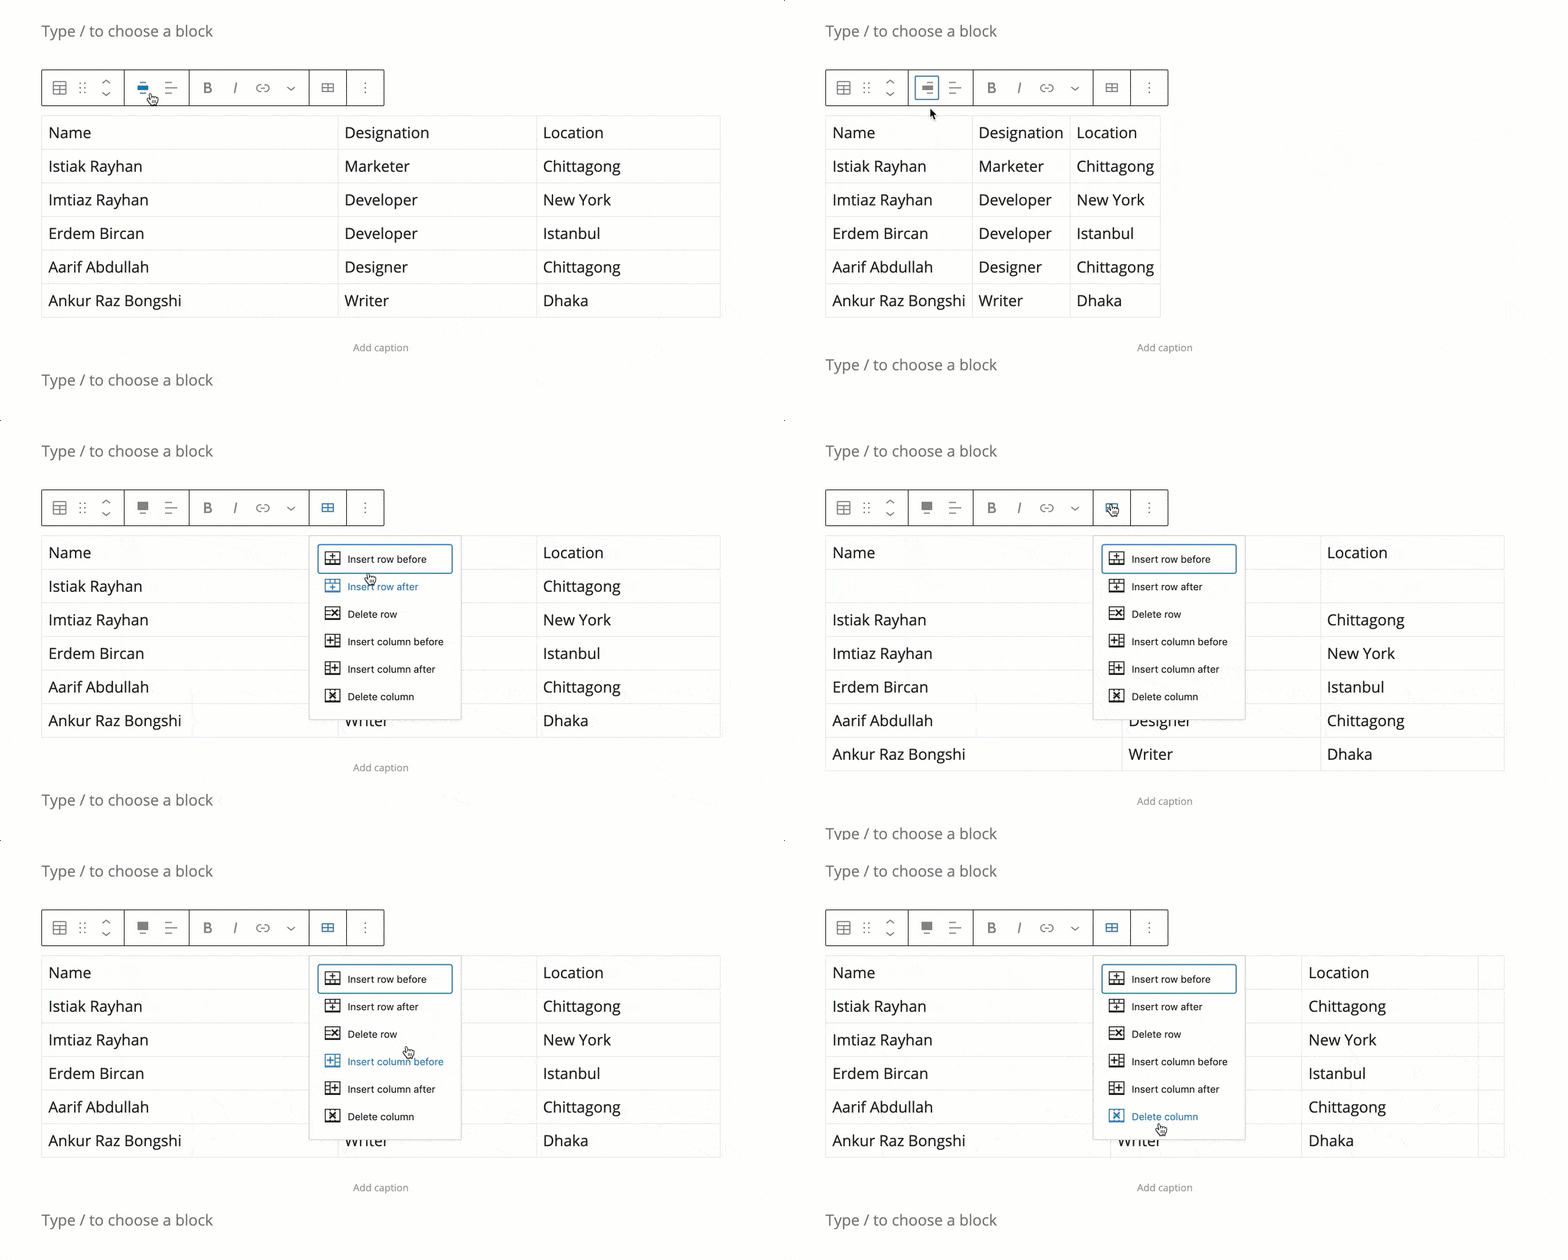
You can change the alignment and add/delete rows and columns from the toolbar.
You can change the style, color, and settings from the right-hand side options panel.
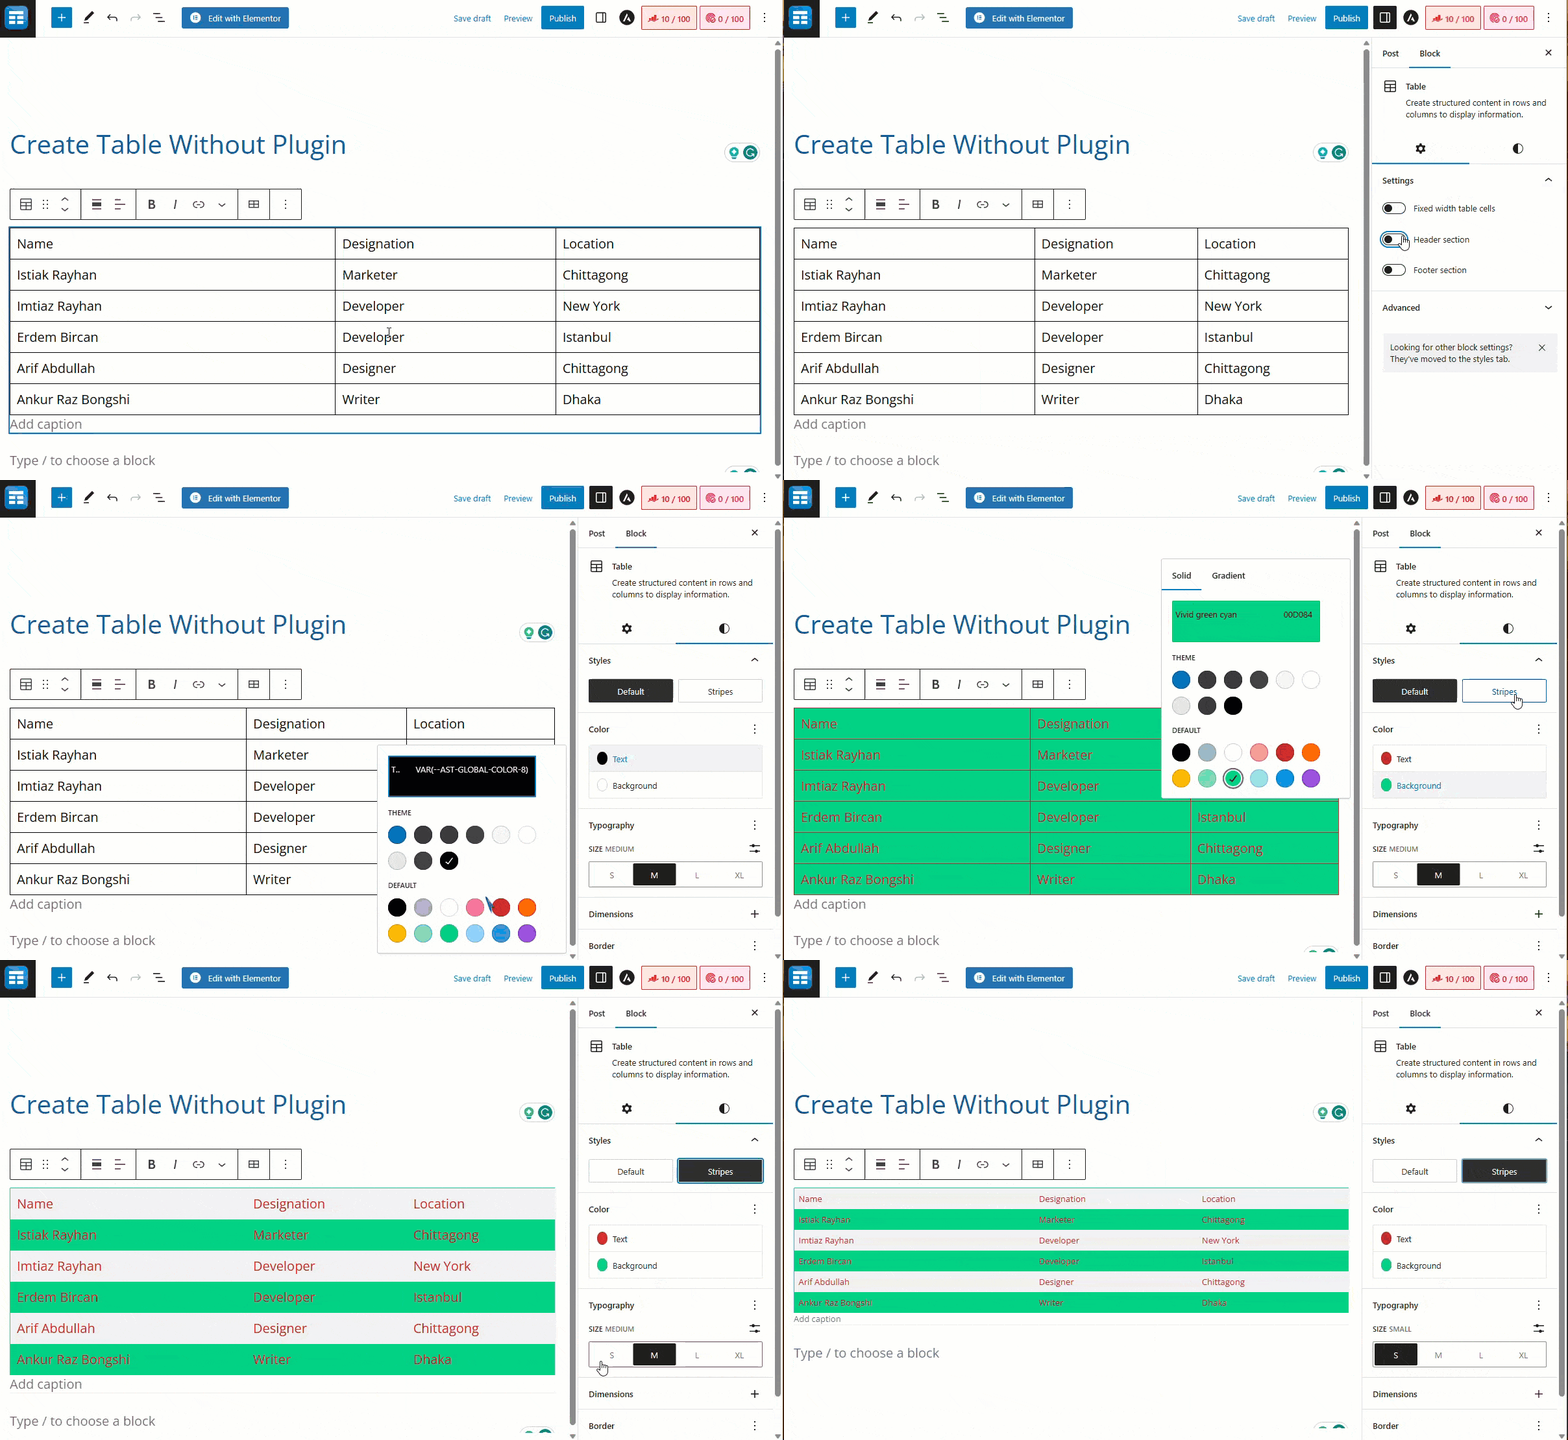
So, this is how you can create a table without any plugin using the block editor only.

However, if you want to create more advanced tables, you can consider using the WP Table Builder plugin.

Create A Table Using Google Docs

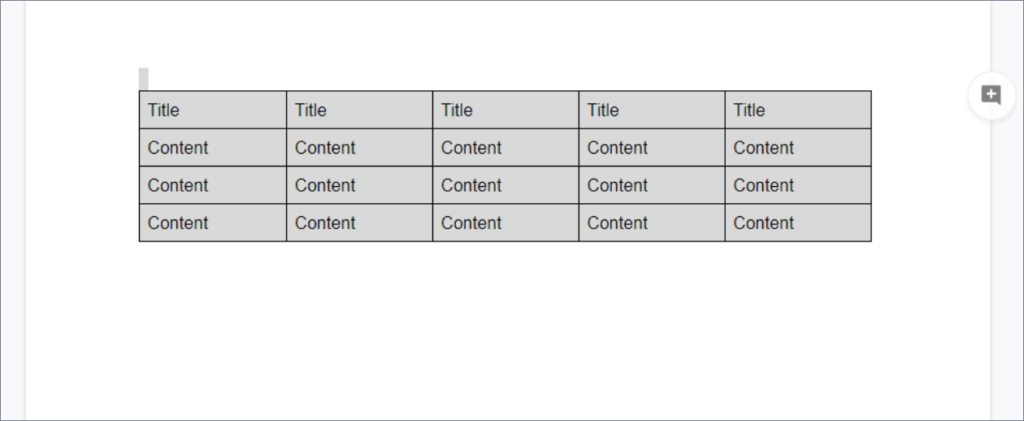
This is another simple way to add tables to WordPress. First, go to Google Docs, look for the insert Option in the top menu bar, and select Table. Choose the row and column, and the table will be created automatically.

After creating your desired table in Google Docs, select the whole table, press “Ctrl + C” or right-click on your mouse, and then select the copy option to copy the whole table.

Now paste the table on your website’s content where it is needed. This is how you add a table from Google Docs to your WordPress site.

How to Add Table in WordPress

How to add a Table using a Table Plugin

Since we’ve shared two of the most used ways of adding a table on your WordPress site without a plugin, we will share the way of adding a table using a table plugin. We will use the WP Table Builder to create a table in WordPress. But before that, you must know Why we choose WP Table Builder.

Why Choose WP Table Builder as your Table Builder Plugin for WordPress?

WP Table Builder allows you to create high converting tables in WordPress without any coding. All you need is to imagine any easy or complex table, and WP Table Builder can help you make it in a breeze easily.

It is perfect for creating product comparison tables, pricing tables, and other data-rich tabels with a wide variety of elements.

Key Features

  • Supports All Page Builders: You can easily add tables on any website regardless of page builders using WP Table Builder. It supports all page builders as it supports the Shortcode feature, allowing you to display your table anywhere you like.
  • Dedicated Drag-and-Drop Visual Table Builder: The dedicated visual builder allows you to create any complex or easy tables live. All you need to do is drag and drop the included elements (image, text, HTML, List, Shortcode, etc.) within the cell to create any table. Currently, It offers more than 10+ elements for creating any table.
  • Pre-Built Templates: Provides a selection of templates to help users get started quickly.
  • Responsive Table Design: WP Table Builder ensures that tables are mobile-friendly and look great on all devices. It is crucial to provide a seamless user experience across all device platforms.
  • SEO-Friendly: The tables created with WP Table Builder are SEO-friendly, ensuring they do not negatively impact your website’s rankings. This is important for maintaining visibility and attracting traffic to your site.

Price

You can try WP Table Builder for free as it is available in WorPress repository. The price of pro version starts from $49 yearly for a single website.

Creating a Table Using WP Table Builder

To create a table using WP Table Builder requires the plugin to be installed first. To install WP Table Builder in your WordPress website, go to your dashboard. Now navigate to the Plugins> Add New Plugins. Search to WP Table Builder in the search box. Click “Install” button to install the plugin.

After that activate the plugin by clicking the “Activate” button.

Now, navigate to the WP Table Builder > Add New. It will take you to the visual table builder of the WP Table Builder.

Here is the look of the visual table builder with details.

To create a table, click the Blank button. Determine the table row and column by clicking the “+” and “-” button.

How to Create Table Using WP Table Builder

Now insert the elements inside table. Give your table a name, and finally click the Save button to create a table successfully using the WP Table Builder. Click the “X” button to exit from the live table builder.

It will take you to your table’s list. Copy the shortcode of your dedicated table.

Now paste the shortcode on your desired post or page. After that you must update your post or page by clicking the update button.

How to add tables in WordPress using WP Table Builder

Here is the final look of your table.

So, this is how you add a table using the WP Table Builder plugin.

Conclusion

I hope you have an overview of adding or creating a table in WordPress without any plugins. If this post has helped you, do not forget to share your feedback in the comment section below. 

Related Posts

Leave a Comment

Scroll to Top