
Horizontal pricing tables are one of the most effective ways to present pricing plans on a website. By displaying multiple plans side by side, they make it easy for visitors to compare features, understand value differences, and make faster purchasing decisions.
In WordPress, it’s possible to create a basic horizontal pricing table using the default Columns or Table blocks. While these blocks work for simple layouts, they quickly become limiting when you want more control over design, structure, or conversion-focused elements like call-to-action buttons and highlighted plans.
That’s where a dedicated table plugin comes in. With the WP Table Builder plugin, you can create fully customizable horizontal pricing tables with better styling, cleaner layouts, and built-in elements designed to improve conversions.
In this guide, we’ll show you how to create a horizontal pricing table in WordPress using WP Table Builder and explain why it’s a more flexible and efficient approach than relying on the default block editor alone.
What Is a Horizontal Pricing Table?
A horizontal pricing table displays multiple pricing plans side by side, allowing visitors to compare features, pricing, and plan differences at a glance. Each column typically represents a pricing plan, while rows are used to list features, limits, or benefits consistently across all plans.
This layout is widely used on product, SaaS, and service websites because it makes comparison intuitive and keeps decision-making friction low. When designed properly, a horizontal pricing table helps users quickly identify the plan that best fits their needs without unnecessary visual distractions.
Creating Horizontal Pricing Table In WordPress
Now that you understand what a horizontal pricing table is, let’s walk through how to create one in WordPress using WP Table Builder.
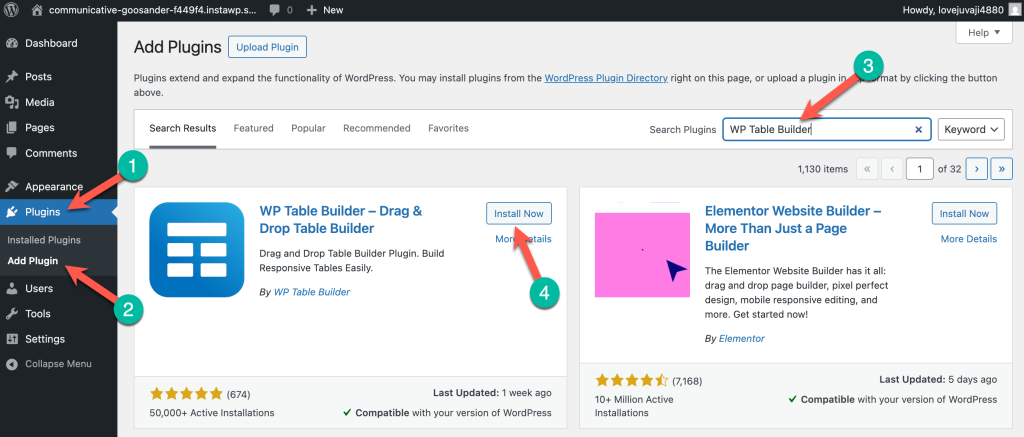
Step 1: Install the WP Table Builder Plugin
WP Table Builder is a freemium plugin. The free version is available in the WordPress repository.
To install the free version, go to your WordPress Dashboard and navigate to Plugins (1) > Add Plugin (2). Then search for ‘WP Table Builder’ (3) and install & activate the plugin (4).
Note: If you’re planning to go with the pro version, here’s how to install and activated the pro version.
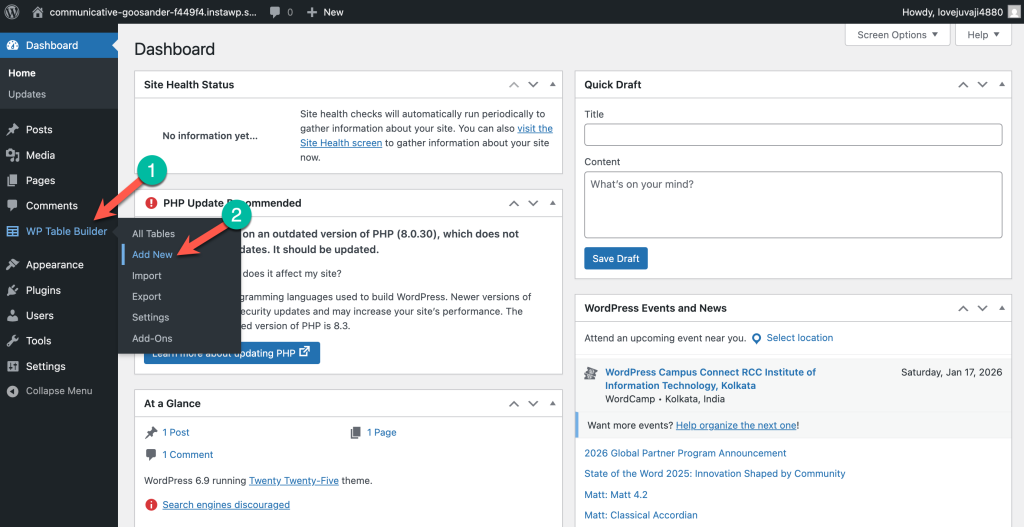
Step 2: Add A New Table
To create a new table, hover your mouse cursor over the WP Table Builder menu and click on ‘Add New’
In the next step, you need to choose the number of rows and columns. For the sake of this tutorial, I’m choosing 4 rows and 3 columns.
Then click on the ‘Create New’ button.
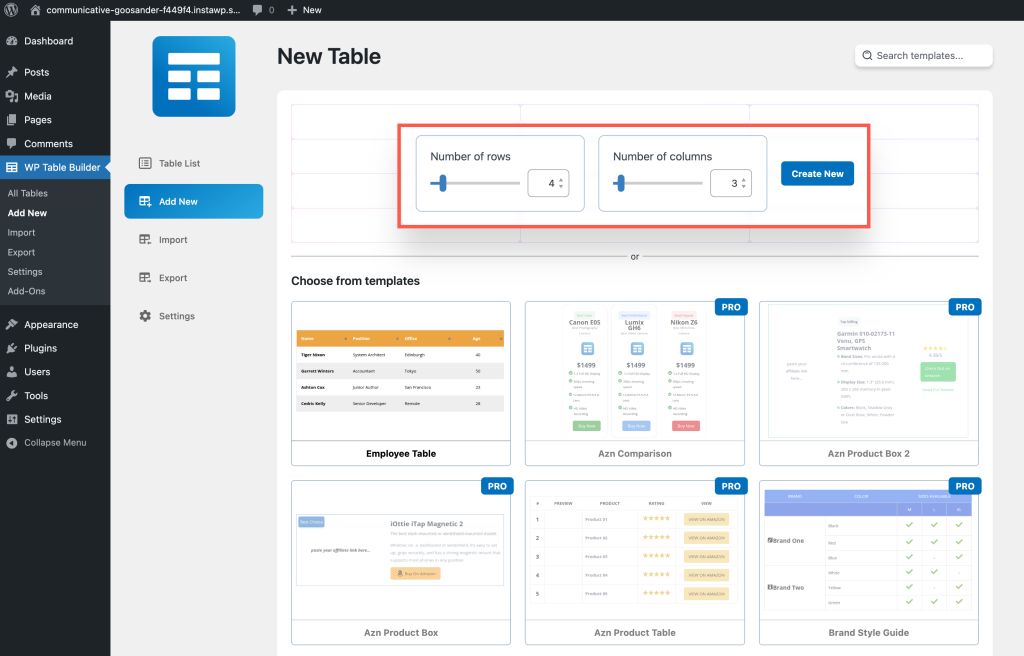
Note: WP Table Builder Pro offers some pre-built pricing tables. If you’re using the pro version, you can get access to those tables.
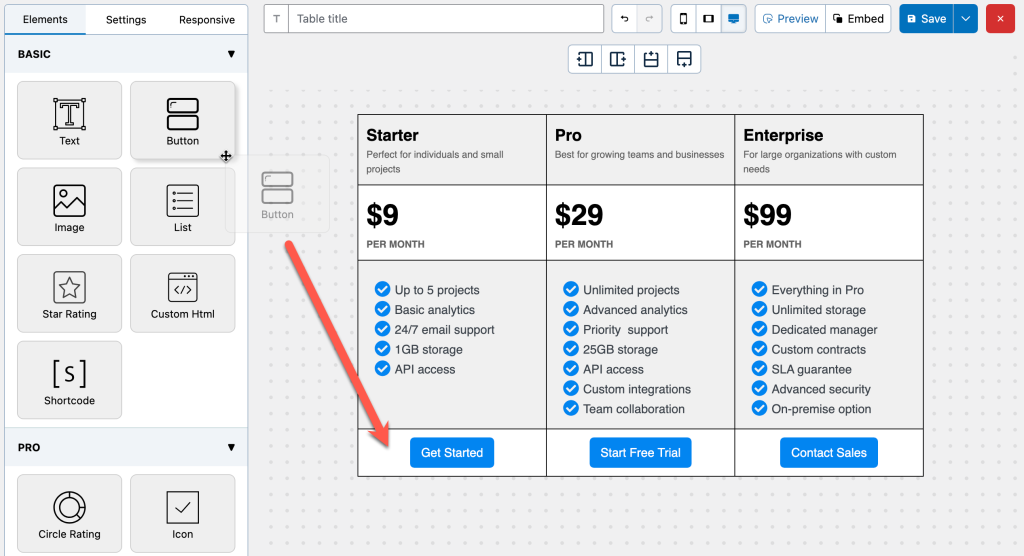
Step: Add Content to the Table
At first, we will add the names of the pricing plans. By default, you’ll find a ‘Text’ on each cell. Simply type the plan name and customize it from the left-hand side options panel.
Then we will add a sub heading for each plan.
Then we will add pricing to the table.
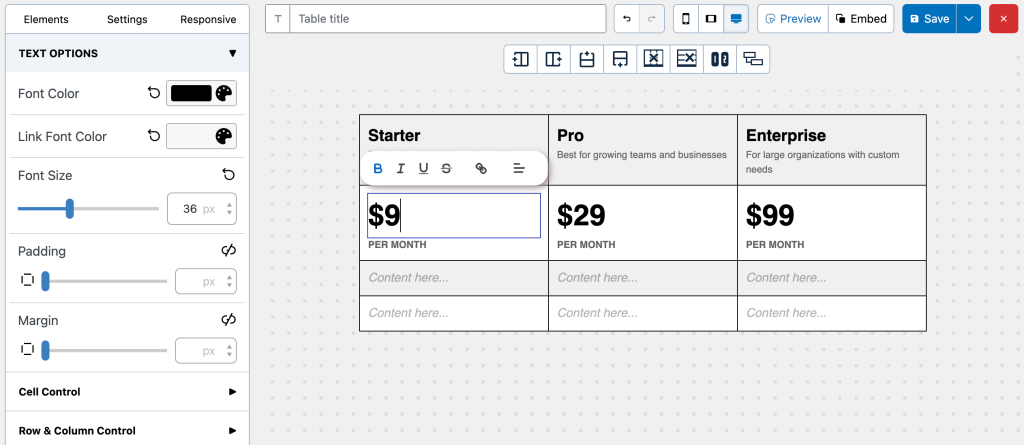
Then we will be adding features to the plans. Here we can use the List (free) or Styled List (pro) element. I’ll be using Styled List here.
And finally, add the Call-to-action buttons using the button element.
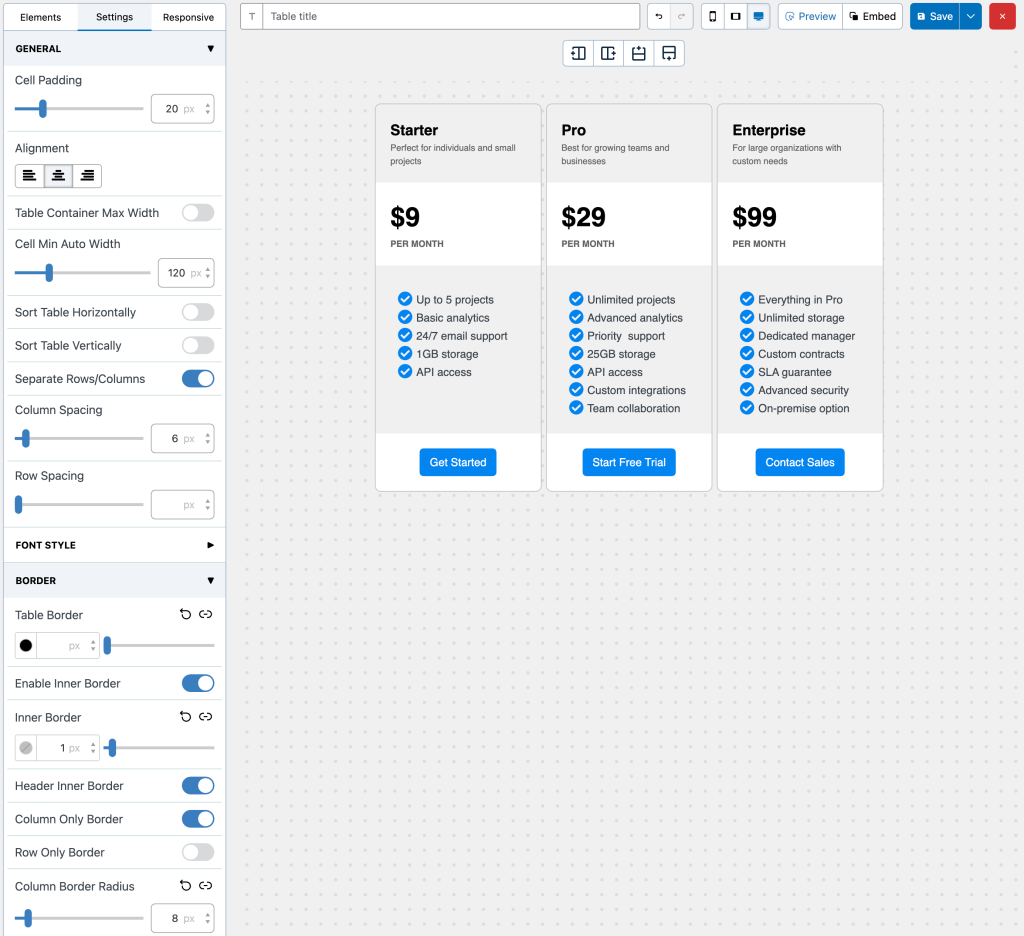
Step: Configure Other Settings
Then we will make some changes to make the table looks better.
We have made these changes to the table:
- Increased cell padding
- Enabled ‘Separate Rows/Columns’ option and set column spacing as 6px.
- Disable table border and set inner border as 1px.
- Set column border radius as 8px.
Our table is almost ready. Now, all we have to do is making sure that table is mobile-responsive.
Conclusion
Horizontal pricing tables are an effective way to present pricing plans clearly and encourage quick comparisons. While WordPress’s default blocks can help you create a basic horizontal layout, they often fall short when it comes to flexibility, design control, and conversion-focused elements.
Using a dedicated plugin like WP Table Builder makes the process much easier. It allows you to build fully customizable horizontal pricing tables with a clean structure, better styling options, and elements designed to guide users toward the right plan—all without writing any code.
If you want more control over how your pricing tables look and function, WP Table Builder is a practical solution that helps you create professional, conversion-optimized horizontal pricing tables in WordPress.
Frequently Asked Questions (FAQ)
What is a horizontal pricing table?
A horizontal pricing table displays multiple pricing plans side by side in columns, making it easy for visitors to compare features, pricing, and plan differences at a glance. This layout is commonly used on product, SaaS, and service websites to simplify decision-making.
Can I create a horizontal pricing table using WordPress default blocks?
Yes, you can create a basic horizontal pricing table using WordPress’s default Columns or Table blocks. However, these blocks offer limited customization and can quickly become restrictive when you need better styling, call-to-action buttons, or highlighted plans.
Why use a plugin instead of WordPress default blocks?
A dedicated plugin gives you more control over layout, design, and conversion-focused elements. Default blocks are suitable for simple tables, but they lack flexibility when building professional pricing tables meant to drive conversions.
Is WP Table Builder suitable for beginners?
Yes. WP Table Builder is designed to be beginner-friendly and does not require any coding knowledge. You can build and customize horizontal pricing tables using drag-and-drop elements and visual controls.
Does WP Table Builder support responsive pricing tables?
Yes, WP Table Builder allows you to adjust table settings to ensure your pricing tables remain responsive and visually consistent across different screen sizes.
Is there a free version of WP Table Builder?
Yes. WP Table Builder offers a free version available in the WordPress plugin repository. A Pro version is also available with advanced elements and pre-built pricing table templates.
Leave a Reply
You must be logged in to post a comment.