
Enhance your blog posts visually and make them appealing by learning how to Add Progress Bars in WordPress. Progress bars visually represent completion or progress towards a specific goal or task.
By providing clear visual cues and feedback, progress bars enhance the overall user experience. If you’re searching for a way to add static progress bars on WordPress, follow the tutorial thoroughly from top to bottom as we go.
How to Add Progress Bars in WordPress Using Ultimate Blocks
To add progress bars in WordPress, we will use Ultimate Blocks, a Gutenberg-Only plugin that provides you with numerous functionalities of various plugins under one hood.
Ultimate Blocks currently provides 20+ blocks, serves the functionalities of 20+ plugins, and helps you to create fantastic content without any coding skills.
The plugin is purely performance-oriented, allowing you to turn off particular blocks you do not use. Also, the plugin is lightweight and does not hamper your site load speed.
Now let’s see how to add a progress bar in WordPress using Ultimate Blocks below. All you need is to follow the simple steps below.
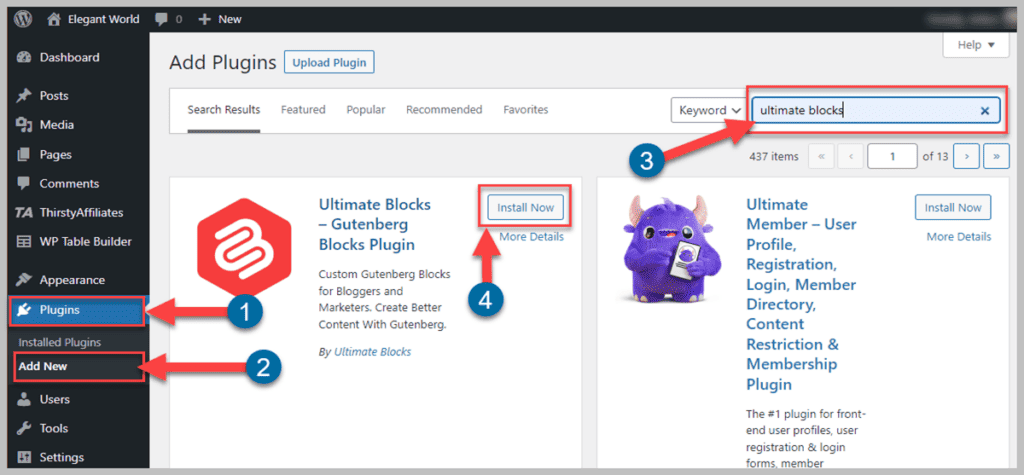
Step1: Install Ultimate Blocks
Head to your WordPress Dashboard. Click Plugis > Add New. Type “Ultimate Blocks” in the search bar. Click the “Install Now” button to install the plugin.
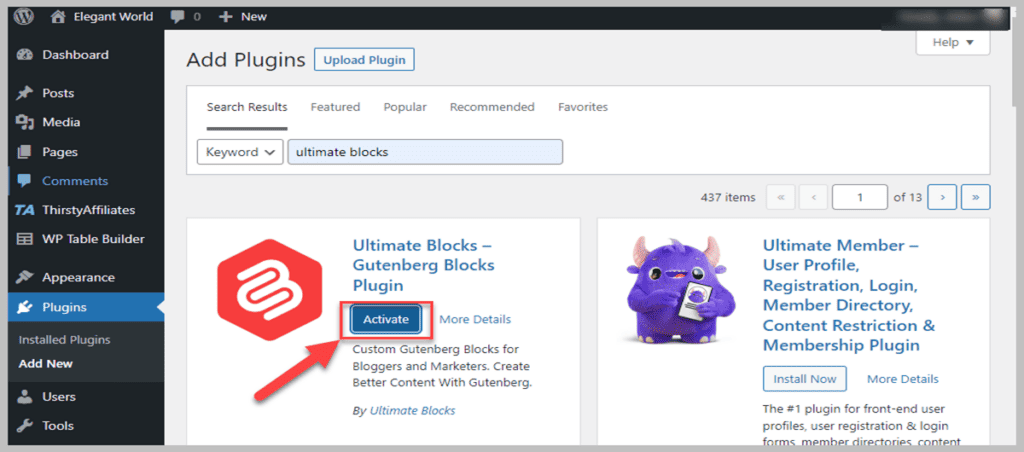
Another necessary step after installing the plugin is to Activate the Plugin, and for that, click the “Activate” button. If you do not activate the plugin, it will not work on your Website.
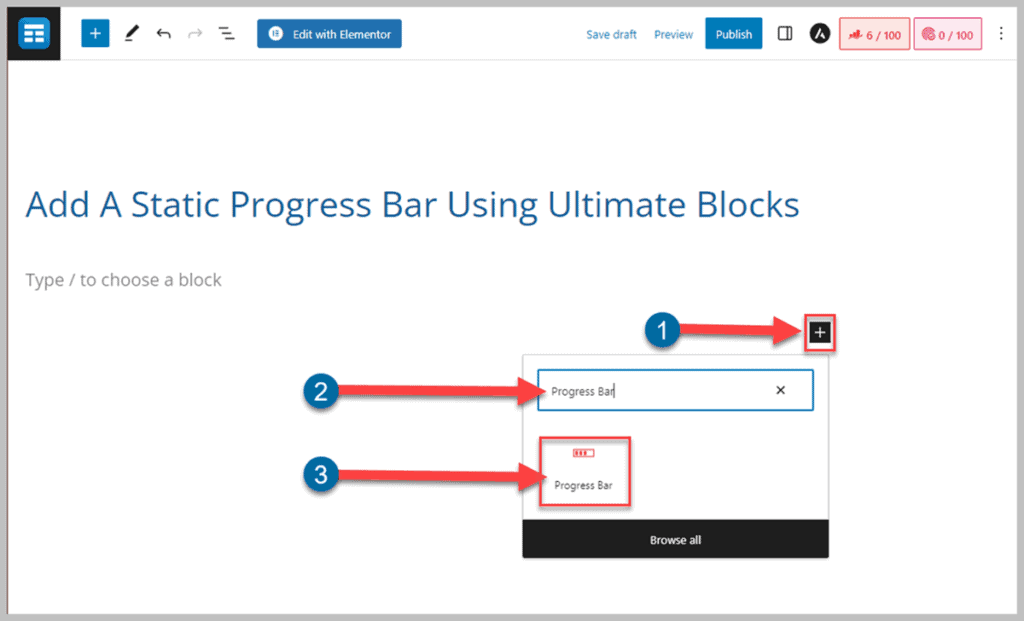
Step 2: Add Progress Bar Block
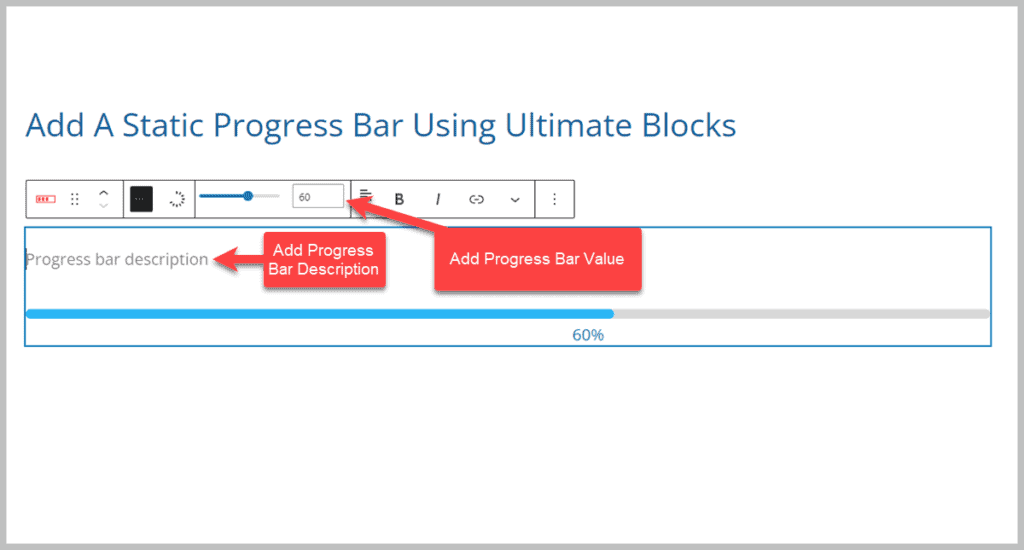
Now go to your posts and pages, click the “+” icon, and type “Progress Bar”. Click the Progress Bar block to insert it on the posts and pages.
Afterward, add the bar description and bar value. The image below shows you the default image of the progress bar.
Step 3: Customize the Block
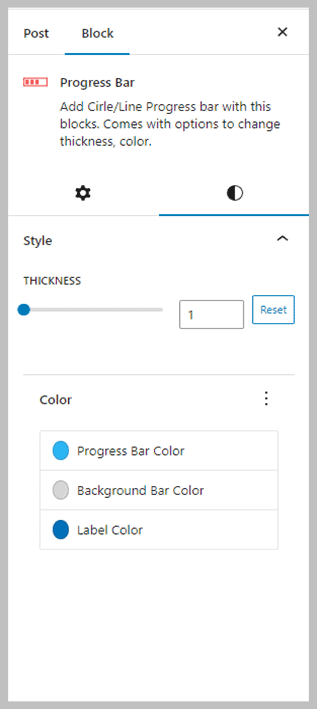
For the block customization option, the Block offers you to customize the bar color, background bar color, label color, and thickness. All these settings are in the Styles menu of the block settings.
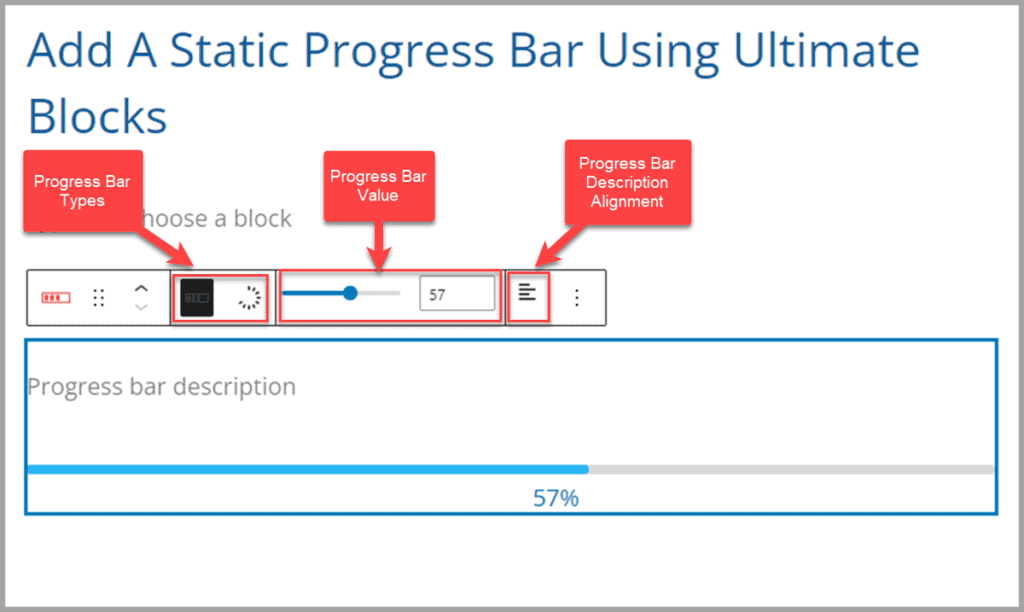
You can also set the progress bar type in the settings menu other than the editor. Check out the image below of the options you will get in the Block Settings panel.
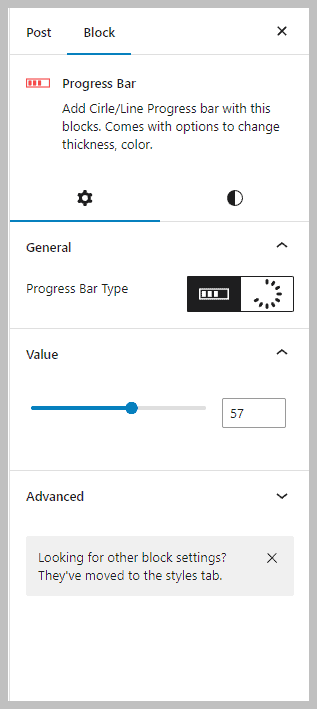
To go to the block settings, select the block, click the settings menu from the top, then click “Block,” and it will show you the settings and style options.
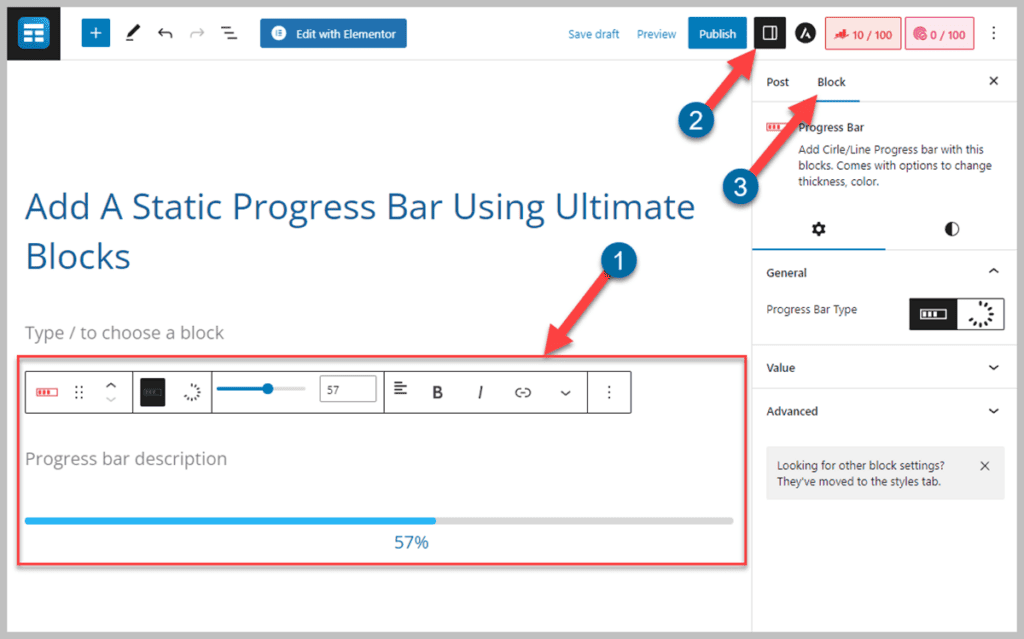
Check out the Images below of the Progress bars.
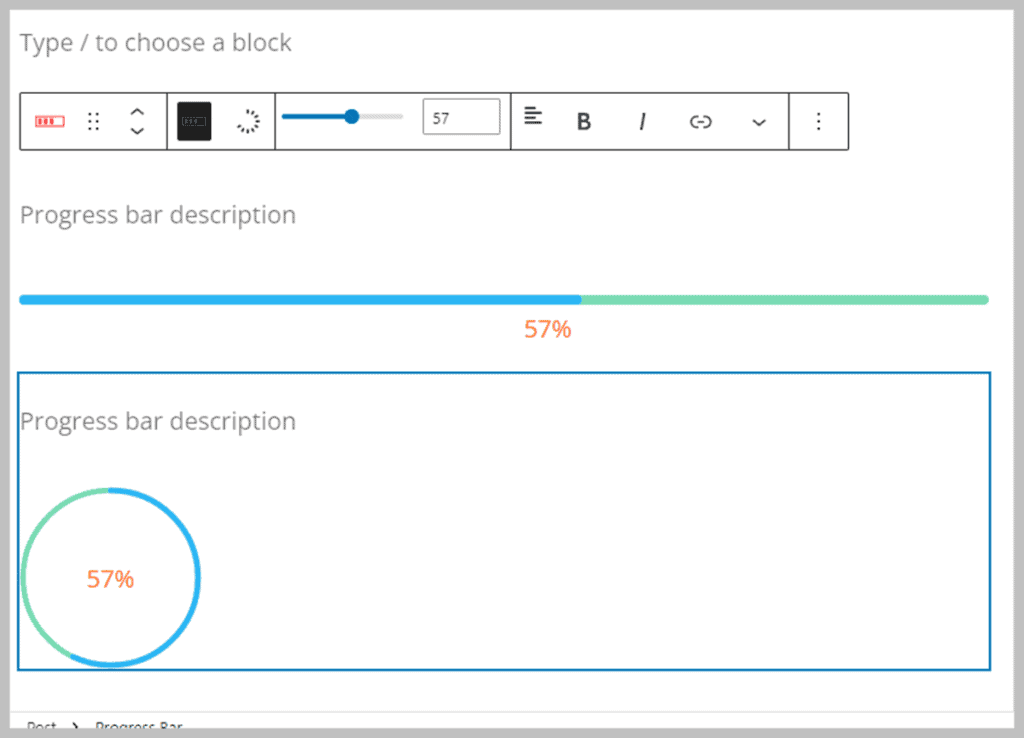
You can add multiple progress bars in your posts and pages using Ultimate Blocks and can customize the progress bars using custom CSS if you have coding knowledge.
Conclusion
Don’t you think adding a progress bar is quite simple using Ultimate Blocks? Let us know your thoughts in the comment section below.
You can also ask any queries regarding the tutorial. We would be happy to answer them. Also, don’t forget to share this excellent tutorial with your friends and family via your social media.
Related Posts
- 5 Best WordPress Estimated Reading Time Plugins
- 7 Best Reading Progress Bar WordPress Plugins
- 7+ Best WordPress Progress Bar Plugins (Free & Premium)
- How to Add a Toggle Button in WordPress In 3 Easy Steps
- How to Build an Amazon Affiliate Website (5 Easy Steps)
Leave a Reply
You must be logged in to post a comment.