
Anyone who wants to learn how to add a toggle button in WordPress can follow our tutorial, as we will show you some easy steps for doing that.
A toggle button helps you to switch between content with a simple click. Also, a toggle button can help you increase the user experience since it does not lead you to a new webpage, saves space for adding extra content, etc.
Today, we will show you three easy steps to help you learn to add a Toggle button without any coding, nor do you need to purchase any premium plugin.
We will use Ultimate Blocks, a block editor-only plugin that offers various functionalities in one place. Currently, the plugin has 20+ fantastic blocks for creating unique, engaging content without coding skills.
How to Add A Toggle Button In WordPress Using Ultimate Blocks
Step 1: Install Ultimate Blocks
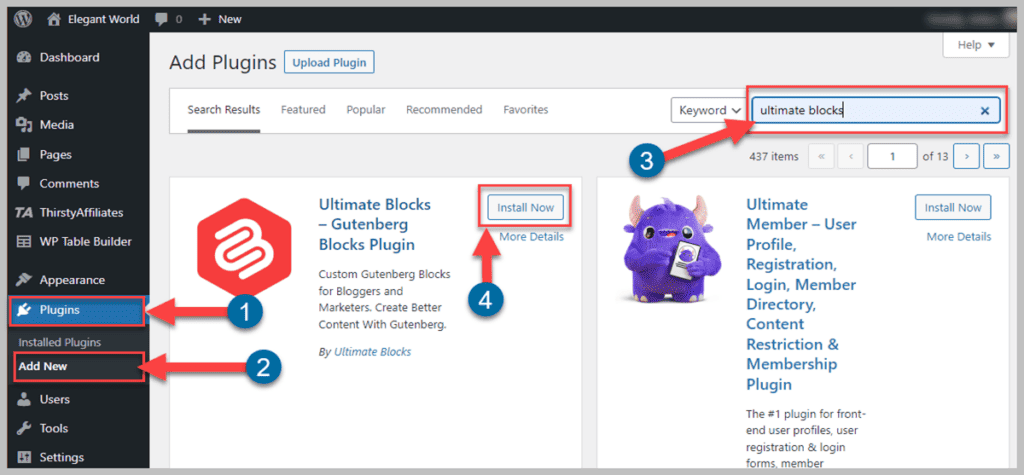
The first step is installing Ultimate Blocks; go to your website’s WordPress Dashboard > Plugins > Add New. Now type “Ultimate Blocks” in the search box and click the “Install Now” button. Do exactly as shown in the image below.
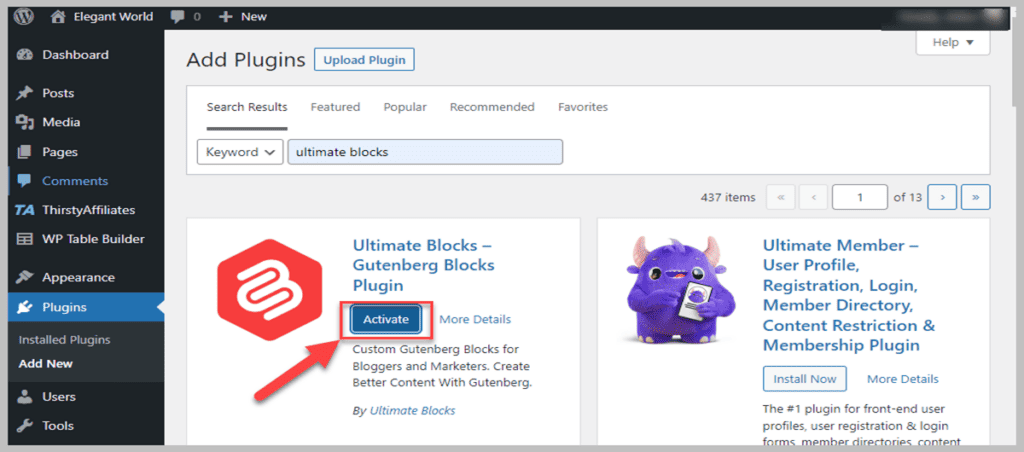
After installing The plugin, you must activate the plugin. Otherwise, it won’t work. Also, the plugin is a Gutenberg-Only plugin. Therefore, it will not work with any other page builder.
Step 2: Insert Tabbed Content
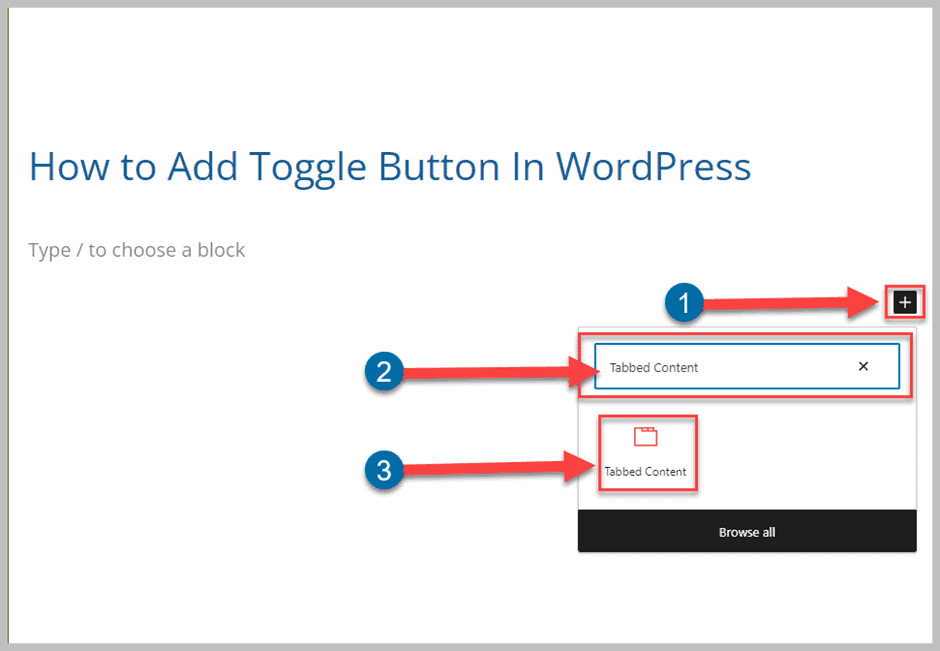
To add a Toggle Button, insert the “Tabbed Content” block of the Ultimate Blocks in your post. For that, click the “+” button in the editor to add a new block, type “Tabbed Content” in the search box, and click the block.
When the block is added to your post, You can see the tabbed content like the image below.
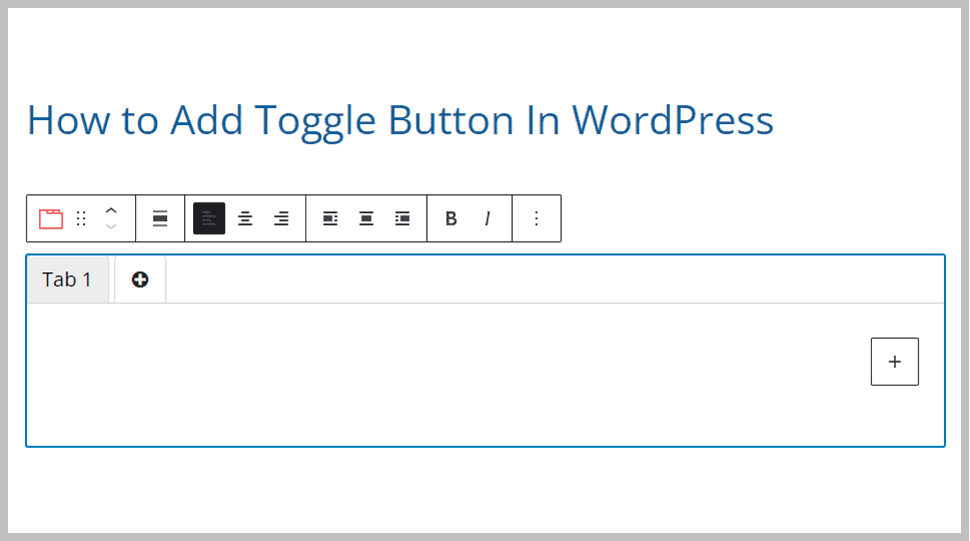
However, the inserted block will not look like a Toggle button, and to make it a toggle button, you have to customize the design settings of the block, and also you need to add more tabs. These tabs will work like Toggle Buttons.
Add more tabs by pressing the “+” button inside the Tabbed Block.
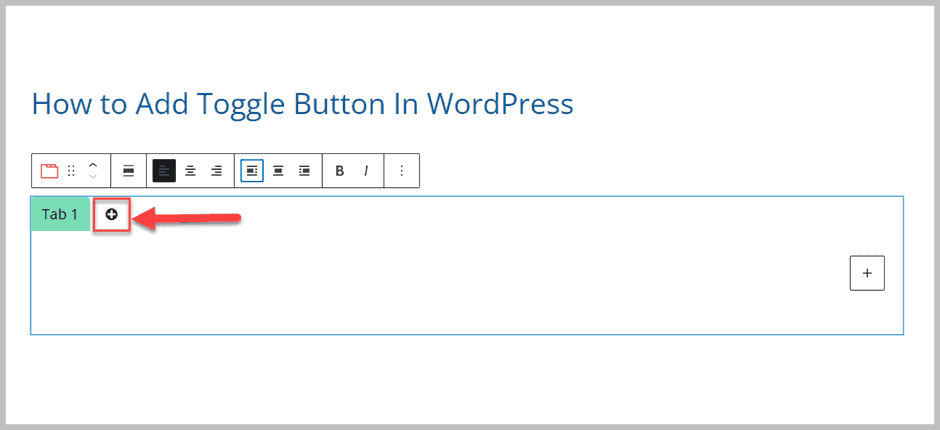
Check out the image below that includes the functionalities in the live editor. You can adjust the tab’s title, title alignment, tab alignment, add other blocks in the content area, etc., from the block editor.
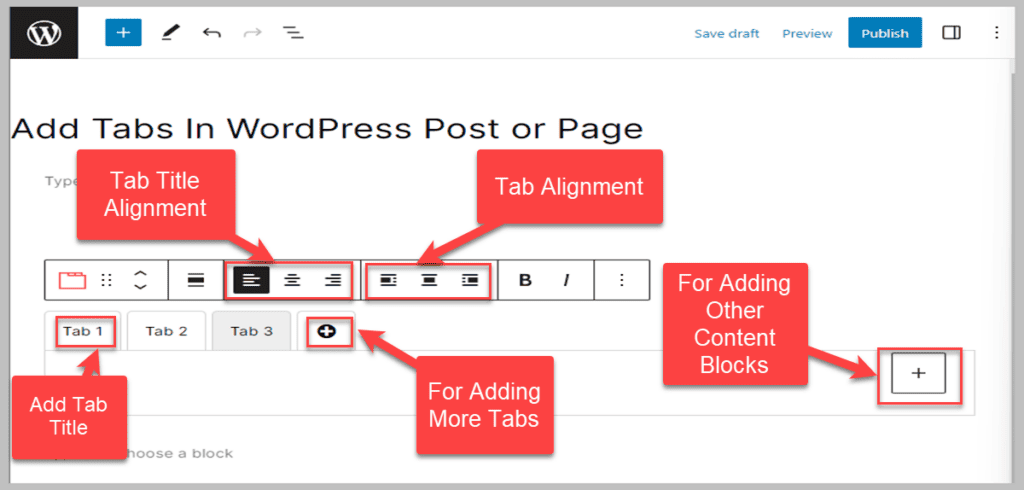
Step 3: Customize the Tabbed Content To Add A Toggle Button
Select the “Content Toggle” block in the editor by clicking above the block. Click the “Settings” button at the top right to customize the block. Select Block > Tab Type > Pills.
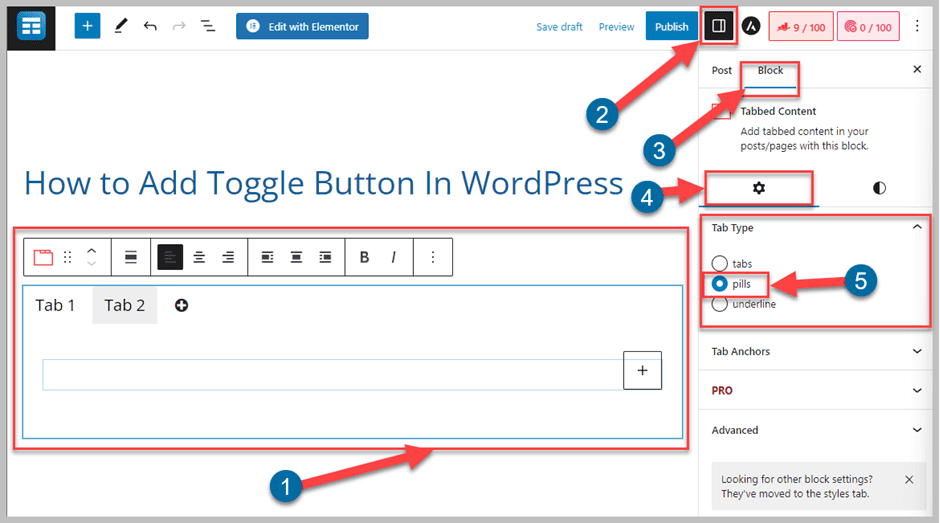
Adjust the alignment of the tabs to the center.
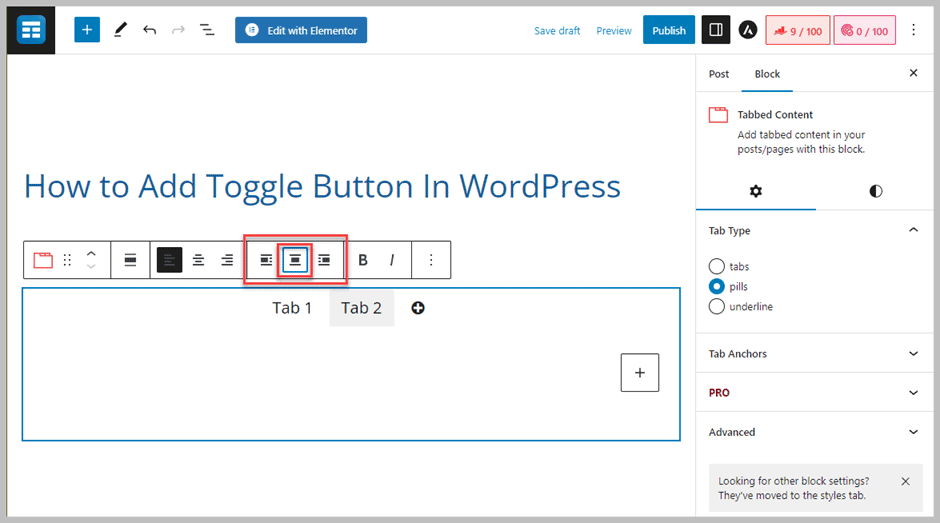
You might think that at this point your work is done. But wait, you need to make your tabs look like toggle switches.
To make the tabs work and look like toggle switches, you must customize the Tab Style in the Styles menu of the Block Settings. Adjust the default tab color, active tab color, Tab Title Color, and Active Tab Title color as needed for all the tabs.
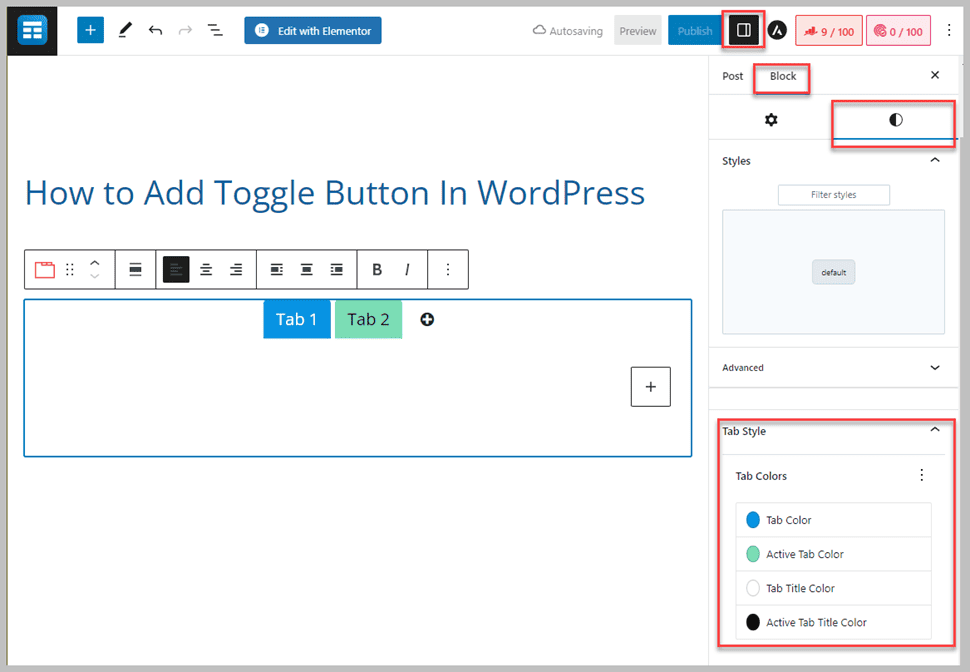
And that’s it. Your Toggle Buttons are ready. Now you can add content and other blocks inside both of the tabs.
Isn’t it easy? You must follow all the simple steps to create unique, eye-catching Toggle Buttons in WordPress Posts & Pages.
You can also follow the video tutorial of this post below. Enjoy!
Conclusion
We hope you’ve completely understood every step we’ve shown in the post to make you learn How to Add A Toggle Button in WordPress easily in three easy steps.
Using Ultimate Blocks, anyone without coding skills can create Toggle Buttons easily. Let us know your thoughts and questions regarding Ultimate Blocks or any other issues you’ve faced when using the plugin.
Also, share the post with your friends and family if you have learned how to add toggle buttons in WordPress.
Related Posts
- How to Create a Product Specification Table in WordPress (4 Easy Steps)
- How to Add Star Ratings In WordPress (3 Easy Steps)
- How to Add a Countdown Timer in WordPress (3 Easy Steps)
- How To Add “Pros & Cons” Table In WordPress
- How to Add Table of Contents In WordPress (Without A Plugin)
- How To Create A Horizontal Pricing Table In WordPress
- How To Create A Product Comparison Table In WordPress
- How To Create A Table In WordPress (Without A Plugin)
- How to Add Tabs in WordPress Posts and Pages In 3 Easy Steps
- How to Add FAQ Schema in WordPress (4 Easy Steps)
