
If you want to learn how to create a product specification table in WordPress easily and quickly, learn from us, as we have the exact tool and easy guidelines.
A product specification table shows detailed information about the specific product. Detailed information includes the product image, parts & materials, specific notes defining the product, etc.
Showcasing the product specification table helps the visitor get the idea of a product quickly and helps them decide whether they want it. It also increases the user experience, for visitors will love your website.
For today’s tutorial, we will use WP Table Builder, a spectacular table builder plugin that allows you to create a table with an intuitive drag & drop interface. It offers more than 10+ elements to create an amazing, professional-looking table effortlessly.
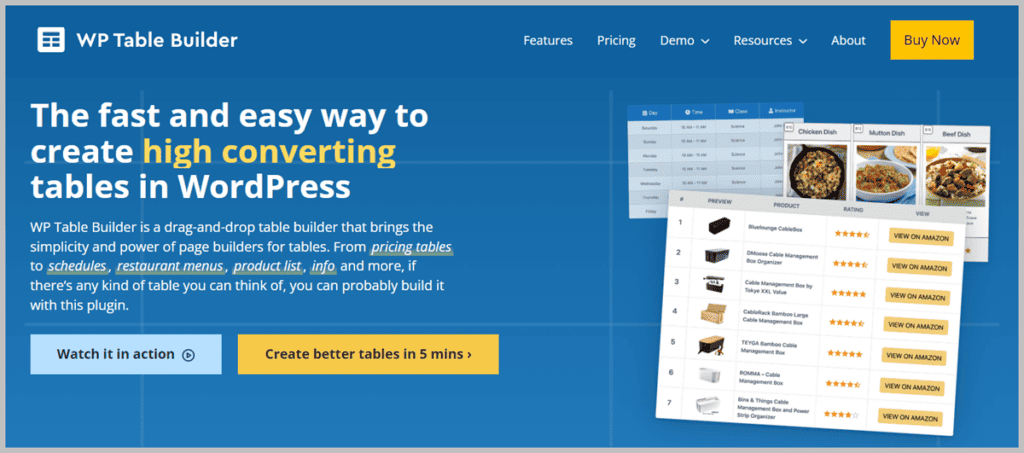
It contains free and pro features to help you create any type of table quickly and efficiently. The plugin also has numerous table templates to help you get started quickly.
But for today’s tutorial, we will not use any template. We will demonstrate how to create a product specification table from scratch.
How to Create A Product Specification Table In WordPress Using WP Table Builder
Step 1: Install WP Table Builder
The first step will be installing WP Table Builder. For that, you will need to go to your WordPress dashboard.
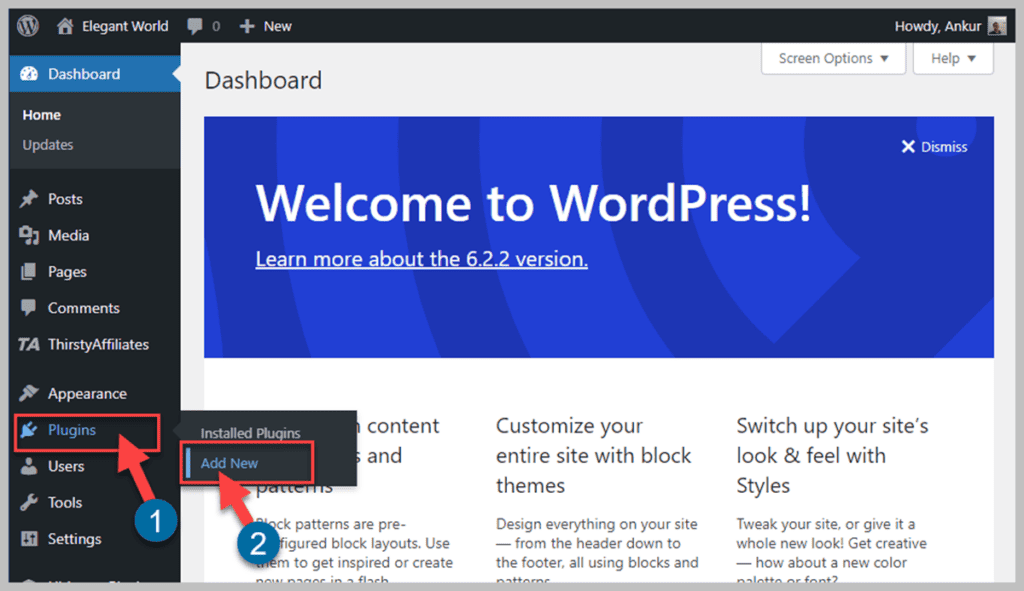
Now hover over the “Plugins” menu on the right side of your dashboard and click “Add New.”
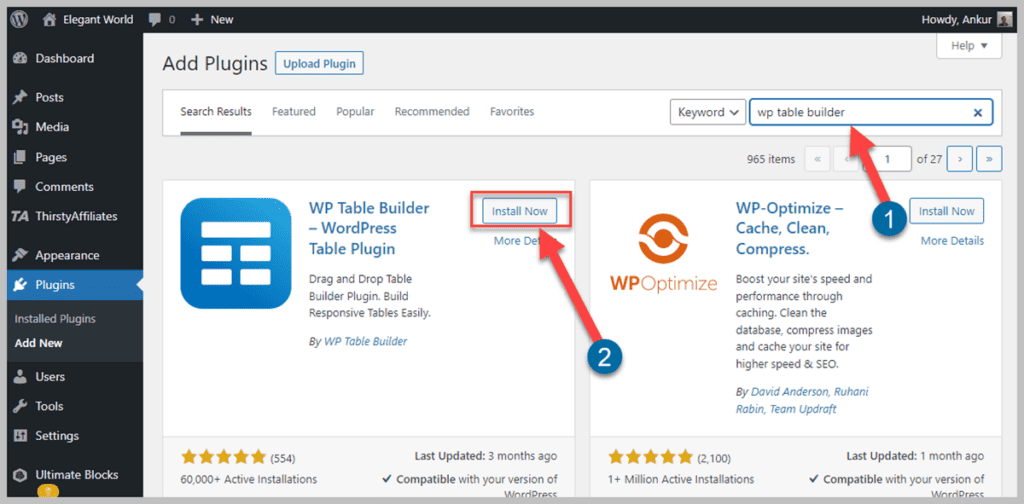
Type “WP Table Builder” in the search bar. It will automatically show you the plugin. If you do not see the plugin or anything, press the “Enter” key on your keyboard and click the “Install Now” button of the plugin.
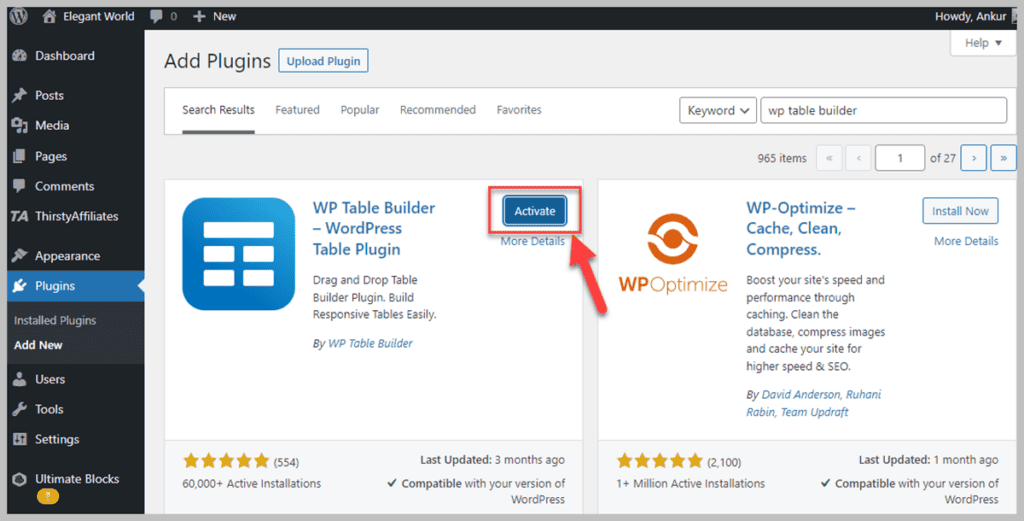
After the successful installation, you must activate the plugin from the same page.
Step 2: Determine Rows & Columns
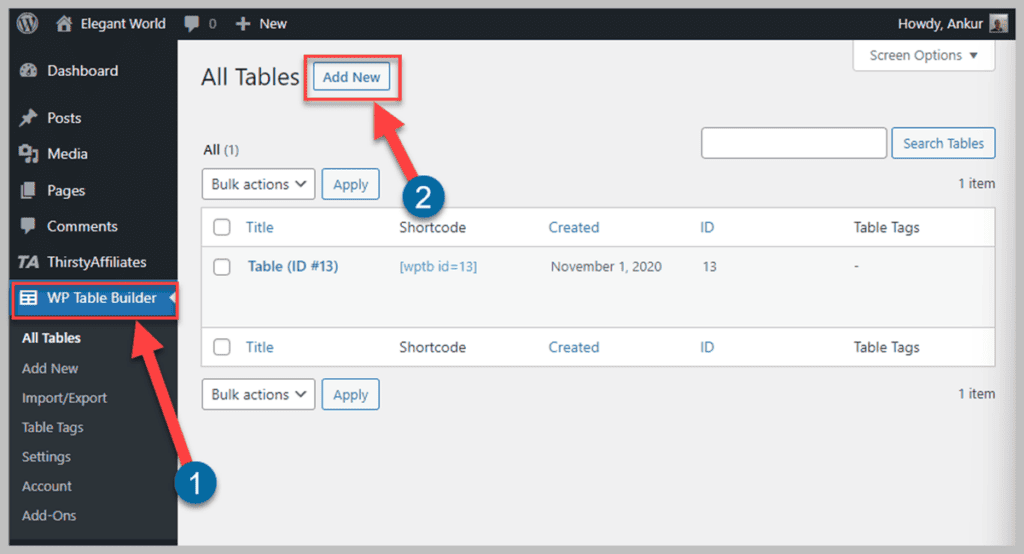
To create a product specification table, click the “WP Table Builder” menu from the right side of your dashboard and click the “Add New” button.
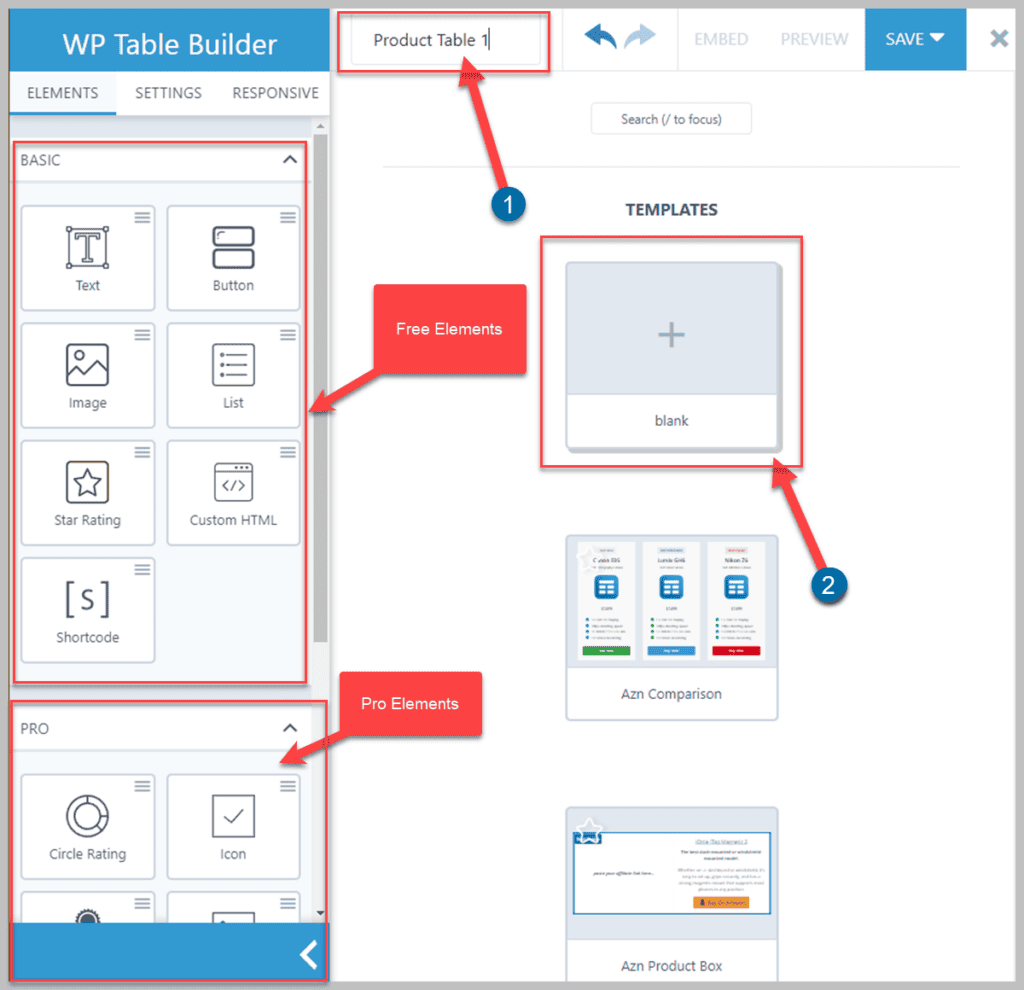
First, name your table and click the “blank” button.
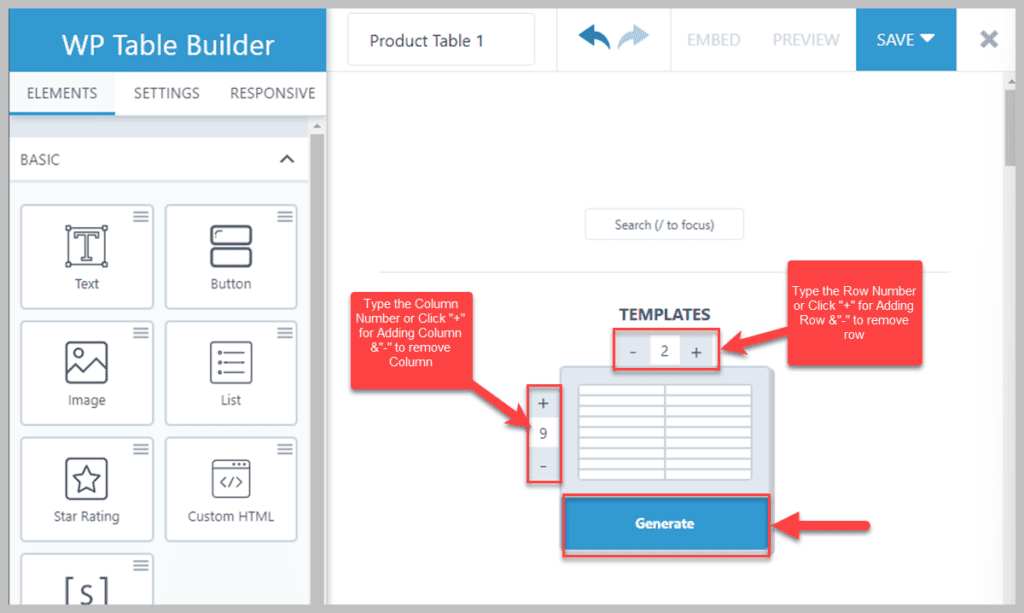
Choose the number of rows and columns that you need. For today’s tutorial, I will take nine rows and nine columns and click the “Generate” button to make a product specification table.
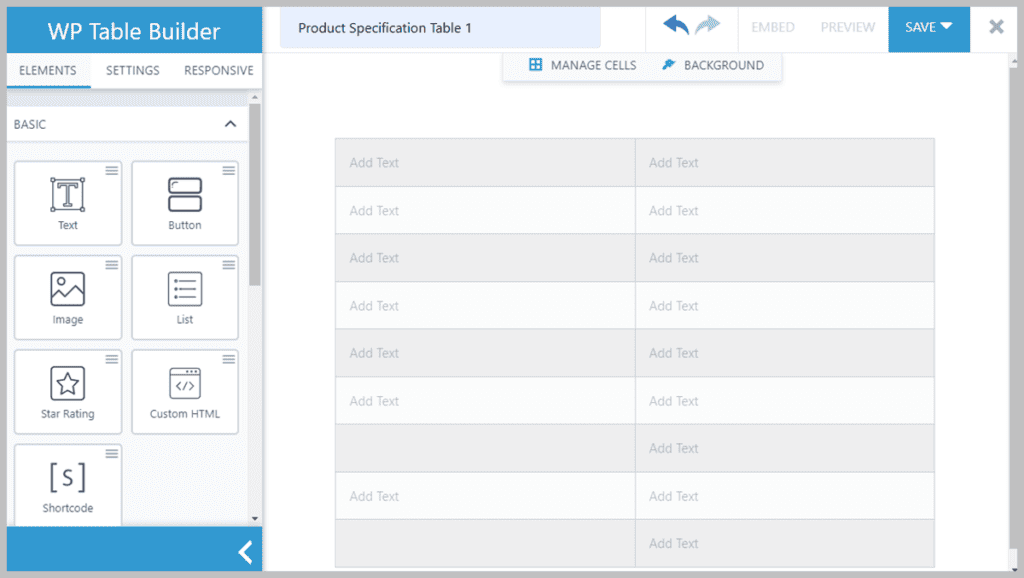
WP Table Builder offers you a live table builder. Therefore, all of the changes you make can be seen live. Your table is now ready for adding data and customizations.
Step 3: Add Elements & Data
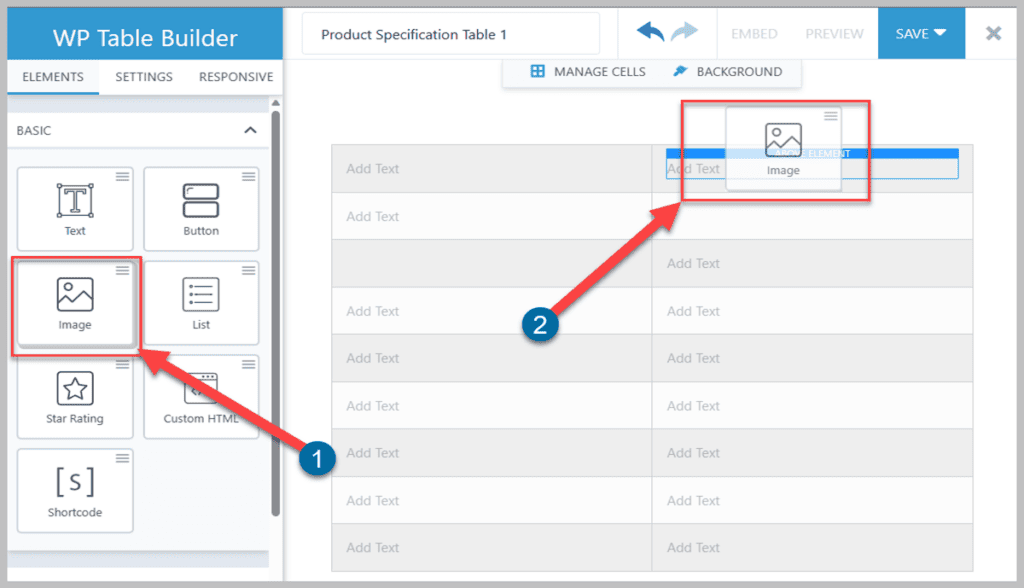
In this step, we will input our data and elements. We will drag the image element from the left side to the top right row of the table. It will tell you to upload the image.
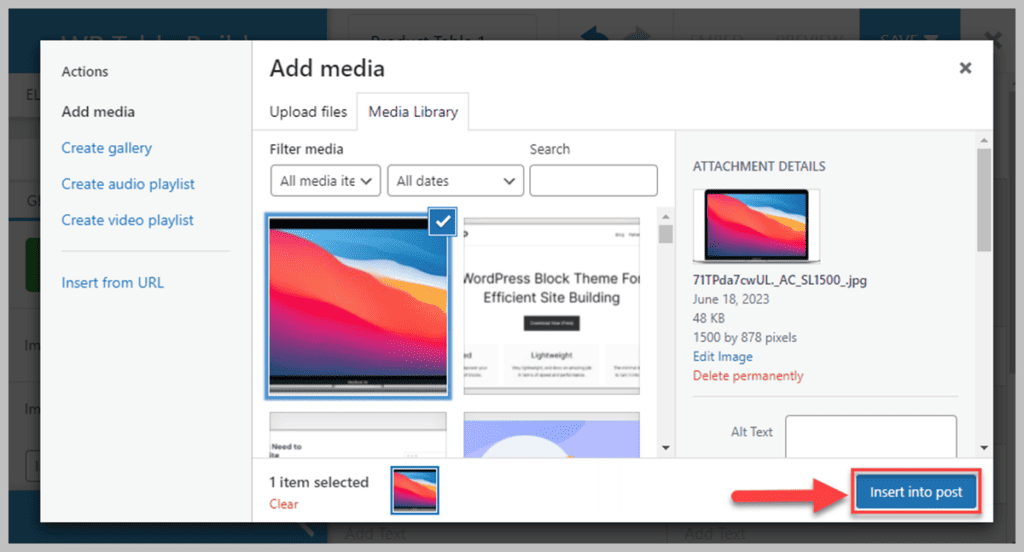
After uploading the image, click “Insert Into Post” button to insert the image into the table.
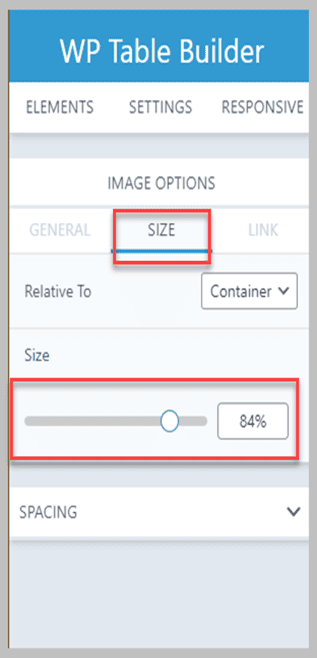
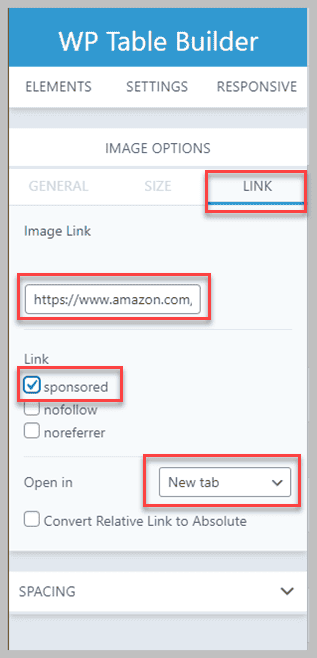
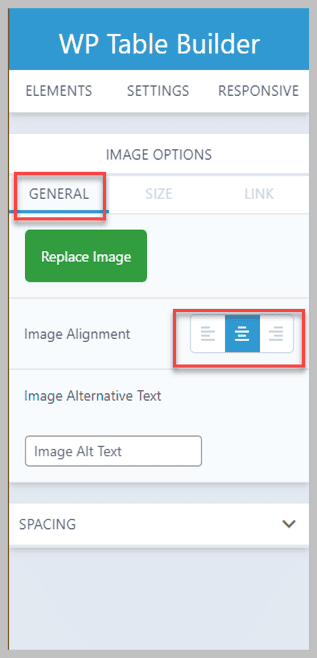
When the image is uploaded, you can adjust its alignment, add Image Alt text, customize its margin & padding with image size, add product link, etc.
For our image size, we will keep 84%, and it will show you the changes live. But you can keep the image size as per your need.
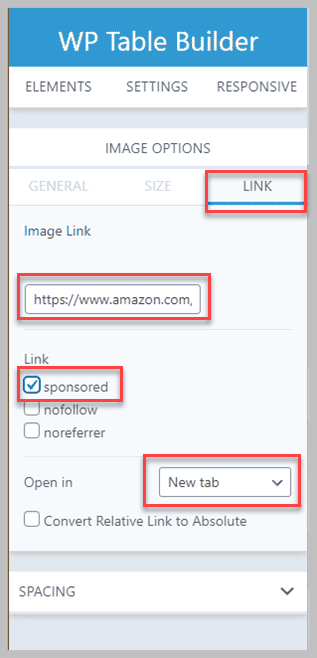
To add the link, we will go to the Link option & insert the link and set the attribute to the sponsored. We will also set the link to open in a new tab.
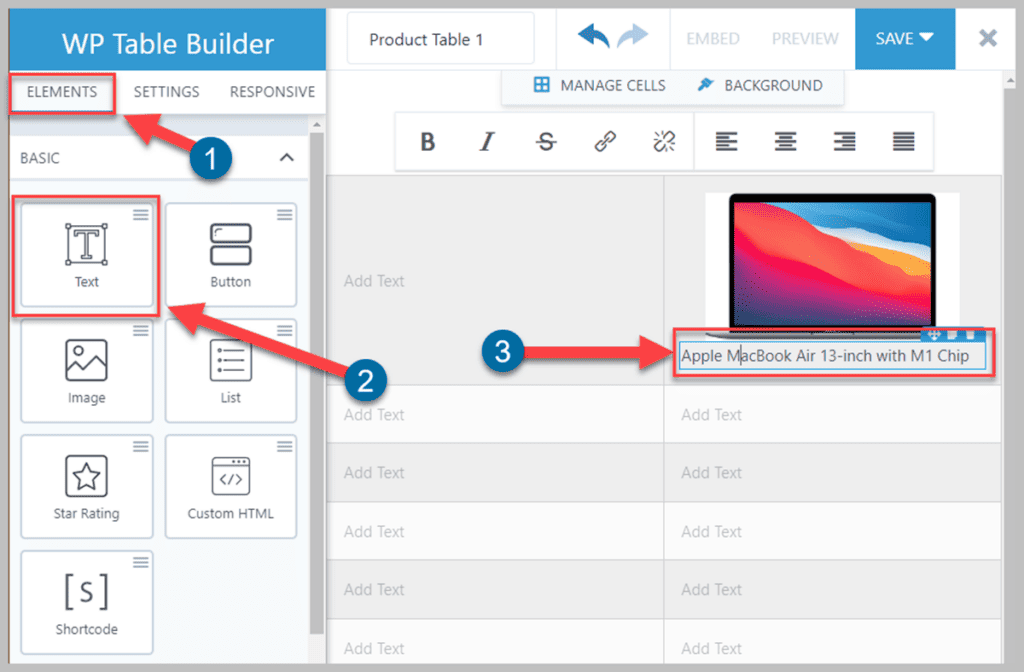
Now we will click the “ELEMENTS” button again on the top left side. Drag the Text Element at the bottom of the image of the first top row of the right side to add the Text element.
Step 4: Customize the Elements
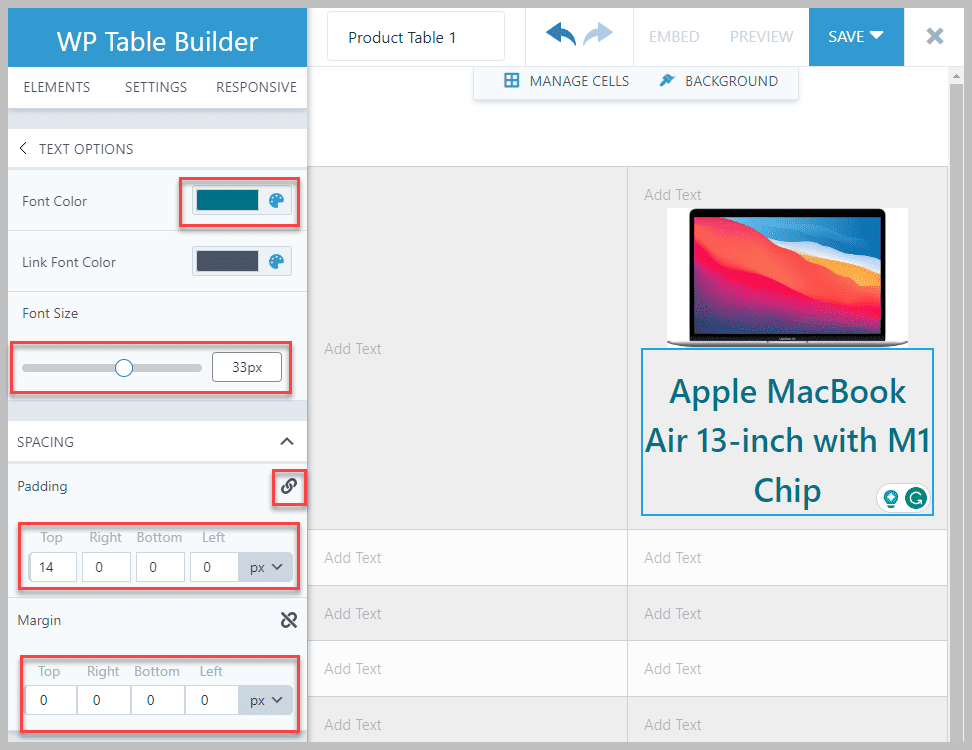
You can customize the text element by changing the font size, text alignment, color, margin, paddings, etc.
Keep adding your data by dragging & dropping your necessary elements into the table editor.
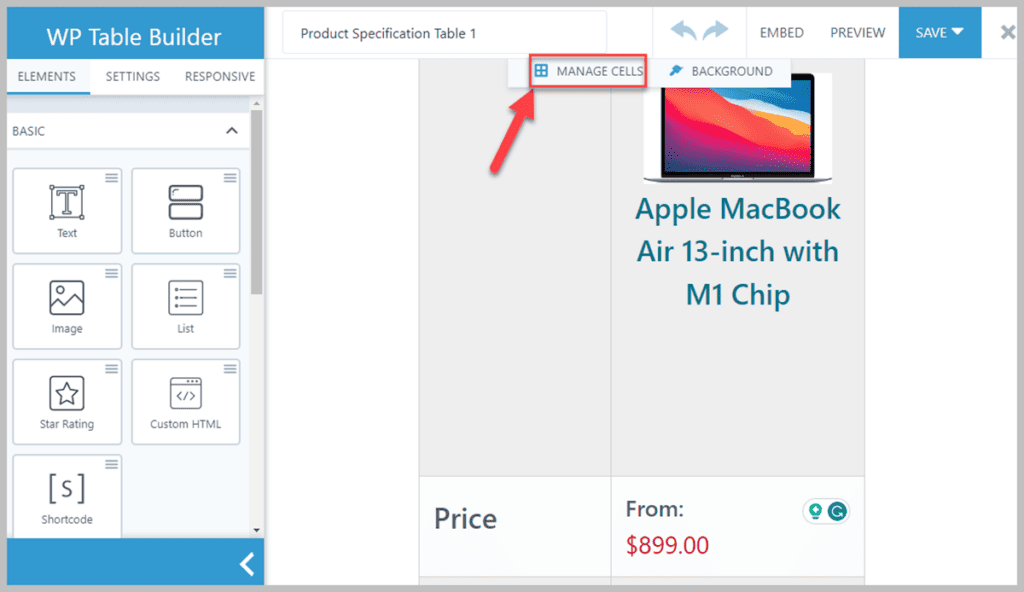
Adjust your table’s row & column height and width by clicking the “manage cells” button at the end of the making of the table.
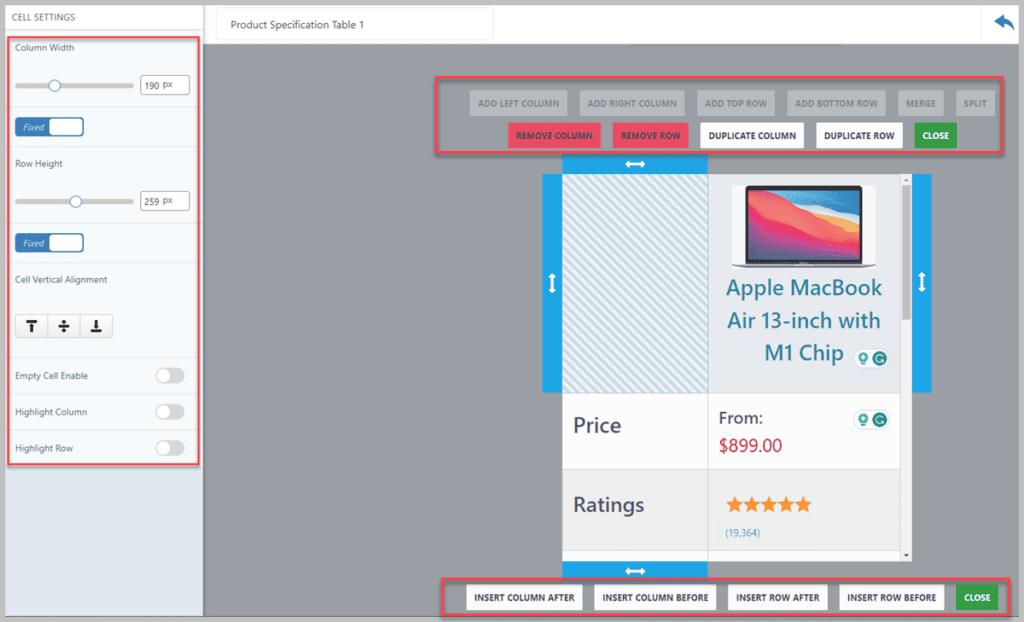
You can set the column width and row height for each cell individually. We have kept the column width 190px and row height 259px for our product specification table.
Apple MacBook Air 13-inch with M1 Chip | |
Price | From: $899.00 |
Ratings | (19,364) |
Display | 13.3-inch (diagonal) LED-backlit Retina Display |
Processor | System on a Chip (SoC), Apple M1 chip, 8-core CPU with 4 performance cores and 4 efficiency cores, Up to 8-core GPU, 16-core Neural Engine |
Graphics | Apple 8-core GPU |
Battery | Up to 18 hours of battery life |
Touch Bar and Touch ID | Touch ID |
Storage | 256GB or 512GB SSD |
This is the end product after completing all those steps. The table created with WP Table Builder is entirely responsive and will adjust on any device screen automatically.
Therefore, you can create unlimited responsive tables for any type of product in a breeze without any coding knowledge in a short time.
Conclusion
If we overview the whole post, you need to install the plugin, create a product table by determining the column and row number, add the data by adding elements into the cells, customize the data, and that’s all.
We hope this simple tutorial has helped you create a good-looking product specification table without hassle. In the comment section below, let us know how you feel when creating a product specification table using WP Table Builder.
Don’t forget to share this excellent post with your friends and family through your social media if the post has helped you with creating a product specification table.
Related Posts
- How to Build an Amazon Affiliate Website (5 Easy Steps)
- How to Add Tabs in WordPress Posts and Pages In 3 Easy Steps
- How to Add Star Ratings In WordPress (3 Easy Steps)
- How to Add a Countdown Timer in WordPress (3 Easy Steps)
- How To Add Amazon Affiliate Links In WordPress (Easy Method)
- How To Add “Pros & Cons” Table In WordPress
- How to Add Table of Contents In WordPress (Without A Plugin)
- How To Create A Horizontal Pricing Table In WordPress
- How To Add Amazon Product Boxes In WordPress
- How To Create A Product Comparison Table In WordPress
- How To Create A Table In WordPress (Without A Plugin)


