
Tabs are very common these days, especially on blog posts or landing pages. If you want to learn how to add tabs in WordPress, we have guidelines for your that will walk you through making one easily.
Improving the user experience by making information easily accessible is a priority for any website. A great way to achieve this is by using Tabs in WordPress.
Tabs organize information effectively, allowing visitors to quickly find what they want by clicking on the relevant tab. Also, it offers an excellent opportunity to display your content in a more organized way in one place.
There are tons of plugins you will find for adding tabs in WordPress. But for adding tabs in WordPress, we will use Ultimate Blocks.
We have chosen Ultimate Blocks because it unifies the functionalities of several plugins under one hood. It offers 20+ blocks using which anyone can build better engaging content without any coding.
Among those blocks, Tabbed Content will help you add tabs to your WordPress posts and pages. Besides, it offers the functionalities of adding vertical, horizontal, and nested tabs.
Furthermore, it is a Gutenberg-only plugin that will not work with any other page builder. It is a performance-oriented plugin that is well-coded, lightweight, and modular. Therefore, it will not hamper your site load speed.
Now let’s see how Ultimate Blocks can help us make beautiful tabs and enhance the user experience of your website.
How to Add Tabs In WordPress Using Ultimate Blocks
If you think of WordPress, it is a great CMS that allows adding third-party plugins for enhancing and extending its functionalities. WordPress has almost every plugin for achieving every purpose.
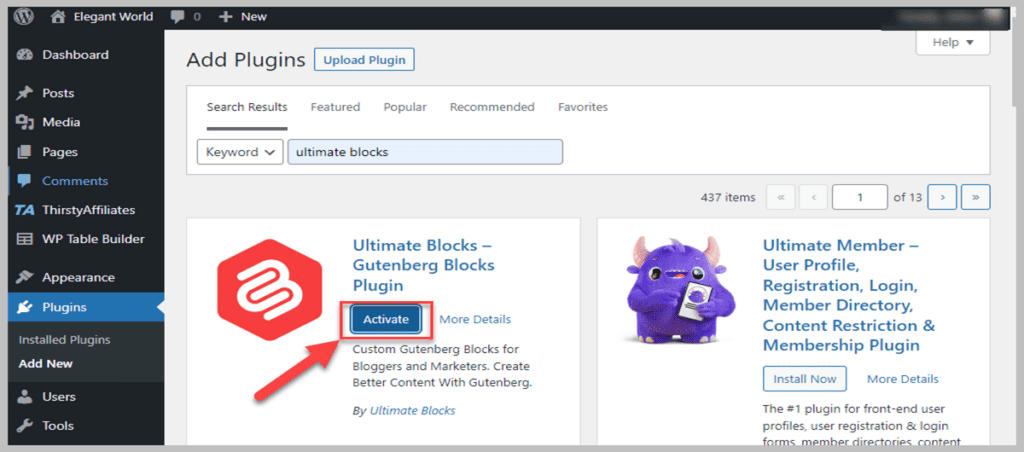
Step 1: Install Ultimate Blocks
To add tabs in WordPress, we will install the Ultimate Blocks first. Go to your WordPress Dashboard > Plugins > Add New, type “Ultimate Blocks” in the search bar, and install the plugin.
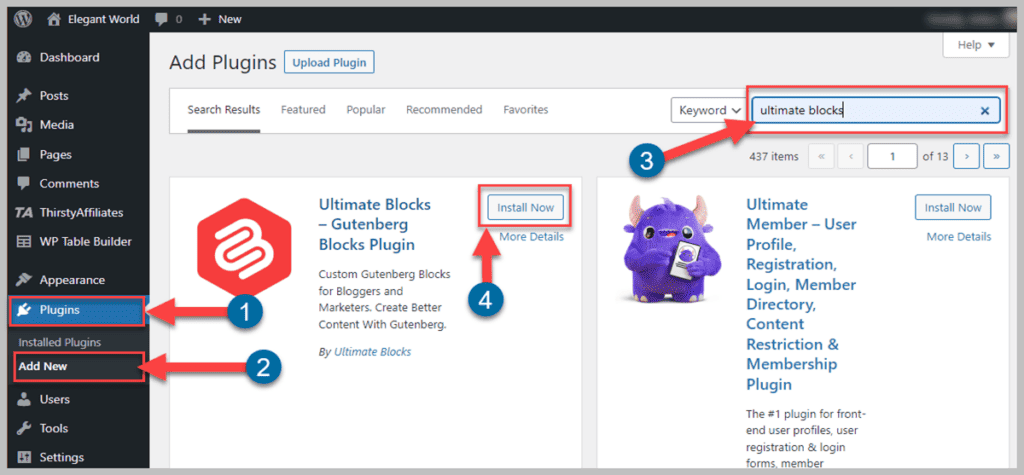
You must activate the plugin after the successful installation from the same page.
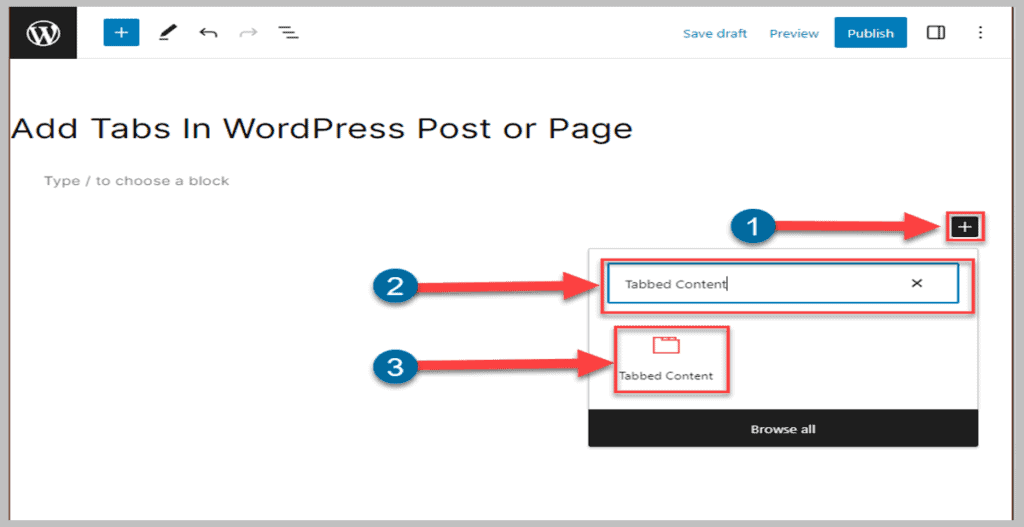
Step 2: Add Tabbed Content Block
Now head to your post or page where you wish to add the tabs. Click the “+” icon, type “Tabbed Content” in the search box, and Click ” Tabbed Content”. Afterward, the tab will automatically be inserted on your post or page.
You will notice that there is only one tab and a dedicated area for adding content in the tab. But If you wish to add more tabs, click the “+” button inside the content tab. Check out the image that includes the functionalities in the live editor.
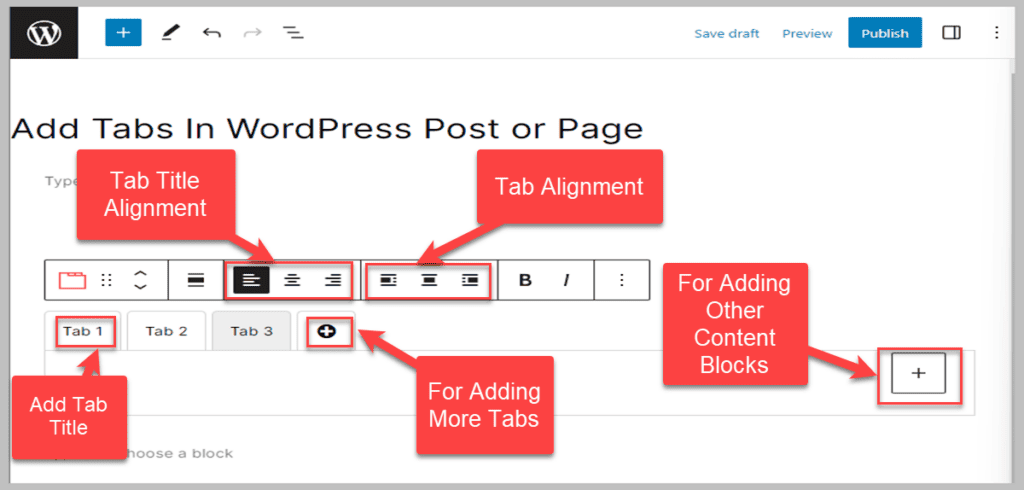
You can adjust the tab’s title, tab’s title alignment, tab alignment, add other blocks in the content area, etc., right from the editor.
Step 3: Tab Customization
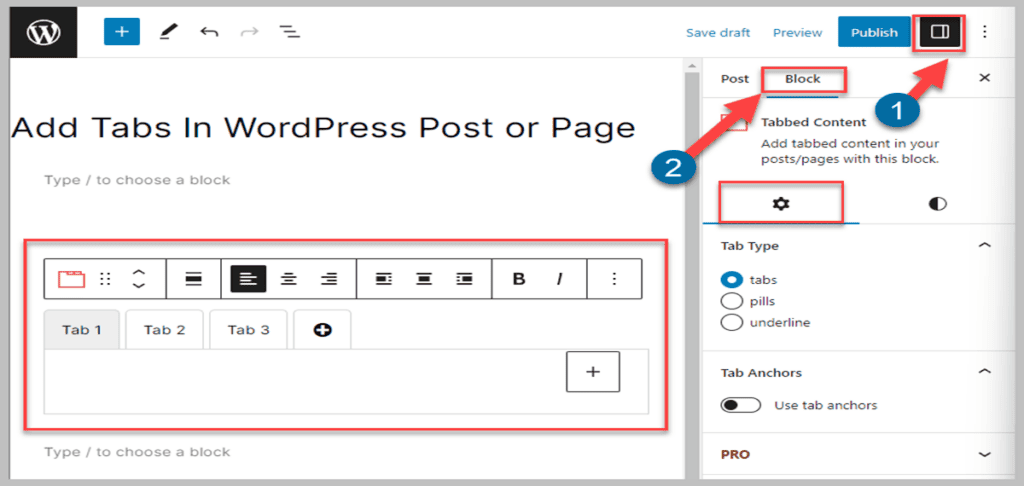
If you want other Customization options, click the “Setting” button at the top. But to see the tab settings, you must select the tab first.
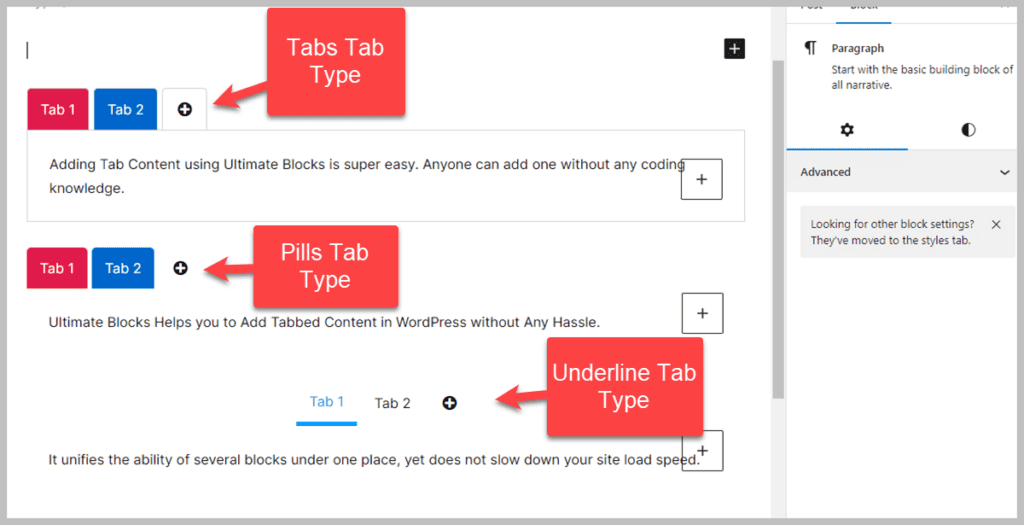
It offers three tab types: tabs, pills, and underline. See the images of all the tab types below.
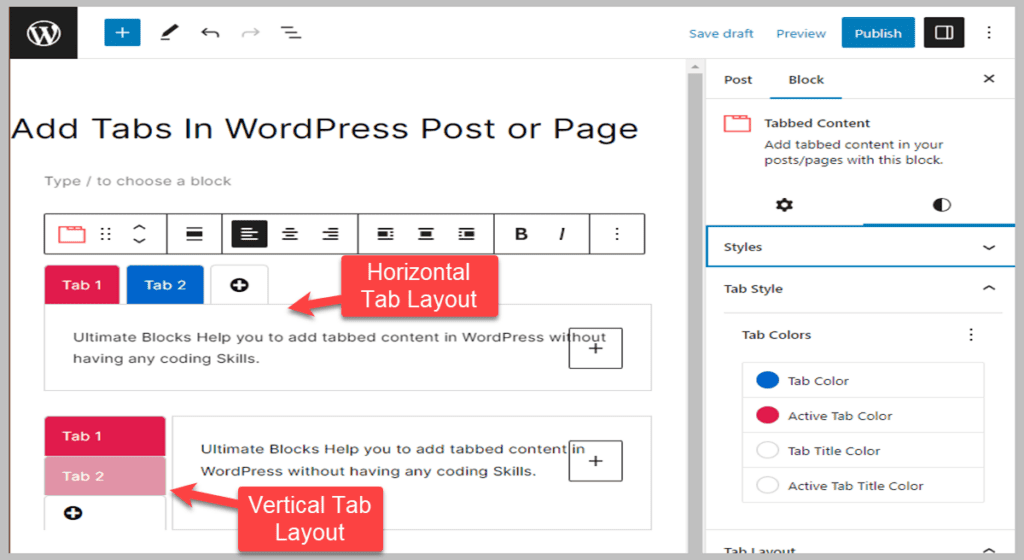
The Styles menu is beside the Settings Menu, which holds the tab styles, tab layouts, overall styles, etc. The Tab Style settings allow you to set tab color, active tab color, tab title color, and active tab title color. There is also the Tab Layout Settings, where you can adjust the appearance of the tabs when it comes to the different device screens.

You get to decide if you want to add tabs horizontally or vertically. All the tabs are equally responsive by nature.
Now go ahead and add & style your tabs and tabbed content the way you want. That’s how you add the tabs in WordPress without any coding skills easily using Ultimate Blocks.
Conclusion
We hope this simple tutorial has helped you learn how to add tabs in WordPress and introduced you to Ultimate Blocks and the usability of the Tabbed Content block.
Let us know if you feel the same by sharing your thoughts in the comment section. Also, if you have any questions regarding Utliatme Blocks, ask them immediately. We would love to interact with you.
If you’ve liked the post, consider sharing it on your social media and help your other friends to learn about the procedure.
Related Posts
- How to Create a Product Specification Table in WordPress (4 Easy Steps)
- How to Add FAQ Schema in WordPress (4 Easy Steps)
- How to Build an Amazon Affiliate Website (5 Easy Steps)
- How to Add Star Ratings In WordPress (3 Easy Steps)
- How to Add a Countdown Timer in WordPress (3 Easy Steps)
- How To Add Amazon Affiliate Links In WordPress (Easy Method)
- How To Add “Pros & Cons” Table In WordPress
- How to Add Table of Contents In WordPress (Without A Plugin)
- How To Create A Horizontal Pricing Table In WordPress
- How To Add Amazon Product Boxes In WordPress
- How To Create A Product Comparison Table In WordPress
- How To Create A Table In WordPress (Without A Plugin)
Leave a Reply
You must be logged in to post a comment.