Adding borders to a table makes it attractive. You can also use your brand color in the table borders to make it even more attractive.
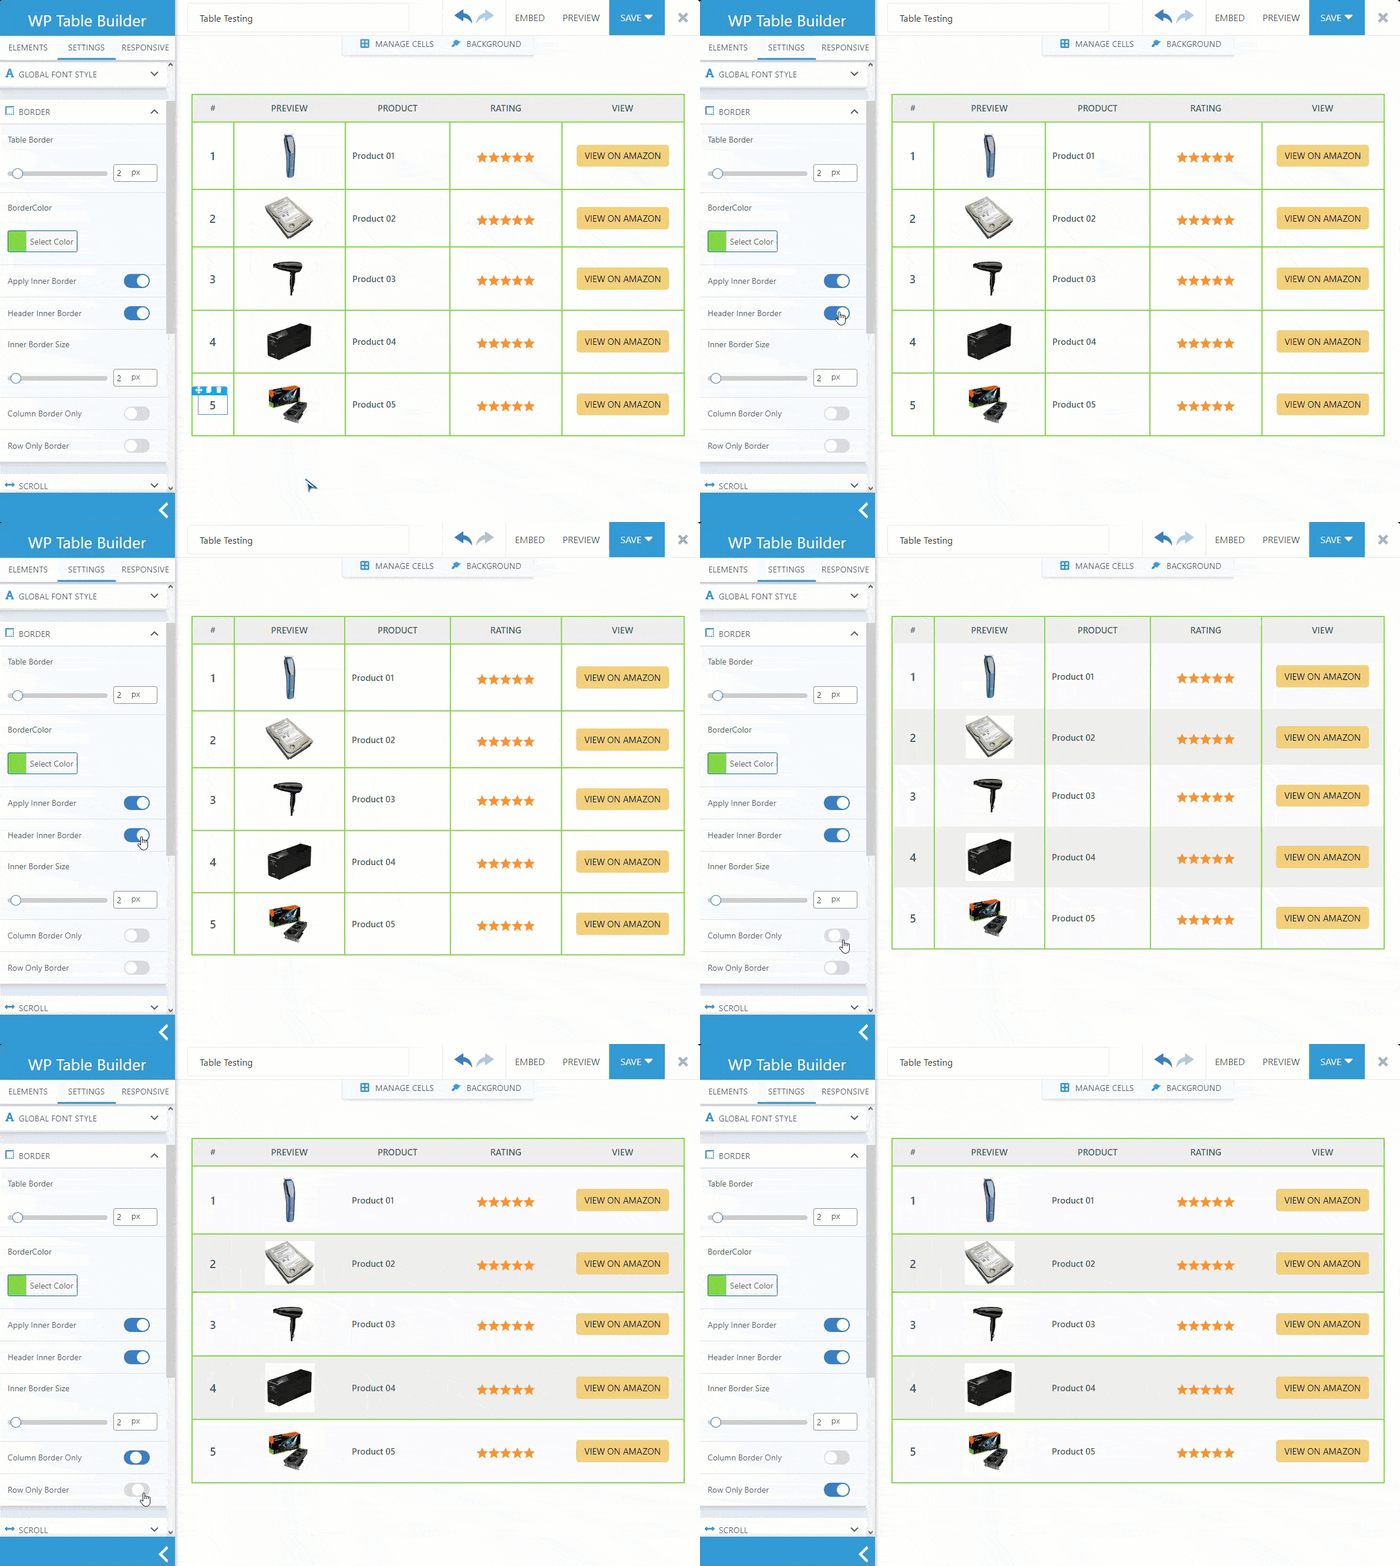
WP Table Builder lets you add external borders and inner borders to a table. You can also change the color of the border. All these can be done from the ‘BORDER’ option under the ‘Settings’ tab.
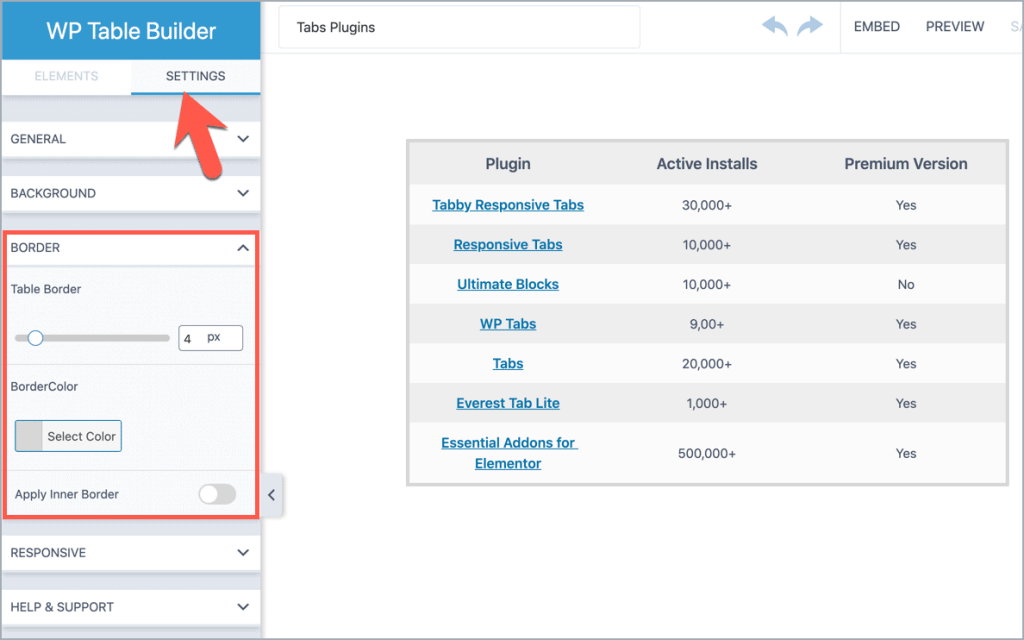
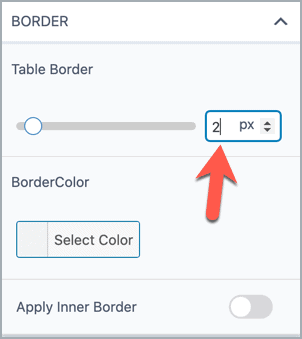
To add an external border, increase the table border px.
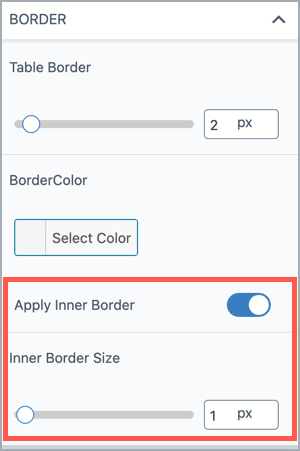
To add inner border, enable ‘Apply Inner Border’ and select the border size.
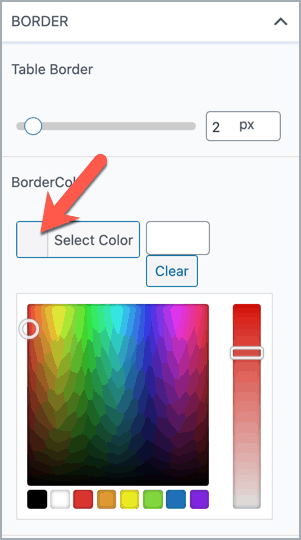
To change border color, click on ‘Select Color’ option.
Again, you can also apply the Header Inner Border. By default, the inner border color is visible for both column and row. But, you can change it to columns-only or row-only by activating ‘Column Border Only’ or ‘Row Border Only’. (Applied Green border Color for better visibility)
Hope this quick tutorial helped you to add borders to your WordPress table.


