Sometimes, you may need to add rows or columns to an existing table. To make things easier, WP Table Builder has added a ‘Manage Cells’ option. It lets you add columns or rows to an existing table.
Let’s see how to use the “Manage Cells” option.
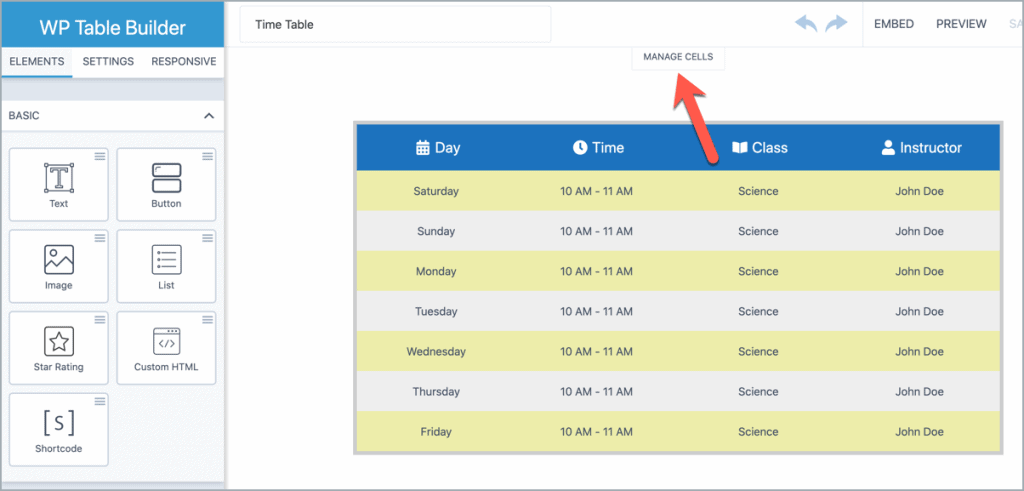
Once you’re in the table builder, you will notice a ‘Manage Cells’ button at the header portion. Click on this button.

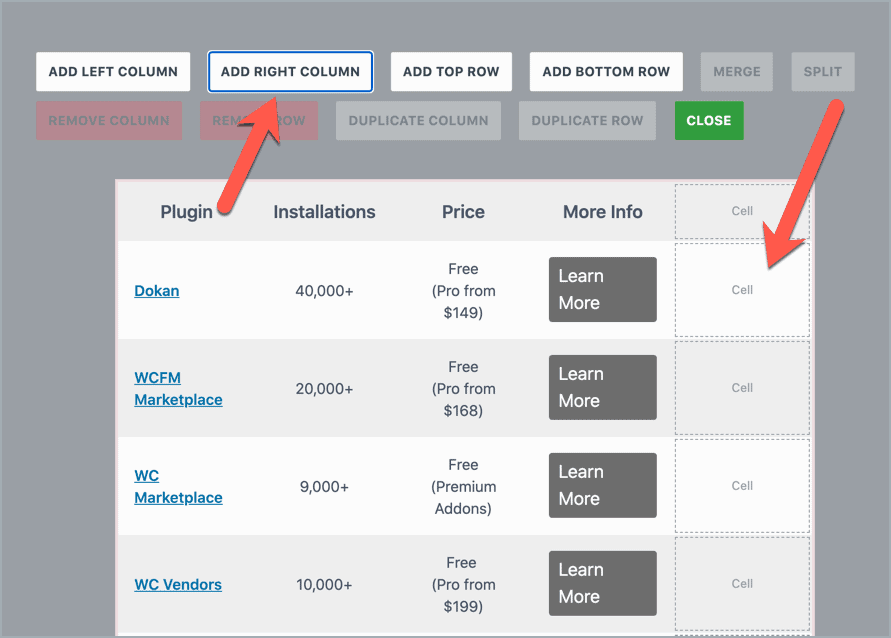
Upon clicking on the button, you’ll see the cell management mode. At the header of the table, you’ll see four options –
- Add Left Column
- Add Right Column
- Add Top Row
- Add Botttom Row

If you want to add a column in the right-hand side of the table, just click on the ‘Add Right Column’ button.

You can do the same for adding a left column or row in the bottom/top.
Now, what if you want to add a column/row in the middle of the table. It’s easy too.
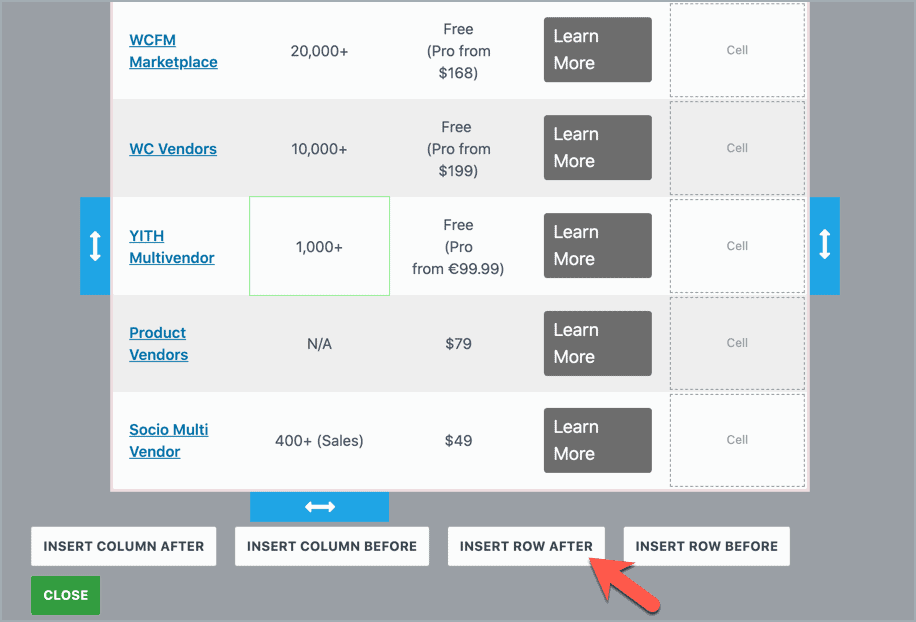
Just select the row/column after or before which you want to add a column or row. You will see four options at the bottom of the table –
- Insert Column After
- Insert Column Before
- Insert Row After
- Insert Row Before
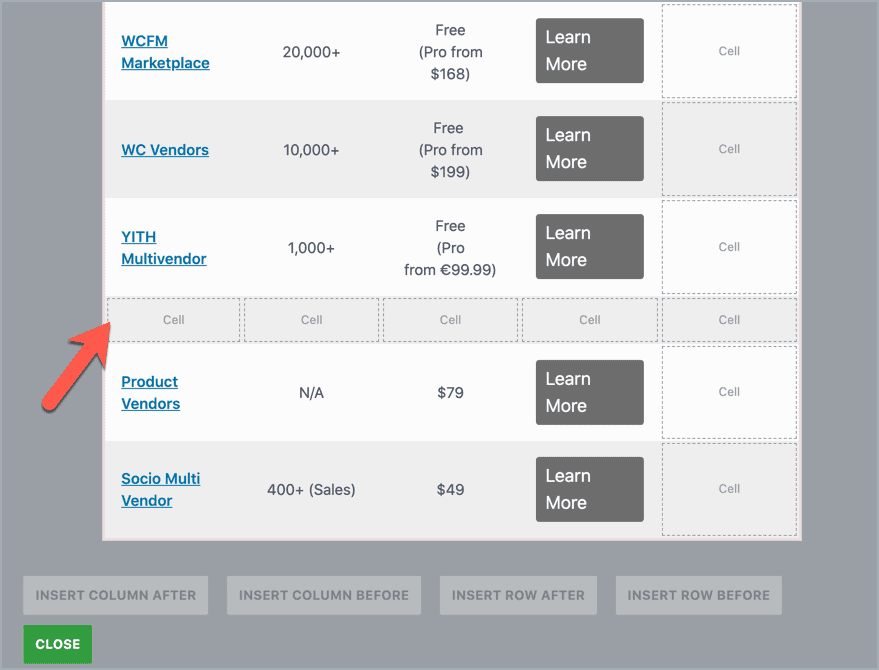
Now if you want to add a row under the selected row, just on ‘Insert Row After’.

You’ll see a blank row like this –

You can do the same for adding rows and columns anywhere you want.
Hope this tutorial helped you to add rows or columns to an existing table.


hi team
The manage cell option is missing from the Settings tab. Can you please check?
Hi Shobhit,
We have changed its position. You will find it on top, under the header bar.
If you don’t see it, please clear your browser cache and try.
Let us know if you still face issues.
Regards.
¿The max number of rows is 30? Need 31.
We are working on it.