As your usage grows and you want to unlock more features or use WP Table Builder on more websites, you may consider upgrading your license.
In this guide, we’ll show you how to upgrade your WP Table Builder license in just a few steps.
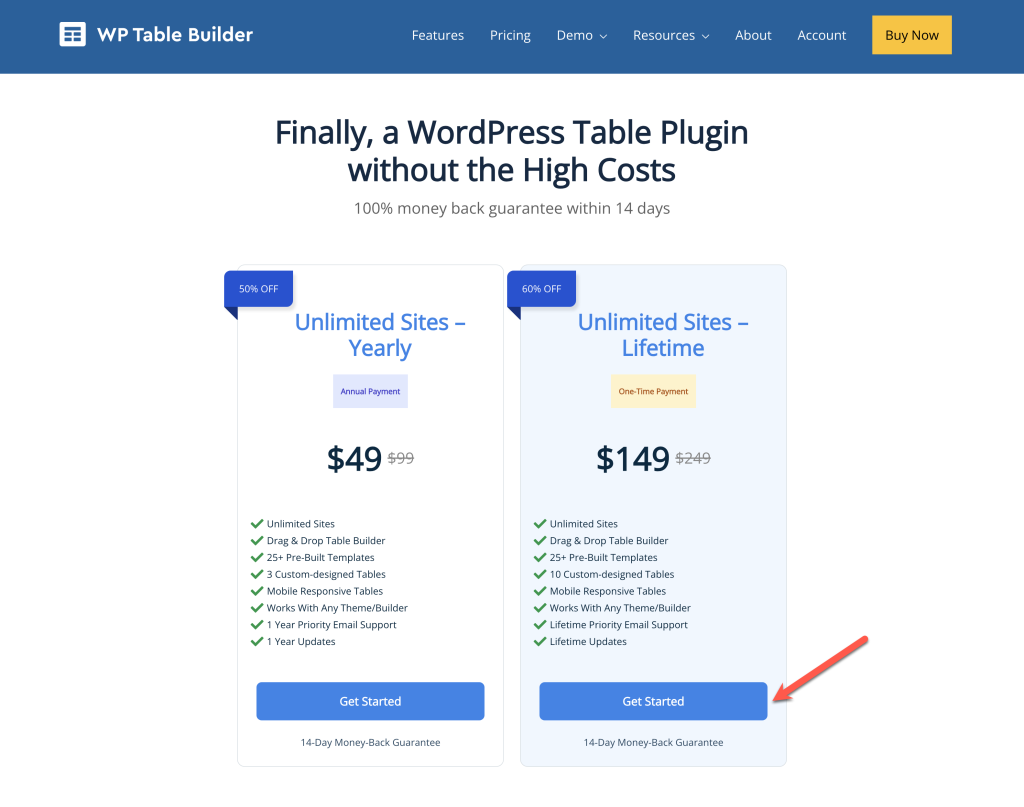
Step 01: Go to the Pricing Page #
Go to the WP Table Builder Pricing Page and click on the Get Started button under your desired plan.
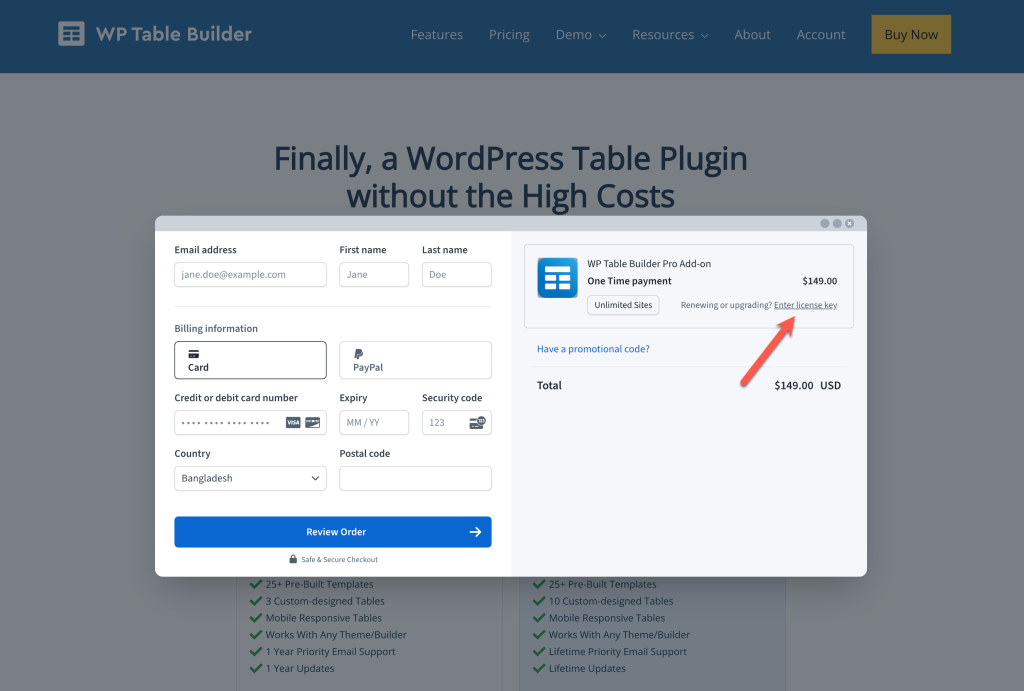
A box will appear where you can enter your existing license key that you want to upgrade. In the checkout popup, click the Enter license key option.
Step 02: Enter Your License Key #
Type your license key into the box and click on the ‘APPLY’ button.
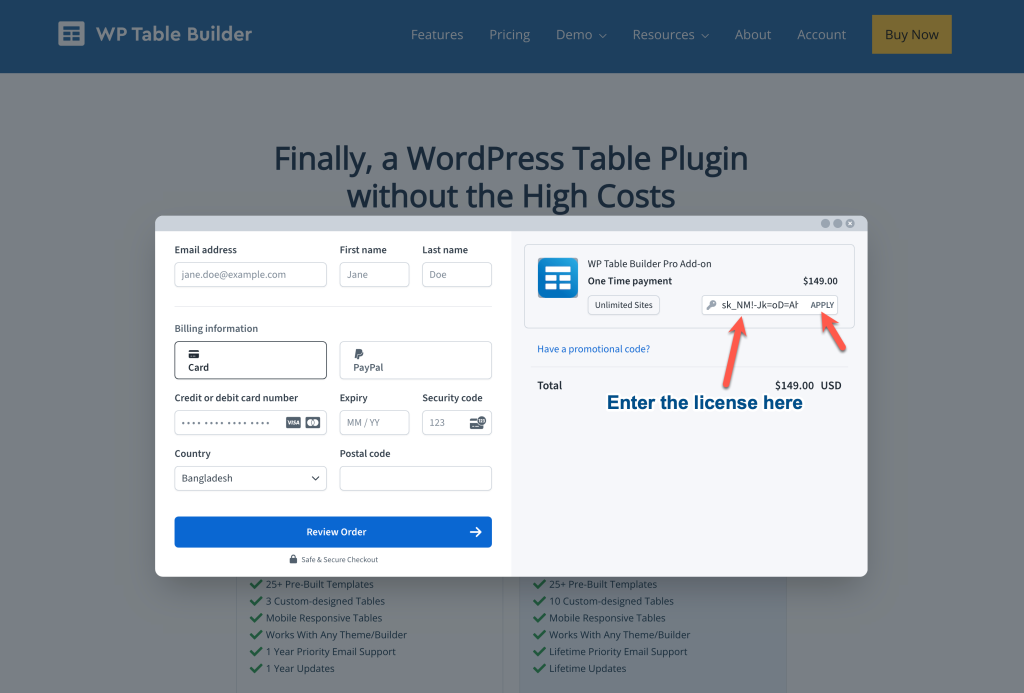
Fill in your billing details as required.
Click the Review Order button to proceed.
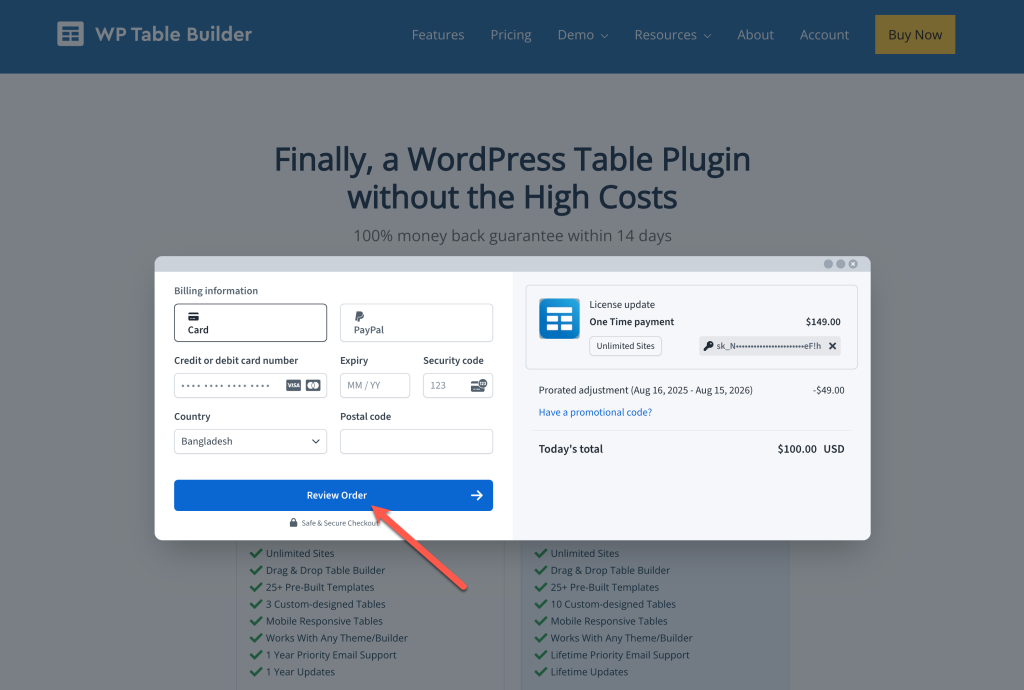
Step 03: License Upgraded #
Once you complete the payment, your license will be instantly upgraded.
💡 Note: If you upgrade halfway through your current billing cycle, the cost will be adjusted automatically, and you’ll only pay for the remaining period.
Conclusion #
That’s it! You’ve successfully upgraded your WP Table Builder license. You can now enjoy the additional features and benefits of your new plan.
If you face any issues during the process, contact our support team — we’re happy to help.


