
Quick Answer
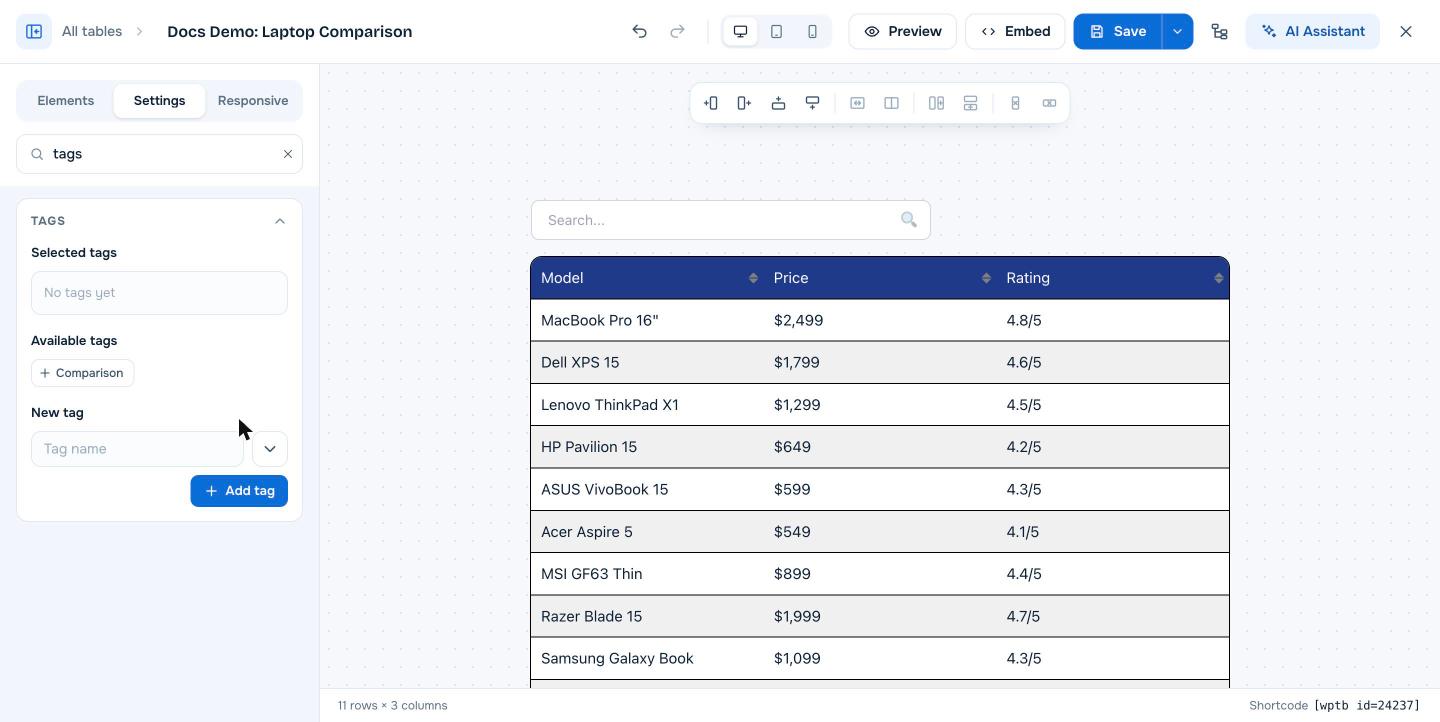
Open a table in the builder, go to the Settings tab and expand Tags. Type a name in New tag and click Add tag to create a tag, then click the tag under Available tags to assign it to the table. Assigned tags appear under Selected tags; click the x on a tag to remove it. Click Save. Tags are free.
Tags are labels you attach to tables, such as “Pricing”, “Hosting” or “Black Friday”. They help you group and keep track of tables when your site has dozens or hundreds of them.
Requirements #
| Item | Details |
|---|---|
| Plan | Free and Pro |
| Plugin version | WP Table Builder 2.3.0 or later |
| Time needed | Under 1 minute |
Step 1: Create a tag #
- Open the table in the builder and click the Settings tab.
- Type
tagsin Search settings, or scroll to the Tags section, and expand it. - Type a name in New tag, for example
Comparison. - Click Add tag. The tag appears under Available tags.
Tags are shared across your site. A tag you create once is available on every table.
Step 2: Assign tags to the table #
- Click a tag under Available tags to move it to Selected tags.
- Assign as many tags as you need.
- To remove a tag from this table, click the x next to it in Selected tags.
- Click Save.
Tagging ideas #
- By table type: Pricing, Comparison, Product list, Schedule
- By topic or niche: Hosting, Plugins, Laptops
- By campaign: Black Friday 2026, Prime Day
- By status: Needs update, Archived
Frequently asked questions #
What are tags in WP Table Builder?
Tags are labels you create and assign to tables in the Tags section of the table’s Settings tab. They help you organize large numbers of tables.
Are tags shown to visitors?
No. Tags are for organizing tables in the WordPress admin. They do not appear on your site.
Can I use the same tag on many tables?
Yes. Tags are shared, so once a tag exists you can assign it to any table.
Are tags a Pro feature?
No. Tags are available in the free version.


